Maya - Apex Cloth
Maya Apex Workflow - Steps and Troubleshooting
First of all - if this is your first armor try to make one part of the mesh first where you can test out workflows and learn how to troubleshoot your mesh before doing the full set. I did this with the arms of my armor and I still ran into trouble later in development.
This primer is also about the workflows I used but I will mainly target issues you should be able to see BEFORE you get into actually modelling it.

This is the concept art I was working from for my armor. At the time I started I thought the most complicated part would be the rigging of the hands, so I started my test round with them. I later discovered that wasn't true at all. Hands are pretty easy to rig compare to multi influence zones like the shoulders, the hipp and the neck area.
I also didn't know anything about the nvidia Apex Clothing Plugin, so I wasn't aware of the many issues I provided myself with throughout the modelling process.

This was the first mesh I created for testing my workflow. It's pretty basic on all ends, modelling done primarily in marvelous designer and retopology in maya. Textures in Substance Designer. There are many other tutorials about stuff like this so I will skip all this.
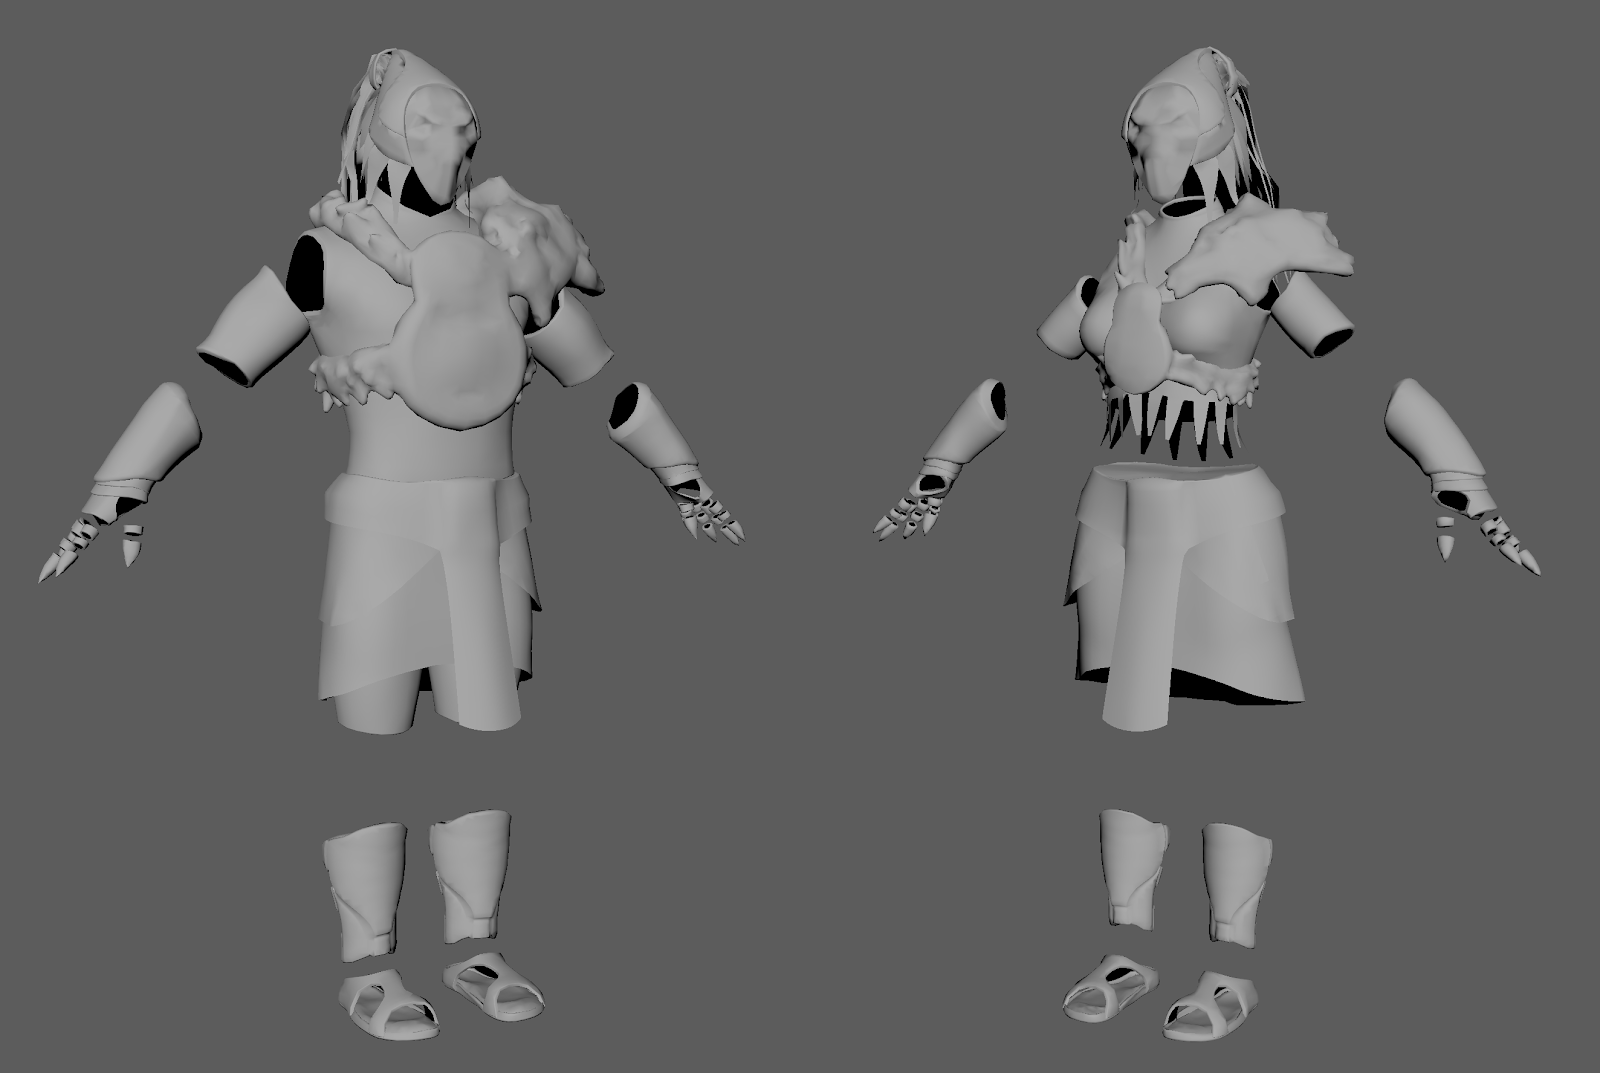
These are the two armor sets I ended up with. On first sight - apart from the missing body parts, they looked clean and the polycount was for both around 30K. At that point I thought I achieved everything. So wrong xD
I expect you too at least take a look at the existing tutorials for nvidia apex before reading the next part.
https://www.youtube.com/watch?v=1WxGKmo6QrM
https://www.youtube.com/watch?v=2tJSUOYHOSA
https://www.youtube.com/watch?v=erM-wLDx-xw&t=320s
This stuff is really old but the basics didn't really change.
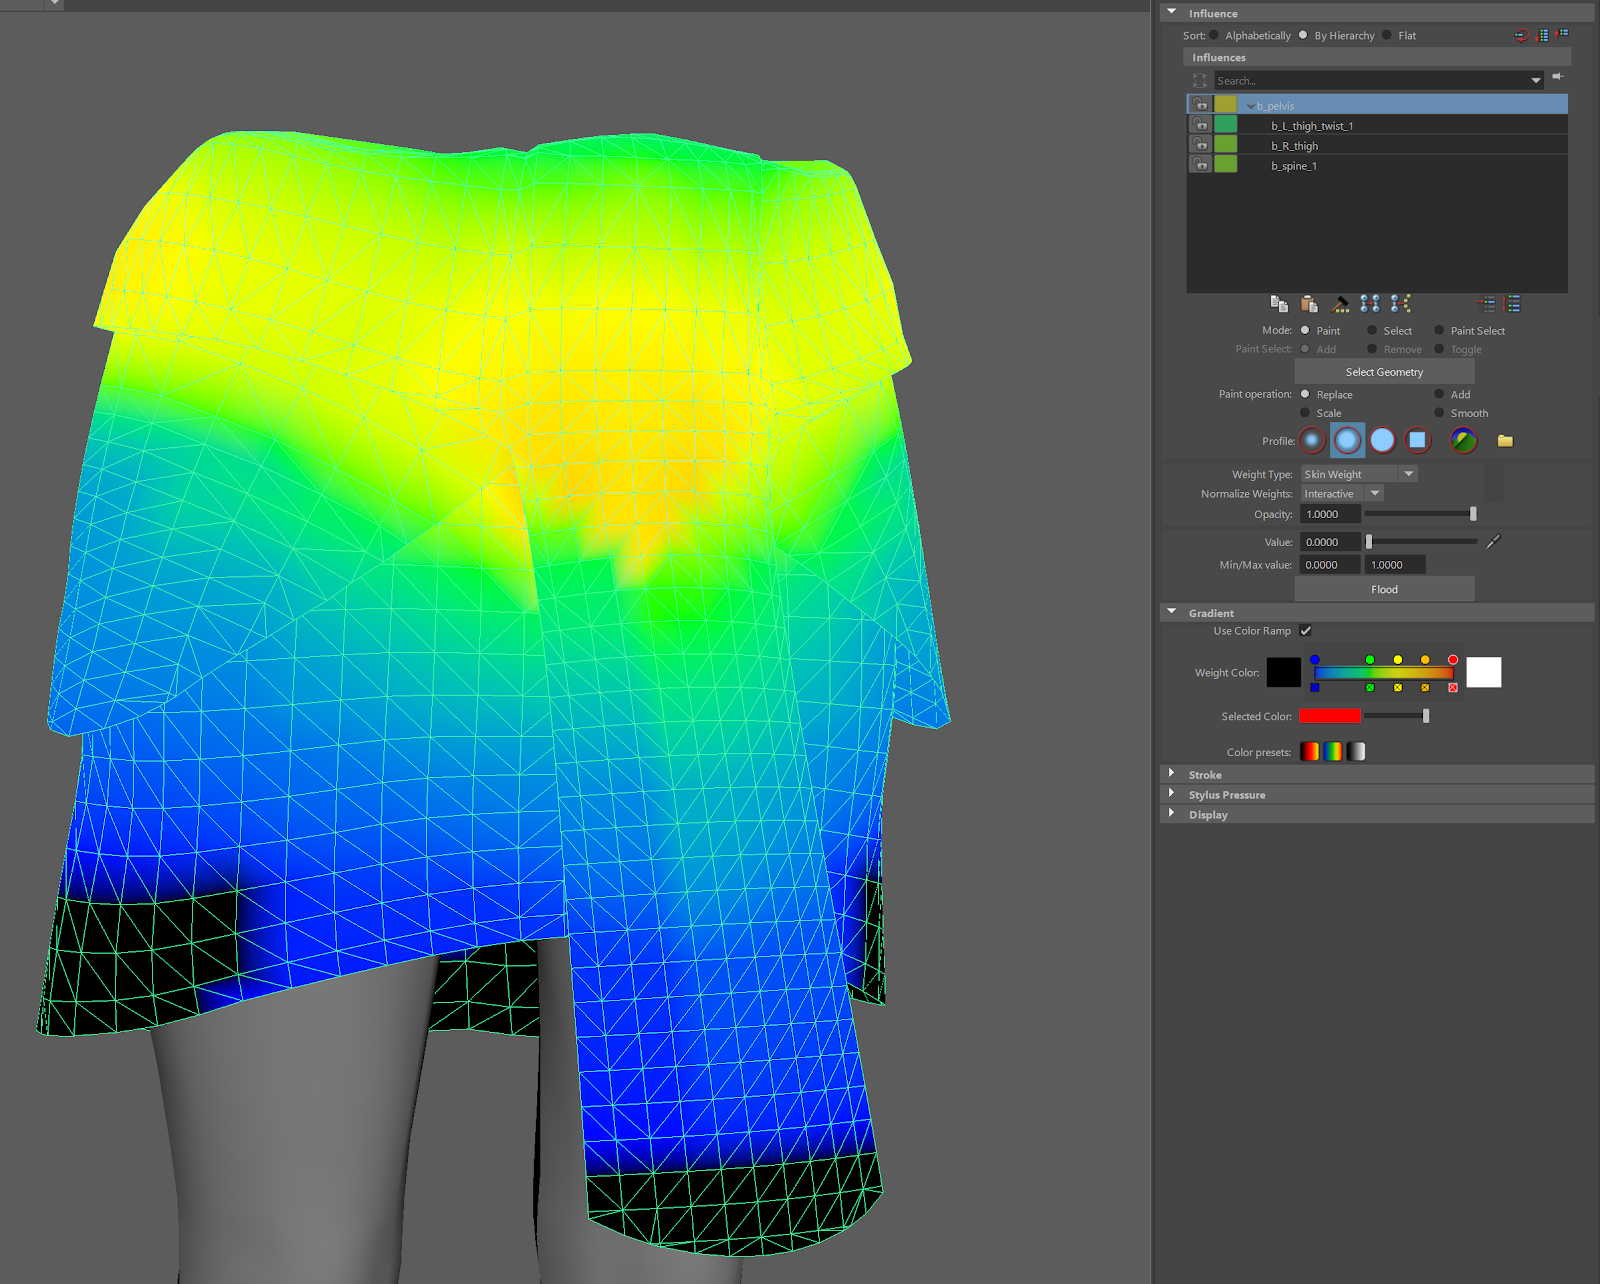
So before actually going into creating the nvidia cloth you need to be SURE that all your vertices have maximum 4 influences. Since a lot of my mesh was moving, I decided to actually gut my influences on this mesh down to 4 overall. There might be less aggressive ways to do so, but they would also be more complicated.
After rigging you can just mark your target mesh, go into the (load via plugin manager) physx tab and create your cloth.
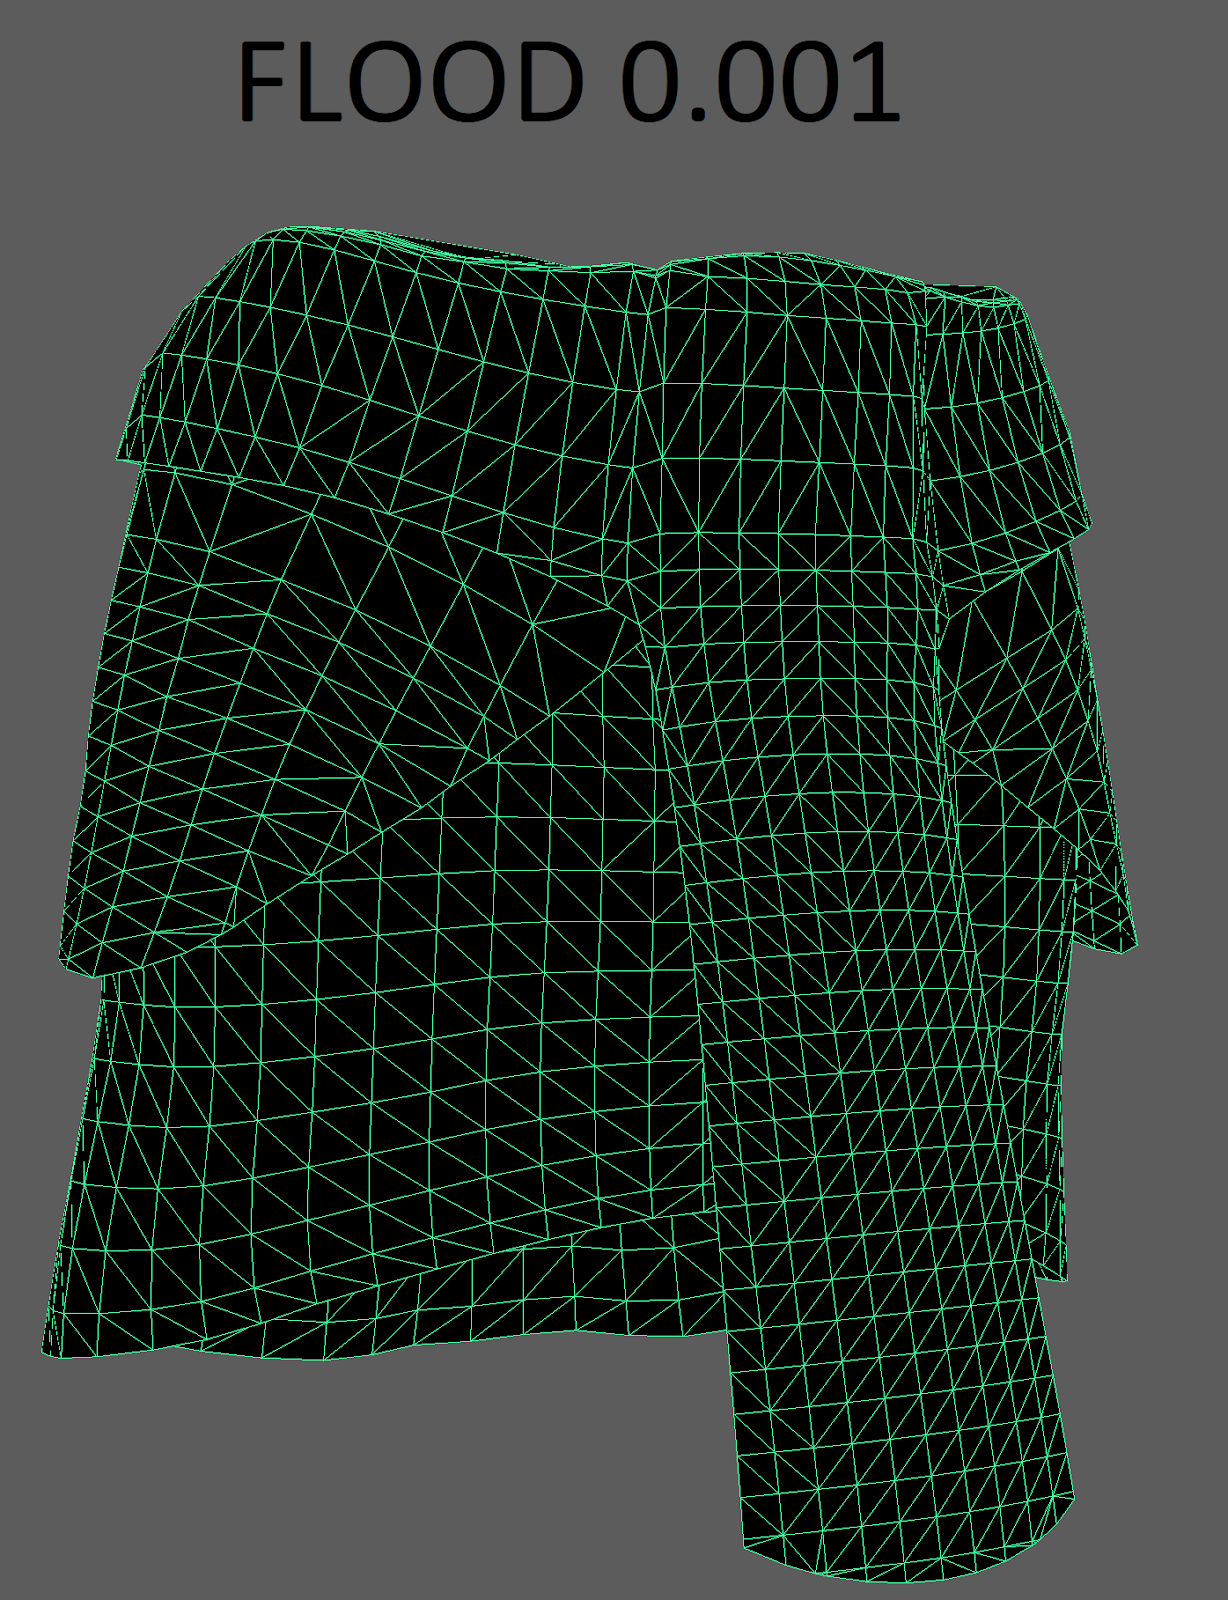
There is a known issue that sometimes occurs with these cloths, when you have vertices with a value of 0.000 on your cloth. If you encounter this you need to first flood your mesh with a value of 0.001 before going into the max distance painting.
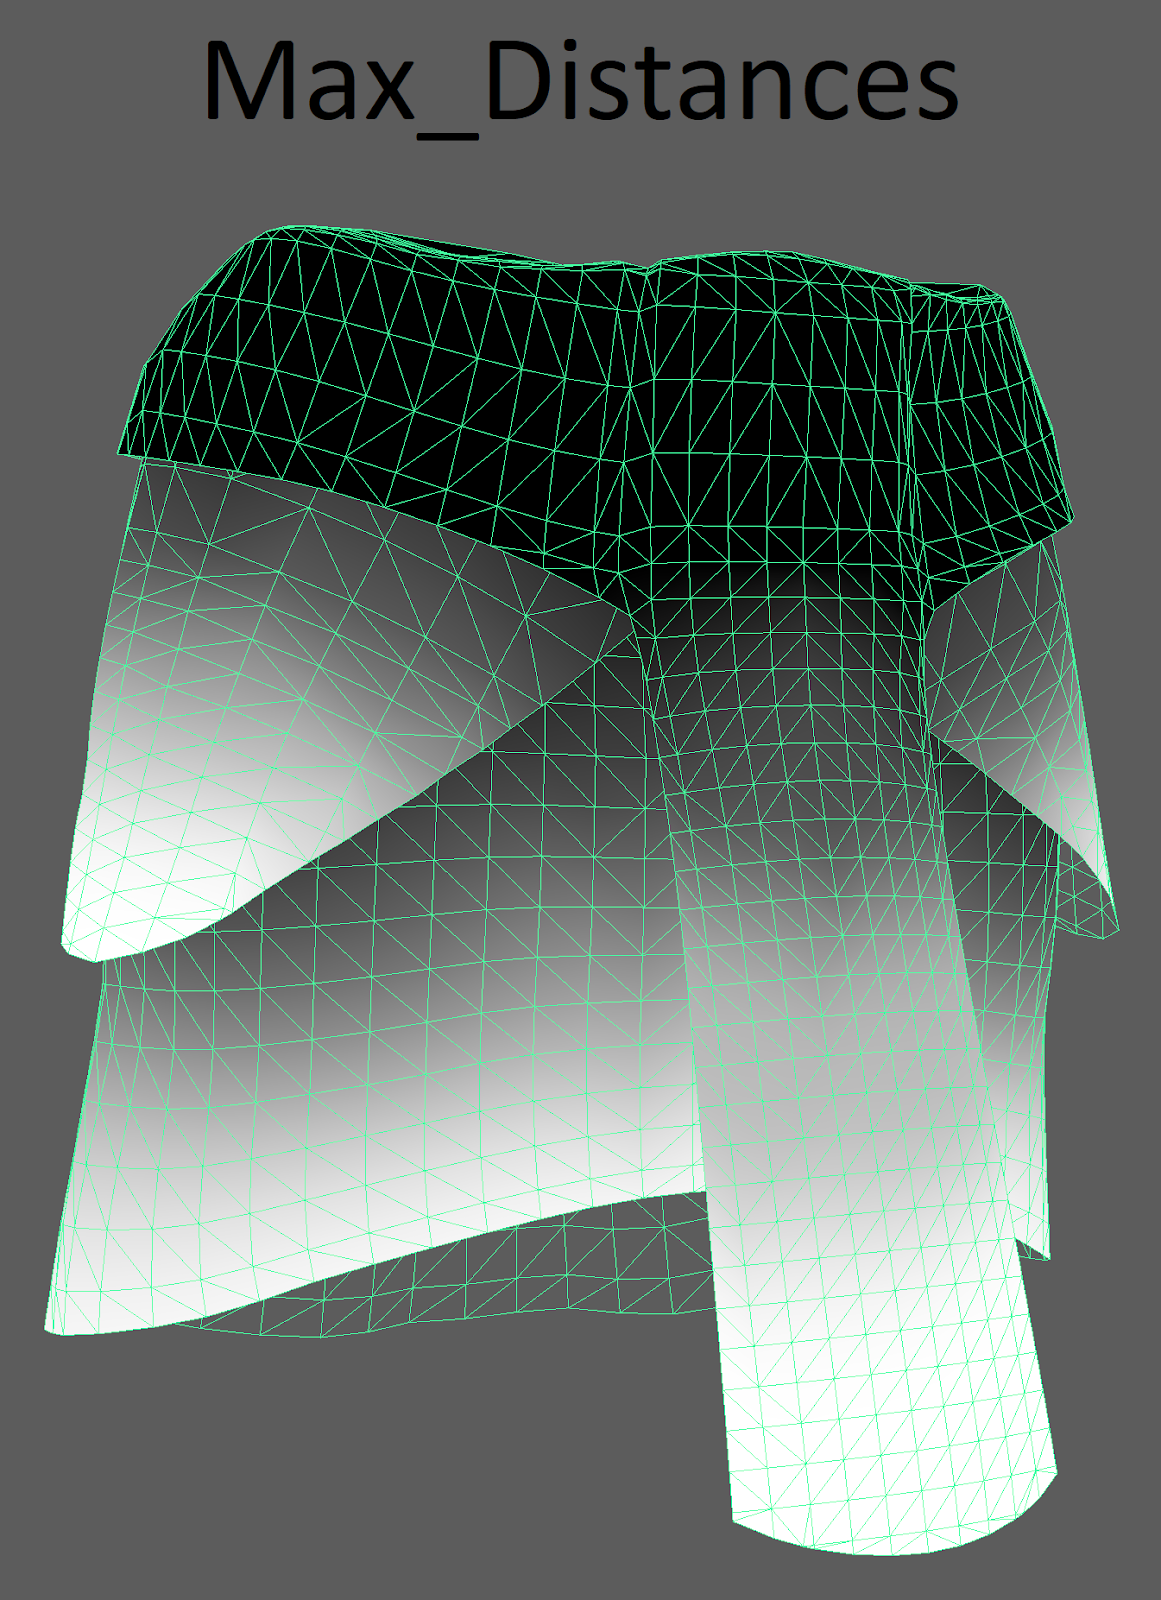
The right picture shows my max distance map. You can see how I defined unmovable parts with 0.001 and then smoothly transitioned into the 120 movable points area. Since there are 4 meshes that are not connected to each other make sure that you paint at least one border of 0.001 influenced vertices on the upper section of each part.
In apex there is a mechanic to keep mech integrity when you have layered meshes. This is usually used for meshes with thickness but can also be used in a case like mine to keep layered meshes from clipping through each other - at least to an extend. If I would need to explain this to a maya user I would say it works like a driver/driven mechanic for vertices.

In Apex this is called Latch and Drive. The latch is the part of a mesh that is being driven by anything that is set as driver next to it. This can also cause some issue.
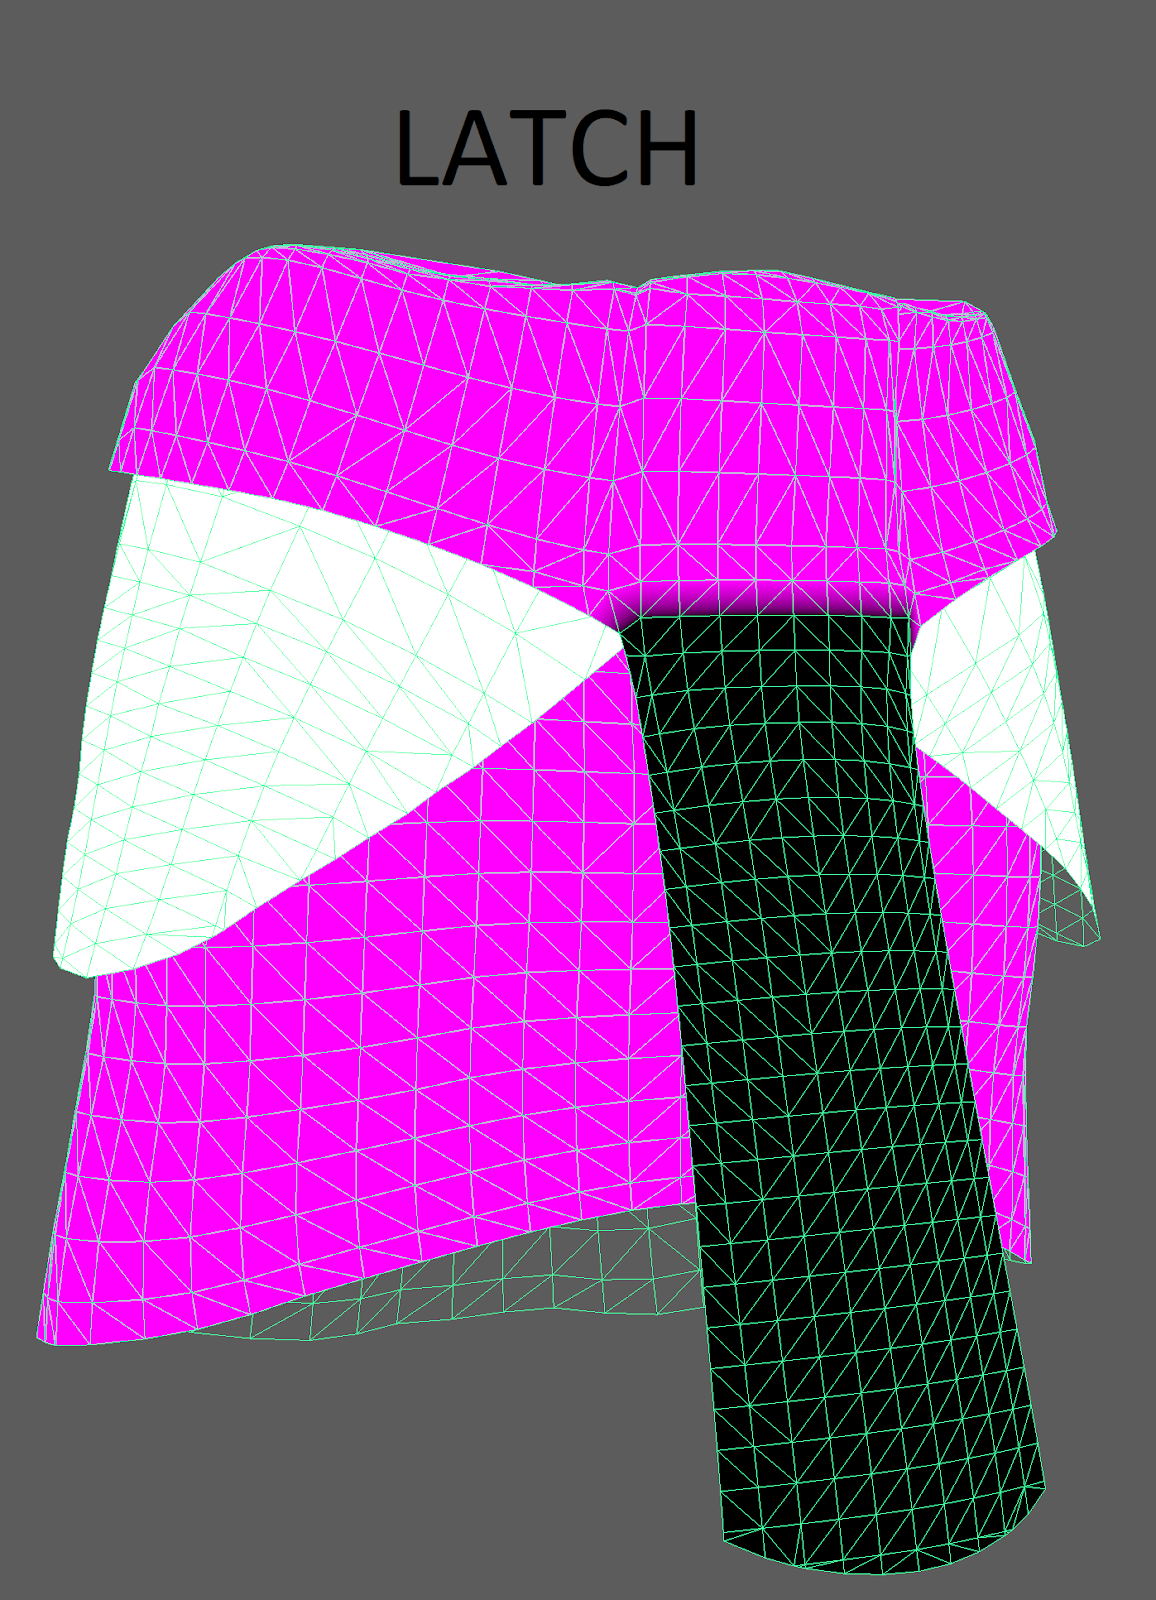

As you can see the core idea to keep my mesh from clipping like hell was to latch the middle cloth to both the under and overlying meshes. I also didn't paint ANY influences on the apron since it was going to move around anyway and I felt like that might just cause issues with the other drivers.
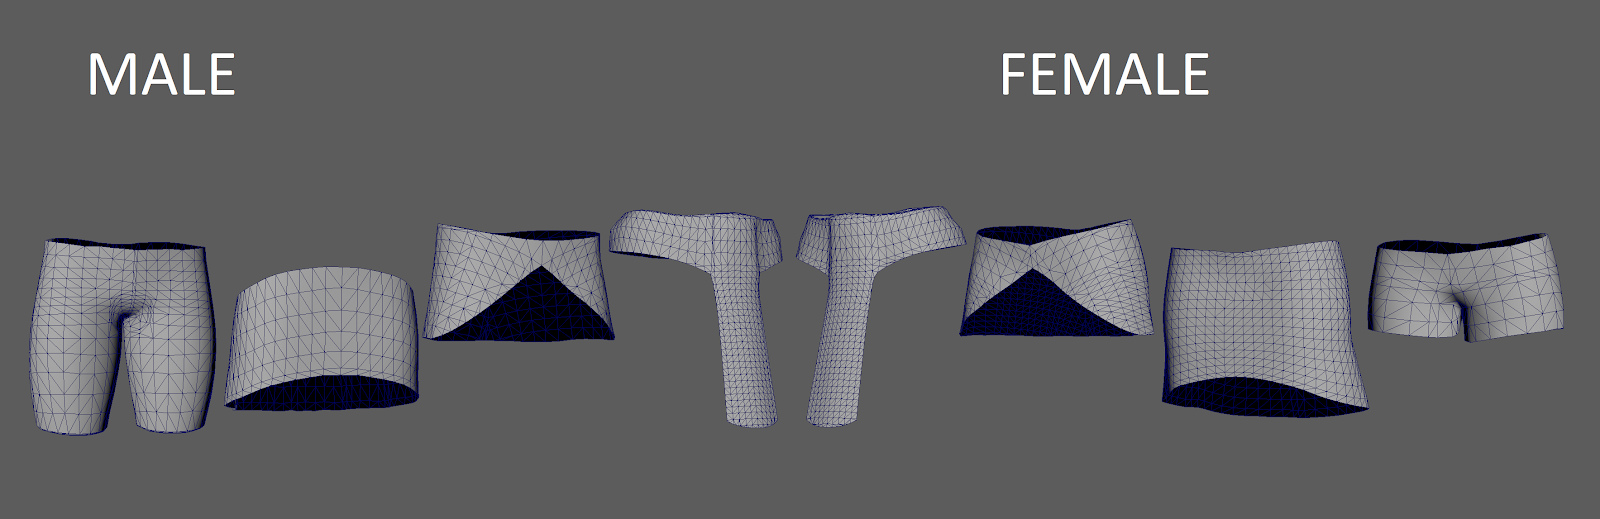
Her is an example of what you should be aware of before going into modelling:
I did the armor parts with different workflows, since I learned from the male one how to create the female faster - and better. But that left me with a huge issue with the male one. I had not enough connection between the cloth parts and that stopped the latch in the middle to work correctly. So before you delete stuff, be sure about whether you might need it in simulation or not.
Last Step: Setting up the collision:
This is pretty well described in the tutorials too. Just some things to add:
Create a kinematic ragdoll.
Delete unselected joints (the spheres). If that does not work, which sometimes happens, just use the remove button inside the attribute editor of the ragdoll node.
It's helpful if you have a full body human character that fits your rig - used correctly you can regenerate most parts of the collision spheres with it. You will still need to fix many of them by hand though.
Also do think about which moves your character will do. In my case I was using the collision too scarce so when my character rolls around in Conan Exiles I get some clipping here and there.
Also of course do not ever use anything but the capsule collisions. It won't work in Unreal 4.15 otherwise. I don't have experience with newer versions of Unreal with Apex so that's not to say there aren't other solutions.

 https://youtu.be/eHevSg-v-OY
Replies