Retopology: What Do I Do?
Hello all,
So I have this sculpt:
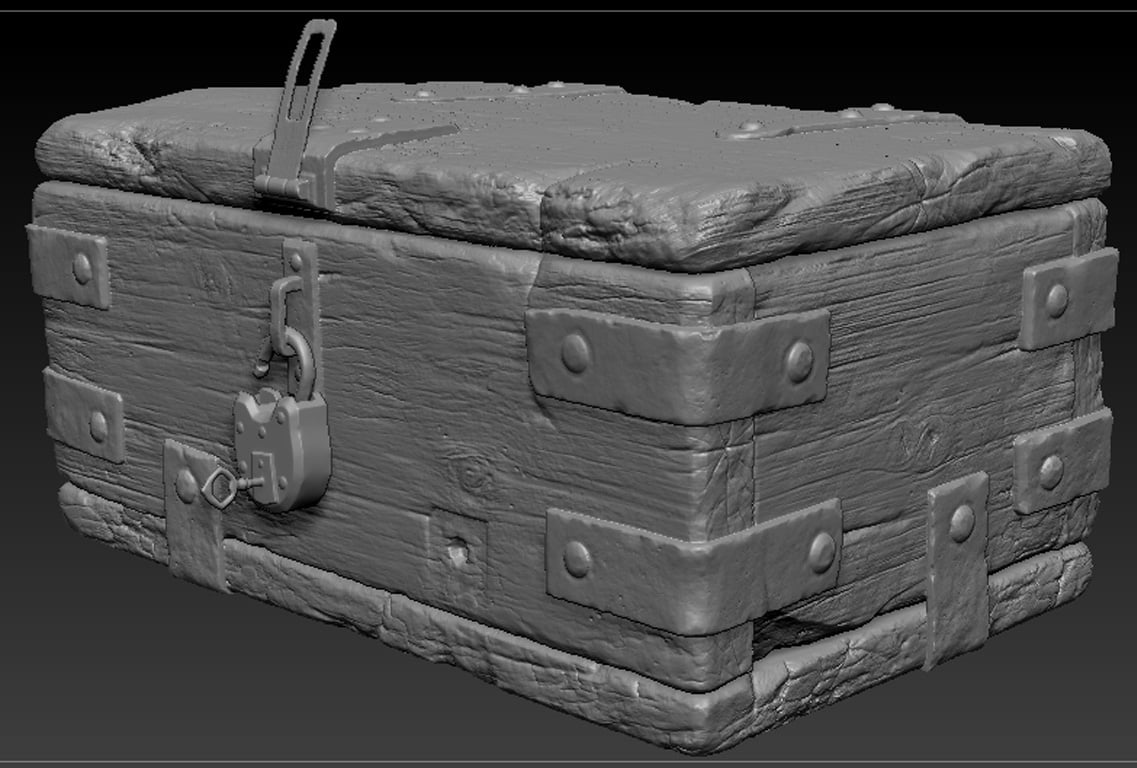
And I need to now make a low poly version and I'm trying to figure out the best process for this.
First I decimated the mesh as low as I could (if that's the right thing to do?)
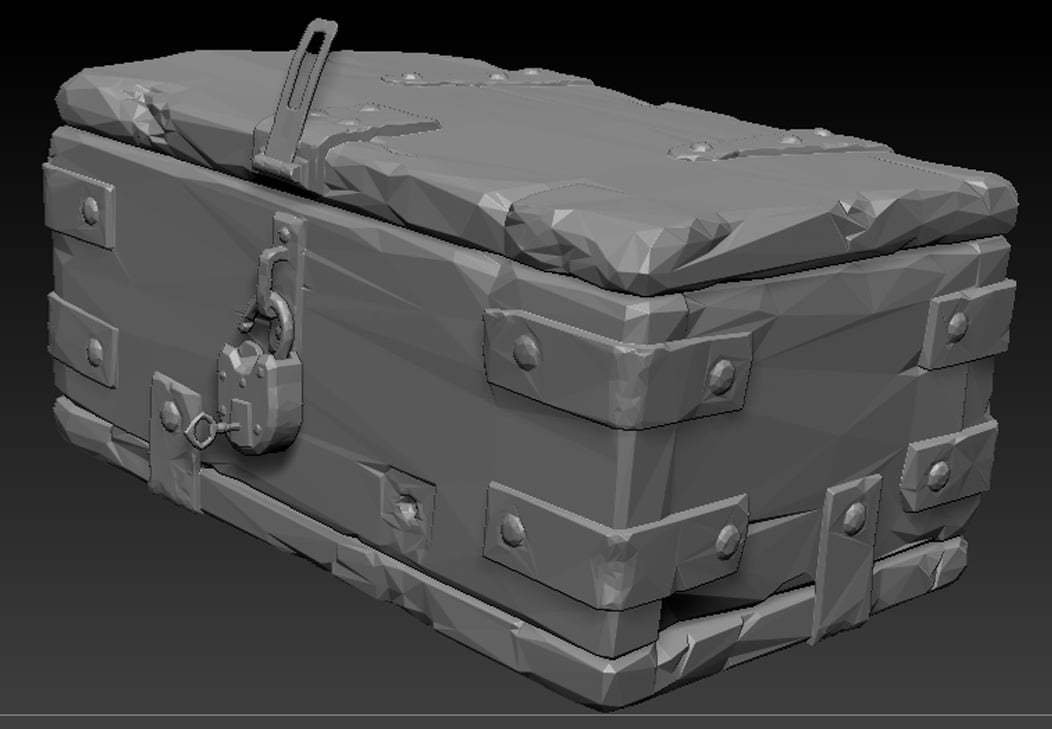
I keep some extra polys around the complex areas.
Then I heard the best thing to do was to use ReMesher so you can get back relatively even quads.
But this happens...
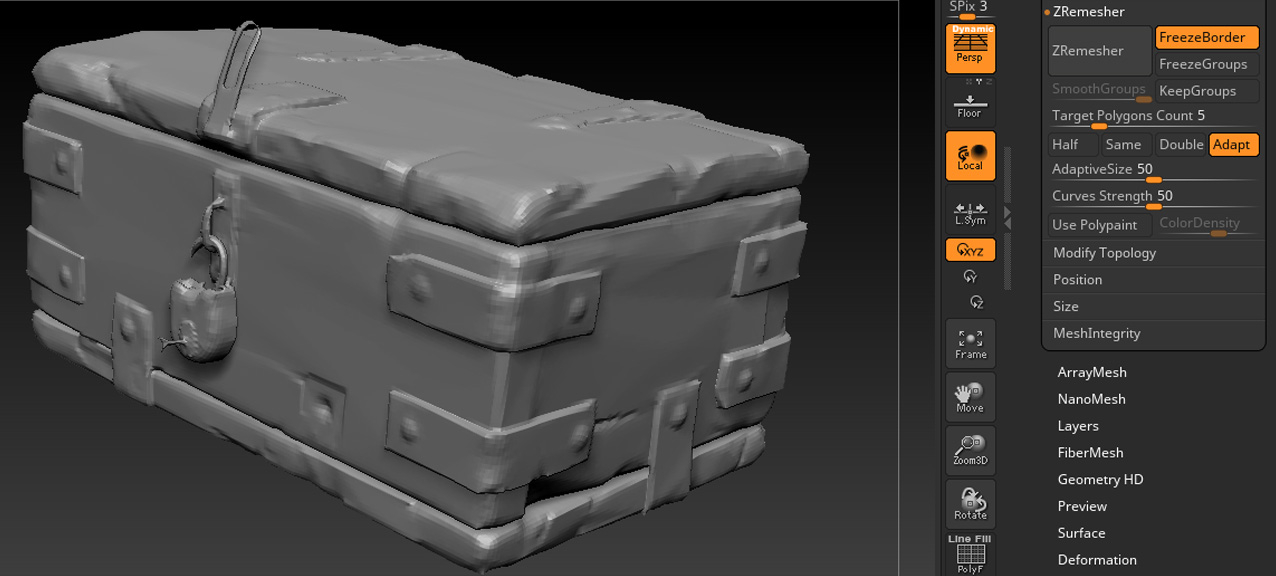
And I have no idea what to do...
I've tried lots of different settings but every time the padlock areas mess up, and the brackets tend to melt into the box.
Do you have any ideas how I could get around this issue? I've been scratching my head for days, and I might be confusing myself with all the different tutorials I've watched - all with different techniques...
Thanks in advance for any help!
So I have this sculpt:

And I need to now make a low poly version and I'm trying to figure out the best process for this.
First I decimated the mesh as low as I could (if that's the right thing to do?)

I keep some extra polys around the complex areas.
Then I heard the best thing to do was to use ReMesher so you can get back relatively even quads.
But this happens...

And I have no idea what to do...
I've tried lots of different settings but every time the padlock areas mess up, and the brackets tend to melt into the box.
Do you have any ideas how I could get around this issue? I've been scratching my head for days, and I might be confusing myself with all the different tutorials I've watched - all with different techniques...
Thanks in advance for any help!
Replies
That way I'll hopefully be able to decide what is best for each piece - not that I'd want anything to have terrible topology!
1. it's very simple. Just a rectangle with some other rectangles. Lock will be a litlte challenging but nothing crazy.
2. By using clean topology for things like the metal brackets, you can easily mask these pieces during texturing.
3. You can easily unwrap and make straight, uniform UV's.
Whatever works for your situation, though. Certainly no harm in getting familiar wiht decimation master and zremesher. They are tools you will use a lot.
@sprunghunt I was thinking this could be a good idea... but I still feel like I might be missing something in the options of the ReMesher... I'm trying to look into Polypainting, or using the brush that you can set topo lines. Maybe that would help with the hard edges?
@kanga It's a static game object for a scene in UE4 (non animated). I'm texturing with Painter, and baking textures with any software that gives the best results (XNormal, SP, SD, Blender).
Blender, ZB and SP is all you really need. This is what I do:
Forget remesher, it shines when you want to up your detail of the main sculpt.
-Separate the chest from the lock. Clown paint the two items (with polypaint) for use as masks in SP. Name them appropriately for import as selection sets in SP (you can find this on youtube). Export the hipolys to a disk. I like the fbx format.
-Decimate copies of the 2 highpolys. Decimate them low enough so they will work snappily in Blender, but not too low so you loose detail. Decimating in stages usually works best: 10%, 5%, 2% and 1% if the mesh will support it.
-GoB the Decimated meshes to Blender making sure the scale in Blender is good.
-Retopo the decimated meshes in Blender. For the lock you can just model over the form as snapping in Blender can get fiddly, and for mech objects this usually works quicker and cleaner.
-Uv the retopo meshes.
-Assign one smoothing group to the polys of each mesh.
Assign materials to each mesh (Im not sure if this is applicable to Blender but it is in Max, so again a quick google).
-GoB the meshes back to ZB and name them per the SP naming convention. Export them to a disk and the reason I send them back into ZB is that the fbx plug works well with SP.
-Import the lowpolys into SP and point them to the location on the disk of the highpolys you exported them to.
-Leave the number and type of maps specified in the SP baker, you will pretty much need all of them.
-Hit bake.
-Use the generated color map for masking in SP. The PBR workflow in SP will knock yr eyes out of their sockets!
Cheers.
Think I have an idea how to move forward now. This is my first asset so I really am just learning as I go haha.
It's killing me because all I want to do is get stuck in to Painter, it looks so damn cool! But I can't afford to rush all the important stuff beforehand.
Thanks again!
ChrisLambert please edit the title in something meaningfull so maybe more people know at first glance if they can help or not?