[MAYA] Shader Based on Relative Distance from Camera?
Hello, everyone!
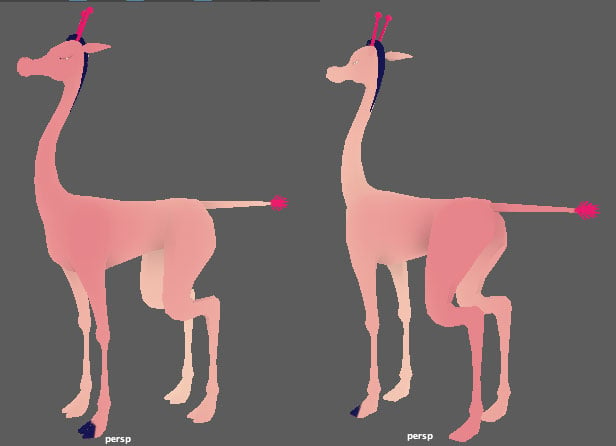
I'm working on a shader for a character. I want the parts closest to the camera to be a darker color than those farther away.
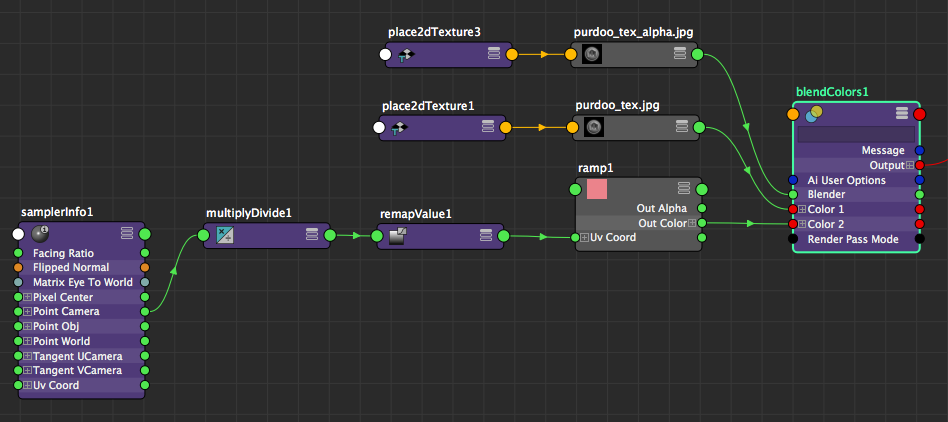
Right now I'm using Point Camera Z from the samplerInfo node to drive a ramp (which eventually plugs in to a surface shader). The problem is, the effect is lost if the camera zooms in or out because it's working with the absolute distance from the camera.
Does anyone have suggestions for how to set this up so that the parts closest to the camera are darker BUT the character has the whole color range no matter how close or far the camera is from the object?
Thank you for taking a look!


Replies
Use shaderfx for real-time?
Something like:
Blender(MyColor1, MyColor2, Clamp(0, 1, (Camera.Z + MyDistanceOffset) * MyDistanceScale * MyMaskTexture))
You have the position so you can just offset everything to the object's space
Edited cos I looked at the picture properly
I should explain, the ramp (dark to light pink) is for the main body, and then the blend node I have is used to overlay that with details like the hoof and horn colors.
kodde -
I don't quite follow. Could you explain what you mean by offset and scale?
Thank you both for your help!
Doesn't work based on your more recent post but the offset and idea of setting a range still apply
This will give you a gradient within a range defined by distanceOffset and distanceOffset+distanceRange.
eg. if you set distanceOffset to 100 and distanceRange to 100 it will blend colors while the camera is between 100 and 200 units from the object
I don't know how ramp works as I don't really do much work with hypershade
Basically:
* Find difference between Distance-from-Object-to-Camera and Distance-from-Point-to-Camera (which is constant for a given point no matter how close or far the camera is)
* Remap that those values from the old range to a new range of 0 to 1
* Old range min and max are driven by a control curve parented to the master camera for easy adjustment (necessary for shots with extreme perspective)
* Use the new values to drive a ramp
* Use the blend color node to overlay that with details (for examples, spots and hoof color)
* Plug the whole thing into a surface shader