High to low poly baking, I'm in need of some direction.
So I have decided to try and improve my understanding of baking normal detail into things as I feel it's something I need to understand to improve as an artist. I have spent the last day or two scrolling by different discussions and testing different things, but to no avail. I feel as though a little guidance will help me research in the right zones.
I have a simple gear, high and low poly versions. And with all the bits I learn from the forums the normal map gets better and better. Although, I know for a fact that I'm missing some fundamentals which are going to be causing me most of these problems. So I would appreciate any direct feedback, so that I could direct my research into obvious areas that are lacking.
The meshes are built in Max, and baked in Substance Painter.
I have a low poly which is here :
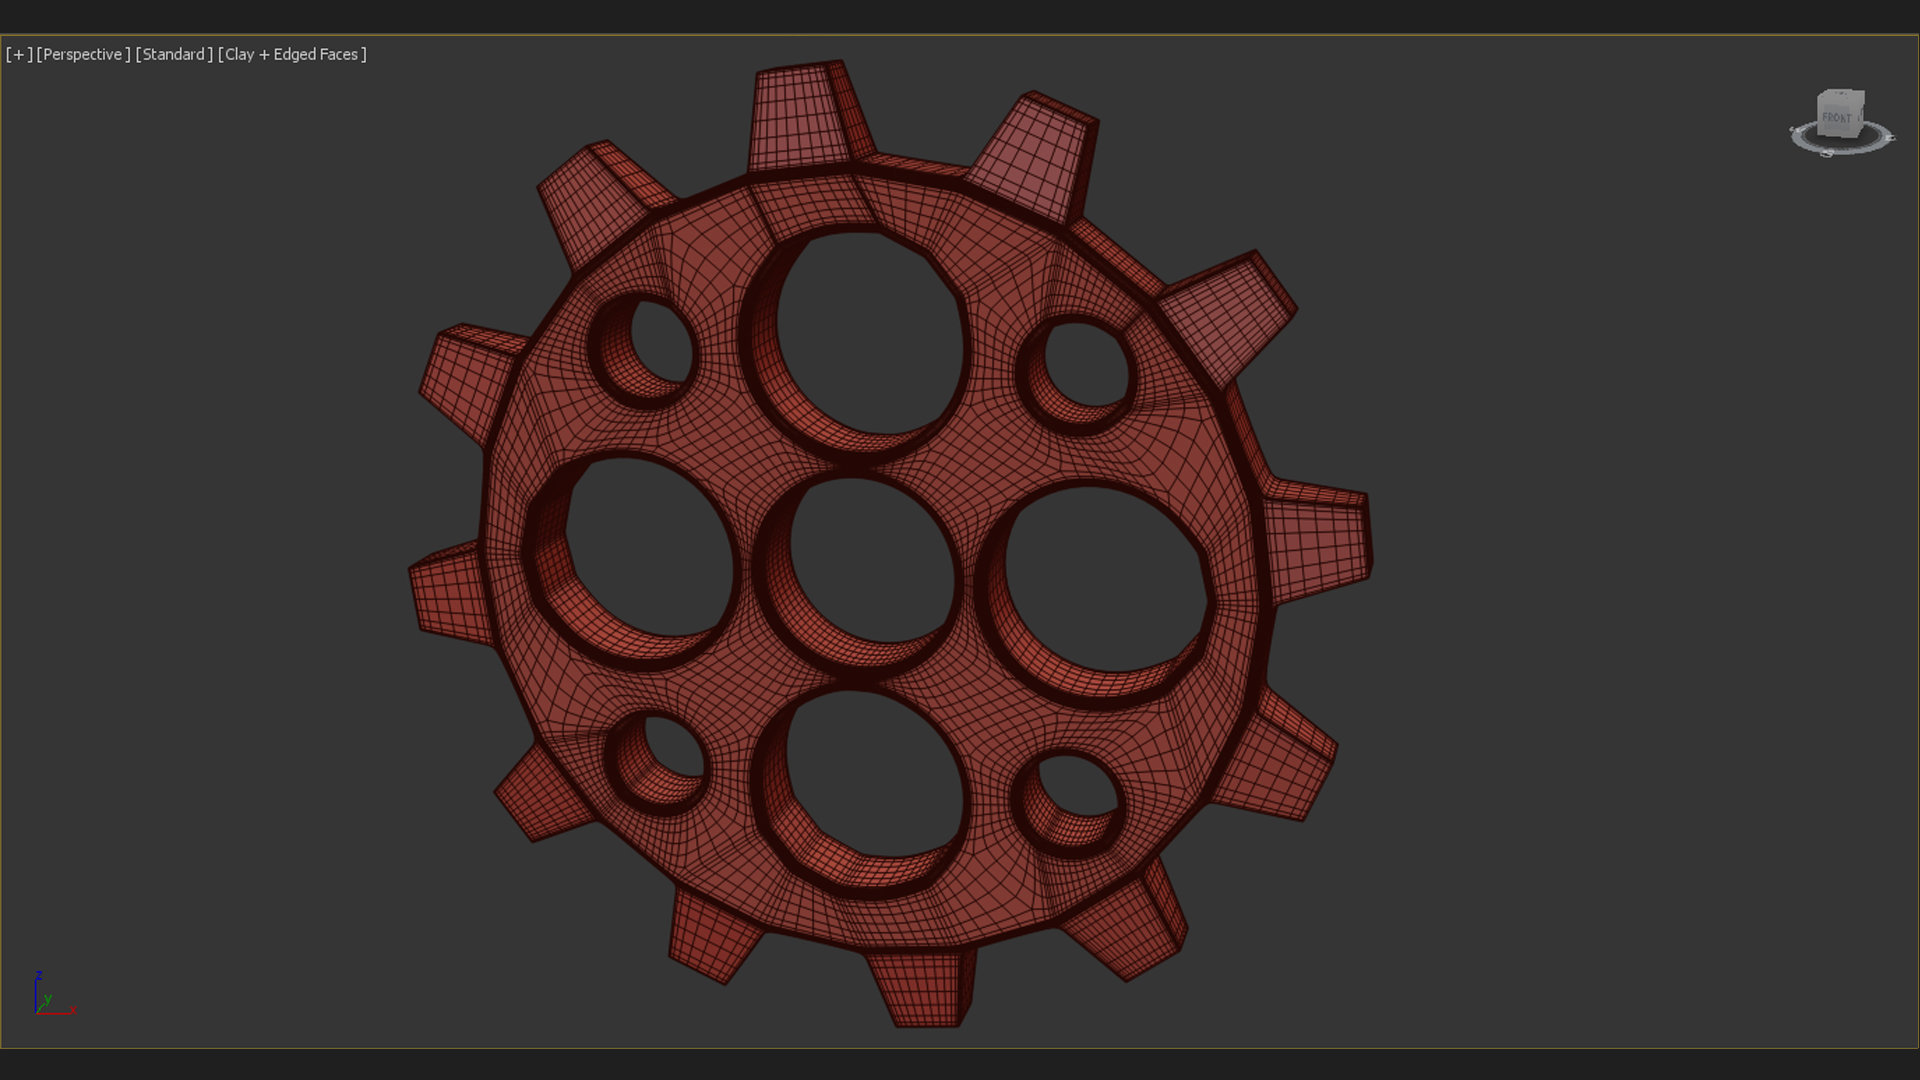
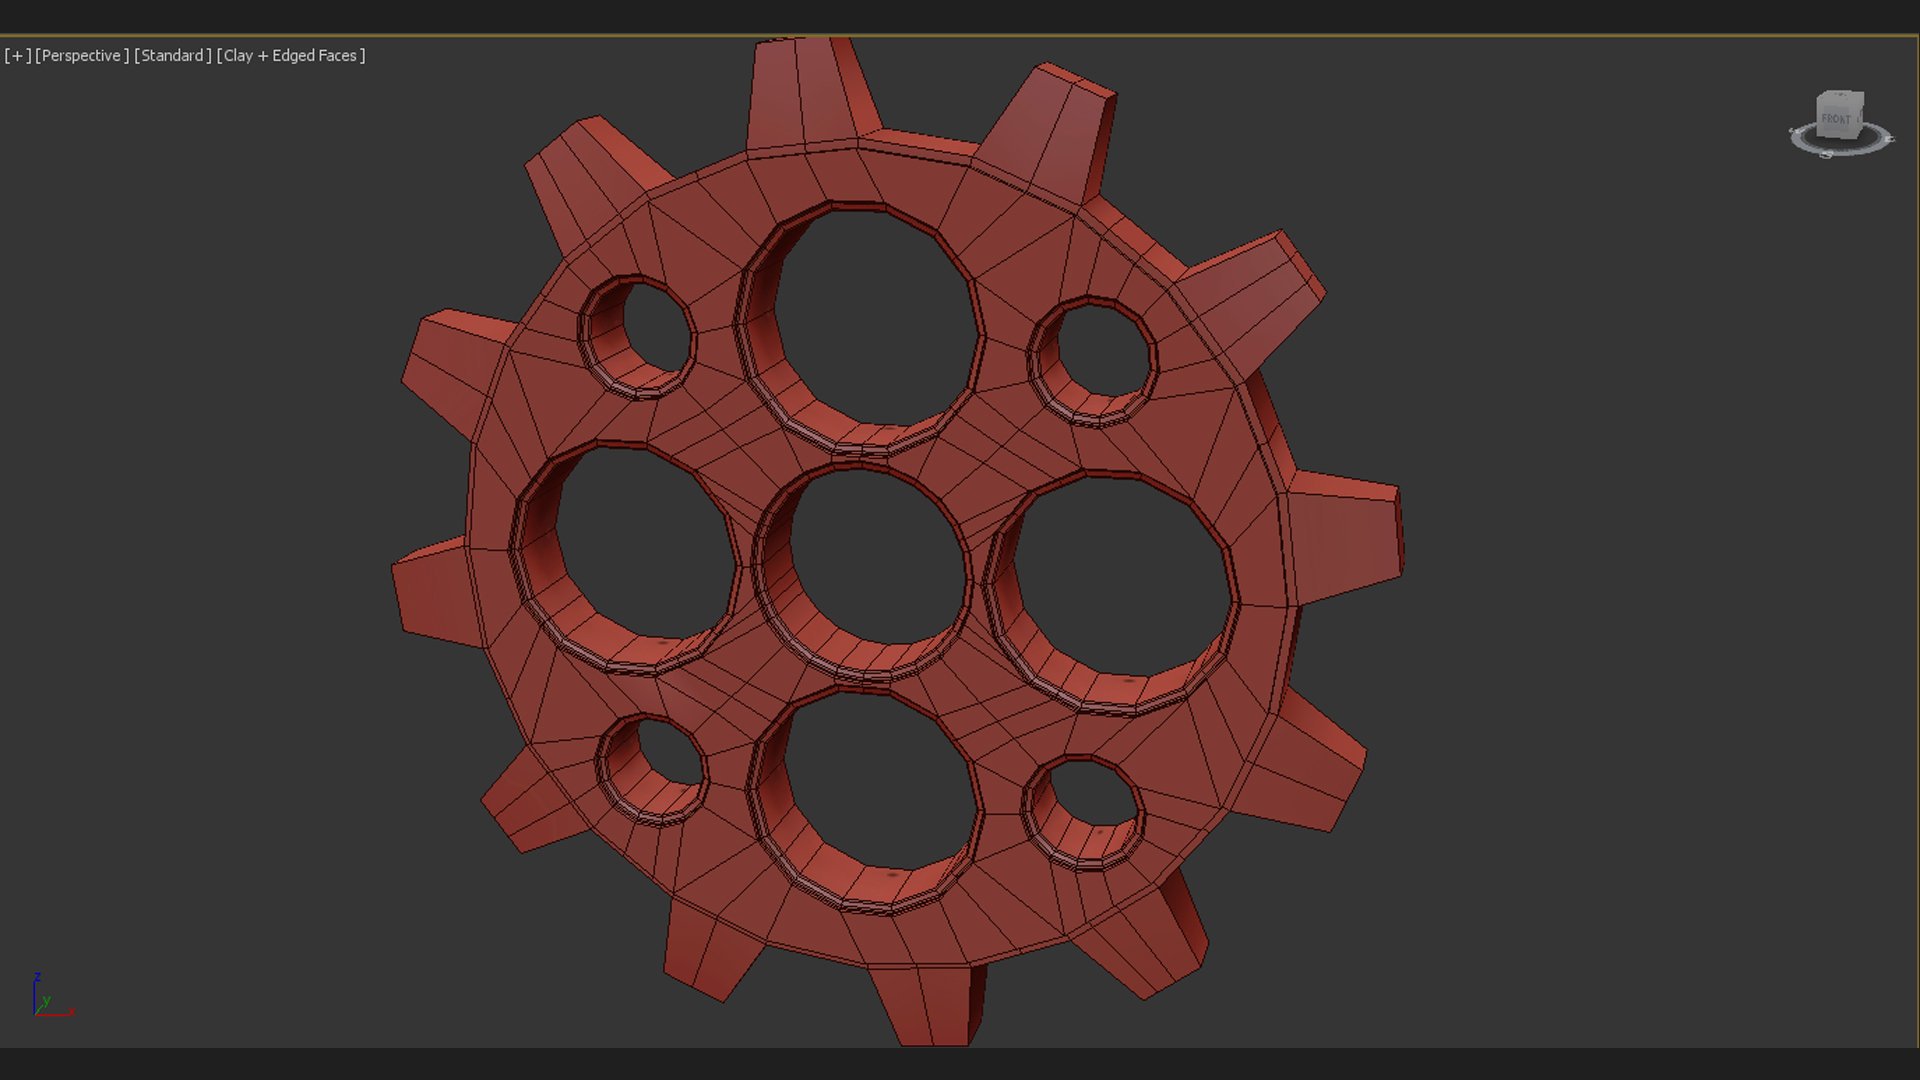 And I have the high poly which is here :
  I have tried altering smoothing groups on the low poly, changing some settings in Substance, increasing the size of the unwraps and maps. The only real result I have gotten is from stretching one of the inner rings to the full size of the UV space to test if it would change anything. But obviously I can't have just one super high resolution ring and low for the rest.
Here are the UV's :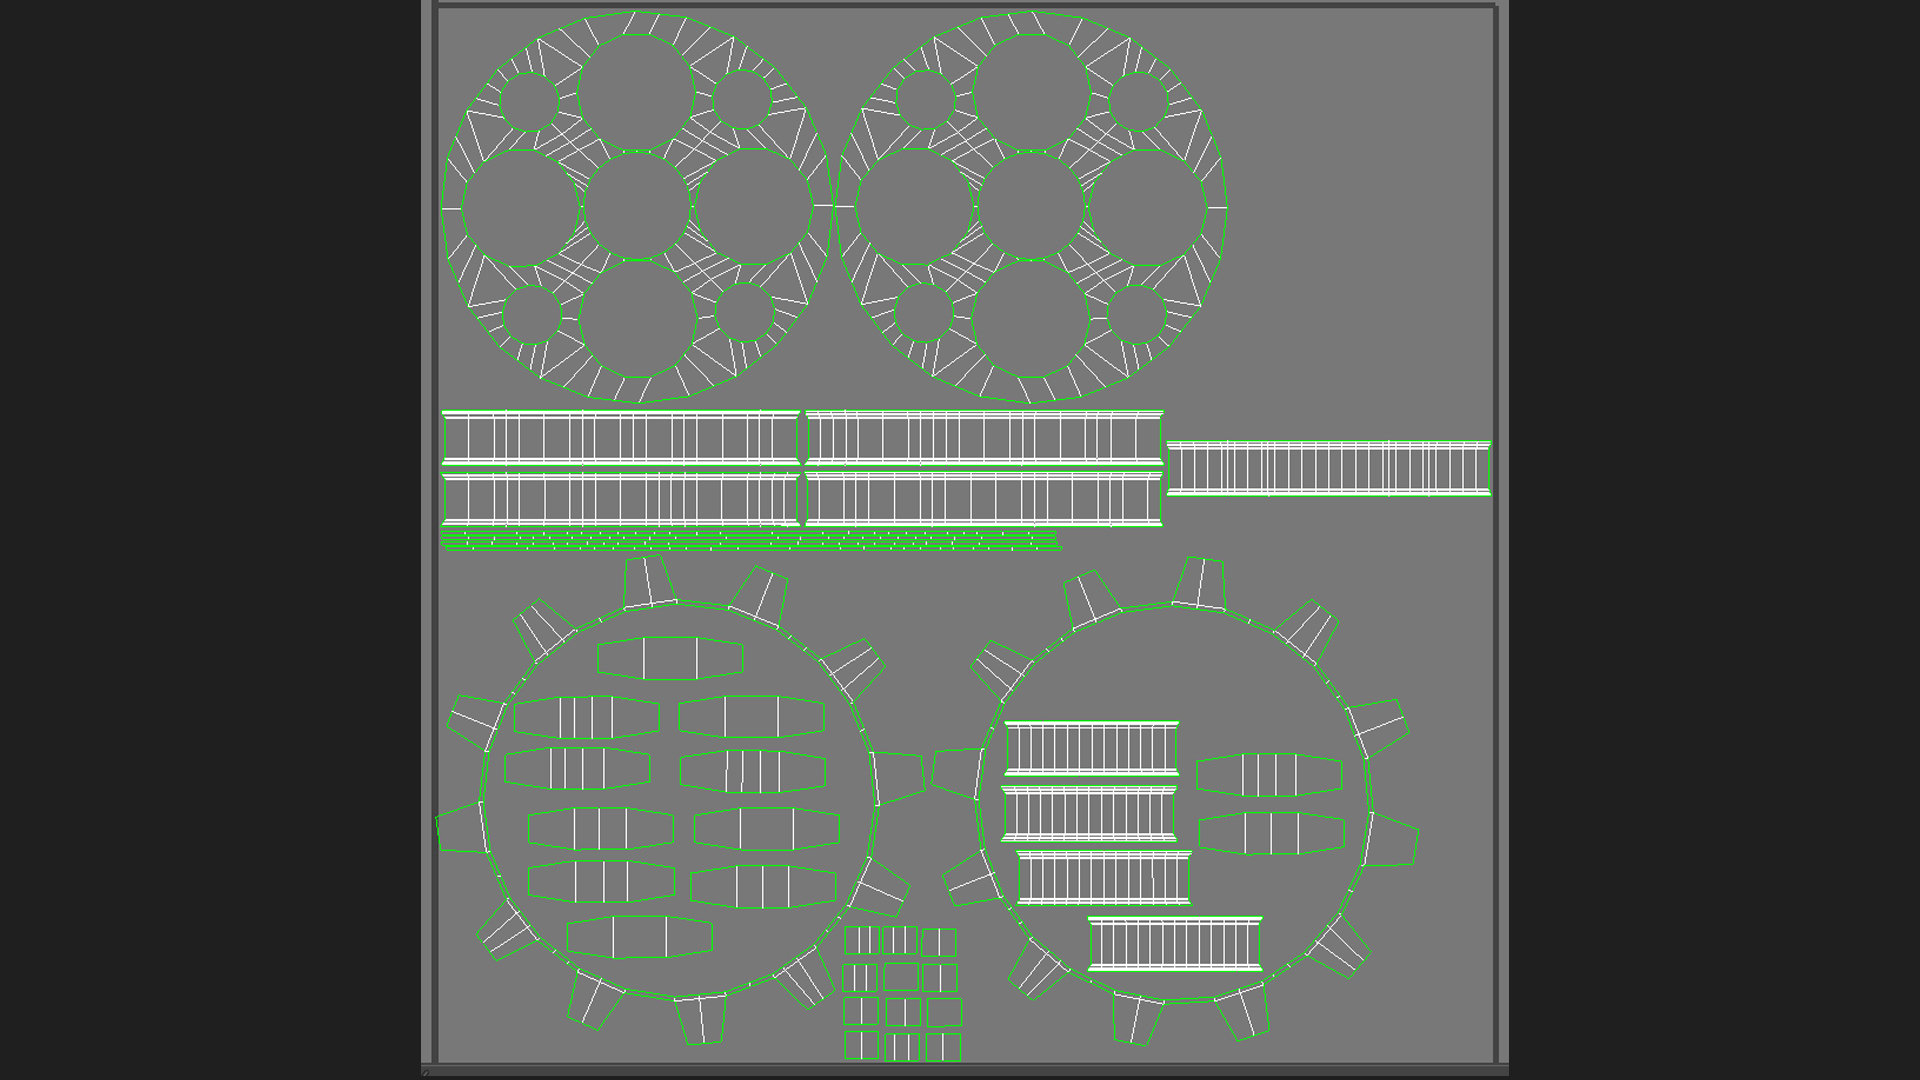 And here are examples of the bakes, one with no normals applied:
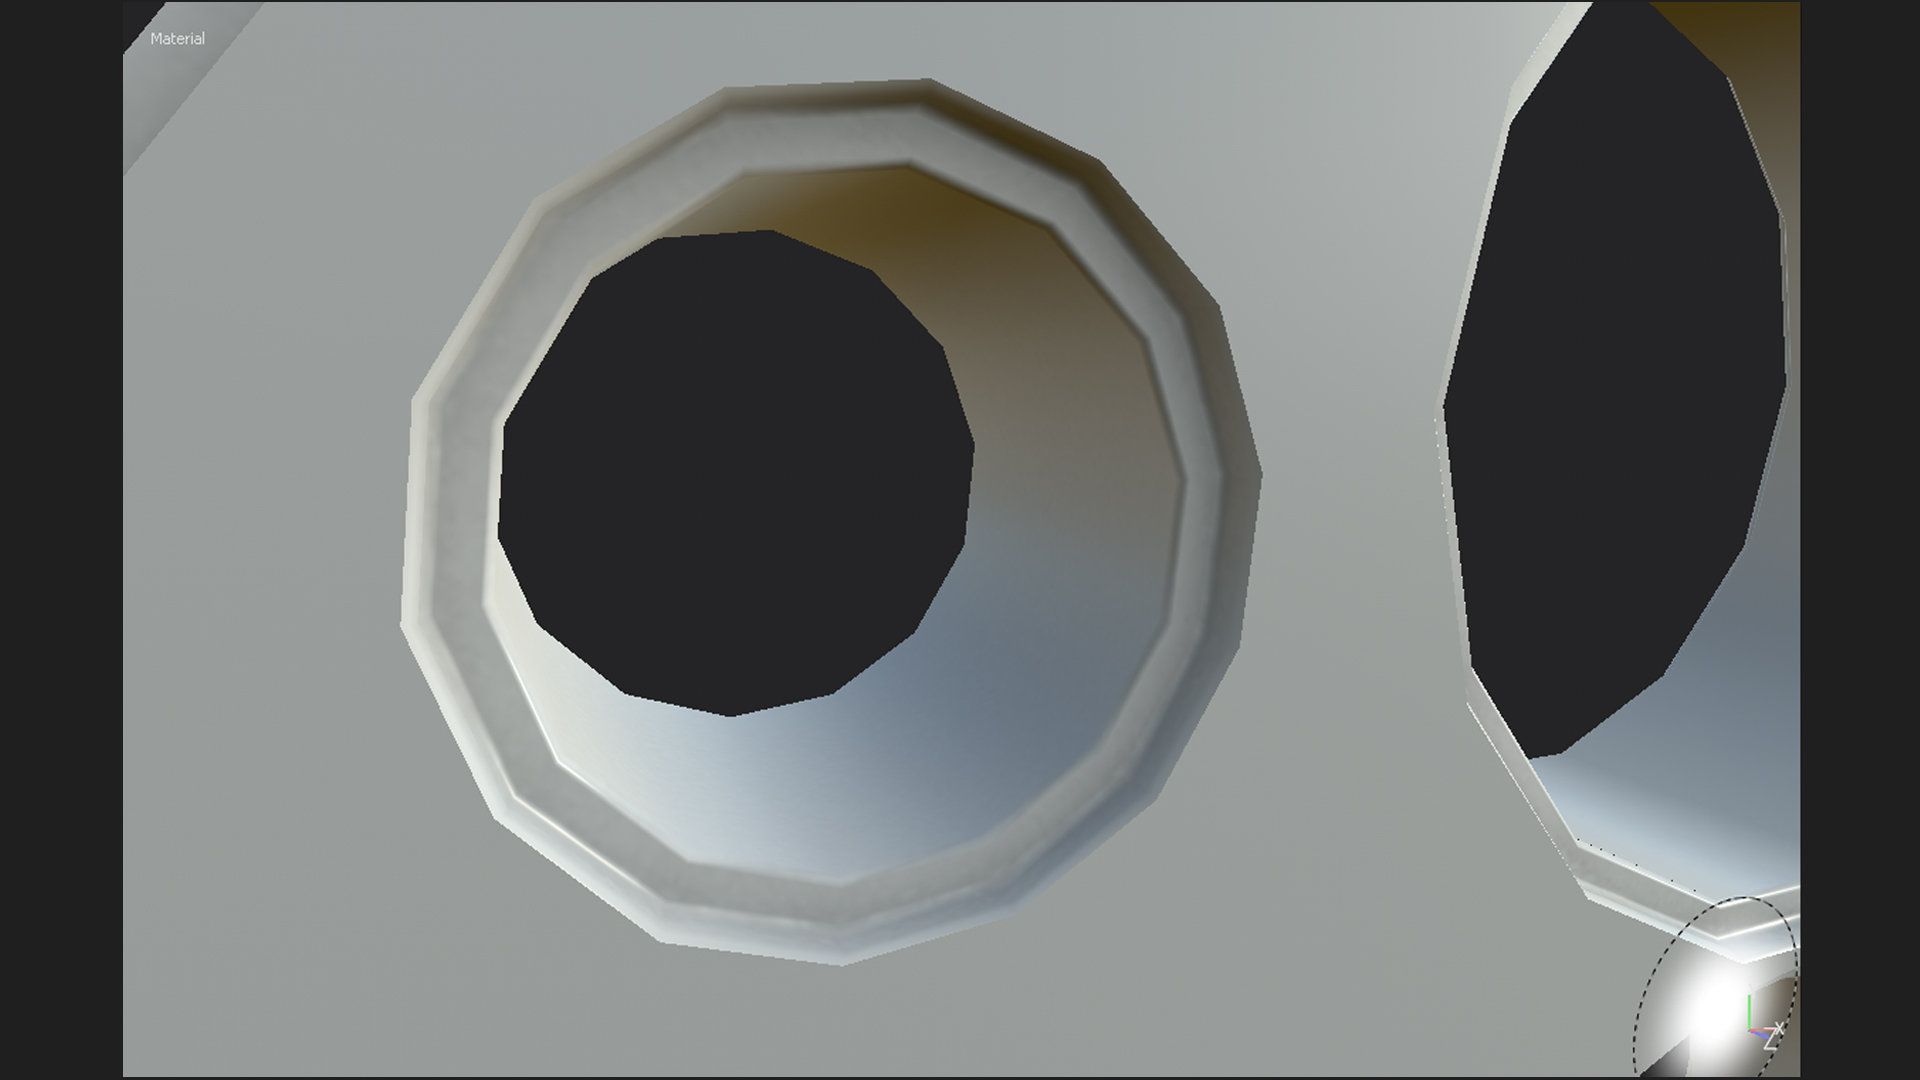 And another with the normals applied:
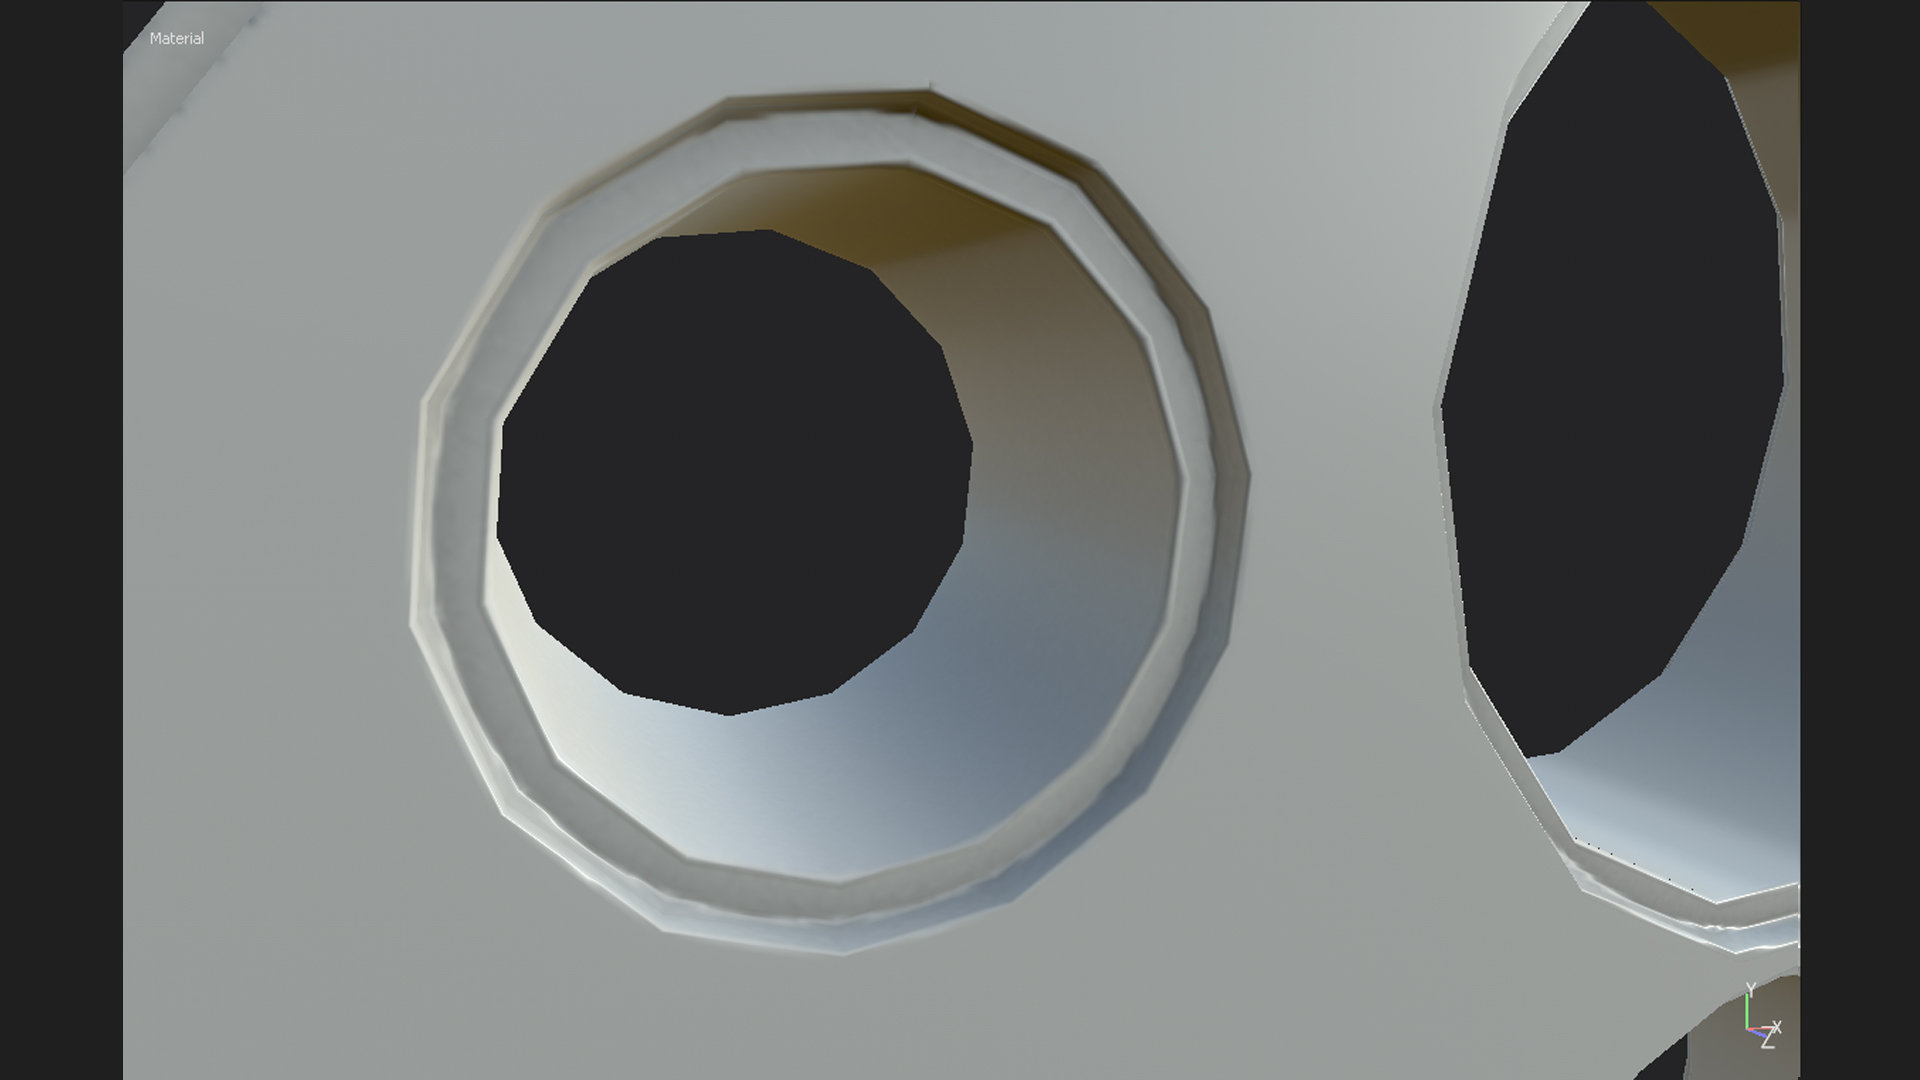
I get a feeling the issue is coming from me lacking a basic piece of understanding which has slipped by me, and would appreciate some help.
I just don't see much of a difference being made when adding the normal map on these edges, and with that in mind wonder if the normal map is worth doing, or if i'm just making some mistakes which hinder the quality of it.
I understand the principle of adding screws and pieces via normal maps, and making sure the edges are not 90 degrees when baking, but using normal maps to smooth out edges and making it so someone can use a low poly model with high poly edges etc, is baffling me.
Thank you, if any more details are needed i'll make sure to post them.
I have a simple gear, high and low poly versions. And with all the bits I learn from the forums the normal map gets better and better. Although, I know for a fact that I'm missing some fundamentals which are going to be causing me most of these problems. So I would appreciate any direct feedback, so that I could direct my research into obvious areas that are lacking.
The meshes are built in Max, and baked in Substance Painter.
I have a low poly which is here :
 And I have the high poly which is here :
  I have tried altering smoothing groups on the low poly, changing some settings in Substance, increasing the size of the unwraps and maps. The only real result I have gotten is from stretching one of the inner rings to the full size of the UV space to test if it would change anything. But obviously I can't have just one super high resolution ring and low for the rest.
Here are the UV's :
 And here are examples of the bakes, one with no normals applied:
 And another with the normals applied:
I get a feeling the issue is coming from me lacking a basic piece of understanding which has slipped by me, and would appreciate some help.
I just don't see much of a difference being made when adding the normal map on these edges, and with that in mind wonder if the normal map is worth doing, or if i'm just making some mistakes which hinder the quality of it.
I understand the principle of adding screws and pieces via normal maps, and making sure the edges are not 90 degrees when baking, but using normal maps to smooth out edges and making it so someone can use a low poly model with high poly edges etc, is baffling me.
Thank you, if any more details are needed i'll make sure to post them.
Replies
@KurtR Ahhh, yeah! Luckily I make sure not to pop that on when exporting, I just have the turbosmooth in the stack before collapsing it. I might try the mesh name option again, since I tried that before a lot of changes, might be worth the look again, thanks!
3dsmax, everthing in one smoothing group.
Maya, every edge set to smooth.
Without it smooth, substance will create all kinds of hard edges that don't look right. Also triangulate your model before bringing it into substance.
The low poly could be optimized, there are a lot of polys that aren't doing too much. They can go, or you can put those edges into rounding out the cylinders so they better match the high poly and capture better. Same tri count, better bakes, win win.
Those are some fugly UVs, you could use the space in a much more efficient way. If I get some time I'll grab the model and show you what I mean.
Also, the bevels on your high poly are SUPER tight which makes for some really sharp corners that aren't going to bake very well. You might want to relax those a bit. The Turbo Chamfer script is great at controlling that.
@Mark Dygert All great tips, thank you very much! So, when smoothing it all into one smoothing group for baking, what would I do if I wanted those custom smoothing groups then? Since I know that can effect the appearance of the model quite distinctly, and it's a shame to always pop on a single smoothing group if it's not how I want the model to read. I'll be interested to see on the front of the optimised UV's, as there's obviously some knowledge missing on my behalf. Thanks!
@musashidan Wonderful, thank you! I'm a visual learner, so it's much easier for me to see with reference. The UV'S without a doubt, are much better! When you say "deleted and can either be attached back together or stacked and offset before baking." Are you referring to actually deleting the back portion of the mesh? If they are deleted, then how would I stack the UV's since there wouldn't be any for the deleted portions right? Am I also right in assuming when you say stacking, you mean that the portions of the mesh which match you lay on top of each other, but then by offsetting you mean moving it out of the initial 1-1 UV space, to the the side to eliminate lighting errors?
And lastly, the optimised UV Mesh, the teeth of the gear, because some lines have been removed, are they not NGons now?
Thank you very much for all the help everyone, it's all very helpful so far and the first time I have used a forum, so far so good!
Like musashidan said, n-gons are great, but be sure to triangulate your low poly model, especially before you bake and ESPECIALLY before you take it into Substance. Substance refuses to render any poly that has more than 2 triangles. Also, make sure to use that same triangulated model in the game engine, to make sure the triangulation matches. Software calculates the winding order of non-visible edges in different ways, if you leave it up to the app, you leave the door open to errors.
So here is how I would approach this... (from the bottom up)
Final mesh is 2,360 tris (your original was 4,722 tris) I put more polys into rounding out the holes, but ended up with an overall lower tri count.
0) Each hole cylinder is 18 sided, you're original was all over the place, the center hole had more sides than the surounding holes and it made it difficult to route loops. If you stay consistent with the number of sides, it will be easier to work with.
1) ProBooleans, they are so nice, especially now that they clean up after themselves. Use instanced meshes so you can control a lot of holes with only a few meshes. This lets you make some pretty big changes, very quickly. You can use this workflow to crank out various test cases as well as create levels of detail models which can be a huge headache for game artists.
2) The bool leaves behind a complex ngon that needs to be triangulated. Thankfully proBools are much cleaner than the old Bools... shudder... But you still need to handle the ngon intelligently.
The best way I've found to do this is to toss the "edit poly" and then a "turn to poly" modifier on top of your stack. Turn on "show end result" and go into edge mode and click "create" to fix any odd triangulation. As you draw new edges, it updates the turn to poly modifier and shows you the triangulation. Usually you can get it all sorted out with just a few new edges created. When you're done, use the symetry modifier to mirror the front to the back.
3) Make the high poly. Remove symmetry edges, Auto smooth with it set to 45. Turbosmooth it once with smoothing turned on, then apply "Turbo Chamfer". Your high poly is done. Export.
4) Copy your high poly. Remove Turbo Chamfer. Set the smoothing to 1 group. Unwrap and you're low poly is done. Export with triangulation checked on in FBX or use the tried and true "turn to poly" modifier again set to max size of 3.
5) Bake n' Paint in substance, export maps to UE4, import it all, hook up the textures and and call it a day.
I gave each piece it's own unique space, but you could have stacked a lot of the UV shells, (with one more symetry modifier after you finished the unwrap, then offset one set of shells 1 tile to the right) but thought that might convoluted the process. We can talk about that later if you're interested.
I attached the process file. Feel free to check it out, and poke around in each objects modifier stack. It will help you figure out how I went through it. If you have any questions let me know
Especially all the visual reference and taking some time out to test some things for me, it's all fantastic!
I'm going to try put all this information to use with a few other models and get back to you result wise shortly.
Thank you again! More than likely I'll pop up with more questions after testing some stuff, all the best!
No normal map applied:
Normal map applied:
Already I have learnt a lot from the process you took me through and the tips you gave me!
Just a follow up question, the whole placing a duplicated set of UV 's one grid space to the right, I did that for this model, hence the seam in the middles on the LP, what is the positives and negatives to this? I understand it saves UV space allowing for a higher resolution texture, and also saves time by painting one area once instead of three times etc. Is there any other points to be aware of? Like I know that in Unreal lighting maps need to be created separately when stacking UV's to avoid light errors.
Another question also, what classes as odd triangulation? When I was testing it for myself, I assume it's where there's too many narrow polys that will cause problems when insetting and such? I had a couple that when insetting overlapped and caused issues, so had to step back and add a few more edges to help. Is that the kind of thing i'm looking for? The edge adding in the Turn to Poly portion of the steps was where I spent the most time trying to understand the process.
Once again, feedback is very welcome as I want to understand what I'm doing, rather than just replicating and forgetting the process.
Thank you SO much, the help has been invaluable, I appreciate the time spent on helping me.
I'll be trying some other assets with the same process which are not gears, and I'll probably find some complications then too, so brace yourselves!
Yep, that is the secret to stacking shells. Save space, Less work.
Yep that is odd triangulation. This ngon is pretty much a nightmare scenario so that part will take the longest, and that's I use the turn to poly trick so it handles most of the edges for you. You put it on top of the modifier stack and turn on "show end result" so you see the triangulation that it creates. After a while you'll get a feel for where to place edges to get the best results. There are other tricks like using bridge or cap, they have a few options to deal with some stuff but they wouldn't really help that much in this case. In the vast majority of cases booleans won't be that hard to clean up, but dove into the fire, you got it figured out, and learned some stuff, so that was a win a.
The Boolean trick with instances help you itterate quickly so you can find those problems like the close edges and work around them without having to manually tweak a bunch of edges or kill yourself redoing a bunch of work.
I'm glad you got it working! On to more problems