The BRAWL² Tournament Challenge has been announced!
It starts May 12, and ends Oct 17. Let's see what you got!
https://polycount.com/discussion/237047/the-brawl²-tournament
It starts May 12, and ends Oct 17. Let's see what you got!
https://polycount.com/discussion/237047/the-brawl²-tournament
[Blender] Ugly neck seam ? classic problem ,but how to rid it , best way ?
Hi everyone, I am struggling with seams after a long time . I would like to stablish a good point for me to rid the seams for my particular workflow (blender to substance painter ). I would like to test some animation and then run my character in Unreal. I am really like to work organize , I do not like to paint over the seams , not clone over the seams ... I would like to animate this character and programming some scripts
in Unreal and this character has not cloth in his upper body , 2K resolution for Unreal and make some "render" then in cycles with further resolution...but animation is my goal and of course, rid this seam ....cof cof cof.
1- Let's see what we got here
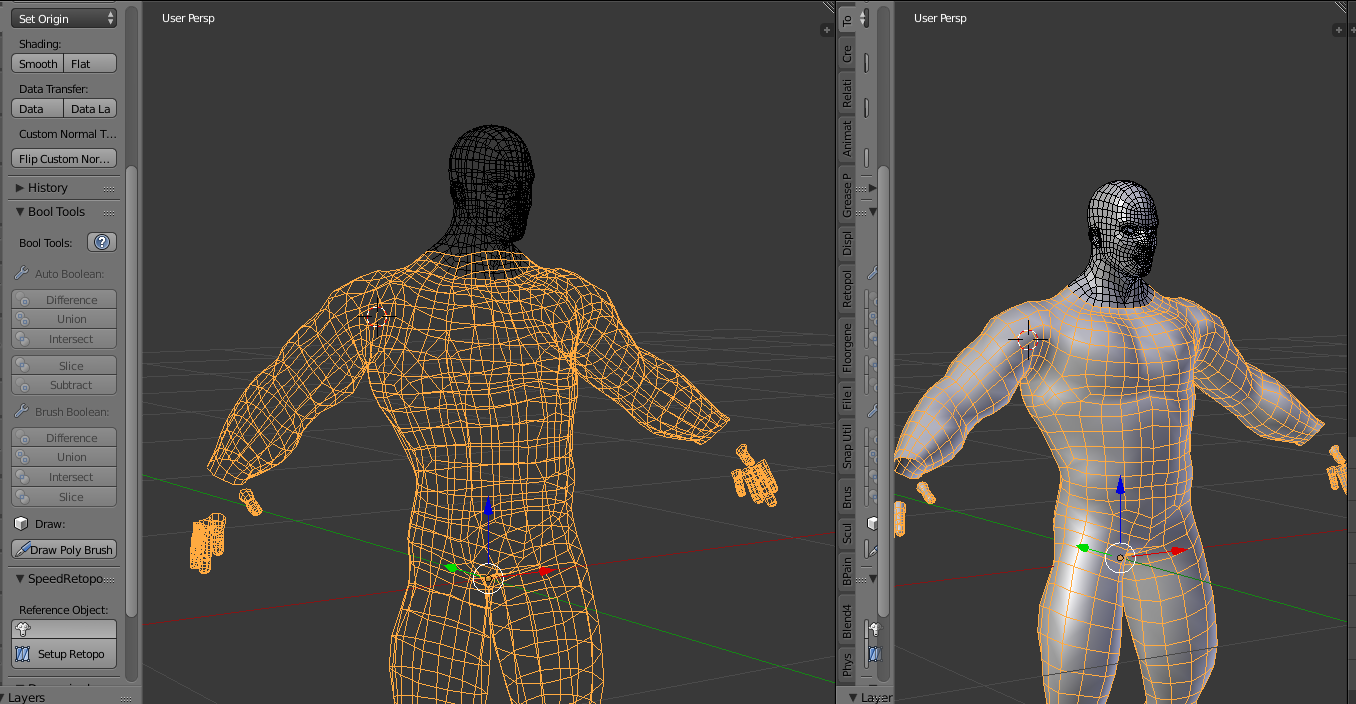
I have got my meshes here in the picture as separate meshes (body_low and head_low in FBX output ) .

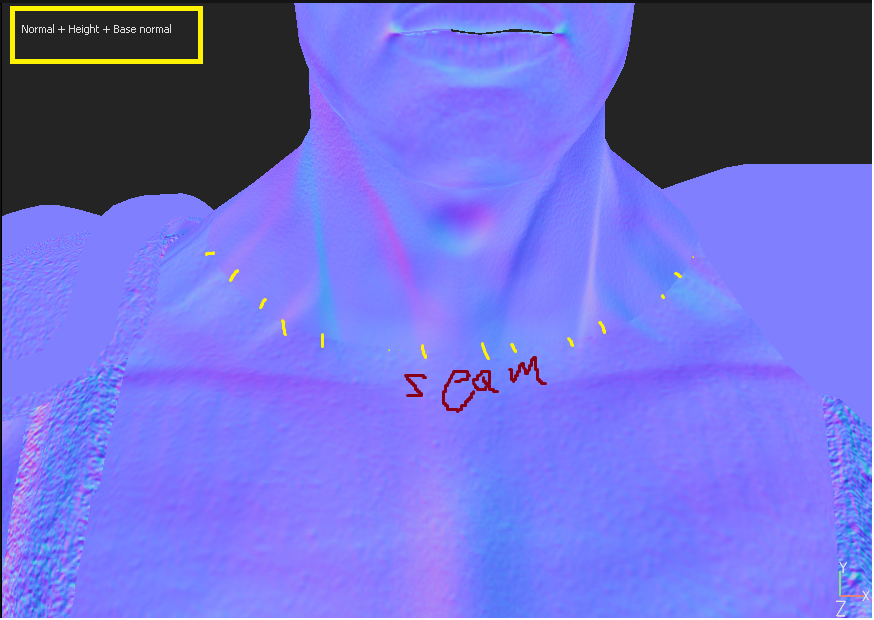
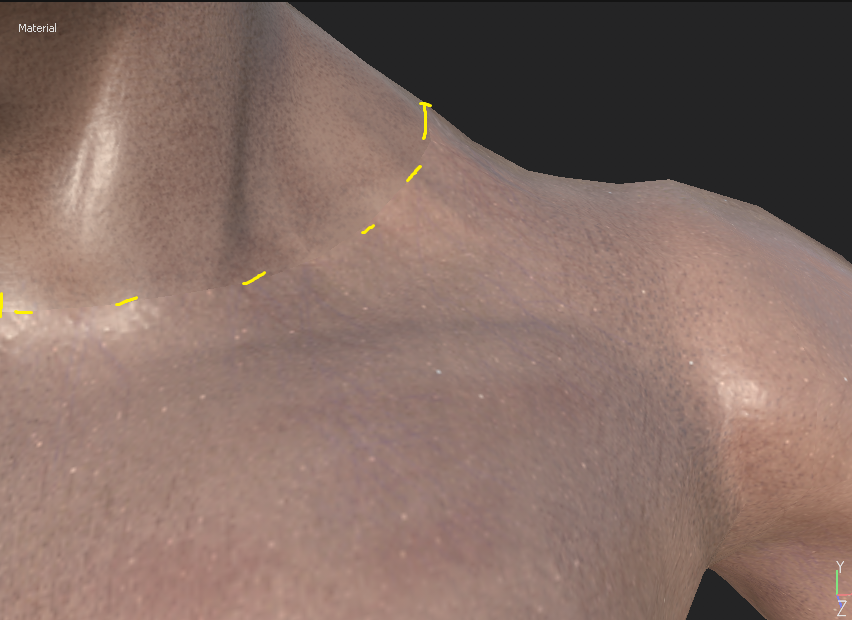
2 - Well after a long time to paint the texture in SP , the result is this ( I am showing in material viewport the seam , also I can see it with another channel contribution , such as roughness map and color map , the seam is there... I do not Abuse of procedular texture , the texture was a mix of hand painting and ton of mask for progressive color values).
 .
. 
3 - In the image above , you can see the seam is quite a little visible there .
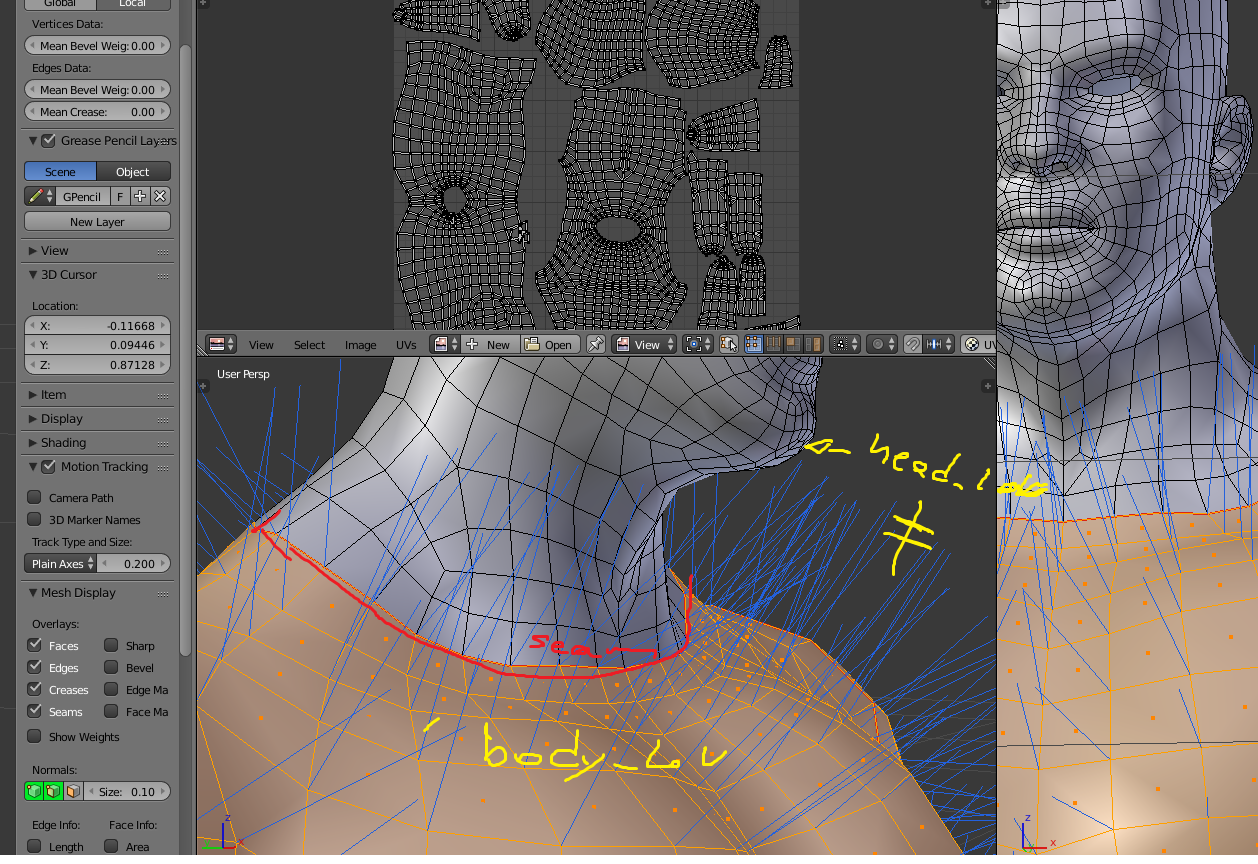
4 - here it is the "vertex normal" direction... ( see the seam) ... the body is another Object and head is separte it from the torso . (I left below a Gyazo's gif to show the direction of this particular piece, the head ).
Giazo's gift (showing the vertex normal direction of the head in blender) :
https://gyazo.com/bc27341acc6bd948b22c2af04798ddf7
5 - the upper body , is show me this direction.

6 - I use blender since 5 years ago , I never put in practice the best way to , rid the seams , can you help me ?
http://polycount.com/discussion/comment/2464105/#Comment_2464105
in the last link (above right there ) I can not understand the example for blender users (too fast and not biped model ).... I just watched 2 o 3 times, I do not how to make transfer in blender , "data transfer" I am not sure if a clue there..I am fighting with seams at least 4 days ago.... I used to paint over the seams in photoshop or whatever , but when I paint the seams I consider , it is not good at all , specially if you are running a test in Unreal engine o Unity , I ve see all blurred afterall when I nocked the resoltuion down for my game.... that's is the reason I prefer to not paint over the seams to rid it and clone It is another bad experience I ve noticed, but this is a point of view, in some cases I found it very well... but in this case I need at least 2K resolution , texture atlasing and so on and so for...so I would like to understan how can I fix the seam for blender and substance painter workflow.
THX
Replies
If it's just the detail textures that are causing the seam, try having them 'tri-planar' mapped, or if it's causing artifacts elsewhere, just paint it around the seam.
mmmm let me explain a little more , I try to use "tri-planar" as you said in detail texture , as you recomend me ...however, I noticed, "tri-planar" projection is only available in "fill layer" .... and fill layer could be a simple flat color layer or could be a bitmap texture ....also , my "detail" texture are not procedular ( with fill layers contribution map ), my details layers are just simple layers ....I create details layers by layer with hand-painting (as you can see in this last picture) , I like the power of procedular for some cases , pores , scratches , acentuate things aswell , but I use procedular , for "roughness" map most of the time , and also for smart mask , mask ....to reveal areas to get better result... this picture I show my workflow.
Just make you way up the stack and see which layers are having seams.
Then you either have to use tri-planar projection or paint/clone the areas around the seams, you probably want to work
on masks rather than actual layers in that case.
That's assuming the seam isn't cause by incorrect bakes.
https://gyazo.com/90085695e5769010a511fcb31c98f3f6
As a follow-up FYI/FFR... the UV's edge-loop for the head and torso sections where they meet at the neck (seam) are difference sizes, they use different amounts of texture space. This causes the problem you had. It can be 'fudged' with textures but unless you make sure both UV edges are (essentially) the same length you'll tend to get seams showing no matter what you do.
1) Unwrap as normal
2) temporarily lay one UV section over the other in the UV/Image Editor
3) resize/scale the UV Islands so holes (where the seam is) are roughly the same size;
4) manually adjust individual vertex positions so both sets match (turn on "Snap to Pixel" in "Image" to help doing the above, also if the islands need to be re-scaled, pin, "P" (Alt+P to clear), the two loops and use them as 'pivot' points around which you scale)
Once you're done you can relocate/reorganise the UV's sections to better fit your image (if snap to pixel is enabled watch out for individual vertices jumping out of alignment - disable to avoid this).
You shouldn't need to weld vertices, all you are doing is adjusting particular selections so the vertex loop seam at the neck match for both head and torso (its this difference that's cause the seam to appear in your textures).
With "Pin", once you organise an island how you want it, pin the entire section to lock it, that way if you do any additional editing the locked UV's won't change.
Snap to pixels is a global feature of the UV/Image Editor, UV vertices 'snap' when its enabled, or can be moved freely when disabled.