The BRAWL² Tournament Challenge has been announced!
It starts May 12, and ends Oct 17. Let's see what you got!
https://polycount.com/discussion/237047/the-brawl²-tournament
It starts May 12, and ends Oct 17. Let's see what you got!
https://polycount.com/discussion/237047/the-brawl²-tournament
How to model this pattern in Maya/Zbrush
Hi there,
I recently start a project which involves modelling something I'm not sure how to model properly and have been struggling to come up with a clean result which I can sculpt onto in Zbrush:
This is the pattern and the current results I have:
Illustrator File:
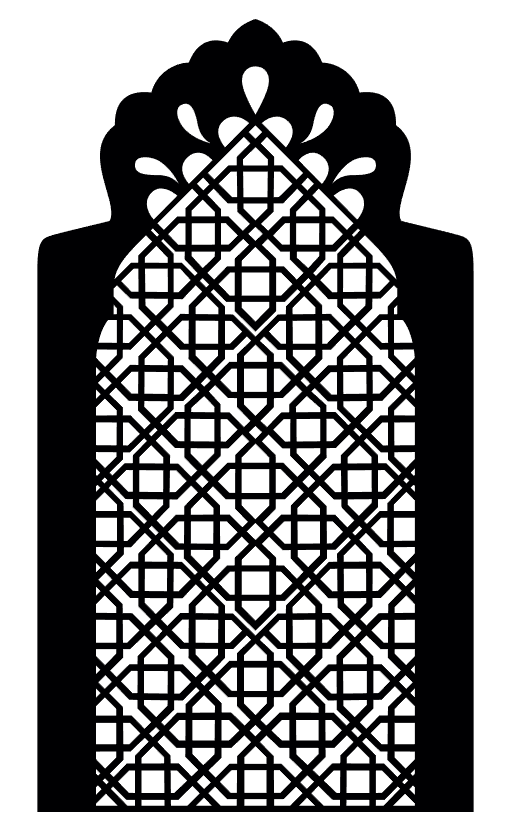
Current results:
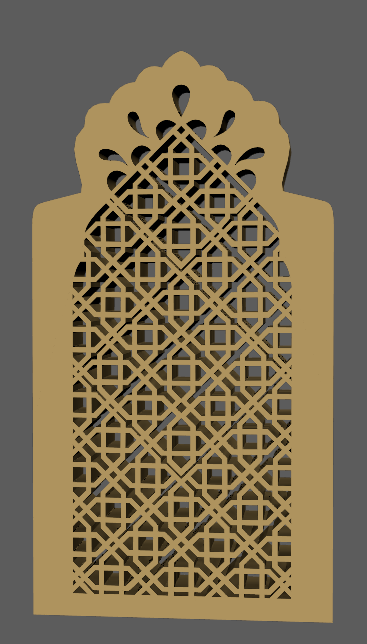
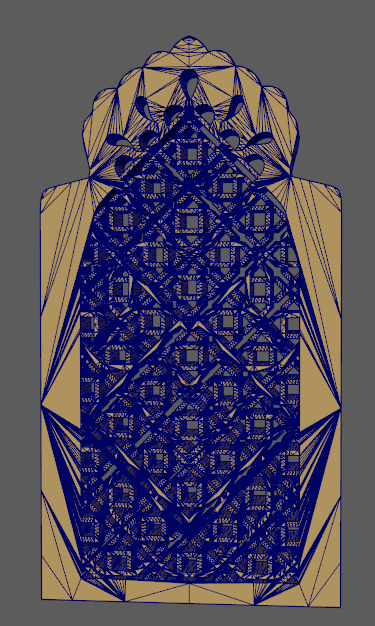
I like the outcome but I'm not happy with the topology and this impossible to sculpt onto in Zbrush.
So I was wondering if anyone knows what the best way is to create this object?
I recently start a project which involves modelling something I'm not sure how to model properly and have been struggling to come up with a clean result which I can sculpt onto in Zbrush:
This is the pattern and the current results I have:
Illustrator File:

Current results:


I like the outcome but I'm not happy with the topology and this impossible to sculpt onto in Zbrush.
So I was wondering if anyone knows what the best way is to create this object?

Replies
@3DShaq
Base Shape
Start with an 8 sided cylinder. Set the radius to 0.5. And extrude it towards center. Also rotate it by 22.5 deg.
Use these grid options. It will make it easy to manipulate it.
Layout pattern like this. One tip: Start from top. You will figure it out easily. Hold X while using move tool and it will snap it to the grid.
Select all objects and use Booleans->Union.
Final geo after booleaning hsould look like this.
You can import this into Zbrush and use Dynamesh to sculpt on it.
Also make sure you merge the vertie and fix some ngons if there are any. So you can properly import it into Zbrush.
I'm going to give this a go and see where it leads.
Is this what the boolean result should look like?
I mean that's a lot of ngons to fix
Even your original attempt would be fine. On static geometry such as this there isn't really any sane way of doing good topology, nor does it matter that much. If you want to sculpt it or deform it, you can voxelize or dynamesh it. Hence why cromadbomber mentioned dynamesh in his technique.
What is the end goal of this piece?
I've also brought my previous attempt into zbrush and dynameshed and it somewhat works. However it doesn't dynamesh accurately as I want it to.
the end goal for this is to be a similar mesh like my first attempt but with cleaner topo like cromadbomber's outcome. I then intend to create a displacement which will be the wear/ageing in zbrush.
The dynameshed model is about 1.5 mil of polygons but you can go higher if you want it even more precise
As for an update from my side. I managed to get a cleaner and lower poly result in Maya with some more development using the first method:
So I decided to cut a section of pattern and fix all the tri and ngons until it smoothed properly and then duplicate.
I then applied a bevel to all of the edges and deleted the few unnecessary after
I'm pretty happy with the outcome, though it may not look exactly as the one before; I'm liking the extruded border in this as well, so will see how it works out after quick unwrap and zbrush displacement.
The only reason why I'm trying to keep it low poly as possible is so that it doesn't get heavy in the Maya scene because there will be a total of 7 of these.
Anyway here how I did it:
1. Create a plane with the same proportions as your image. You can do it in maya as well. I did it inside zbrush by just scaling a plane with gizmo.
2. Open the plane in zbrush and subdivide it to about 6 or 7 subdivisions. Remember to turn off smoothing "smt" while subdividing
3. Import your image as alpha mask
4. go to masking and hit "mask by alpha"
5. press "ctrl+w" to polygroup masked area
6. Hide unwanted area
7. go to edge loops and use panel loops to get the width. You have to play with the settings and remove bevel
8. use dynamesh master for zbrush 4.R8 plugin(https://pixologic.com/zbrush/downloadcenter/zplugins/) to dynamesh the mesh. Remember to turn on "use auto scaler" in additional options. It is off by default.
Your result looks nice to me. I am a bit confused though. You said you are planning to go to zbrush and sculpt on the mesh. So I imagine you could then use decimation master to reduce the polygon count drastically without loosing any detail. May I ask what is the end goal for this ?