3ds Max/Unity Normal Issue with Trim Texture | Probably Tangent Basis Problem
polycounter lvl 6
Hello, fellow Polycounters!
until now I was usually able to fix my 3D issues by myself, but on this one, I did not found a satisfying solution. Warning: It's going to be a long post.
To give you a little background: I am a student & environment artist and currently working on an environment for a VR game in Unity. My problem occured, as I made environment modules and tried to use and combine some new workflows and techniques I've learned over the last year. My goal was:
- to make modules with chamfered edges & face weighted normals which
- are sharing atlasses for general textures and
- have another UV channel, with which I throw some fancy trim sheet details on my modules.
Here is a picture of my modules in unity:

The problem occured in the third point, my trim sheet. I was making the highpoly details and baked them with xNormal on a plane which looks like that:

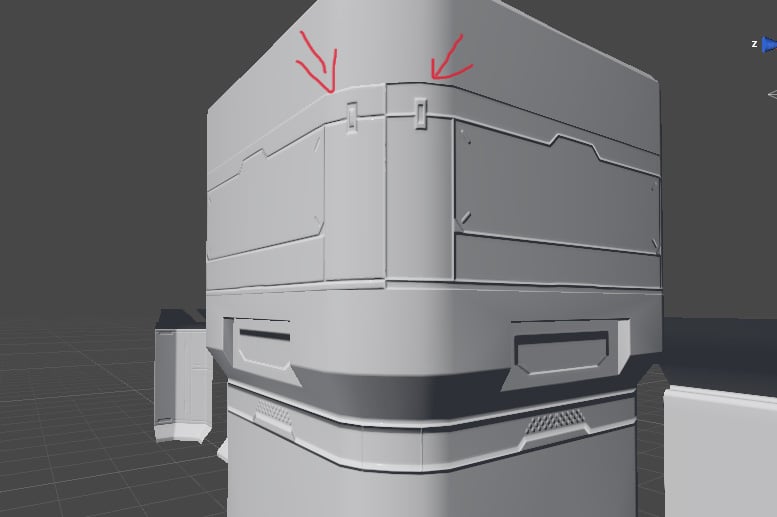
Now my thought was, that I could simply go into my uv1 channel, drag the uv islands on top of the trims (like I saw in every post about using trimsheets) and everything will be fine. But as I was looking on the results in Unity, the shading of my trim sheet details were partially wrong. Here you can see an image of my test box.

In the first picture, you see one side, which seems to be shaded right in 3ds Max, even if an omni light instead of default scene lighting. It was one face, which I gave an inset and the insetted part was turned around 180° in the UV, but uses the same part of the normal map. When I had a look at it in Unity (second image), you can see, that the insetted part is shaded wrong: the shadows seem to point into the wrong (opposite!) direction. The shadows of the inner section are at the left and upper rim, but should be at the right and lower edge, like in the outer section.
It looks like the normals are in general ok, they look like they point into the right direction. My guess is, that it is an issue with the tangent space. The normal map is probably treated wrong or the tangent basis of my vertecies does not match the tangent basis of the plane, I have baked my trim sheet on. But on the other hand, why the hell does every asset look right when I look at it in 3ds Max, but not in Unity?
The research I did brought me too this Polycount wiki article about normal maps, where they tell, that the tangent basis of 3ds Max and Unity do not match (are not synchronized). I also read that the tangent is derived out of the UV coordinates and that the bitangent is simply calculated via cross product. Though I always export my tangents with the fbx exporter from 3ds Max, the standard import settings in Untiy are to recalculate the tangents. When I change this option to use my imported tangents, it either makes no difference - or the mesh shading is way more off then before.
I thought about solutions and came to another workflow. My idea was, that if I cut and divide my original plane (the one I have baked my trim sheet on) into pieces, their tangents should still be the same. So I took these trim pieces, moved them into position on the meshes where I wanted them and integrated them into my existing geometry (so they were no floaters, but became actual parts of the mesh). This took a little more time, but seemed to work. But after the first few models worked just fine, I had models where I got these errors even with my new technique, like this pillar:
The possible cause of this problem could be, that I have worked with a symmetry modifier after integrating these trim pieces. After I deleted the wrong shaded right site and put a rotated copy of the working left site in it's place, it looked totally fine again in Unity. But there were also other meshes with little errors that never used a symmetry modifier.
My wish is to find out, how and why exactly this problem occurs and how I can avoid in the future or, what would be even better, a way to automaticly fix this problem. Or a workflow that is keeping me from running into that problem. Because going back and forth between Max and Unity, spoting errors, deleting faces, turning UVs and trying around is not a stable and good workflow in my eyes.
Thanks for everyone who managed to read until this point
Hopefully someone can enlighten me with this issue.
until now I was usually able to fix my 3D issues by myself, but on this one, I did not found a satisfying solution. Warning: It's going to be a long post.
To give you a little background: I am a student & environment artist and currently working on an environment for a VR game in Unity. My problem occured, as I made environment modules and tried to use and combine some new workflows and techniques I've learned over the last year. My goal was:
- to make modules with chamfered edges & face weighted normals which
- are sharing atlasses for general textures and
- have another UV channel, with which I throw some fancy trim sheet details on my modules.
Here is a picture of my modules in unity:
The problem occured in the third point, my trim sheet. I was making the highpoly details and baked them with xNormal on a plane which looks like that:
Now my thought was, that I could simply go into my uv1 channel, drag the uv islands on top of the trims (like I saw in every post about using trimsheets) and everything will be fine. But as I was looking on the results in Unity, the shading of my trim sheet details were partially wrong. Here you can see an image of my test box.
In the first picture, you see one side, which seems to be shaded right in 3ds Max, even if an omni light instead of default scene lighting. It was one face, which I gave an inset and the insetted part was turned around 180° in the UV, but uses the same part of the normal map. When I had a look at it in Unity (second image), you can see, that the insetted part is shaded wrong: the shadows seem to point into the wrong (opposite!) direction. The shadows of the inner section are at the left and upper rim, but should be at the right and lower edge, like in the outer section.
It looks like the normals are in general ok, they look like they point into the right direction. My guess is, that it is an issue with the tangent space. The normal map is probably treated wrong or the tangent basis of my vertecies does not match the tangent basis of the plane, I have baked my trim sheet on. But on the other hand, why the hell does every asset look right when I look at it in 3ds Max, but not in Unity?
The research I did brought me too this Polycount wiki article about normal maps, where they tell, that the tangent basis of 3ds Max and Unity do not match (are not synchronized). I also read that the tangent is derived out of the UV coordinates and that the bitangent is simply calculated via cross product. Though I always export my tangents with the fbx exporter from 3ds Max, the standard import settings in Untiy are to recalculate the tangents. When I change this option to use my imported tangents, it either makes no difference - or the mesh shading is way more off then before.
I thought about solutions and came to another workflow. My idea was, that if I cut and divide my original plane (the one I have baked my trim sheet on) into pieces, their tangents should still be the same. So I took these trim pieces, moved them into position on the meshes where I wanted them and integrated them into my existing geometry (so they were no floaters, but became actual parts of the mesh). This took a little more time, but seemed to work. But after the first few models worked just fine, I had models where I got these errors even with my new technique, like this pillar:
The possible cause of this problem could be, that I have worked with a symmetry modifier after integrating these trim pieces. After I deleted the wrong shaded right site and put a rotated copy of the working left site in it's place, it looked totally fine again in Unity. But there were also other meshes with little errors that never used a symmetry modifier.
My wish is to find out, how and why exactly this problem occurs and how I can avoid in the future or, what would be even better, a way to automaticly fix this problem. Or a workflow that is keeping me from running into that problem. Because going back and forth between Max and Unity, spoting errors, deleting faces, turning UVs and trying around is not a stable and good workflow in my eyes.
Thanks for everyone who managed to read until this point
Hopefully someone can enlighten me with this issue.
Replies
I have tried also some other things:
1. that's a picture of the wrong shaded piece
2. here I have tried to split the individual faces, but beside the fact that it didn't change anything, it also worsens my shading because of the resulting hard edges
3. now I tried to make every face that uses the trim texture to an individual UV island. Th shading looks a littlebit better, but is still not right
4. here is one picture of many attempts, to mirror and/or turn the UVs. Doesn't matter what I do (just mirroring in one axis, mirroring and turning, just turning), the shading is still off.
And in 3ds Max everything looks fine as usual..
Do you need to flip your green channel for unity?
Are you bringing tangents in with your meshes or are you recalculating them?
Greenchannel is the way it should be, also in that case I would have errors everywhere..
I'm not sure if I have written it, but I am recalculating them (as Unity does by default), but when I choose to use the imported tangents theshading looks even weirder..
https://www.dropbox.com/sh/lvhkjptqgh5bfk0/AACCNMbOCMOCbyHMpEz3V5Tca?dl=0
Can you link your unity project too without the library please ? The trim sheet looks fine on a plane
I guess that's not possible to put the whole project online.. on the one hand it is a team project and on the other hand our Assets folder is quite huge...
But my setup is simple, it's just a scene with my assets and a directional light. I have put the environment assets, with materials and shader into my dropbox, same link as before
It was to have the material with the tiles parameters correctly setup so just the material with the .meta should be good!
From what I understand this can vary depending on the shader/implementation. In some contexts the recommendation is to never rotate or mirror trim elements ; while in some others, anything goes.
What I am trying to get at is that I'd be quite curious to see the issue you are running into first hand. But that said, it is up to you to make the effort to provide a Unity project that people can simply download and open.
My import setting was not to import tangents, but it doesn't really matter, because it would use UV0s tangents anyways. Please try and see if swapping the first and second UV channel fixes your issues, or if there is a way to have correct tangents when normal mapping using any other UVset other than uv0.
I try to find some info on that.
I have made now a simple test project everyone can download who is interested.
@Prot I put the trim uv in the third channel, because, the second is for lightmaps, so I could not use them.
@Obscura this looks very interesting! I will try it immediately in Unity!
I think this looks like the solution I was looking for the last month! I will start converting my other meshes now, thanks Obscura and all the others for your help!