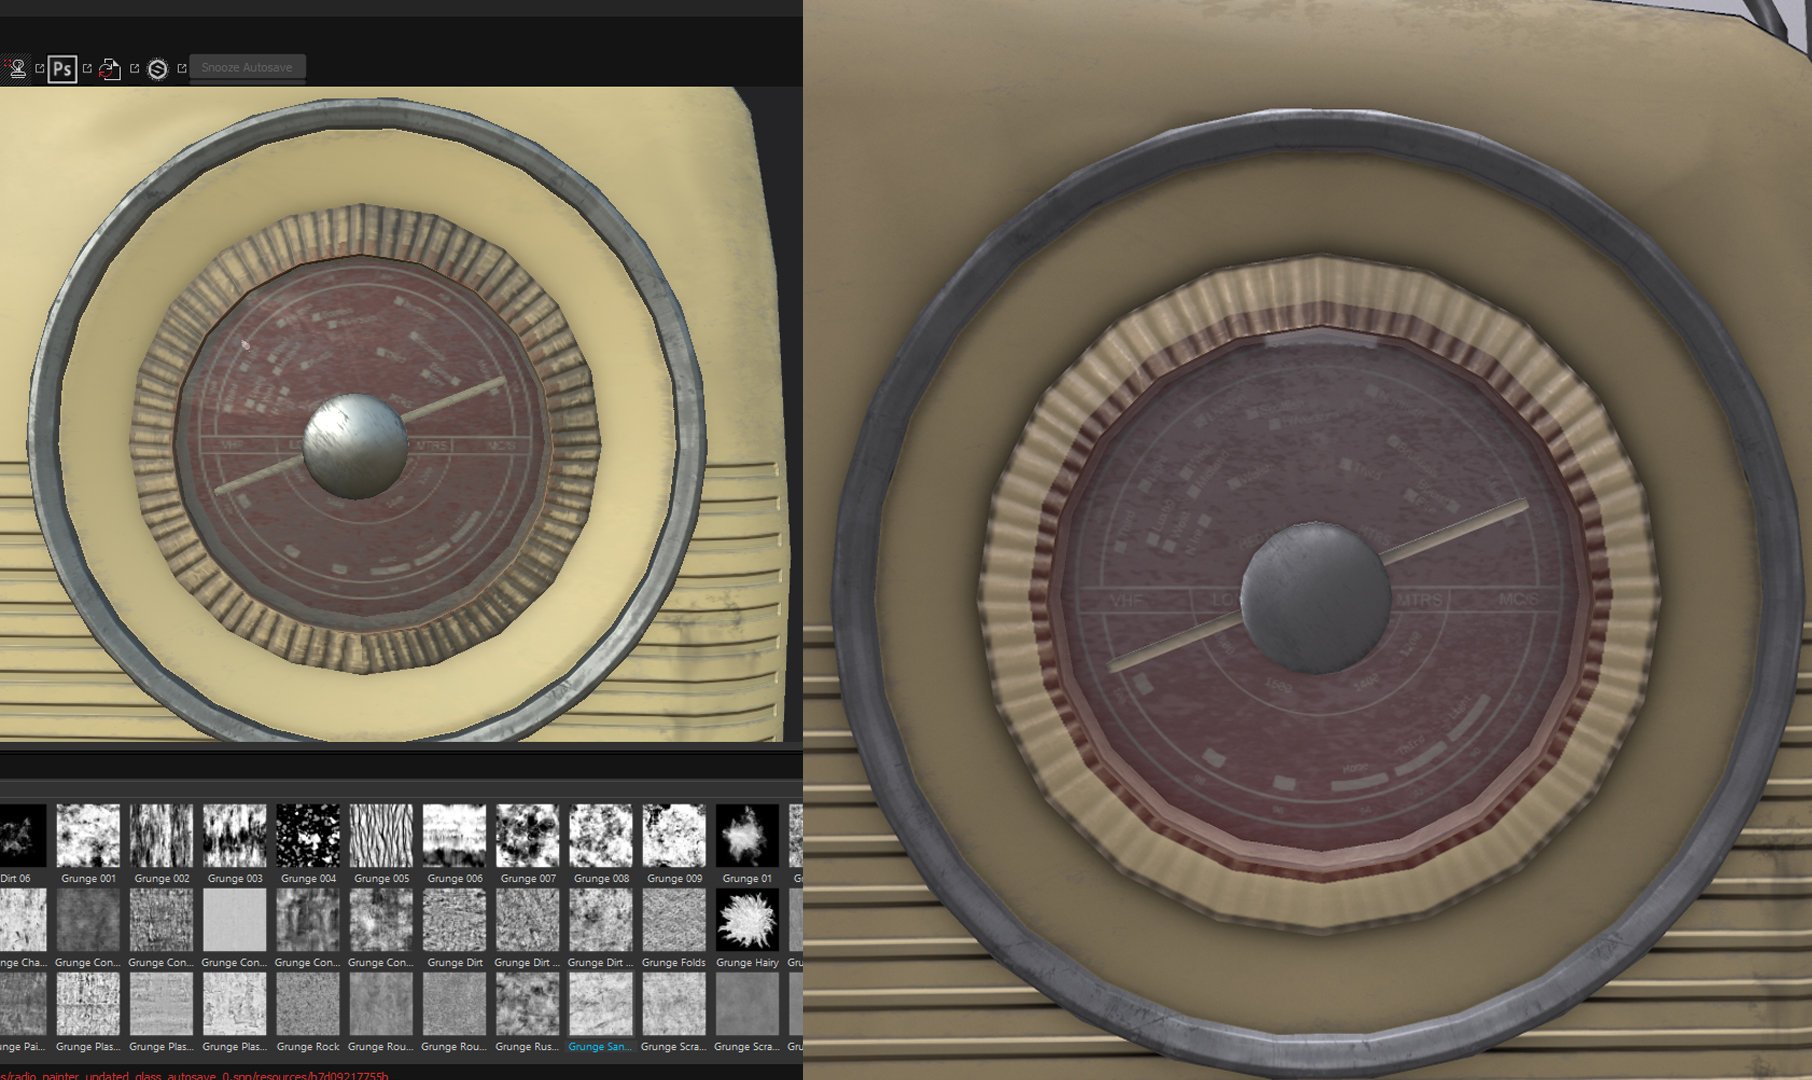
Getting my Transparency to display in Marmoset like it does in Painter?
Hey,
Trying to set up my model in Marmoset but I'm a bit stumped when it comes to setting my Transparency channel.
In Painter, I've added some color information to the Transparent parts of my model, but I don't know how to get the same result in Marmoset. In Marmoset all that color is lost and the whole parts completely clear. I've attached pictures to show how it looks in Painter versus Marmoset.
I've exported an Alpha map and I've tried using the Albedo map as well but I still can't figure it out. Would greatly appreciate it if anyone has any insight as to what I'm doing wrong.
Thanks


Replies
Cutout is typical alpha testing, where each pixel is on or off, this is generally useful for something like a chain link fence.
Dithered is an order-independent blending mode which is perfect for many overlapping transparent elements like hair. Dithered uses a technique similar to cutout, but dithers the result so you can get soft edges. To reduce noise, crank up the samples in capture settings (ctrl+P).
Add is standard additive blending. This is useful for creating shells for clear coat type materials and things like that. This used to be the best option for glass, but we added Refraction for Toolbag 3.
Refraction is what you generally want for glass. It has a bunch of options, including a refraction setting to distort the elements behind the glass, as well as options to tint and mask the glass. You can find a video that explains the refraction model here: