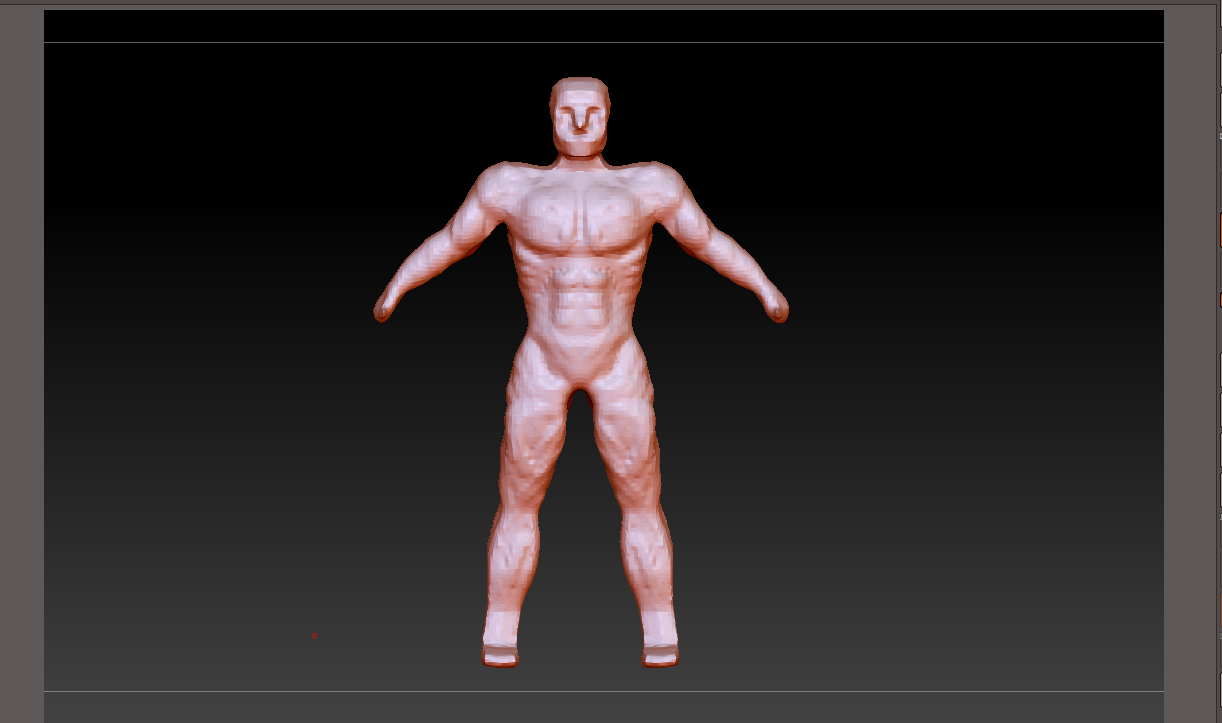
Charachter making progress : need a solution for this problem
Helo guys
I posted a thread in which i asked multiple questions regarding game charachter workflow. Someone said to me that I should post a new thread with the progress and ask questions mid way, so here I go.
^This is the character i am trying to build. I modeled basemesh in blender. So my problem is how should i go for adding fingers?? It seems difficult to me
thanks everyone
I posted a thread in which i asked multiple questions regarding game charachter workflow. Someone said to me that I should post a new thread with the progress and ask questions mid way, so here I go.

^This is the character i am trying to build. I modeled basemesh in blender. So my problem is how should i go for adding fingers?? It seems difficult to me
thanks everyone
Replies
Let's start off by getting a few questions out of the way so I know what we're trying to accomplish
1. What's your end goal? do you have a concept you're working off or are you just winging it?
2. Do you have any examples of previous work you could show me, just so I know the level you're at
First, use reference images, don't be afraid to get a bunch of images to use as reference to achieve better proportions in your work. A good way to use reference in ZBrush is to overlay them onto the mesh so you can get things exact, it takes a lot of the guesswork out of things!
I recommend for you to just google stuff like "male orthographic view" or male front view. Don't only get front view, make sure with reference that you get enough angles, when doing a body you should get front, side, and back views. Don't forget that you're working in 3D, so even if something looks good from one angle, when you rotate the mesh, things might start to look weird
How to use image reference in ZBrush
1. Find a reference image that you want to use, the best reference images you can use should be clean and extremely easy to see, the better your reference, the better time you'll have.
2. Click on the 'Draw' menu, and go down to the section highlighted in the picture, this is where you can modify the XYZ planes in ZBrush and change what they display.
3. For example: If you want to show a reference of your front view, click on 'Front-Back', and you'll see a new sub menu
4. This is where you can assign the texture you want as the reference, click on Map1, then Import, and find the reference you want to use, change around the settings until you're happy with them and the reference looks good
5. Do the same for the other angles you want reference for, and use the images as a guide for your sculpt or model
This technique will hopefully be an immense help, especially for a beginner, if you have any more questions, post them and i'll try to help!
Another way to make fingers is to mask off the hand, then leave a circle where you want the finger to come from, and pull the fingers out with the move tool, this method might be a little easier, but is harder to manage. Hope this helped
I will look into some ref images as you mentioned( I used a ref image for basemesh). Also thankj for answering the question.
Now at this point I will surely add some more screen shots as I progress.
My next question is : What should I do at this point? should I zeremesh then dynaesh or keep working with dynamesh and then subdivide as I want to add further details??
Zack has a really nifty setup for fingers and toes.
If you are in love with dynamesh you can insert hands using the human body parts insert mesh brush in ZBrush. You will need a pretty dense mesh to keep the fingers seperate when re-dynameshing though. You can help that along by spreading the fingers before re-dynameshing.
Cheerio
When working with a sculpt, generally you stay in dynamesh for a while, and only really move on when you are totally happy with the proportions, and have sculpted a moderate-to-high amount of detail.
Generally you want to sculpt in stages, the first being dynamesh, and once the major landmarks in the sculpt are ready, then you make a subdivided version
You do that by:
1. duplicating your dynamesh
2. then using Zremesher you remesh the duplicated mesh down to a lower poly count, for a body around 5000polys is a good sweet spot.
3. Next, subdivide up 3-5 times
4. Now we use the ProjectAll feature, with project, you take the detail from one object and copy it over to the other (Even though it started from the same mesh, it lost detail from remeshing)
5. Make the subdivided mesh your selected subtool, and hide everything except that and the dynamesh
6. Now, while on the highest subdivision, click ProjectAll, and all the detail from the dynamesh will transfer over
Done! Now you have a mesh that has nice poly-flow, and has subdivision levels
Like i said before, you only go to this stage when you know you're finished with dynamesh, if you want to dynamesh again, you'll have to repeat this process
https://www.youtube.com/watch?v=n8t-SV8rU8o&t=2s