Home Technical Talk

Xnormal: problem with baking normal map - extremely distorted maps

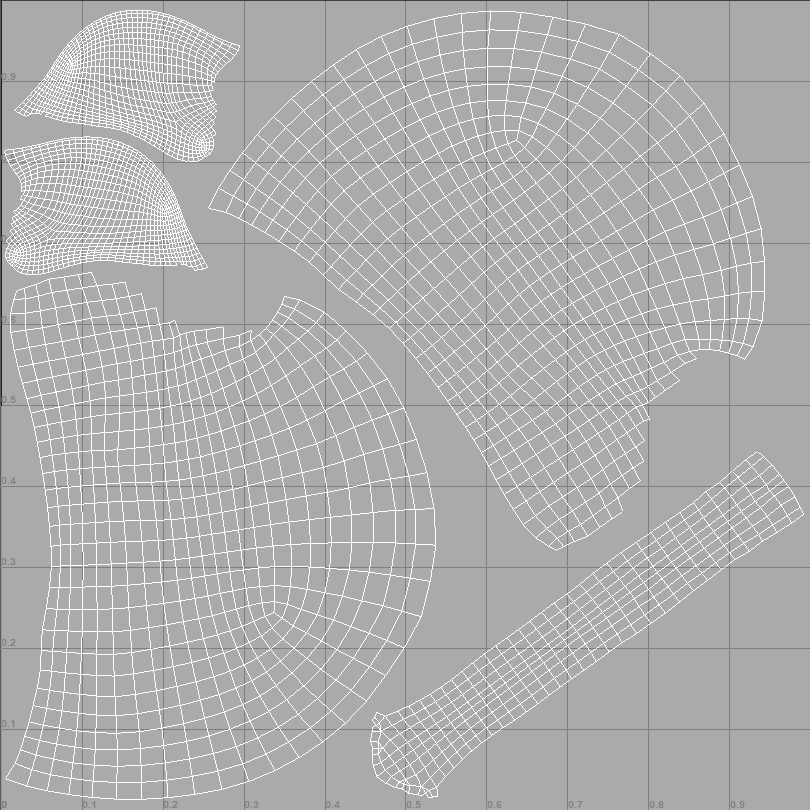
So I've been struggling with making a normal map for this helmet I modeled in zbrush (and retoppoed in topogun then uv'ed in maya) and from what I can tell the UV maps look fine

iv'e tried a multitude of different settings setups in Xnormal and this would be the second attempt at a retopo of the model (cause I thought my original retopo was just bad and was causing the problem, turns out that was wrong).

Frankly i'm stumped on what could be going wrong so I decided to make a post here to see if anyone can help me spit ball some solutions.
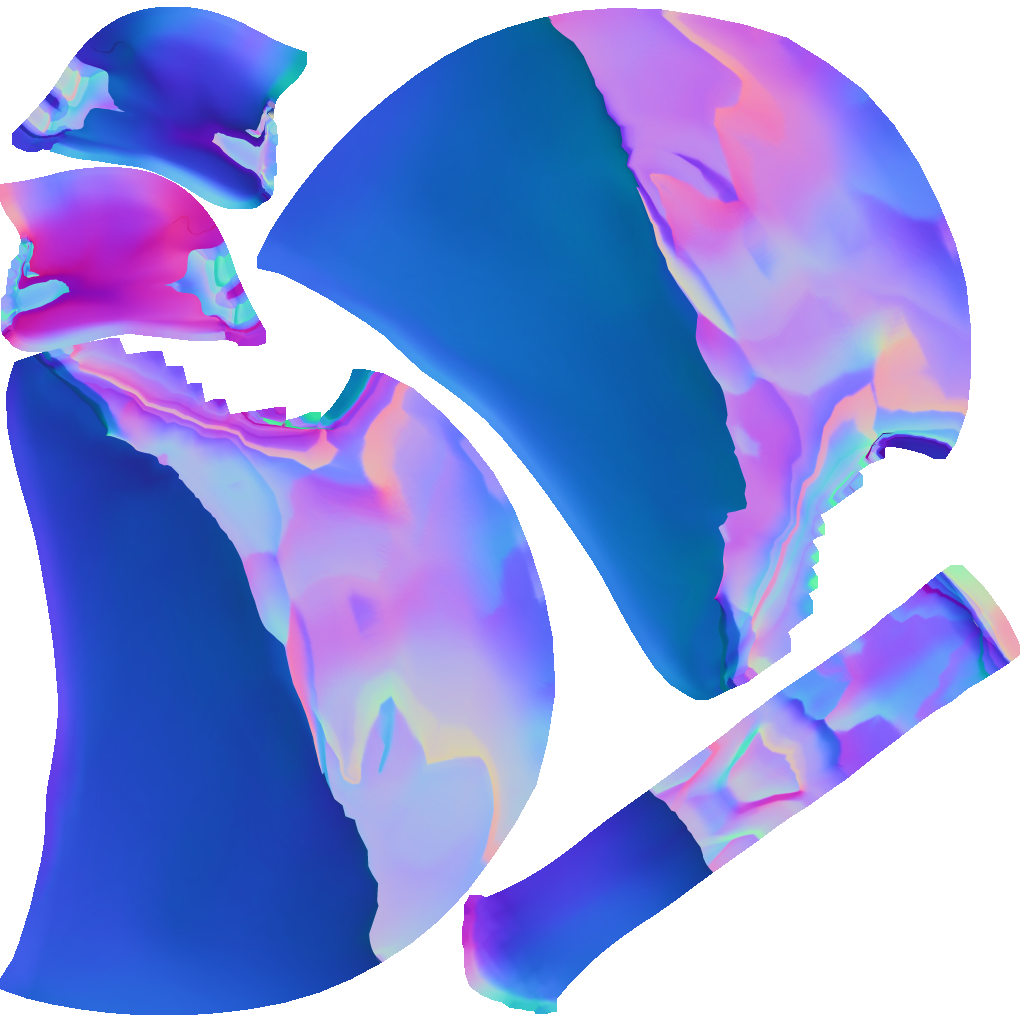
This is what the normal maps on the actual low res model look like (side note I don't know if that poly is way to high or way to low so let me know!)

Replies

  • Mirbobo
    With that amount of polygons your retopo could be a lot better and follow the shapes of the highpoly a lot closer instead of being just a blob of polygons.

    Regarding the bake, are you using a cage in Xnormal and have you made sure the objects are in the same location? as it seems to be baking something it could be that the rays are simply missing the highpoly. Recommend reading the stickys bout normal maps as well as checking the polycount wiki.
  • gnoop
    Offline / Send Message
    gnoop polycounter
    Beyond the fact that retopo model and unwrap are very inefficient  and troublemaking   you forgot to make the shading smooth or make a set of smoothing groups  matching UV seams .  It's first to start from
  • dodgytactics
    Mirbobo said:
    With that amount of polygons your retopo could be a lot better and follow the shapes of the highpoly a lot closer instead of being just a blob of polygons.

    Regarding the bake, are you using a cage in Xnormal and have you made sure the objects are in the same location? as it seems to be baking something it could be that the rays are simply missing the highpoly. Recommend reading the stickys bout normal maps as well as checking the polycount wiki.
    I kinda figured the retopo was inefficient I had a older retopo that had far less polygons but that still had problems, so I decided to try one with more polygons as you can see that didnt help so Ill redo the retopo thanks for letting me know though. 

    As for the bake not using a cage but ill look into it because I haven't tried that yet. As for are they in the same location.... I actually need to double check that so Ill get back to you on that one.
  • dodgytactics
    gnoop said:
    Beyond the fact that retopo model and unwrap are very inefficient  and troublemaking   you forgot to make the shading smooth or make a set of smoothing groups  matching UV seams .  It's first to start from
    wait the unwraps inefficient? Is because I made those two pieces in the top left so small? Cause I figured giving resolution to those pieces was unnecessary since their the inside of the helmet and wont be seen.

    Yup you 100% on the shading groups bit I completely forgot about that entirely ill go see if that makes a difference now so Ill get back to you on that 
  • EarthQuake
    This looks like the scale and/or position of your highpoly and low poly meshes don't match. Check xNormal's 3D viewer to verify, or bake in an app like Toolbag or Knald so you're not flying blind.

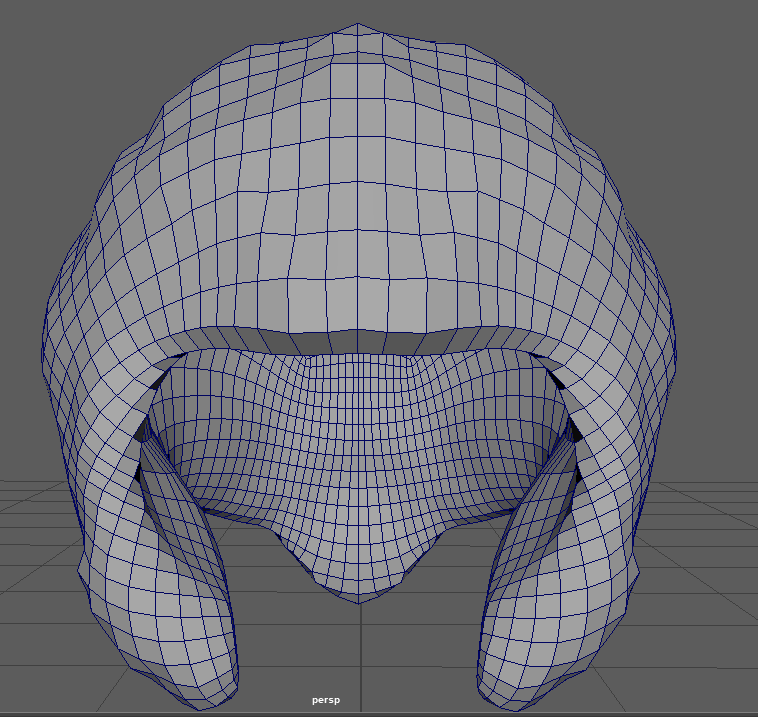
    It also looks like your low poly mesh normals aren't set up well. I would recommend finding some basic tutorials on normal mapping.
  • dodgytactics
    Hey folks just wanted to give a update. I turned on smoothing  and also made sure they were located in the same world space, unfortunately  the map still came out very badly ( ill be back with pictures in a bit I'm just out right now)

    Edit: 1 heres the normal version with the corrected orientation and smoothing on, sadly the results are very similar.
  • CheeseOnToast
    Offline / Send Message
    CheeseOnToast greentooth
    Looks like you're using the normal map as a greyscale bump map. Go into the bump slot of your material and make sure it's set to tangent space normals.
  • dodgytactics
    Looks like you're using the normal map as a greyscale bump map. Go into the bump slot of your material and make sure it's set to tangent space normals.
    I tried what you suggested it looked a little better also tried it with a non beveled square and a beveled one and still didn't turn out quite right. So what ever i'm not doing right it seems to be something obscure that I don't know about cause the two squares noramls didn't turn out right either(also tried baking in substance painter got bad result as well). I don't know i'm stumped to be honest I've looked up several tutorials, read through those stickied forum posts nothing seems to come out well.  ¯\_(ツ)_/¯
  • slosh
    Offline / Send Message
    slosh hero character
    Try just slotting this into the normal map slot in marmoset or something.  Maya is easy to set up but marmoset should be even easier.  You should really retopo your low poly to match the silhouette and shapes of your high poly.  It looks like you just zremeshed out of zbrush for your low poly.  The geo flow doesn't match the highres at all.
  • dodgytactics
    slosh said:
    Try just slotting this into the normal map slot in marmoset or something.  Maya is easy to set up but marmoset should be even easier.  You should really retopo your low poly to match the silhouette and shapes of your high poly.  It looks like you just zremeshed out of zbrush for your low poly.  The geo flow doesn't match the highres at all.
    agreed on the retopo which i'm in the process of doing for now but this problem has persisted even when just using a square and a beveled square so I feel like im just missing an obscure step somewhere. Ill defiantly check out marmoset as suggested though.

    Edit 1: So I discovered something interesting apparently view port 2.0 defaults to sRGB for normal maps, were as the legacy doesn't and the legacy version looked nicer. So I did some google foo and found out that its apparently supposed to be in Raw mode instead of sRGB to display properly in maya.

    SRGB mode 
     Viewport 2.0

    Viewport 2.0 with Raw instead of SRGB

    is it perfect? well nah theres still that black edge but hey its an improvement at least. Ill finish up that retop of the helmet and try again and see how that turns out. 
  • Millenia
    Offline / Send Message
    Millenia polycount sponsor
    Triangulate your low poly before baking, those look like errors you get from the mesh being triangulated differently in the baker vs Maya.
Sign In or Register to comment.