[Maya] Tank tread with mash
Hi,
I wanted to create a mash network to make the pieces of a tank tread.
I make 2 mash networks for each piece with a distribute and a curve node each one.
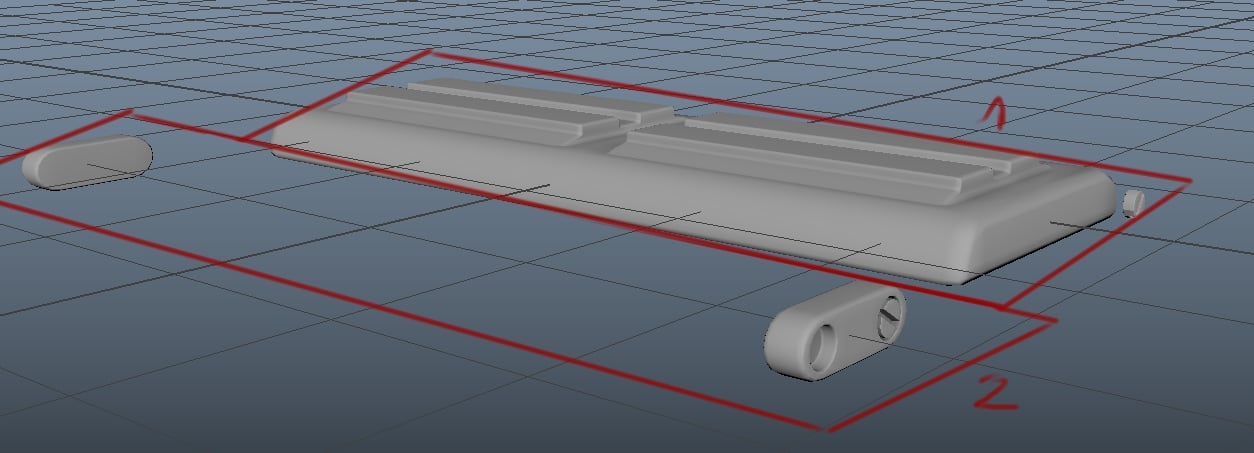
These are the pieces:
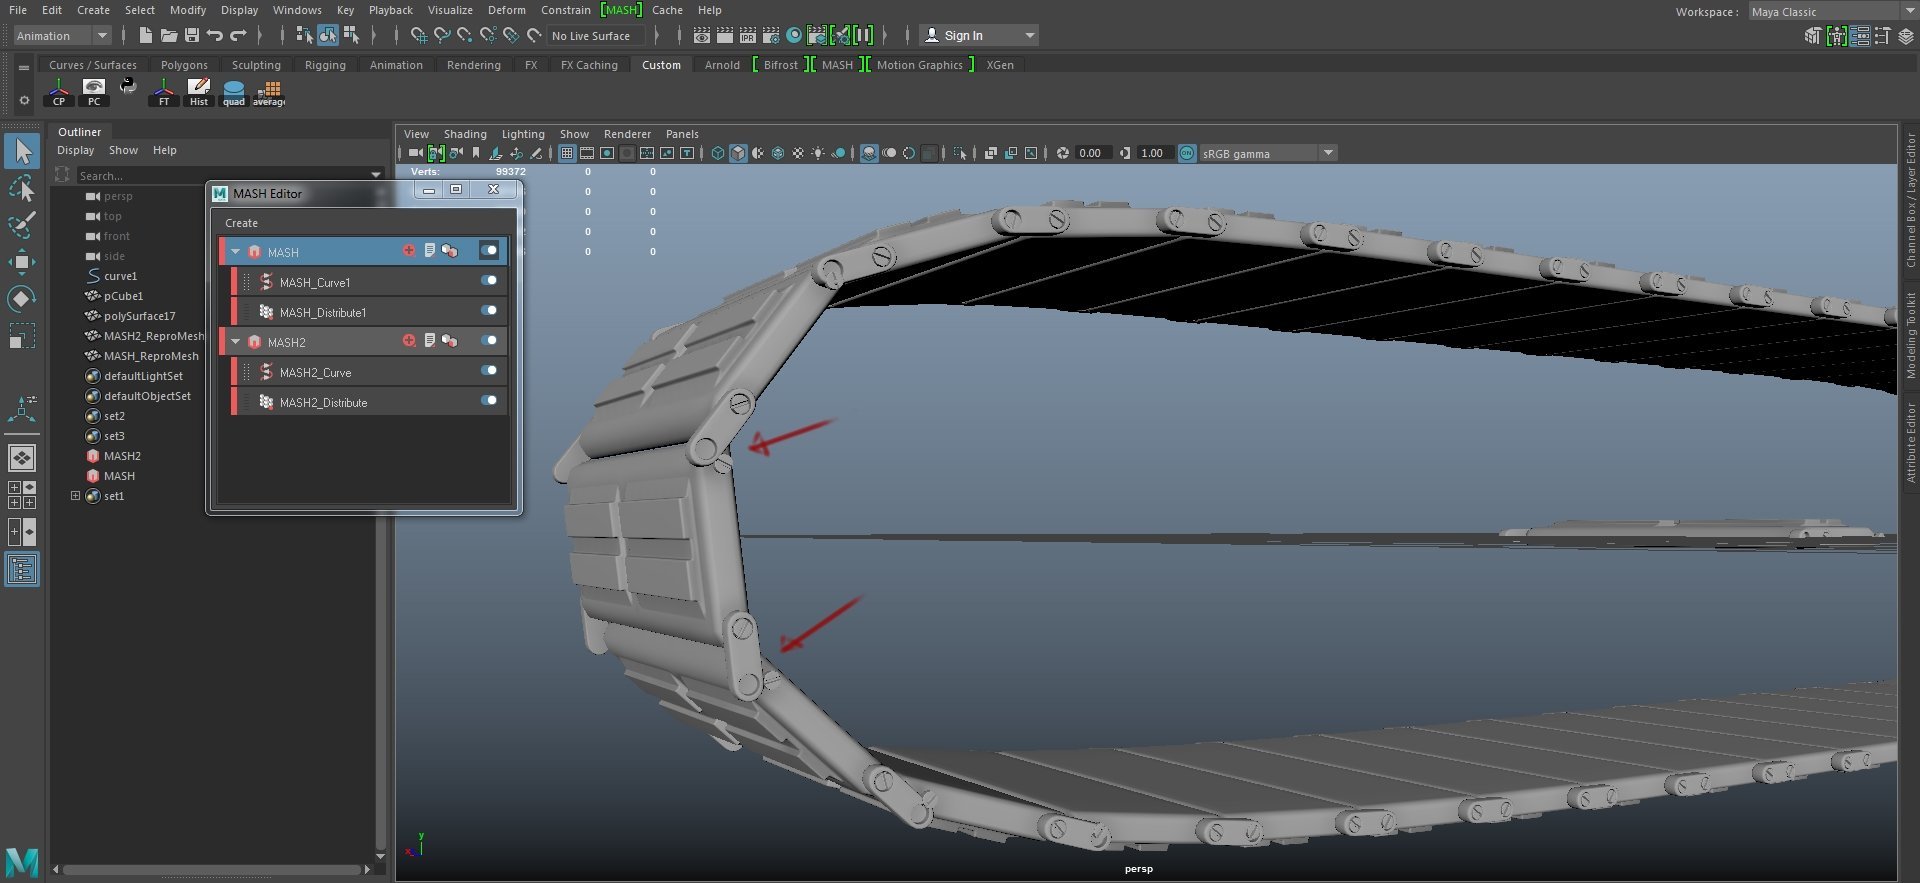
i wanted the "2" piece to fit perfect between two "1" pieces but i get that result
The "1" piece unhook when the curve gets more concave.

Any ideas of how can acomplish that?
I wanted to create a mash network to make the pieces of a tank tread.
I make 2 mash networks for each piece with a distribute and a curve node each one.
These are the pieces:

i wanted the "2" piece to fit perfect between two "1" pieces but i get that result
The "1" piece unhook when the curve gets more concave.

Any ideas of how can acomplish that?
Replies
If you set it up right, this is what it should be doing.
Notice the orange and pink pieces are separate from the tread.
The pivot for the orange piece is at the vertex center of the orange screw. The orange is parented to the green. The orange has an aim constraint and is looking at the blue pivot.
The pivot for blue is at the vertex center of the blue screw. The blue is parented to the orange.
The setup here is Distribute>Curve>Transform in order. The transform node has a rotation controlled by a strength map, which I set to a ramp and is being projected along Z (the direction my camera is facing here). The plane in back was created as a map helper to both place and visualize the strength. Not really ideal since you need to more or less eyeball it and change the time slider a few times, but not too painful.
Note that I've made this example in a bad way, the tread and links are part of the same network so they're receiving the same rotations.
Hey, thank you a lot, the video explains the idea perfect
@throttlekitty
Your solution with the strength map is mind-blowing i never thought on a strength map that way. i will try that when i have some time.
One more thing, when you said "Note that I've made this example in a bad way, the tread and links are part of the same network so they're receiving the same rotations." You mean that i have to do two diferent mash networks for each of the 2 pieces no?
Also, MASH ignores translations on the input objects, but will happily use parent transforms. You can group objects if you need to make any transforms or set a custom pivot if you create a hierarchy like this. You can use the root node for the mash repro input, so you can keep adding objects as you please. (I'm discovering this is really fantastic for a boolean workflow)
Thank you anyways
b) I'm still a little fuzzy on this part, but in my scene I...
Right clicked on Map Helper and chose Create, which gave me the plane that you see in my image.
I then positioned this behind the track, moving it around you can see the effect of the rotation/strength.
This is after creating the strength map, I can't recall offhand what happens if you don't create a helper for positioning.
I made a mess for myself with the transforms and now I'm confused about how pivots actually work in mash now that I'm recreating the scene. I think my problem is related to the aim curve I'm using. I'll try to set some time aside later and post back.