Sculpting prop issues...And passing them to UE4
Hello guys so i have this container that i made. I made 2 versions, one that i want to import in UE4 and one that i wanted to import to Zbrush for sculpting.They have the exact same uv's, i just added some loops on the left one, to even out the topology, then turbosmoothed it with smoothing groups to get that to zbrush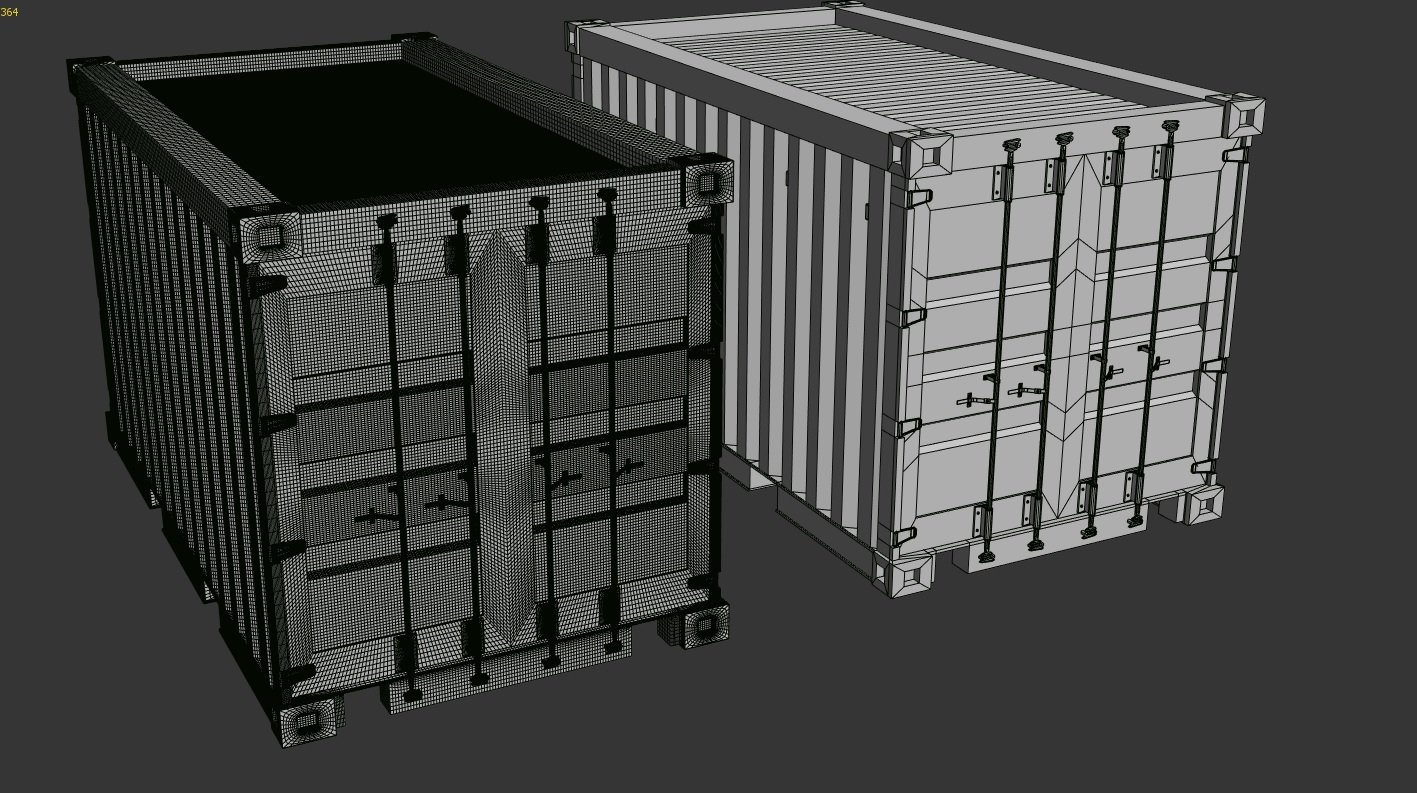
But after some sculpting in zbrush, the form of the original mesh changed as well, even if i dropped it down to level 1, it has its basic shape changed. Do i need to export THAT model into 3ds max, and remove those loops again to get the sculpted mesh that i want?
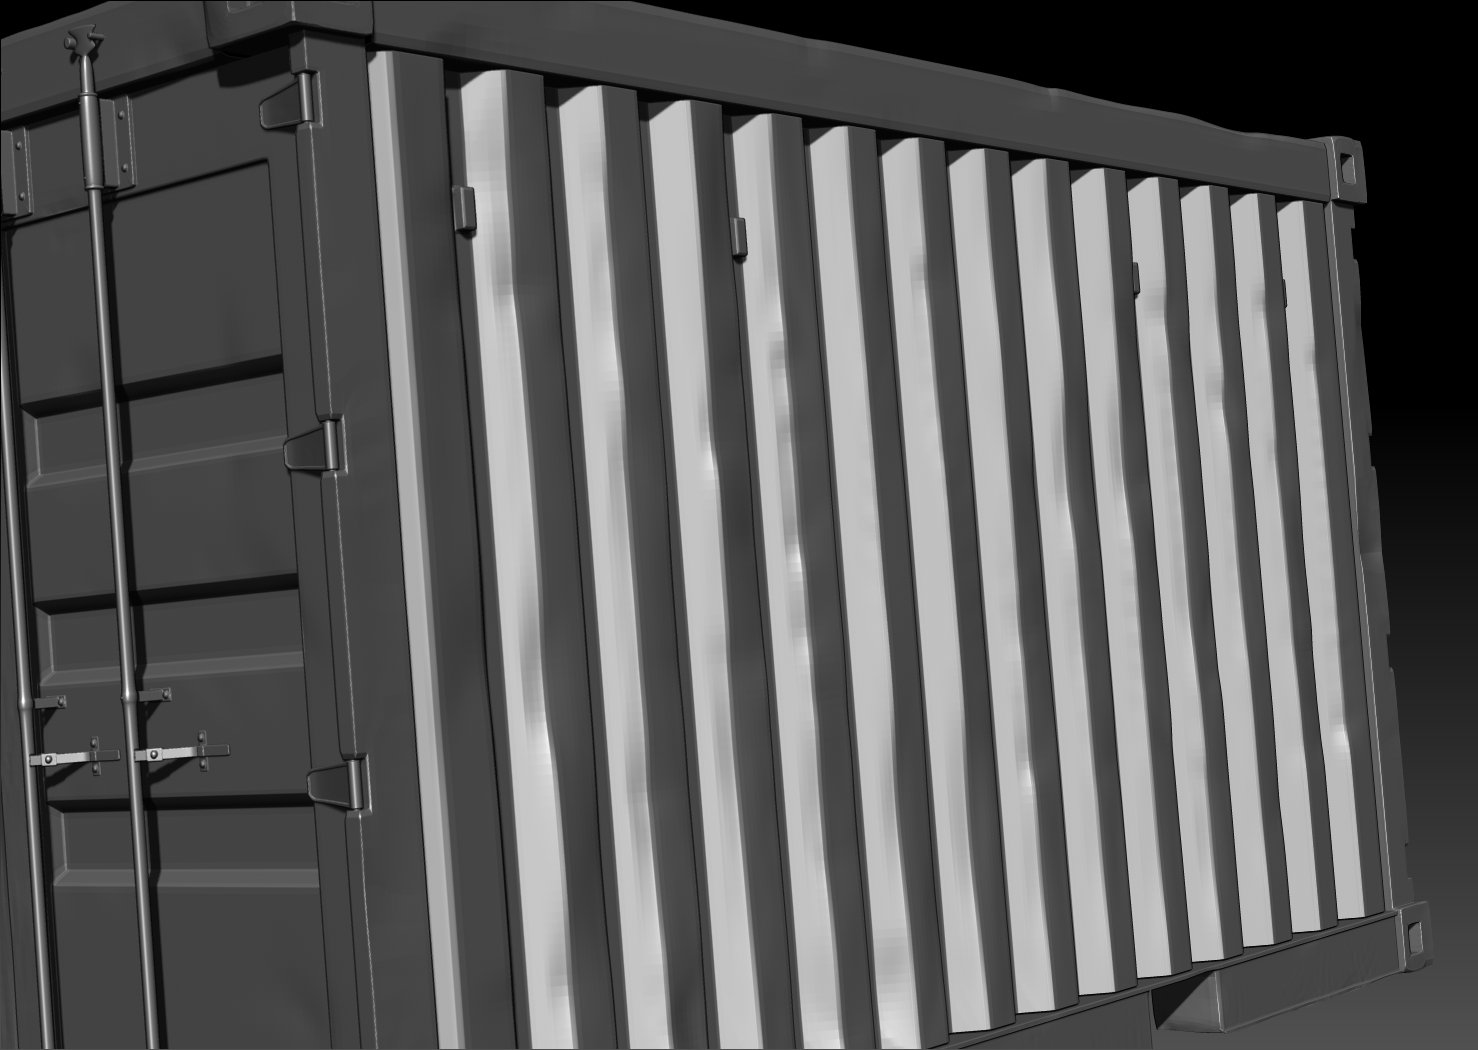
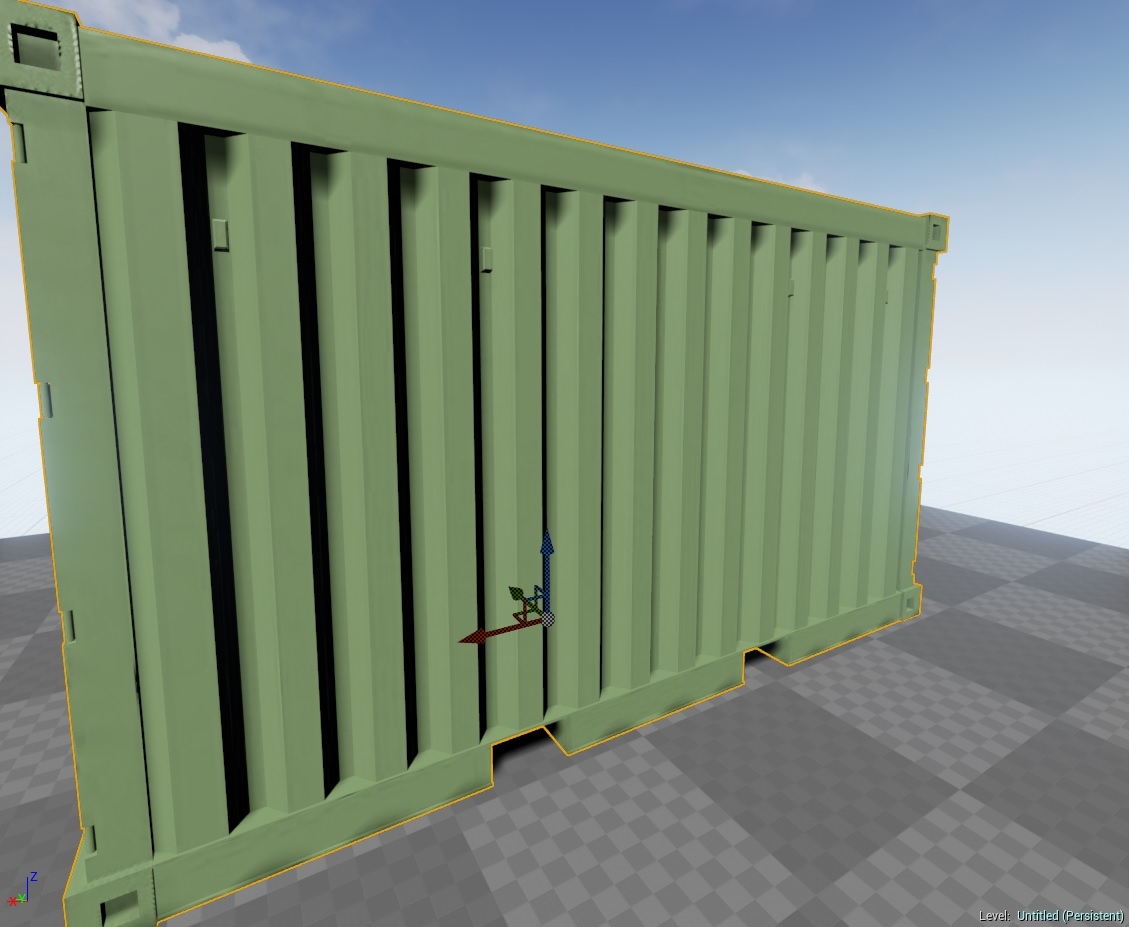
In unreal i just used the normal map on a material and dropped that to the low poly that i had, and i think it only makes those gaps larger inbetween.No other detail is shown. This is the normal map i got from turbosmoothed object.
Can someone explain me what am i doing wrong?I have been trying stuff for alot of time, doesnt get me anywhere.Thanks in advance!

But after some sculpting in zbrush, the form of the original mesh changed as well, even if i dropped it down to level 1, it has its basic shape changed. Do i need to export THAT model into 3ds max, and remove those loops again to get the sculpted mesh that i want?


In unreal i just used the normal map on a material and dropped that to the low poly that i had, and i think it only makes those gaps larger inbetween.No other detail is shown. This is the normal map i got from turbosmoothed object.

Can someone explain me what am i doing wrong?I have been trying stuff for alot of time, doesnt get me anywhere.Thanks in advance!

Replies
Break the crate into several pieces and reuse each piece as much as possible without making it too obvious.
Your approach of building a low and then subdividing it into a high is fine, so long as you don't expect to make any significant changes in zbrush. With very few exceptions, you always want the low in your bake to be the same as the low in game.
@AlecMoody this is the first time I hear about vertex paint shader. I will try and find information about it, but could you give me some insight?
I also noticed that you said that low+subdividing method is fine, do you mean that there other methods that you can sculpt an object?
Thank you both guys for the help!
For props like this my workflow usually looks like this:
1. Build a medium resolution mesh where I can easily reduce the number of sides to make the low poly. For example, on something round I might use my target low poly number of sides and the turbo smooth with smoothing groups. This isn't to make even topology but just to add a lot of subdivisions for roundness.
2. Dynamesh master in zbrush to make even quads and nice control edge fillets.
3. Build the final low off of the medium poly mesh (not the sculpt) by removing turbo smooth, combining meshes where I want contiguous topology, and optimizing where needed.
i did as you suggested, i used 4 textures and exploded my model to build different normal maps, it worked out great.I used 1 texture for the side planes, 1 texture for the skeleton 1 texture for the doors and 1 texture for the metal bars+floaters.Now, i'm having issues on the shading in UE4. Does this have to do with the smoothing groups? I used smooth from UV's but this is what i got. Is this happening from smoothing or overlapping?
I use a baking app like xnormal or substance painter so I don't have to load the high poly into anything once I have exported it from ZBrush. Then I import a decimated copy of the the high poly into max and use it as a template to build or edit my low poly on top of it to check everything is in the same space and that the high poly doesn't penetrate the low poly cage. I put everything in one smooth group on the low poly. With substance I haven't needed a projection cage yet. If you have exploded your model and all the parts have enough space for baking you should have success.
@kanga I did everything you say except that my lowpoly and high poly were penetrating each other a little. Does my low poly have to cover the high poly entirely so that i cannot see the high poly? I am using xnormal and I have pumped up the distance a bit, I exploded the whole model in safe places too. The normal map seems okayish in 3ds.
https://docs.unrealengine.com/latest/INT/Engine/Content/Types/StaticMeshes/LightmapUnwrapping/
While it does explain it decently, I cannot correlate to any of the examples it states since my mesh is somehow different from these ( or I lack experience to relate to any of these)
@Obscura well then I can copy the textured uvs and make sure the mirrored parts do not overlap? Will try that as soon as I get home!
Thanks guys for the info