Japanese garden lantern - beginner trying to improve

polycounter lvl 2
This time I will be making a Japanese garden lantern from a photo I took when I was in Japan, I want to show to everyone my progress and my failures (I am sure I will have many of them).
Before starting showing to all of you my progress, a little about my 3d experience, I am a self thought aspiring 3D artist who started this great adventure 1,5 years ago, and now I want to improve my portfolio to land a job (you can see my portfolio if you want at the signature).
I choosed to make a single asset to learning new techniques, getting better at modeling, uving, texturing and so on.... When this lantern it's finished, I will think about creating a small japanese environment.
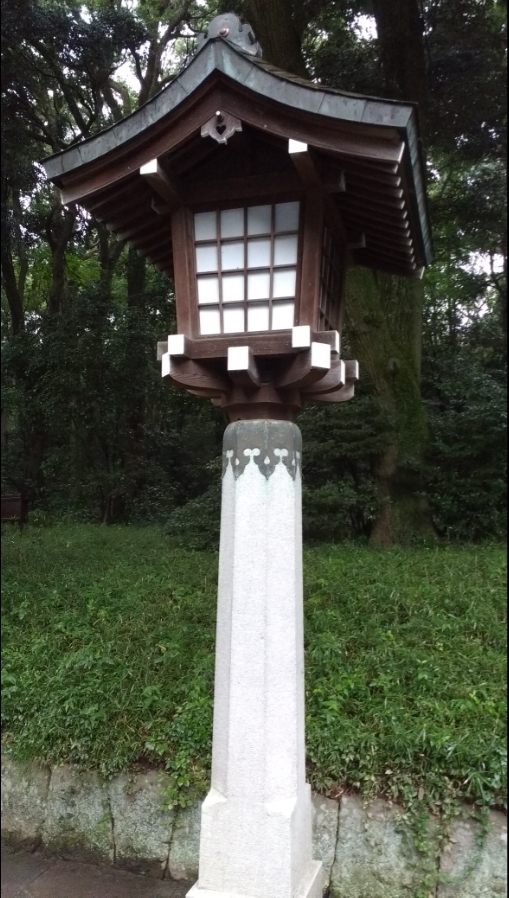
So, This is the photo I took at Japan :
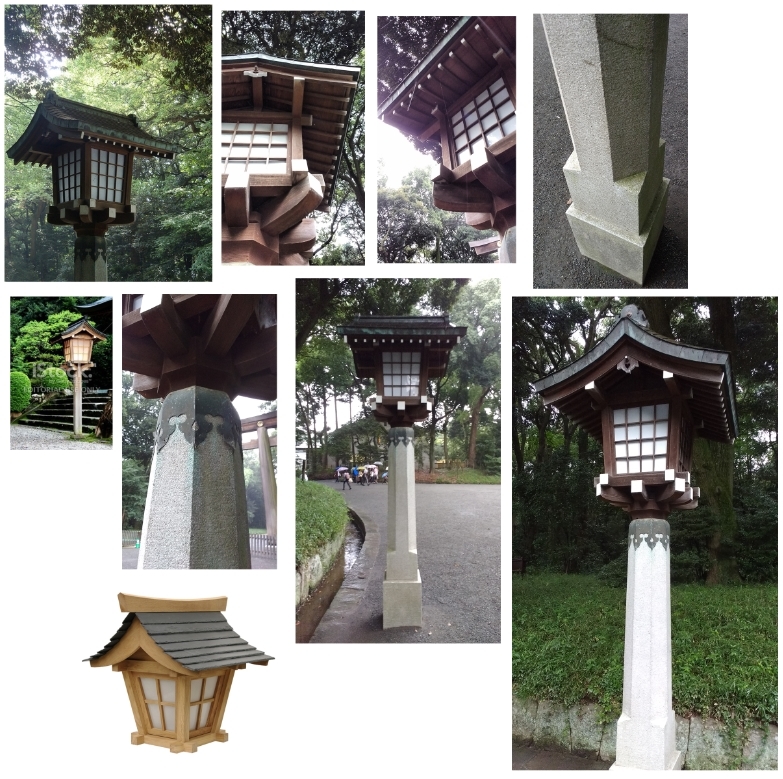
And this is my Reference Board :
------
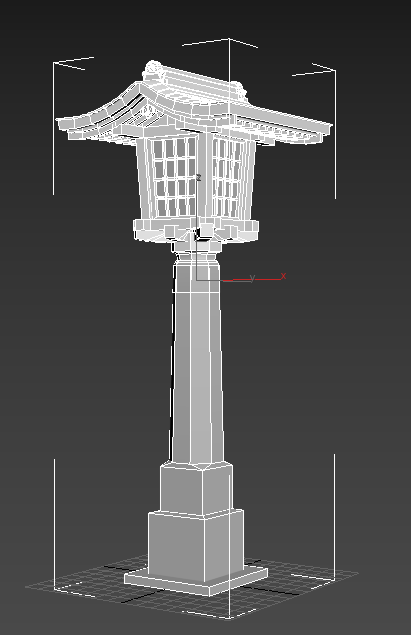
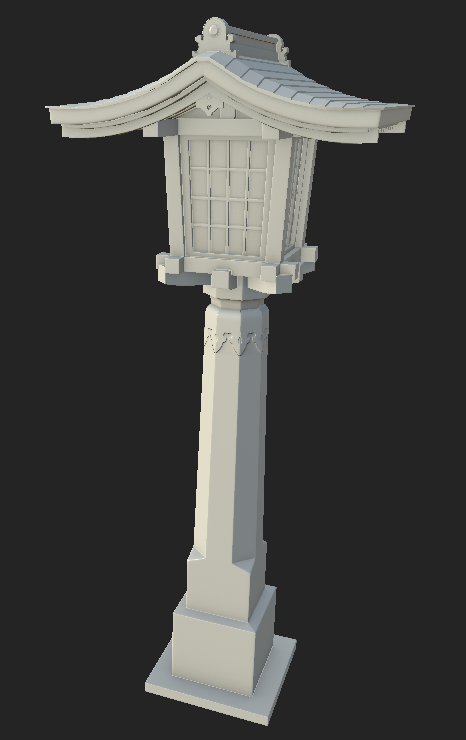
I already modeled it, I finished it with 4,564 tris, I didn't wanted to make a super low poly asset.
Ofcourse I also maked the UVs and baked it inside Substance Painter 2.
The UVs are separated in 2 different UV sets.
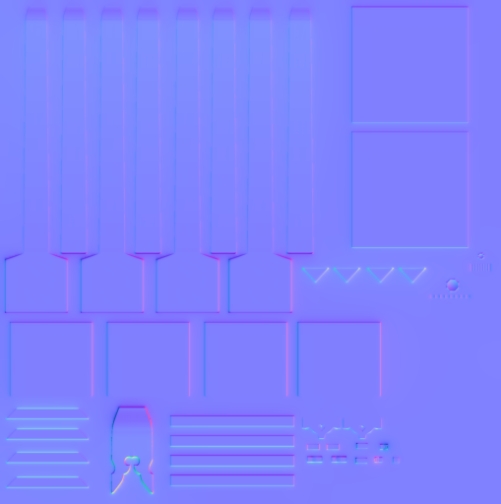
Now, I will show you my normals maps allready baked and the result in Substance Painter 2.
Note: I followed a tutorial to make the Uvs and maps with cages for this asset, "Creating props for games, VOL. 1" from TheGnomonWorkshop.com
- Making a different UV island per smoothing group for hard surface assets.
Set 1: Stone and deco
Set 2 : Wood and Metal
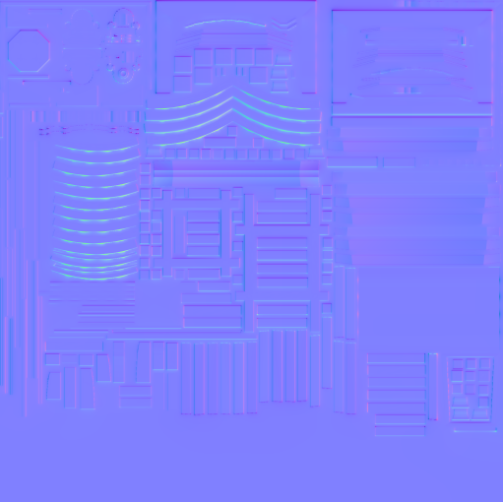
And the maps Applied into the model inside Substance Painter 2:
I am very happy with the bake results with this hard surface asset so far. At least I think I am slow improving")
Now I will do another pass on the normal maps, and then texture time!
I will texture the model using Substance Painter 2, and I will create some procedural texture inside Substance Designer to learn, never used it before.
If you want to give me an advide, critique or even say hello, feel to do it.
I will keep posting my progress.
Before starting showing to all of you my progress, a little about my 3d experience, I am a self thought aspiring 3D artist who started this great adventure 1,5 years ago, and now I want to improve my portfolio to land a job (you can see my portfolio if you want at the signature).
I choosed to make a single asset to learning new techniques, getting better at modeling, uving, texturing and so on.... When this lantern it's finished, I will think about creating a small japanese environment.
So, This is the photo I took at Japan :
And this is my Reference Board :
------
I already modeled it, I finished it with 4,564 tris, I didn't wanted to make a super low poly asset.
Ofcourse I also maked the UVs and baked it inside Substance Painter 2.
The UVs are separated in 2 different UV sets.
Now, I will show you my normals maps allready baked and the result in Substance Painter 2.
Note: I followed a tutorial to make the Uvs and maps with cages for this asset, "Creating props for games, VOL. 1" from TheGnomonWorkshop.com
- Making a different UV island per smoothing group for hard surface assets.
Set 1: Stone and deco
Set 2 : Wood and Metal
And the maps Applied into the model inside Substance Painter 2:
I am very happy with the bake results with this hard surface asset so far. At least I think I am slow improving
Now I will do another pass on the normal maps, and then texture time!
I will texture the model using Substance Painter 2, and I will create some procedural texture inside Substance Designer to learn, never used it before.
If you want to give me an advide, critique or even say hello, feel to do it
I will keep posting my progress.
Replies
I will share with you the graph and the result in Substance Designer 6, in the future, tomorrow I will implement this in Substance Painter.
Maybe it's a bit messy, but, it's my first material :P
I will keep working as allways!
I made a first pass of the entire model, here we go:
Still a lot to do, I need to rework a little more the wood, and add little details.
Thanks ! ;D
model
It was harder than I thought, I lack on textures, but I learned a lot of new tricks for my future models.
Any critique is very welcome, I try to improve on each model, thanks you for viewing it.
Future plans: I will be on hollydays for a few days, but my plans are to make a japanese scene. ^^
The next thing you may want to focus on is texturing.
Push the weathering, especially on the concrete. If I zoom in I can see it, but if I zoom out so the distance matches that of your reference photo, your weathering is lost. There should be some dirt collecting in the crevices, some water stains etc.
The metal part looks very flat in your final render, almost more like a shadow then an actual separate piece that is sitting on top.
I love the roof - maybe push the spec a little further?
Keep it up!