First Year 1000 poly limit Character 2016

polycounter lvl 5
First character done as part of my uni assessment this was something I was very proud of last year looking back on it I see so much wrong I'd love feedback on what you think about it and any feedback for improvement is always welcome I'd love to better myself.
The following images are a walk through of my process working im Maya, rigging and texturing, what I found really hard was rigging model and weight painting I still now struggle with it if there is anyone with some use full tips to help the rigging and weight painting stage easier I would be very much thankful.
It has been a long road with this knowing Maya for only 4 months and managing to produce this was a great achievement but now to me i know there are things i could really have done better but that's the fun of learning.
My Art station for anyone interested")
https://www.artstation.com/artist/mogyie
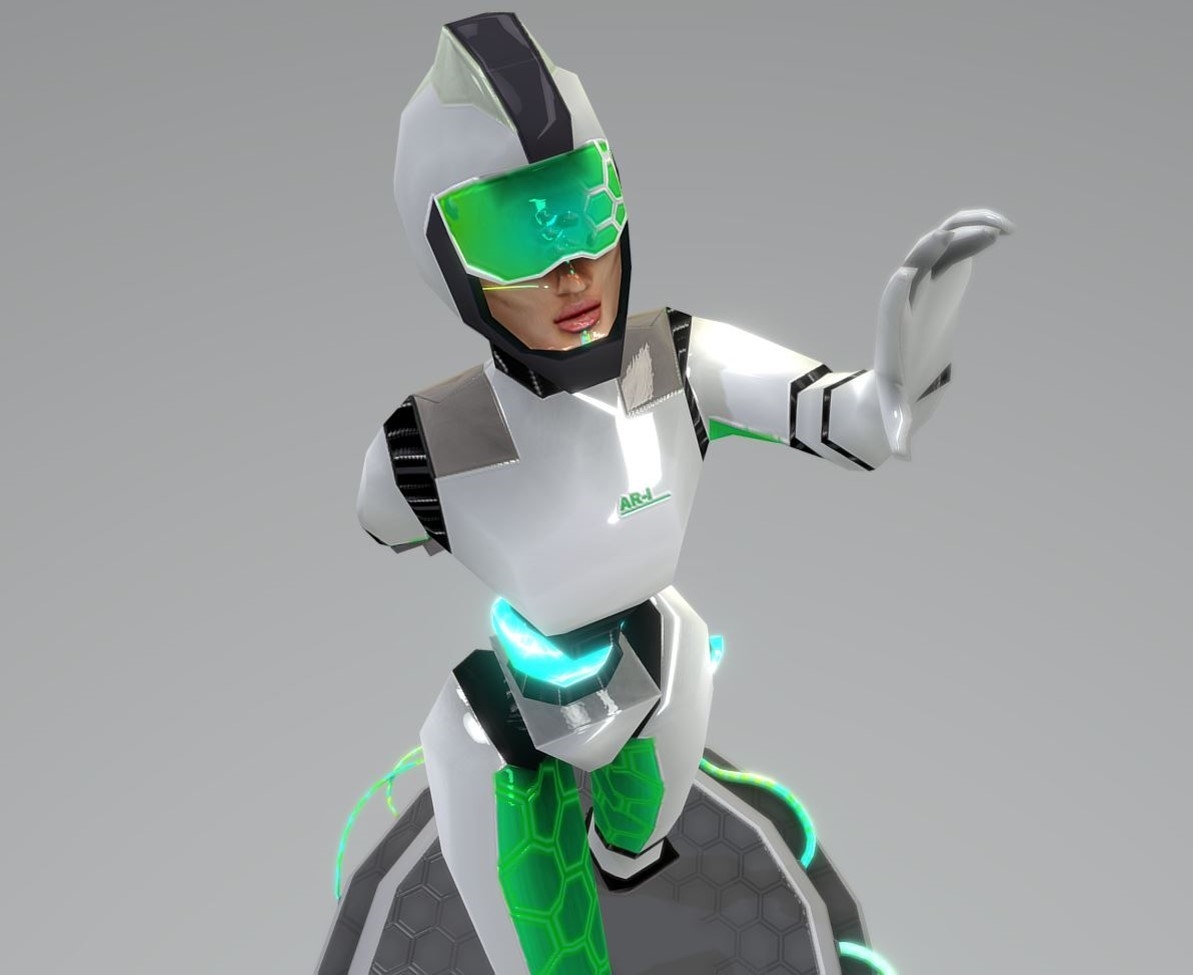
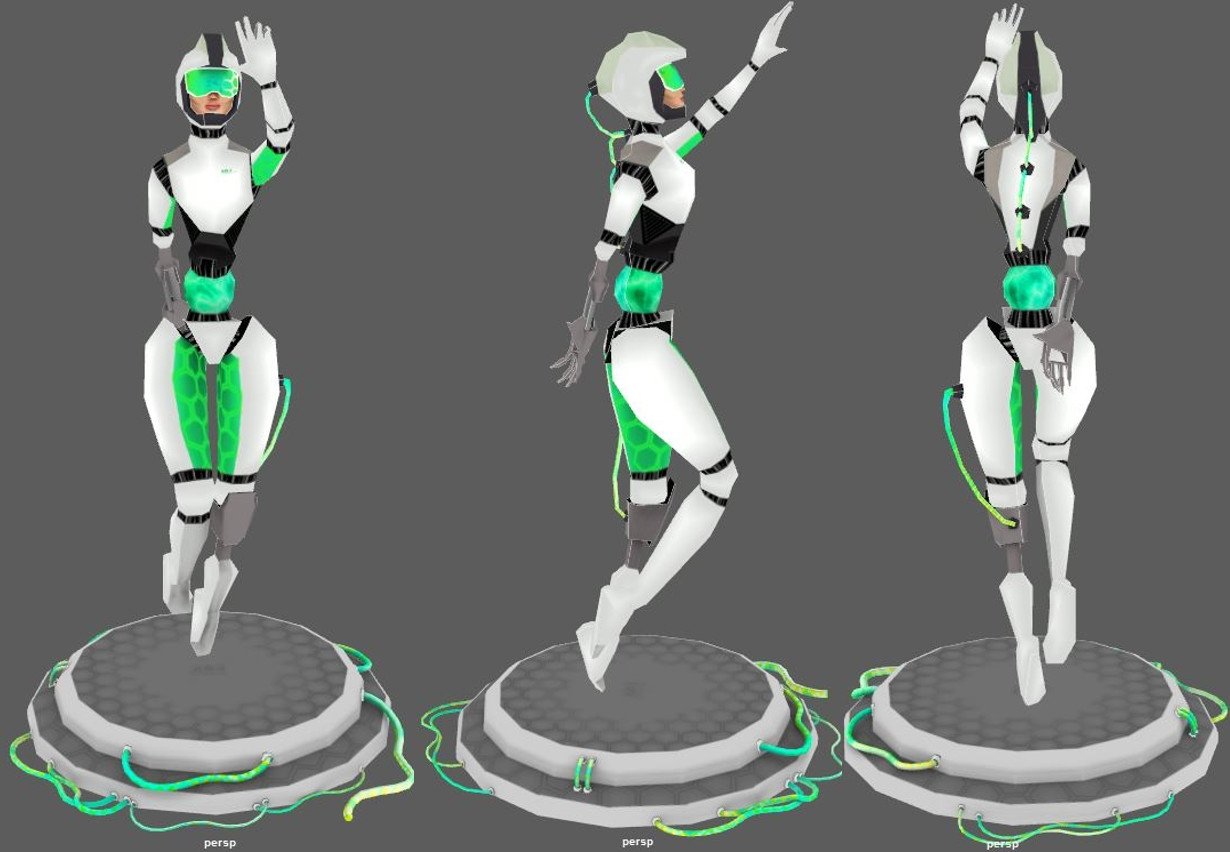
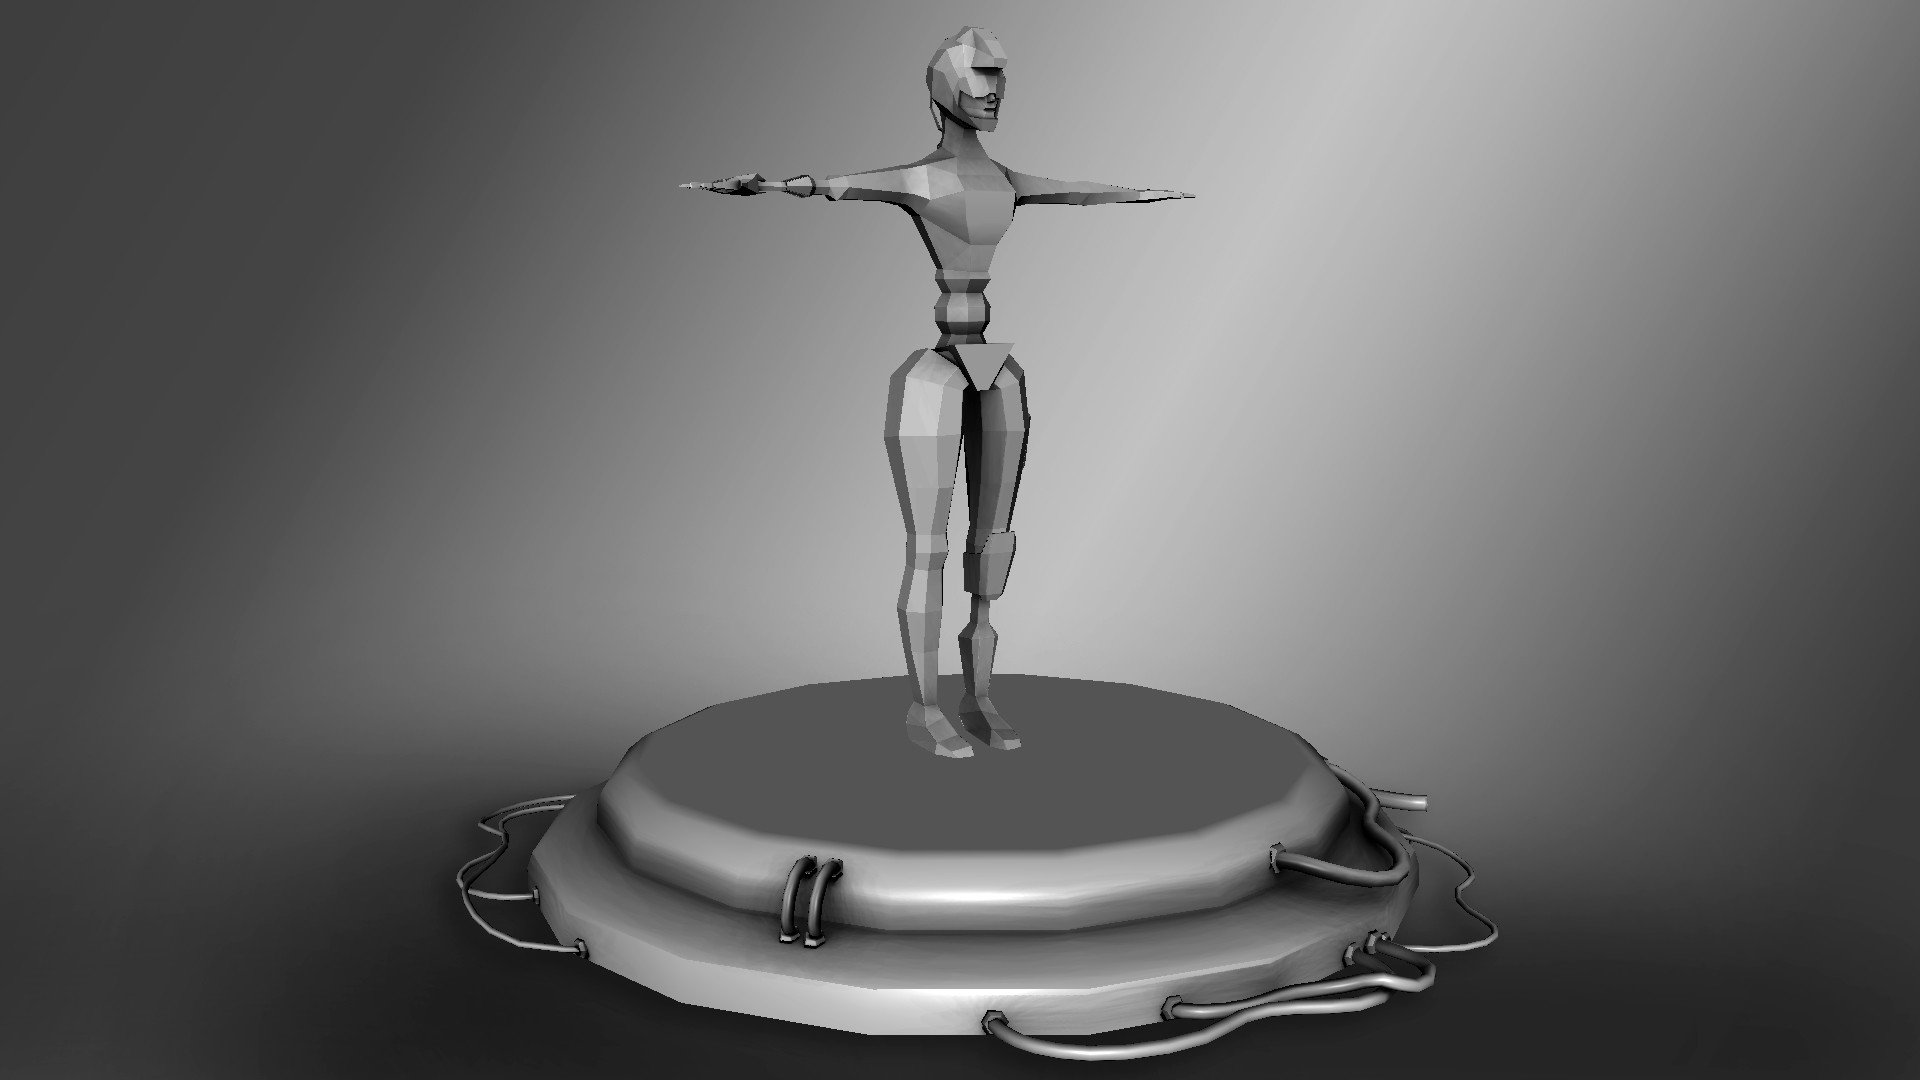
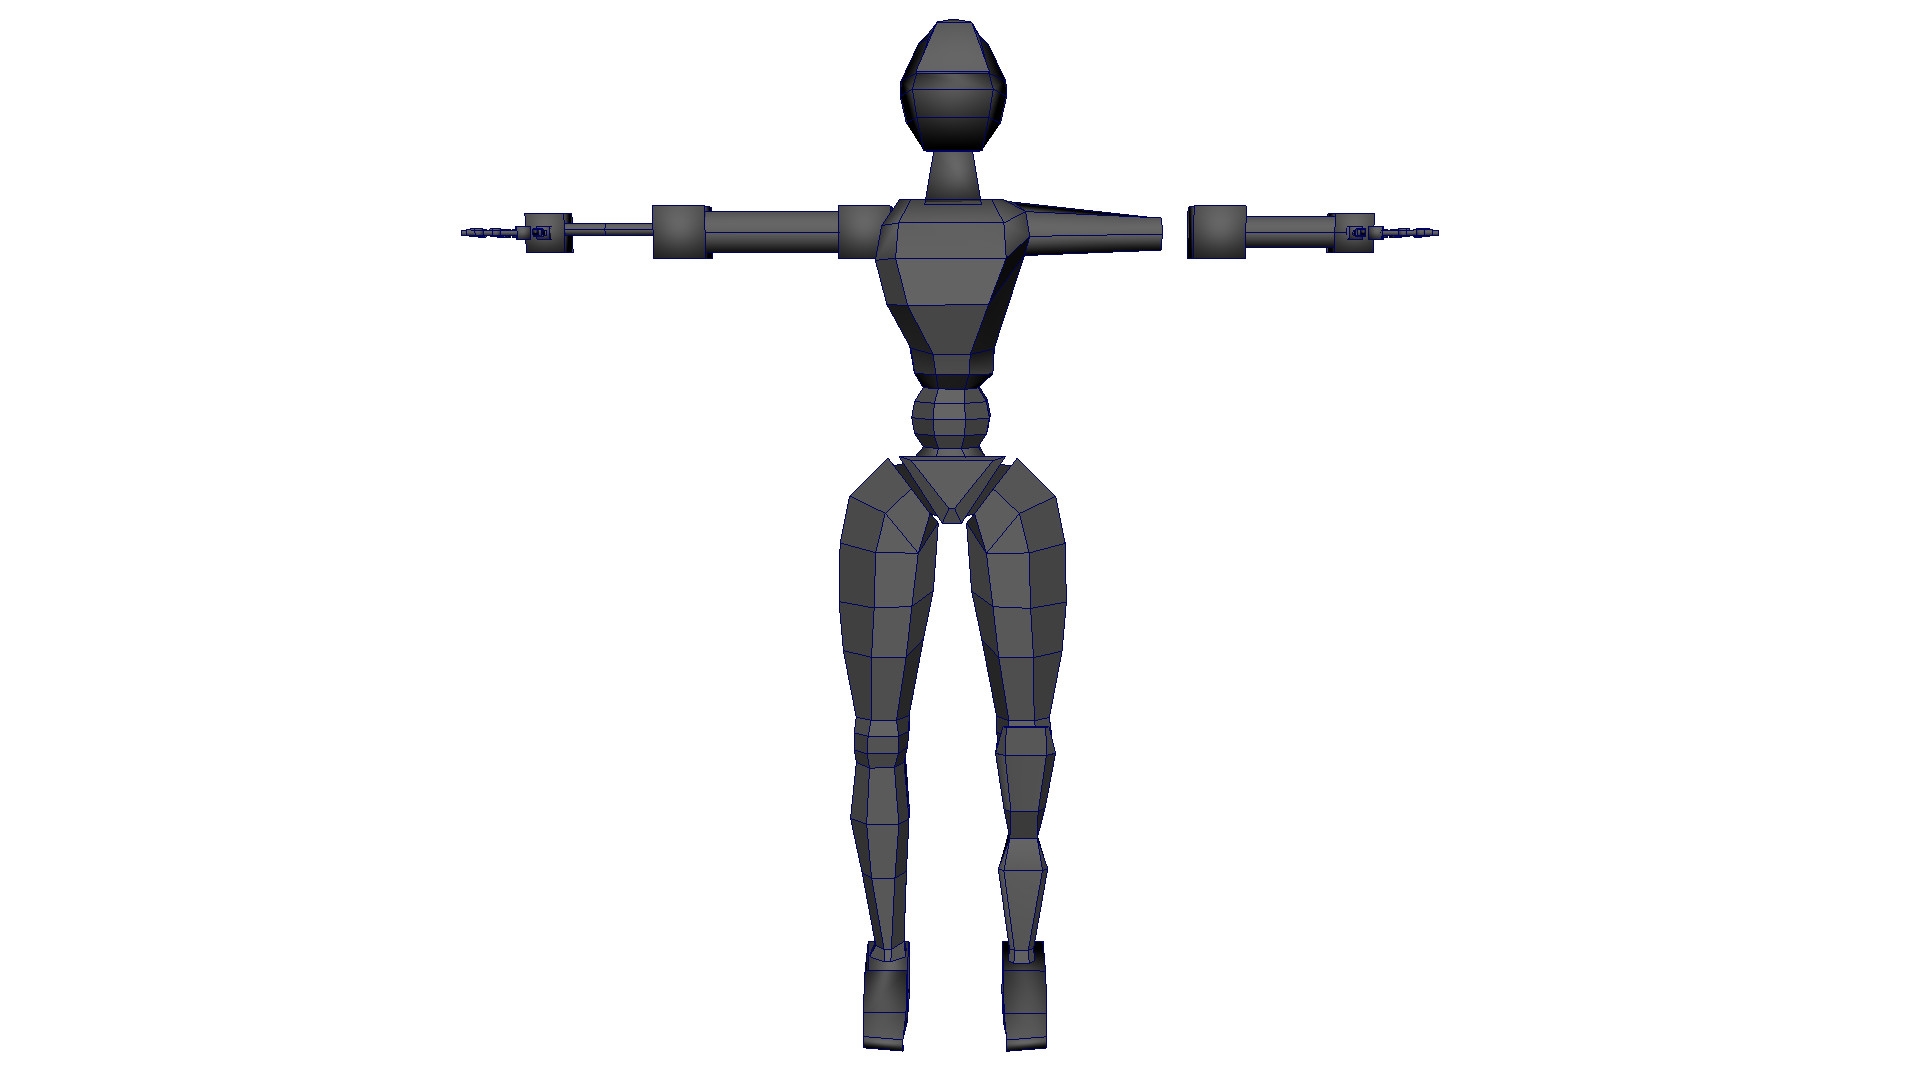
Final Model
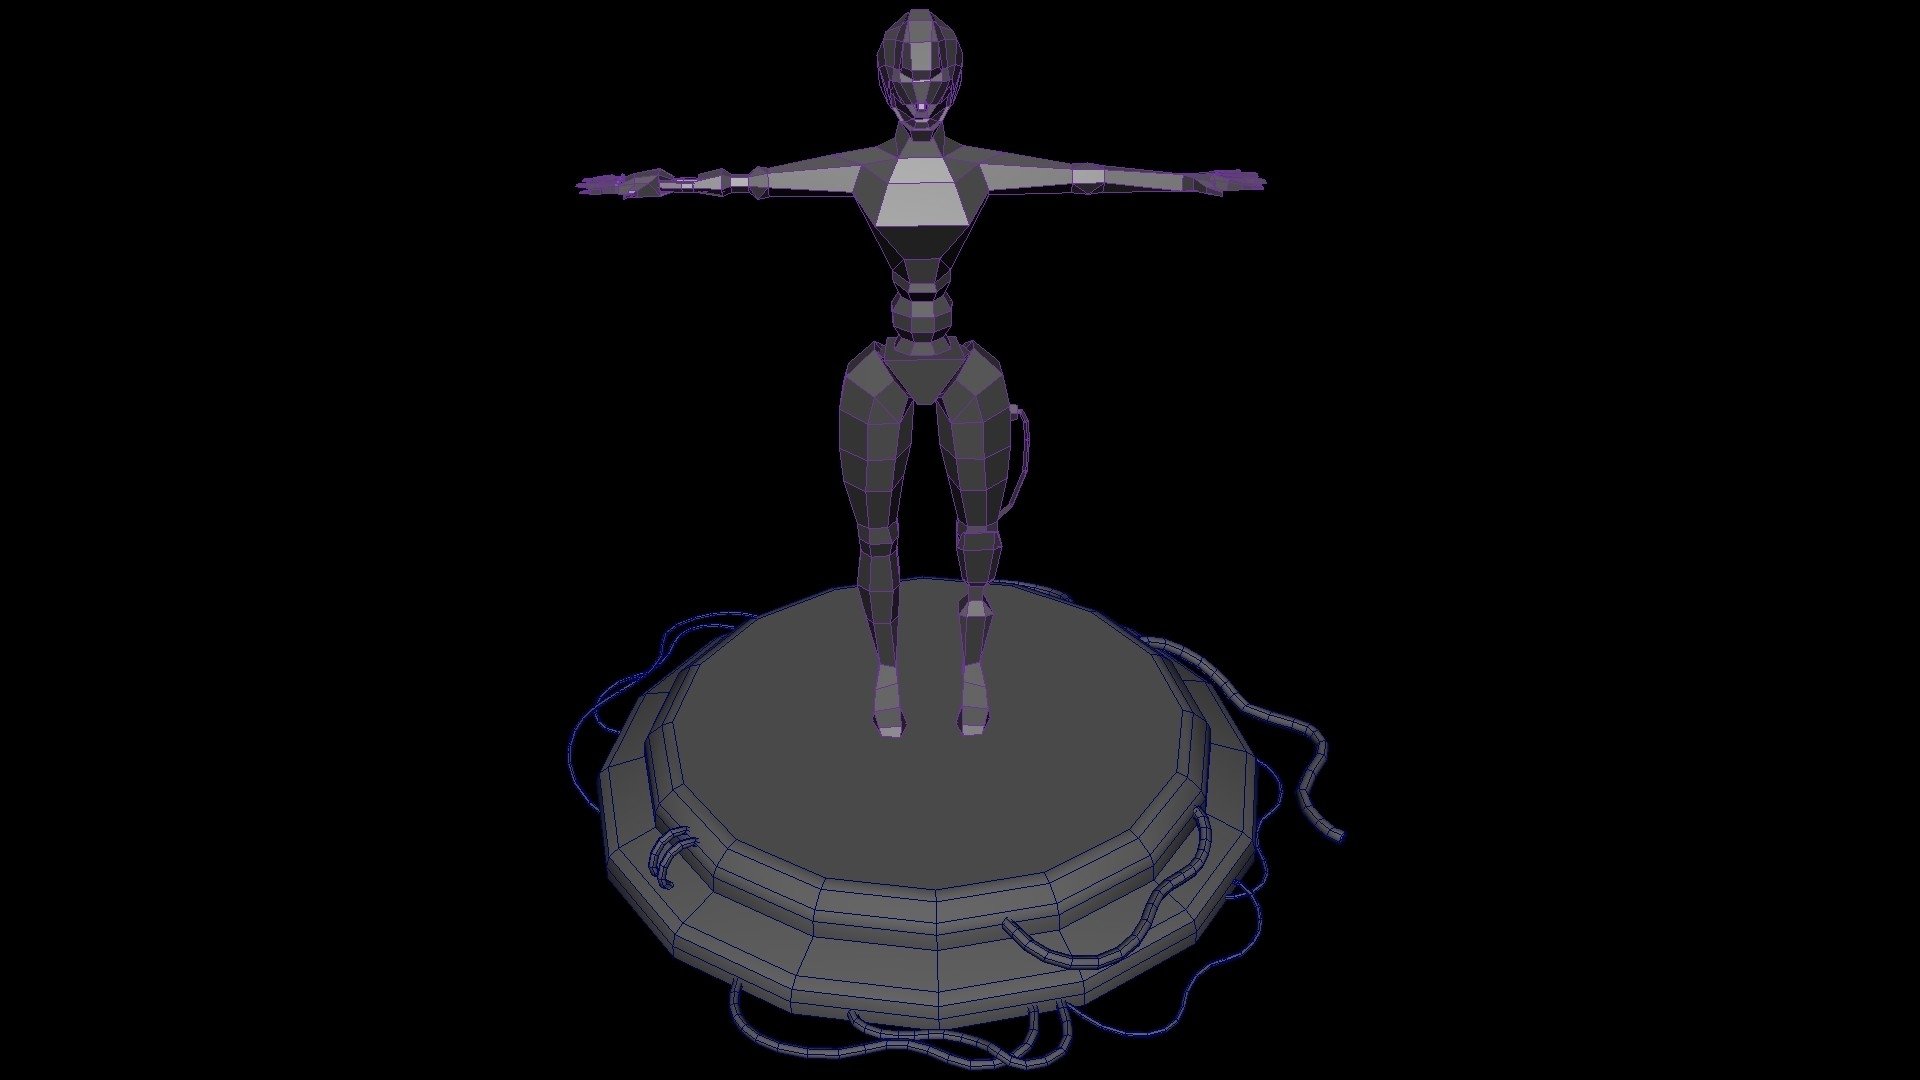
Positioning and dealing with rig problems.
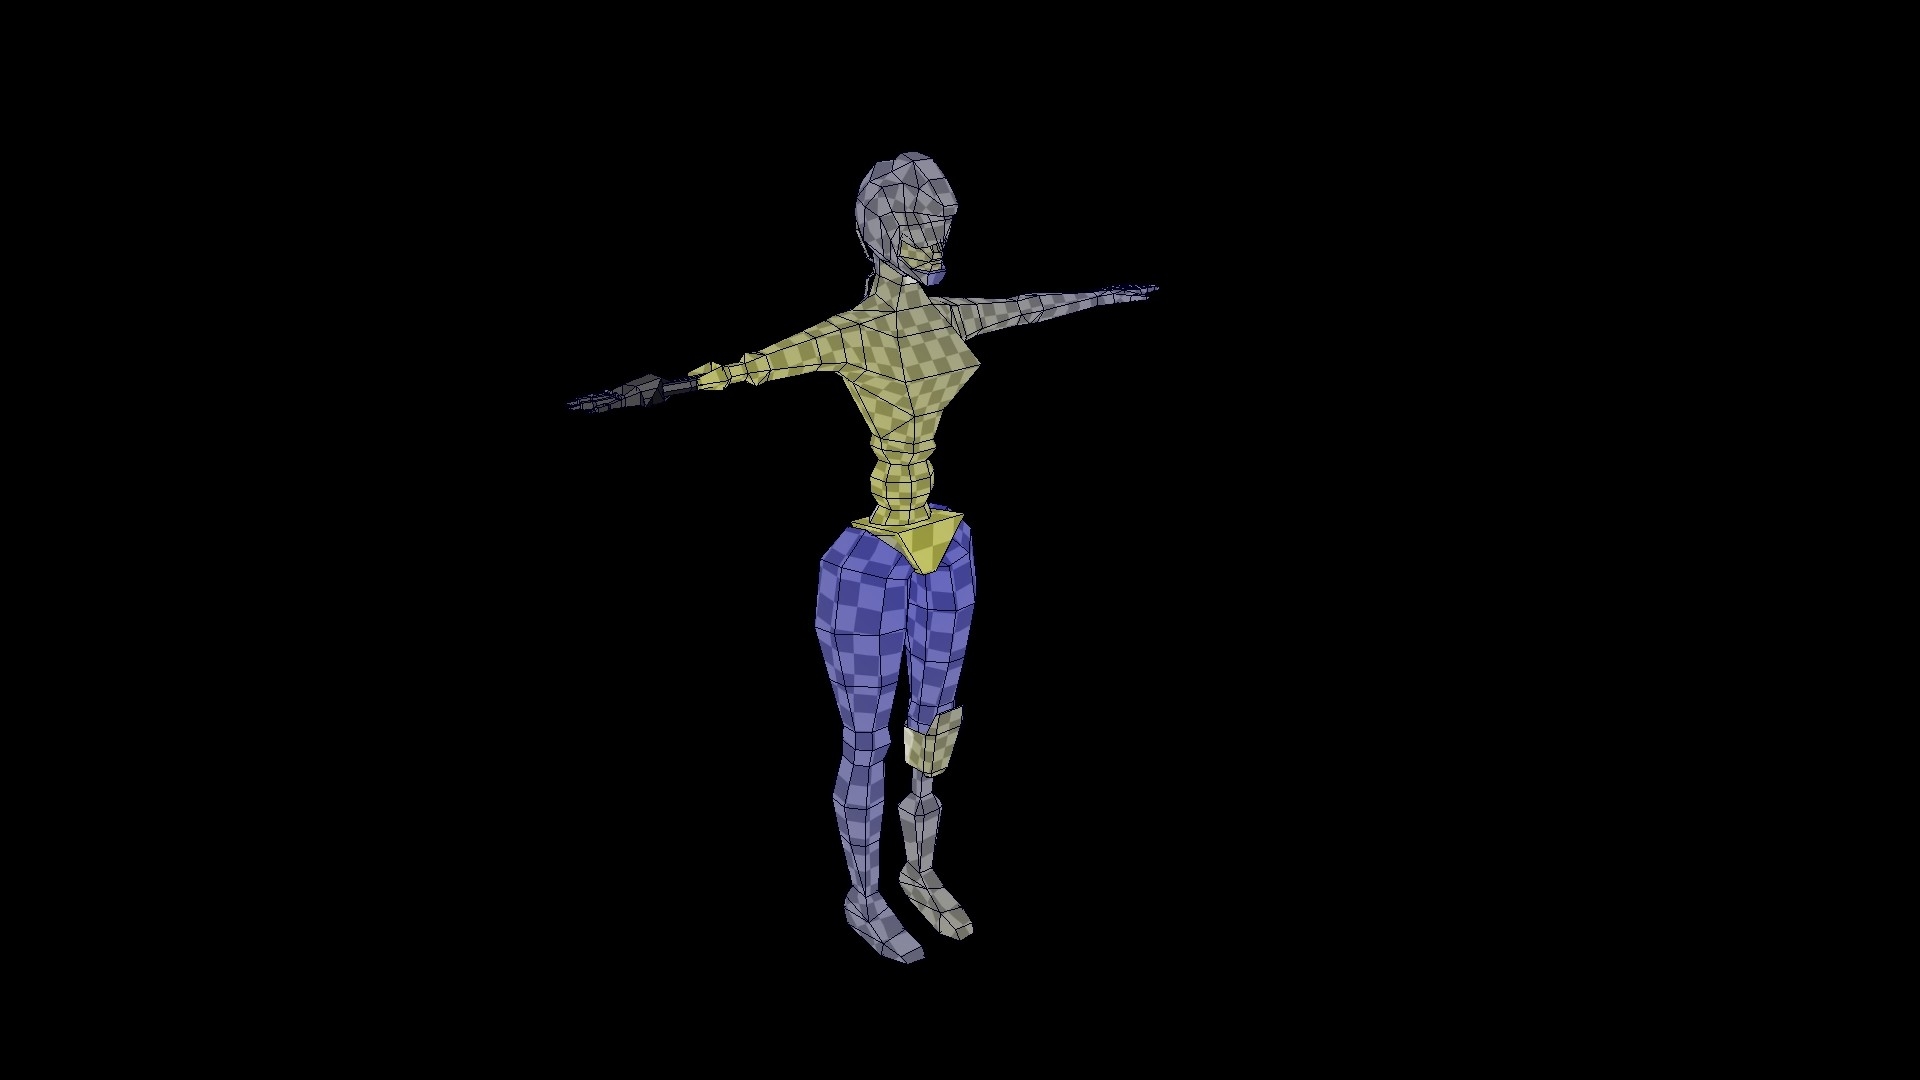
Skinning not good and problems present with model deforming wrong and horrible
Working more with rig deforms trying to fix errors with deforming skin
Looking over the final texture map realizing there is no bleeding on the texture meaning i will have horrible lines showing.
Playing with face texture, low poly cover up, beginning stage for texturing no maps applied at this stage.
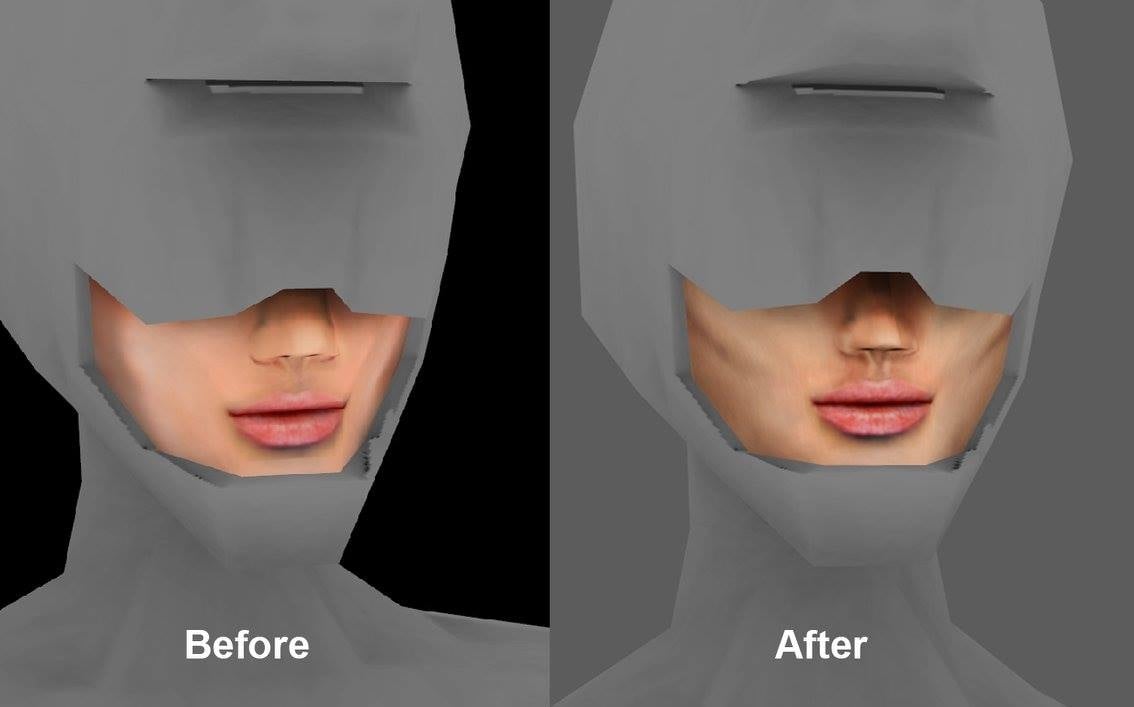
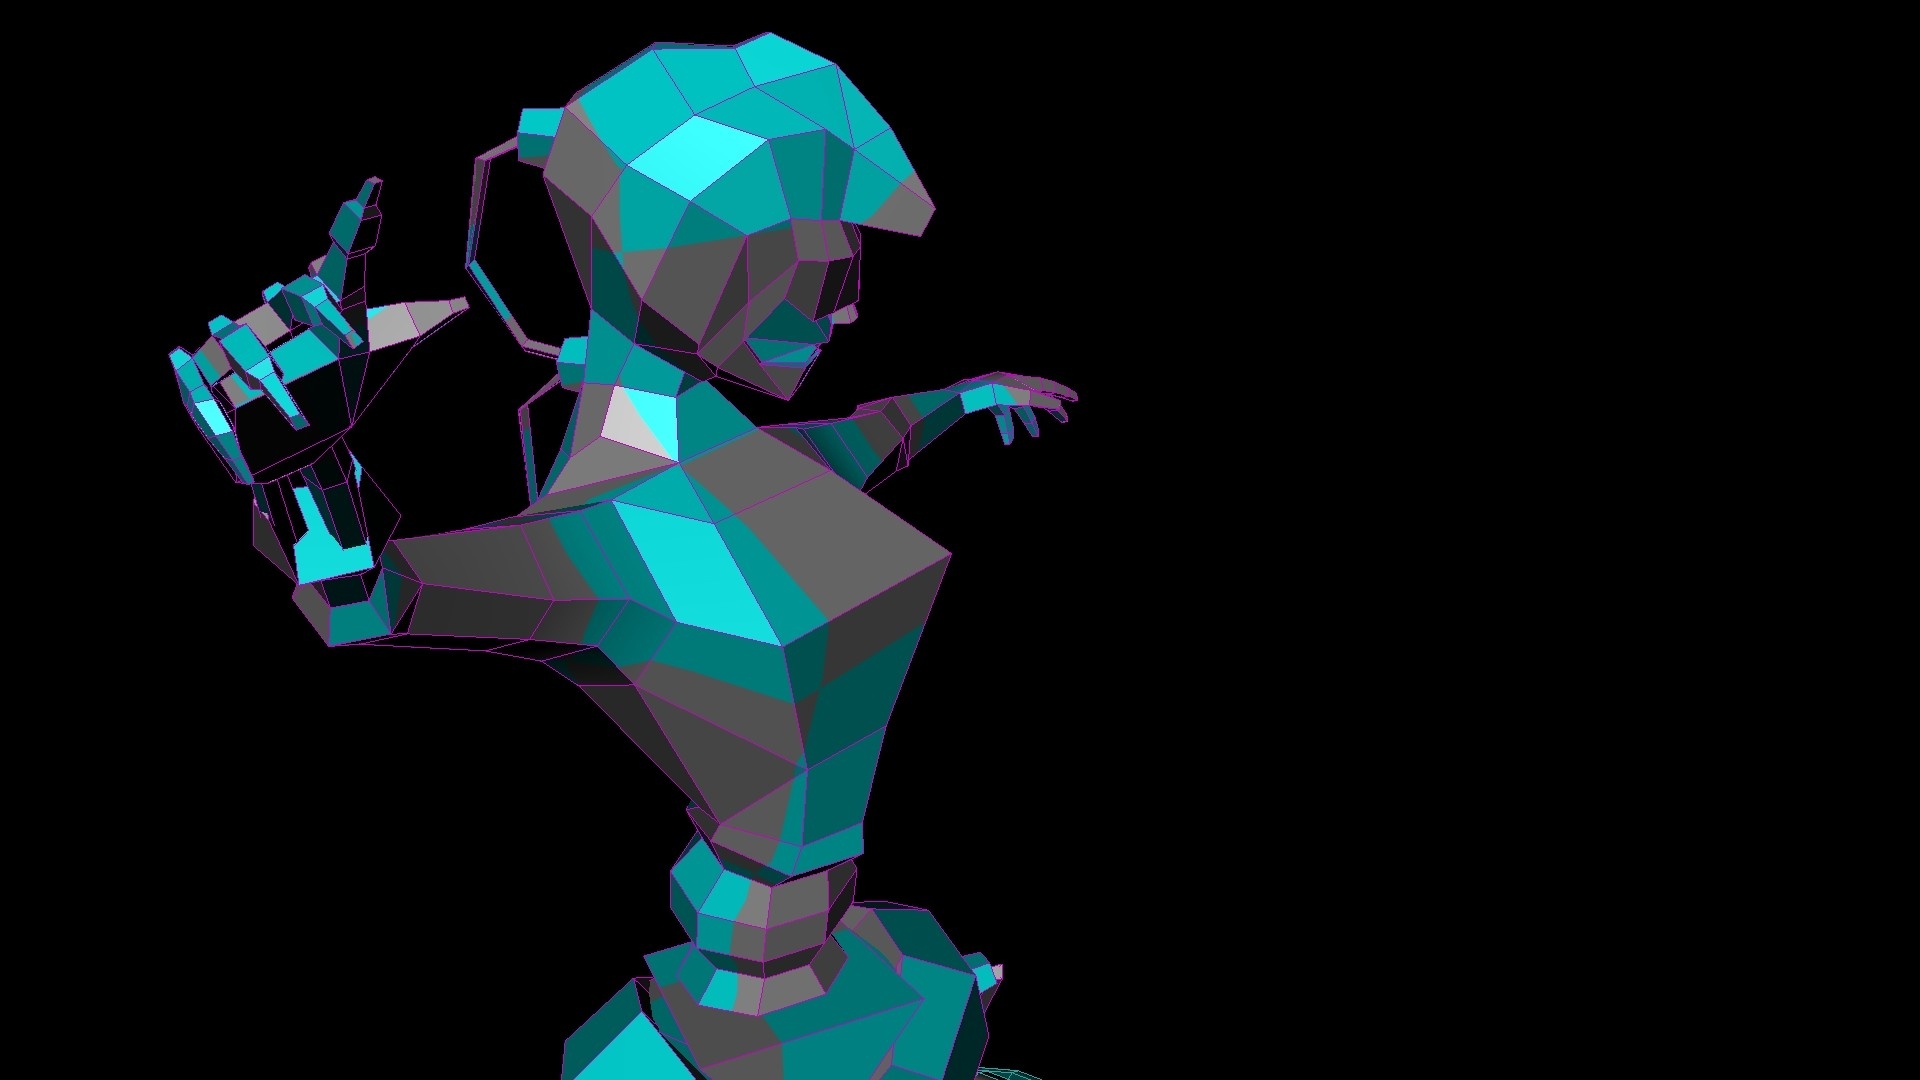
Ambient Occlusion Map applied to see where shadows hit and highlights shine, Finalized Model no smoothing applied
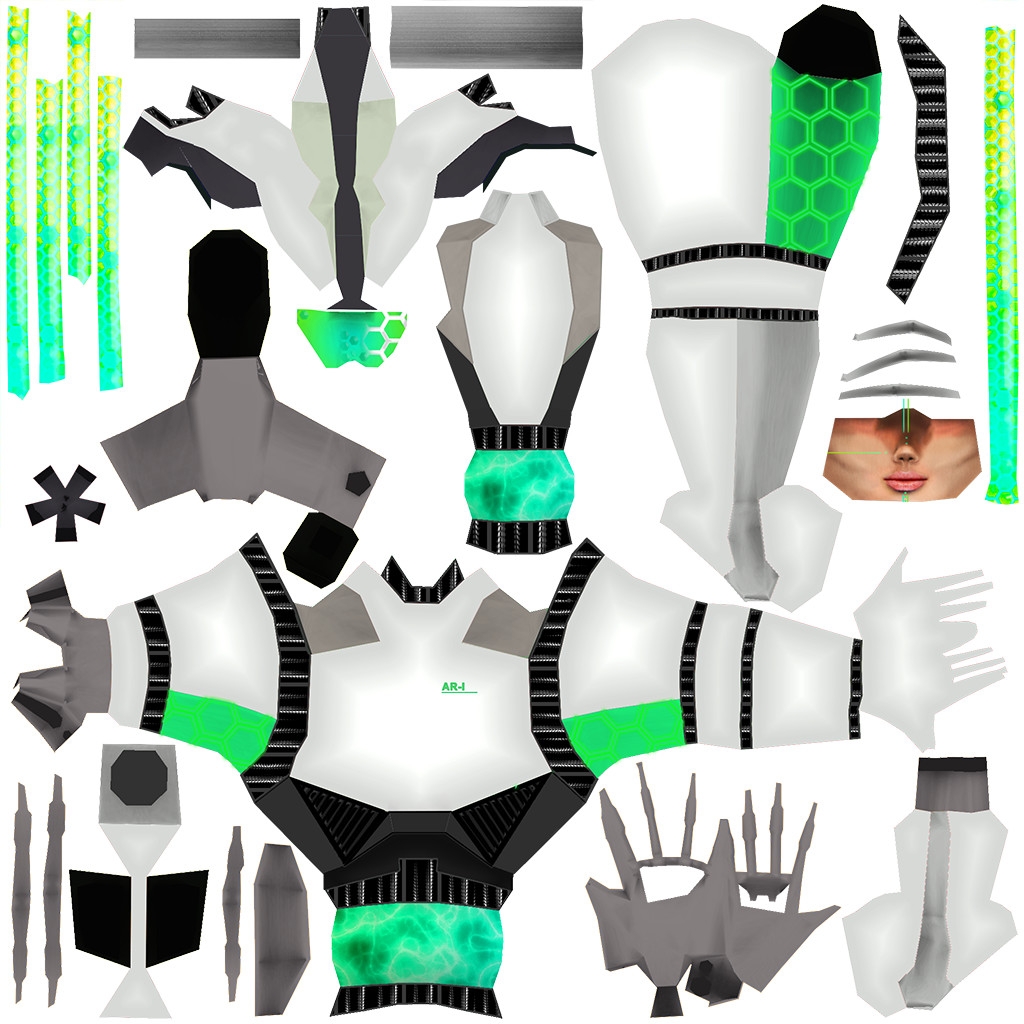
UV stage nearly done unwrapping
Final model done time for unwrapping
Block out stage beginning of the adventure
Concept stage rough idea of what i am looking to get in terms of my character.

The following images are a walk through of my process working im Maya, rigging and texturing, what I found really hard was rigging model and weight painting I still now struggle with it if there is anyone with some use full tips to help the rigging and weight painting stage easier I would be very much thankful.
It has been a long road with this knowing Maya for only 4 months and managing to produce this was a great achievement but now to me i know there are things i could really have done better but that's the fun of learning.
My Art station for anyone interested
https://www.artstation.com/artist/mogyie
Final Model
Positioning and dealing with rig problems.
Skinning not good and problems present with model deforming wrong and horrible
Working more with rig deforms trying to fix errors with deforming skin
Looking over the final texture map realizing there is no bleeding on the texture meaning i will have horrible lines showing.
Playing with face texture, low poly cover up, beginning stage for texturing no maps applied at this stage.
Ambient Occlusion Map applied to see where shadows hit and highlights shine, Finalized Model no smoothing applied
UV stage nearly done unwrapping
Final model done time for unwrapping
Block out stage beginning of the adventure
Concept stage rough idea of what i am looking to get in terms of my character.
Replies
1000 triangles is really low resolution, so don't be too hard on yourself if deformation looks bad. You really can't avoid stretching at that resolution. However there are some good tips for modeling low-res joints here on our wiki:
http://wiki.polycount.com/wiki/Limb_Topology
First off, props to your Uni teacher for having you learn proper optimization so early. These days a lot of artists don't put much effort into this area due to how powerful hardware has become, but it can be very useful to know for mobile games, low budget games, or ones that are trying to hit a certain retro aesthetic. It can also be a lot of fun to see just how much you can get out of a very low and strict poly budget.
About the model itself; Because this is essentially a robot (cyborg?) I would split the shoulder and knee joints and have a deformable piece between them and the rest of the body. By doing this you can cut down on the large amounts of stretching/distortion that's occurring. You may end up using about 50-100 more tris, but if you've left yourself some headroom with the poly budget it's worth it. Always keep in mind which materials are supposed to be solid (metal/plastic) and which are bendable (rubber) when creating a mesh that will deform.
Also, I wouldn't use so much geometry for the fingers. If you look at old games where these kinds of poly budgets were common you'll see that most used much simpler hands so they had more tris available for other areas.
Thank you for pushing me more into area's where I could cut down more and more the hands take up a lot of faces and I tried my hardest to limit them as much as I could but it was probably one of the hardest stages along with the helmet that was terrible modelling that I didn't even know where to start but it was very good to get into it and for 4 months of knowing Maya and mapping im surprised I managed to get this out at all
Thank you for taking the time to give me some tips and pointers i really appreciate it a lot it only going to help better me in future and for that i thank you.