Quad Draw Help
Hey guys,
First time using Quad Draw and had some questions...
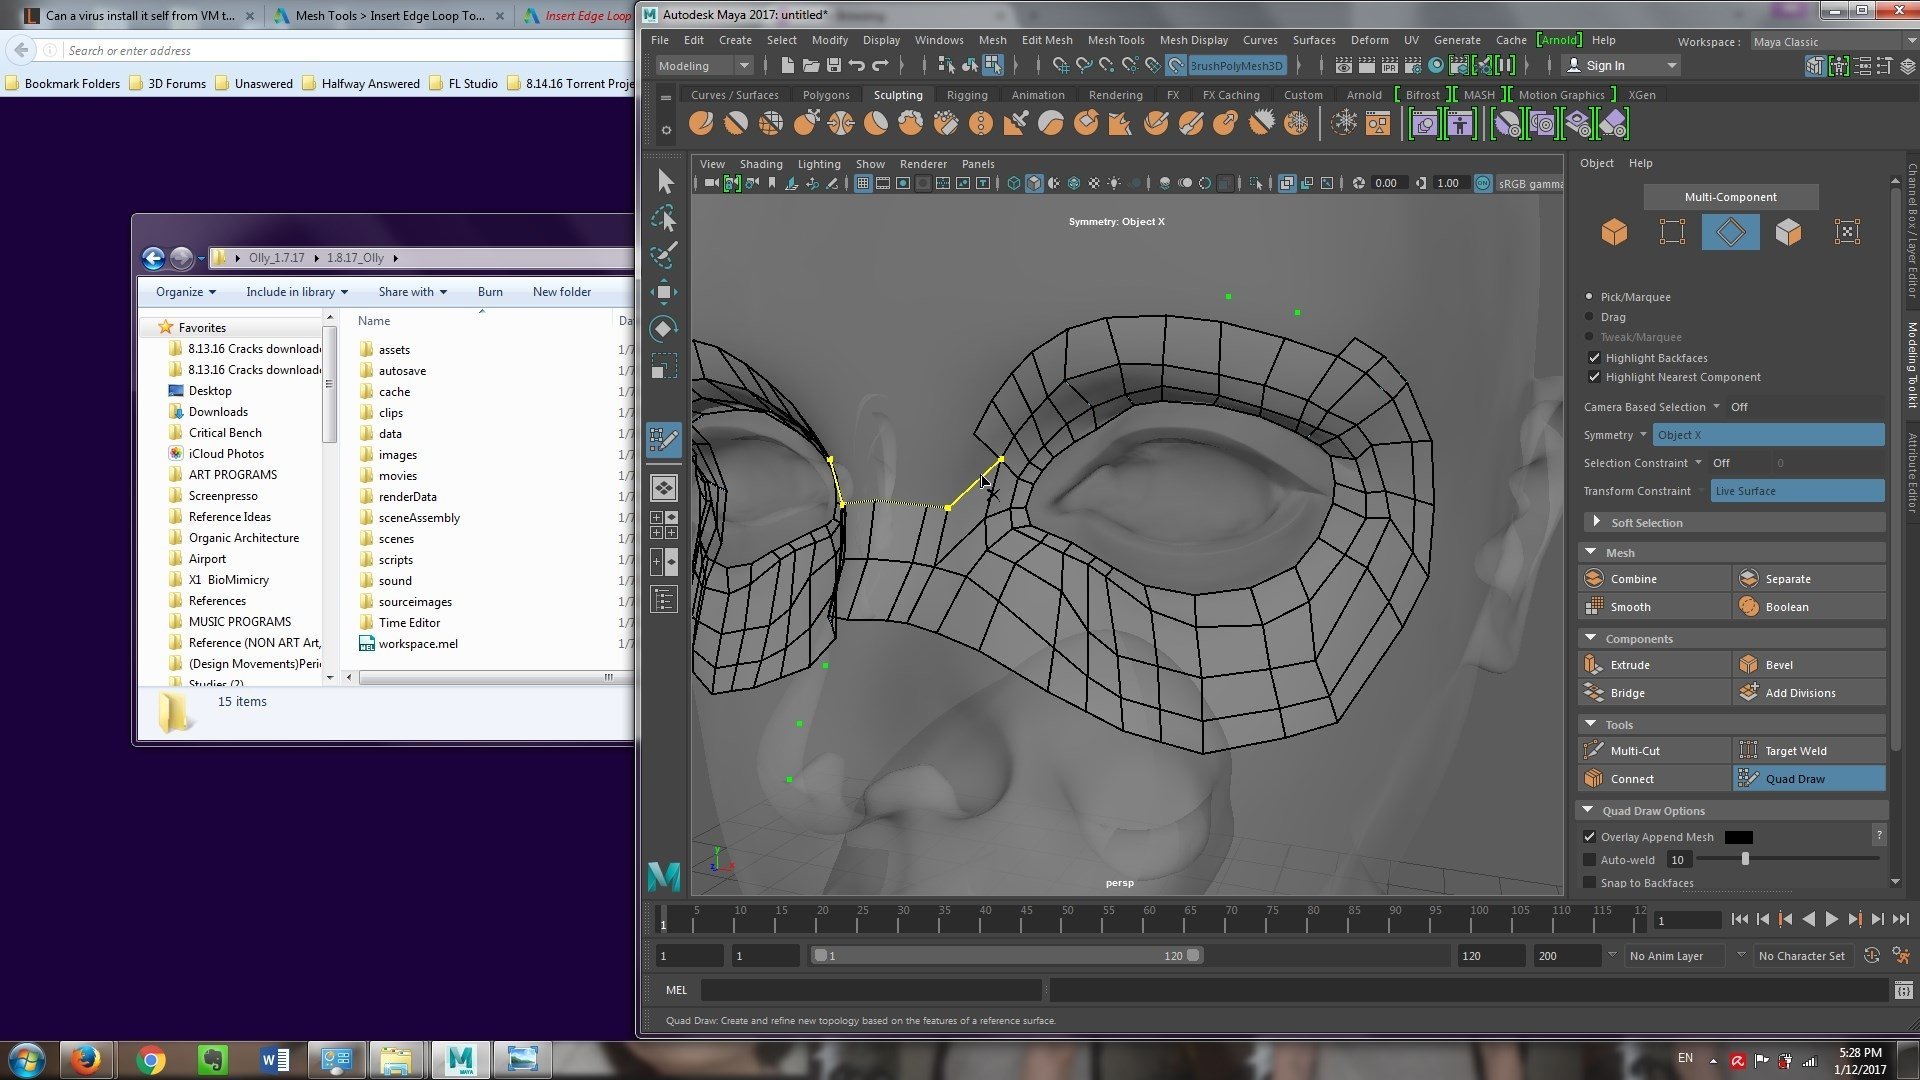
1)i know Ctrl+Shift +Click = Delete a quad point, face, or single edge
However after quads are connected, I can no longer delete a single edge
IT becomes like this...
Anyone have any idea how I could delete only a single edge even after the quads are connected?
2)
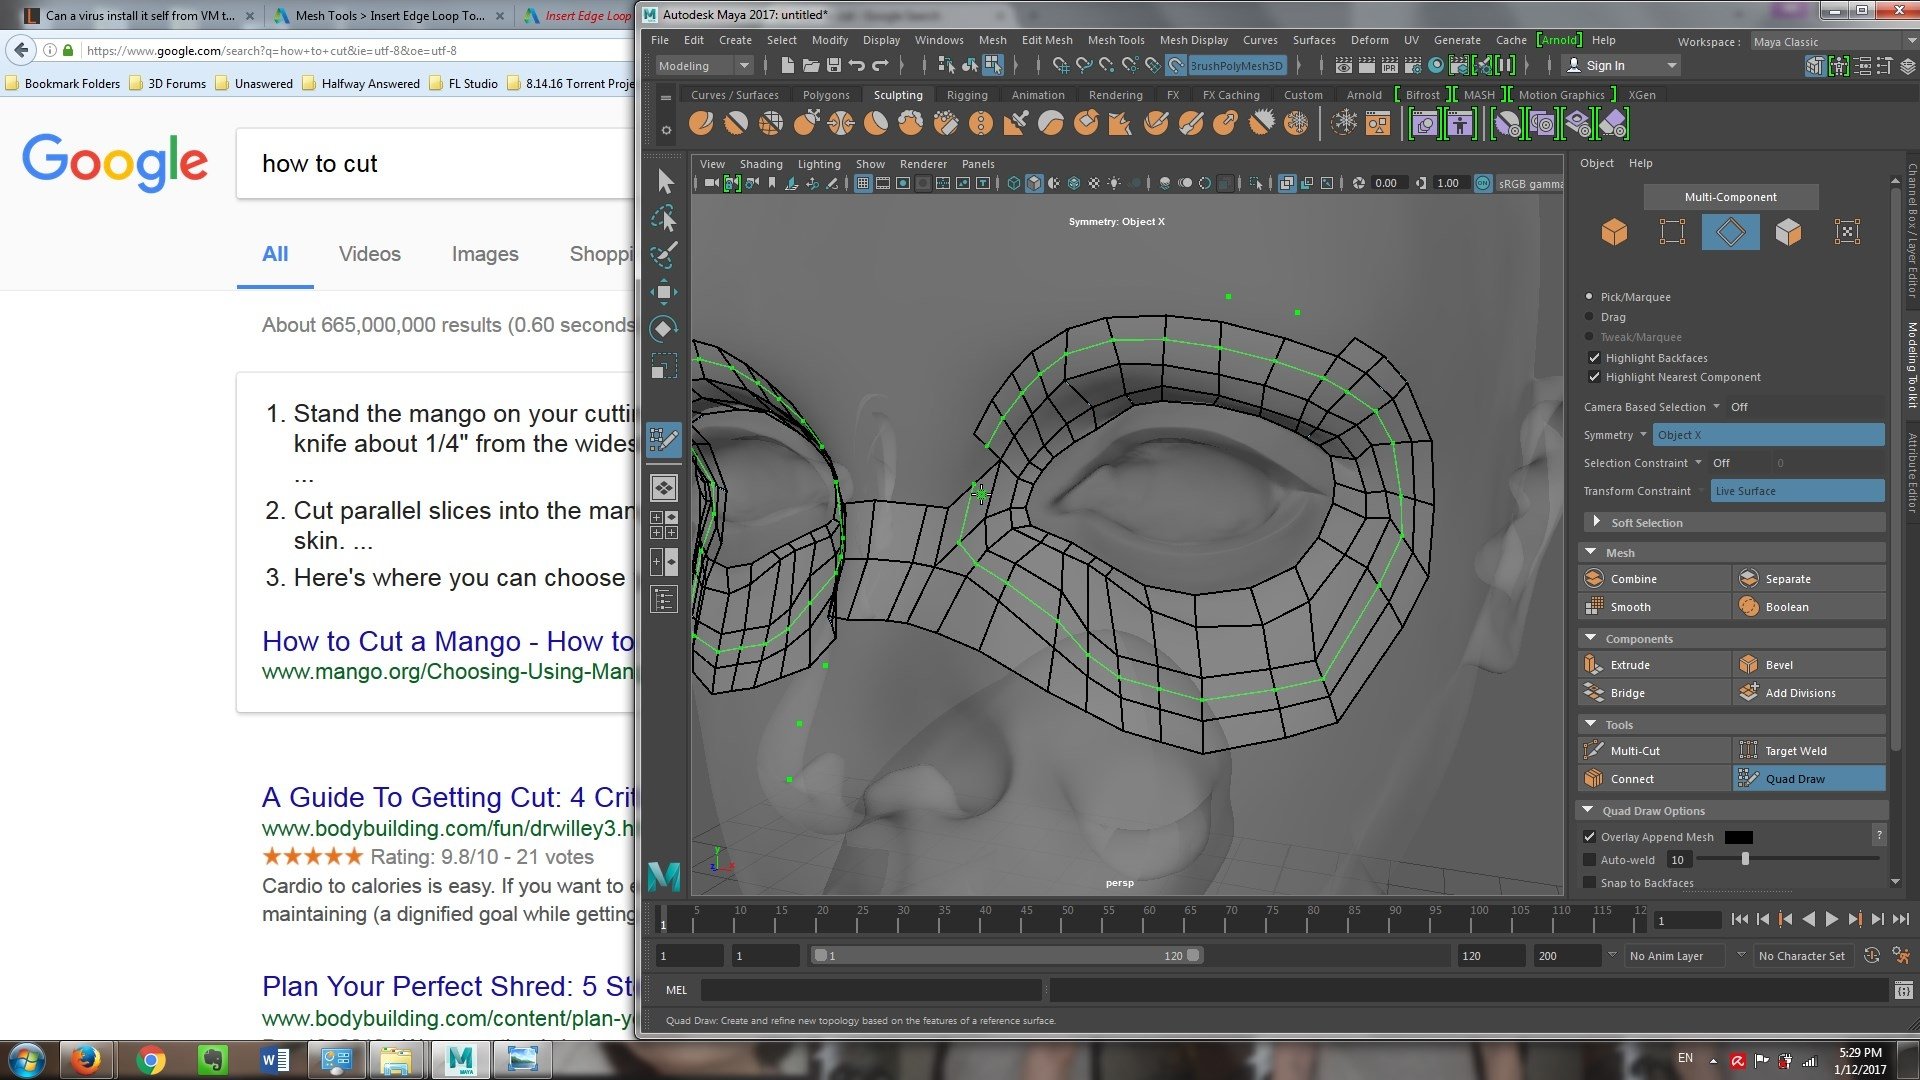
For creating an edge loop, its Hold Ctrl + CLick
In the beginning I used to use the ctrl + Clickto make single edges within a quad
However now that the quads are connected I can only make a huge edge loop..
How can I control the edge loop to only single edges within a quad?
3)
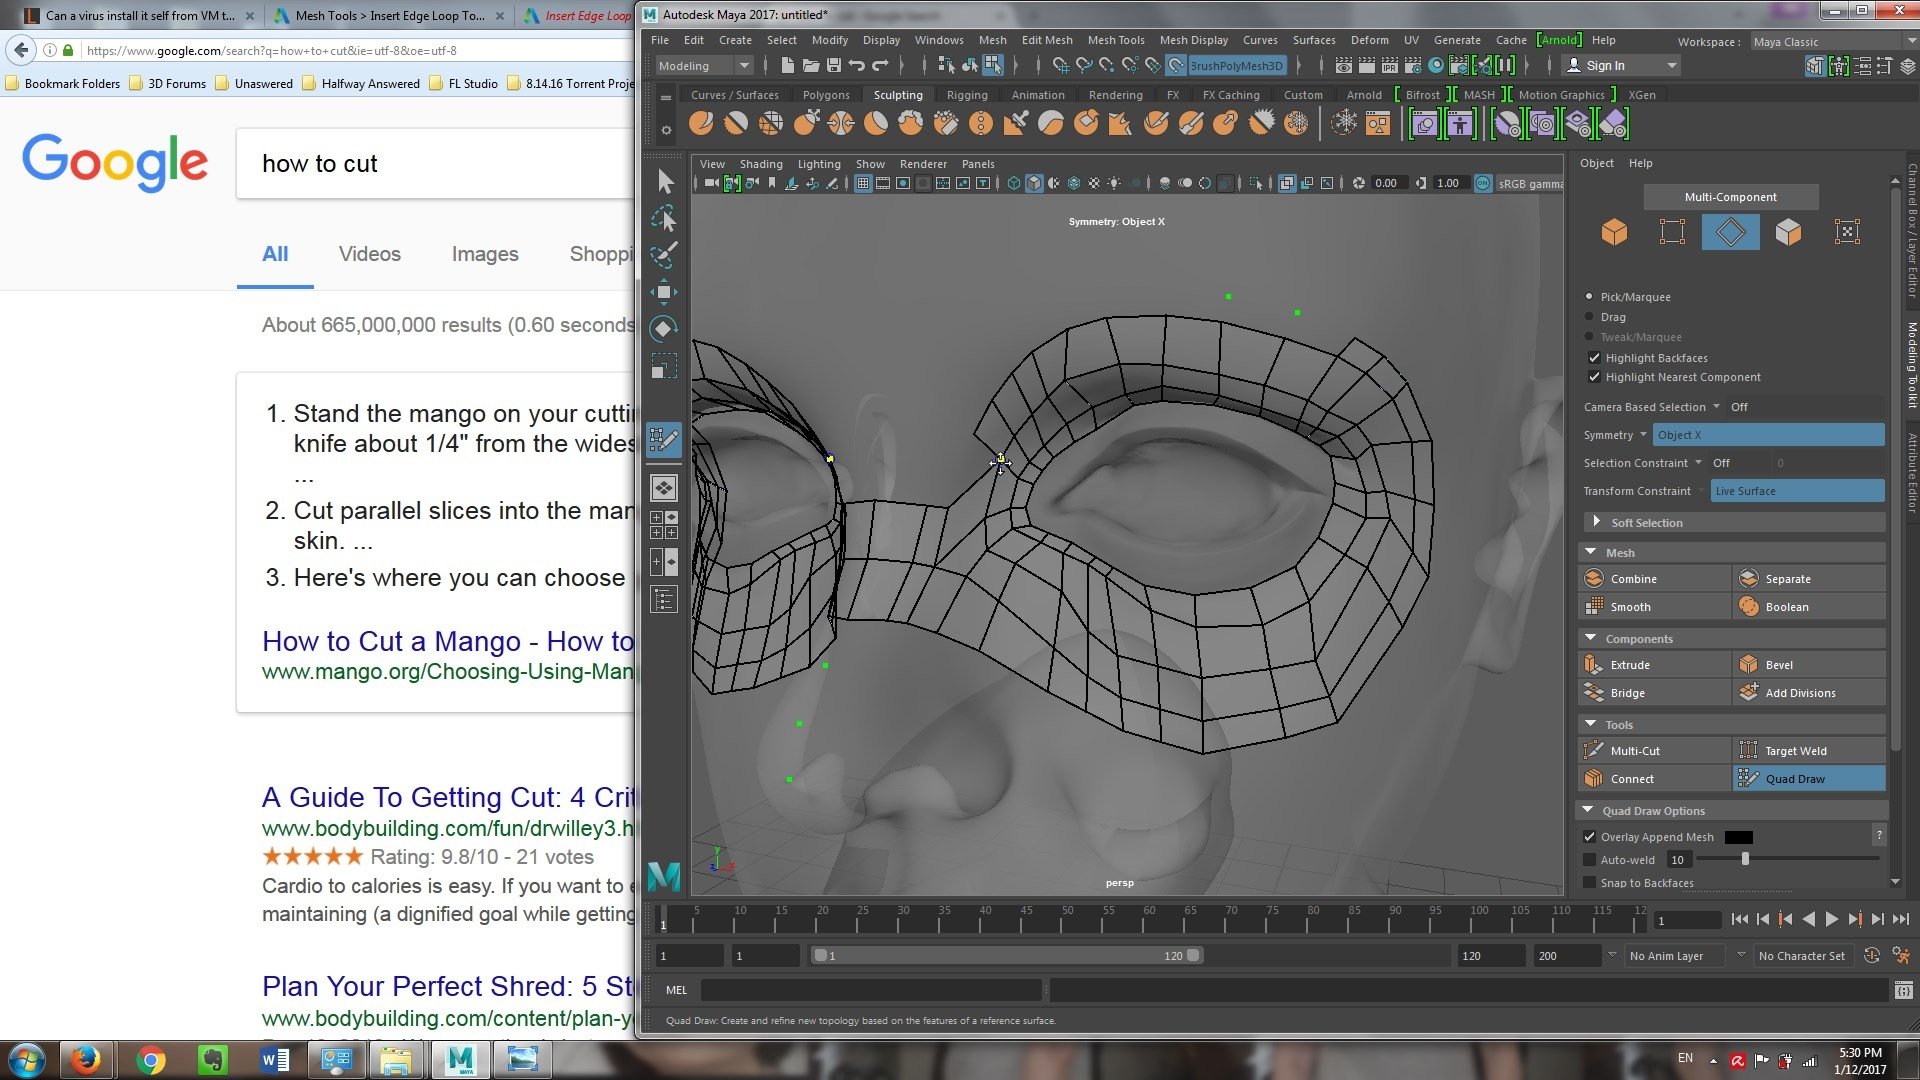
The most annoying is when there is a quad that auto merged and how I want it to seperate...
As you can see the moment i move my cursor over that automerged vertex itmoves the faces together...
Is there and way I can cut the vertex and seperate the quads?
4)
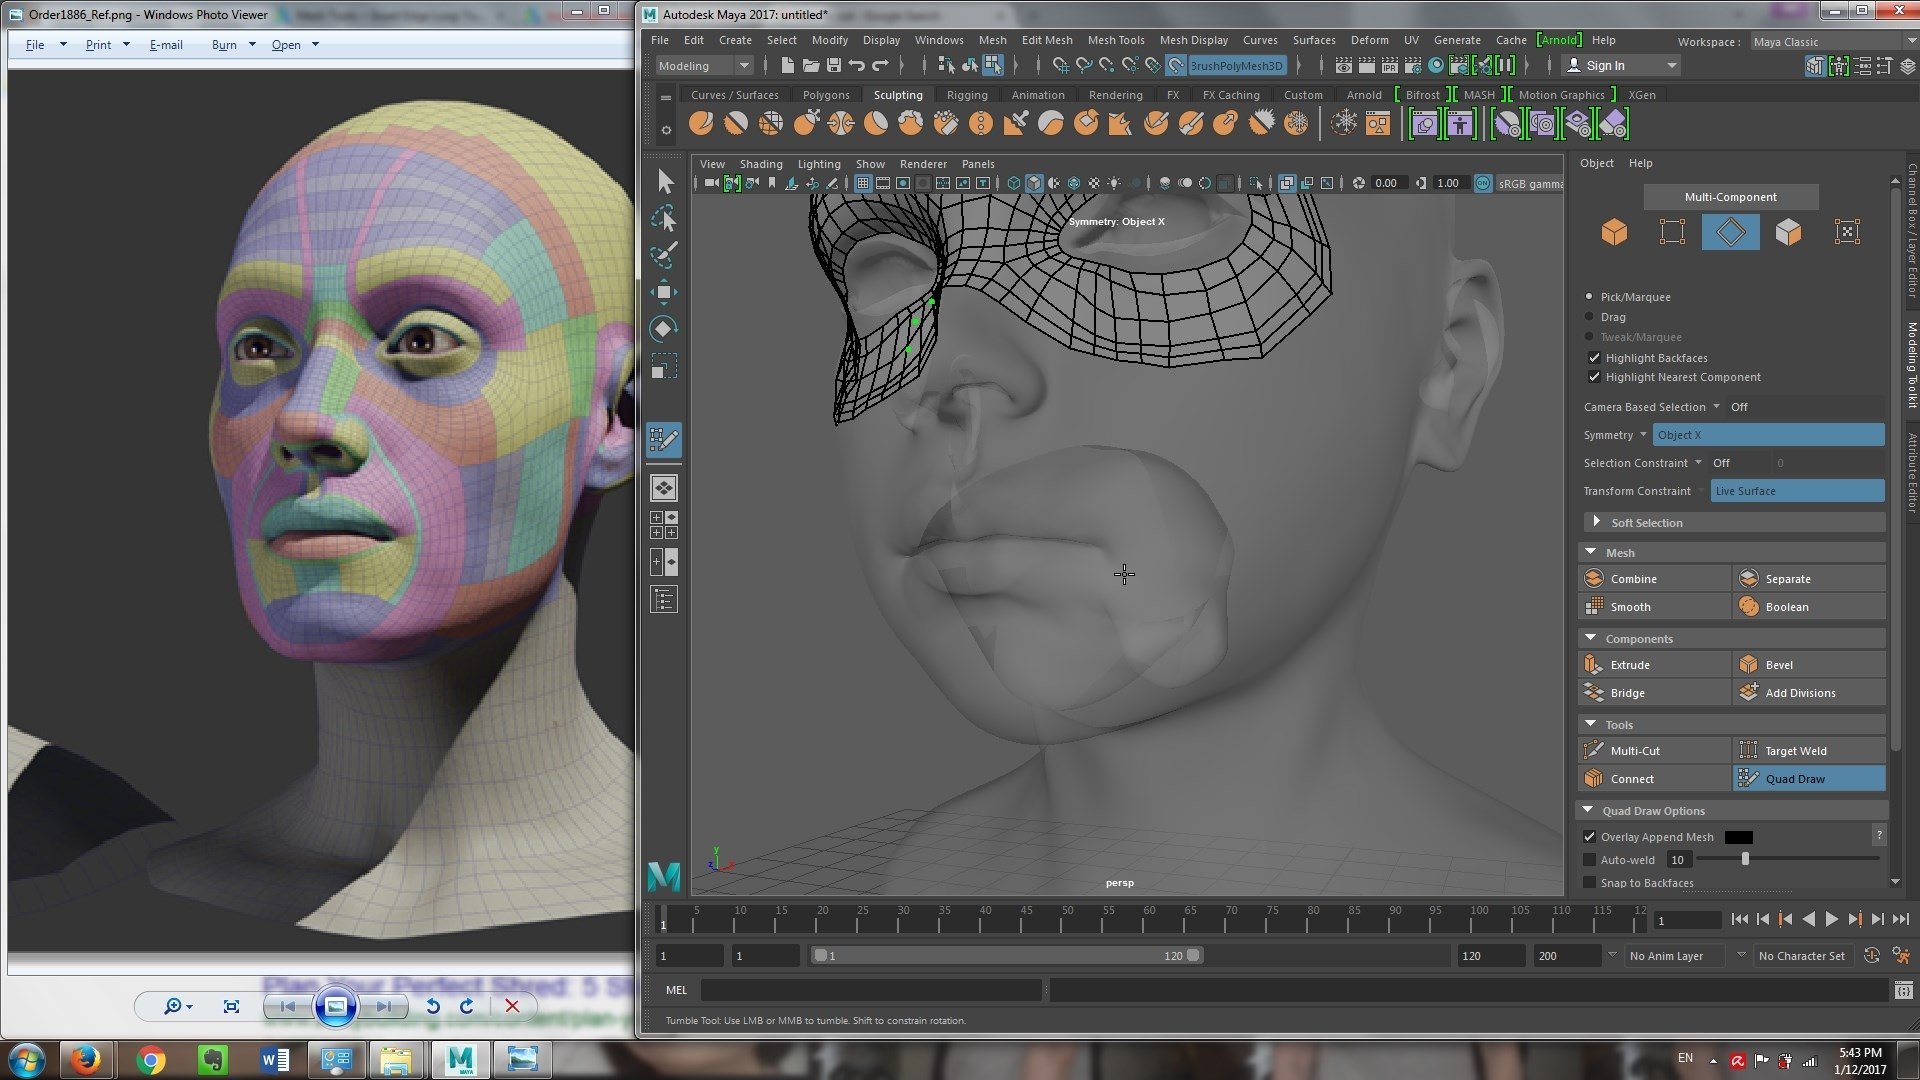
I have a mouth tunnel inside the character...
How do I go about retopologizing this?
First time using Quad Draw and had some questions...
1)i know Ctrl+Shift +Click = Delete a quad point, face, or single edge
However after quads are connected, I can no longer delete a single edge
IT becomes like this...
Anyone have any idea how I could delete only a single edge even after the quads are connected?

2)
For creating an edge loop, its Hold Ctrl + CLick
In the beginning I used to use the ctrl + Clickto make single edges within a quad
However now that the quads are connected I can only make a huge edge loop..
How can I control the edge loop to only single edges within a quad?

3)
The most annoying is when there is a quad that auto merged and how I want it to seperate...
As you can see the moment i move my cursor over that automerged vertex itmoves the faces together...
Is there and way I can cut the vertex and seperate the quads?

4)
I have a mouth tunnel inside the character...
How do I go about retopologizing this?

Replies
For the mouth bag, You don't really need fancy topology here, simple box cutting should be sufficient. But in Quad Draw, make sure it's separate geometry from your head while doing retop, and reverse the normals so you don't need to keep the camera inside since QD is view dependent.
1) How do i "make a split"?
2) How do I turn off construction history?
(Does this make it so that if I want ot use Ctrl Z it wont work?)
3) How do I do this?
"simple box cutting should be sufficient."
4) Or this?
"In Quad Draw, make sure it's separate geometry from your head while doing retop, and reverse the normals so you don't need to keep the camera inside since QD is view dependent."
1) Multi-cut tool on a polygon object.
-laaate edit! I answered that poorly. You can select a vertex, shift-rmb and select Detach to split at just that vertex. This also works on faces and edges.
2)
4) the menu Mesh Display>Reverse is under the normals header. If you try to use quad draw on an inverted model, you'll find it snaps to the opposite side. Imagine a sphere, but it's inside-out so the back is the front, so if you painted with a brush, you'd paint the back-front, not the front that's closer to you since it's facing the other way.
3) Box modeling is an old term now, come to think of it... It's essentially using the basic modeling tools like multi-cut, extrude, bevel, along with pushing polygons/vertices/edges around with the move/rotate/scale tools. I'd like to suggest a tutorial, but I really don't know where the good ones are.
I ve been spending the last couple days trying it all out and....
1)The shift rmb to get the detach function i dont have that?
heres what i get
[IMG]http://img.techpowerup.org/170115/2017-01-15-17h48-51.jpg[/IMG]
2) I can understand this...
"the menu Mesh Display>Reverse is under the normals header. If you try to use quad draw on an inverted model, you'll find it snaps to the opposite side. Imagine a sphere, but it's inside-out so the back is the front, so if you painted with a brush, you'd paint the back-front, not the front that's closer to you since it's facing the other way.
But I dont get how I can even get to the inside of the mouth right now?
Its blocked off by the front of the mouth...
And if I do them as seperate geometries how do I combine them later on?
The shift-rmb marking menu is context sensitive, you'd need to be in a component mode (vert/edge/face) on the mesh you want to edit and have something selected for it to appear. Same with separate, you can select some faces, shift-rmb >Separate to pull those off into a new object. Combine works similarly, select two or more objects, shift-rmb and Combine. I call out the marking menus since I use them constantly, these are all functions in the top menus, but I'm too lazy to look up which ones.
So, getting inside the mouth. I assume that you're working on someone elses model that you've imported. If the mouth parts are separate objects, you can find them in the Outliner. If they are, you can move them around, hide the other objects, or use the panel menu's Show>Isolate Selected. If the whole thing is one model, you'll have some fun times ahead with getting a selection, so here's some tips: Double-clicking a face will select everything that's welded to it, AKA Shell. If you find the mouthbag is welded to the head, you could select an edge loop along the inside of the mouth and Detach, leaving you with an easy selection of the mouth interior. Or, if the UVs are easy to get to, you can make a selection from that. Or the < and > keys will contract or expand a selection.
So I ended up going back in ZBrush to isolate the mouth tunnel and export it as an obj and now in maya i reveresed the normals like you said and can work on it with quad draw...
Question...
After I finished working on it,
Do I need to re reverse the normals? Or can I leave it as it is?
And also how do I connect the seperate geometry of the mouth tunnel and the outside face?
(Would I reverse the normals and then combine the edges of each of the mouth tunnel and insde of head geometries?)
The only thing is the detach only works on the opposite faces of the face that I used detach on?
How can it be done to be symmetrical and applied to both?(In the picture....Left is detached, Right was the one I did...
Shift-rmb>Press Q to be in Selection mode>Select only one of the faces>Detach it>(In component mode=Face Mode for what I just did(But vertex face and Vertex mode are also component modes)))
UPDATE)
Actually I just discovered that both faces are detached.
HOWEVER when going back into quad draw mode to move the vertex,
Say i decide to move the one on the right, then the left faces are seperated
But if I now go and move the vertex on the left the Right side gets seperated
So both are detached!
HOwever...this not in synic movement of the vertexes causes loss in symmetry...
As I will post
but no "Seperate" faces option like you mentioned?
Yes, you'll want to re-reverse the normals on the mouthbag. It's typical for a game engine to render meshes single-sided, so you'd see through to the world when the character opens their mouth. Combining it back with the head is up to you, or whatever needs the head animations need to have. It could easily exist as its own object or part of the head. If you do join them, then yes, you'd want to also weld the verts along the mouth and mouthbag.
I tend not to use Maya's symmetry because of things like that, as much as it's improved over the years and I can be pretty anal, but I don't do much character stuff these days. (I stick with the old-school method where you duplicate half the mesh as an instance with the scale inverted) Autodesk has this page up on re-symmetrizing, i've honestly never used that before. Symmetry has a few options for how it's applied, sometimes it's best to leave it to World or Object space, other times it's better to use Component.
Because when sculpting realism, the sculptors purposely use asymmetry on the face to make it more realistic.
__________________________________
Actually now that I think about it...my model isnt perfectly symmetrical either...
Would a symmetrical retopology on live surface adapt itself to the asymmetries?
Update) Just found out, what the retopology does on live surface is it takes the average of both side and that becomes the retopo.
So if the left side is a peak and the right side if flat, the retopo becomes half a peak on both sides but the resulting topology is still symmetrical.
then would that mean that the asymmetry doesnt really affect the normal maps?
For this I guess its probably not true since a lot of Triple A studios have symmetrical retopos on high realistic char. Like Uncarted 4 and its still works fine.
_________________________________
I guess my real question would be,
how do I split the model perfectly along the half mark line to start retopo?
I'm not sure I understand your question exactly here, I think you're overthinking a step?
You really explained everything really well, Im very grateful