The BRAWL² Tournament Challenge has been announced!
It starts May 12, and ends Oct 17. Let's see what you got!
https://polycount.com/discussion/237047/the-brawl²-tournament
It starts May 12, and ends Oct 17. Let's see what you got!
https://polycount.com/discussion/237047/the-brawl²-tournament
[Blender] [UE4] Scene practice
Of course I posted it by mistake, and can't get it off till its finished. Srry guys, I'm editing it, please be patient! Thanks!
Introduction
Hi there everyone!I'm kinda new here, a really short introduction won't be painful I believe. I work as a UI / UX designer at the moment, and I've started to play around with 3D art for like a year ago. Traditional / digital art always interested me, drawing and painting is really close to me.
This project is like a playground for me. I decided to prepare high quality props for game development, and I'm far from the nextgen stuff I wish to create. Don't expect fantastic areas, I'm really taking everything step by step.
However, I hope I won't giving you boring stuff, and you find some delight in my work.
First topic I get interested in was the tessellation in UE4. Creating these awesome materials from creating high poly meshes and mapping all the textures you need, it's just a brilliant way to optimize the performance. I got kind of inspired by the tutorial of Fanny Vergne, because it shows a clear pipeline of her work.
On my print screens, you will see some elvish styled structures, those were the practice models for getting a picture about Blender. I've used Maya for a longer time, and it was a huge turn to get familiar with the UI of Blender. For the record, I already new some horrible steps I took creating those, so later on, I will recreate them, and I will update the creation of those aswell.
I think I earned to be slapped for this wall of text, it's time to show you something after all.
Please, let me know your thoughts about my practice exercise or point out my obvious mistakes.
Thanks, p0zitr0n aka Gabor
TESSELLATION / MATERIAL CREATION
1. Creating the low poly mesh
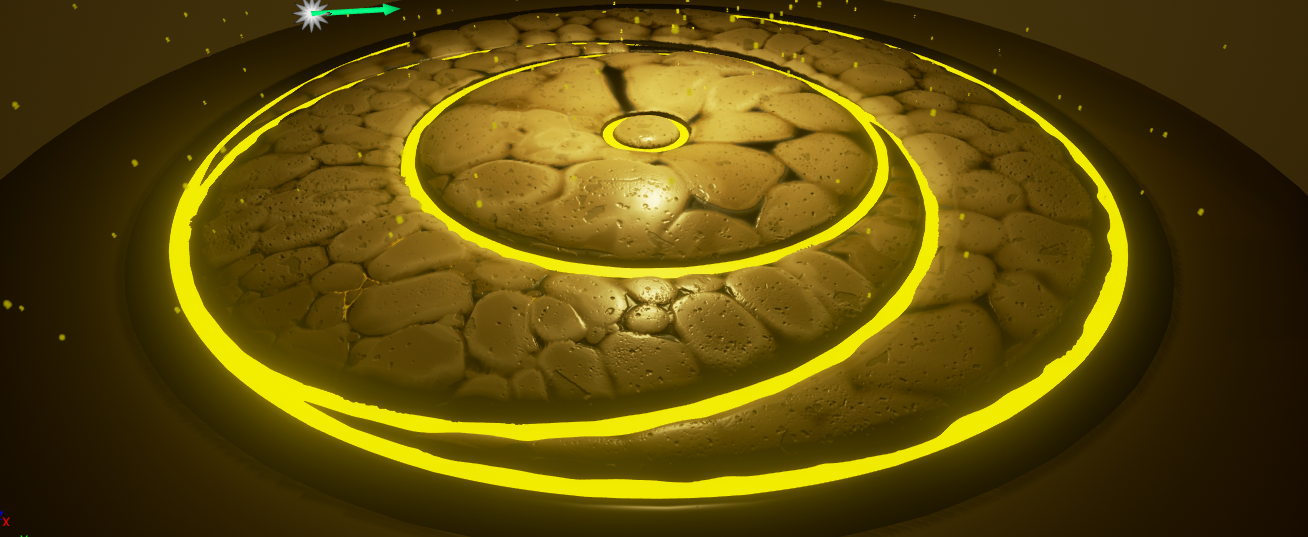
Not much to say. After some inner brainstorming, I've drawn a simple, clean template in PS, and based on that, I've created a really simple circular model. It is wise to set up the UV map, till it's get "messy".
2. Creating the high poly mesh
Next step was to get some extra loops, for creating even quads. Those will help to get nice subdividing, and prevents odd forms later on wih sculpting. ( Well, I'm not sure if this step is a must have, dynamesh is kinda about retopologizing and subdividing with a setable resolution. I experienced it helped for me, cause I had to trash a first version, when I added extra loops for getting sharp edges. Maybe I haven't tap on a button which would do that one more time. I have to get use to the UI of Zbrush )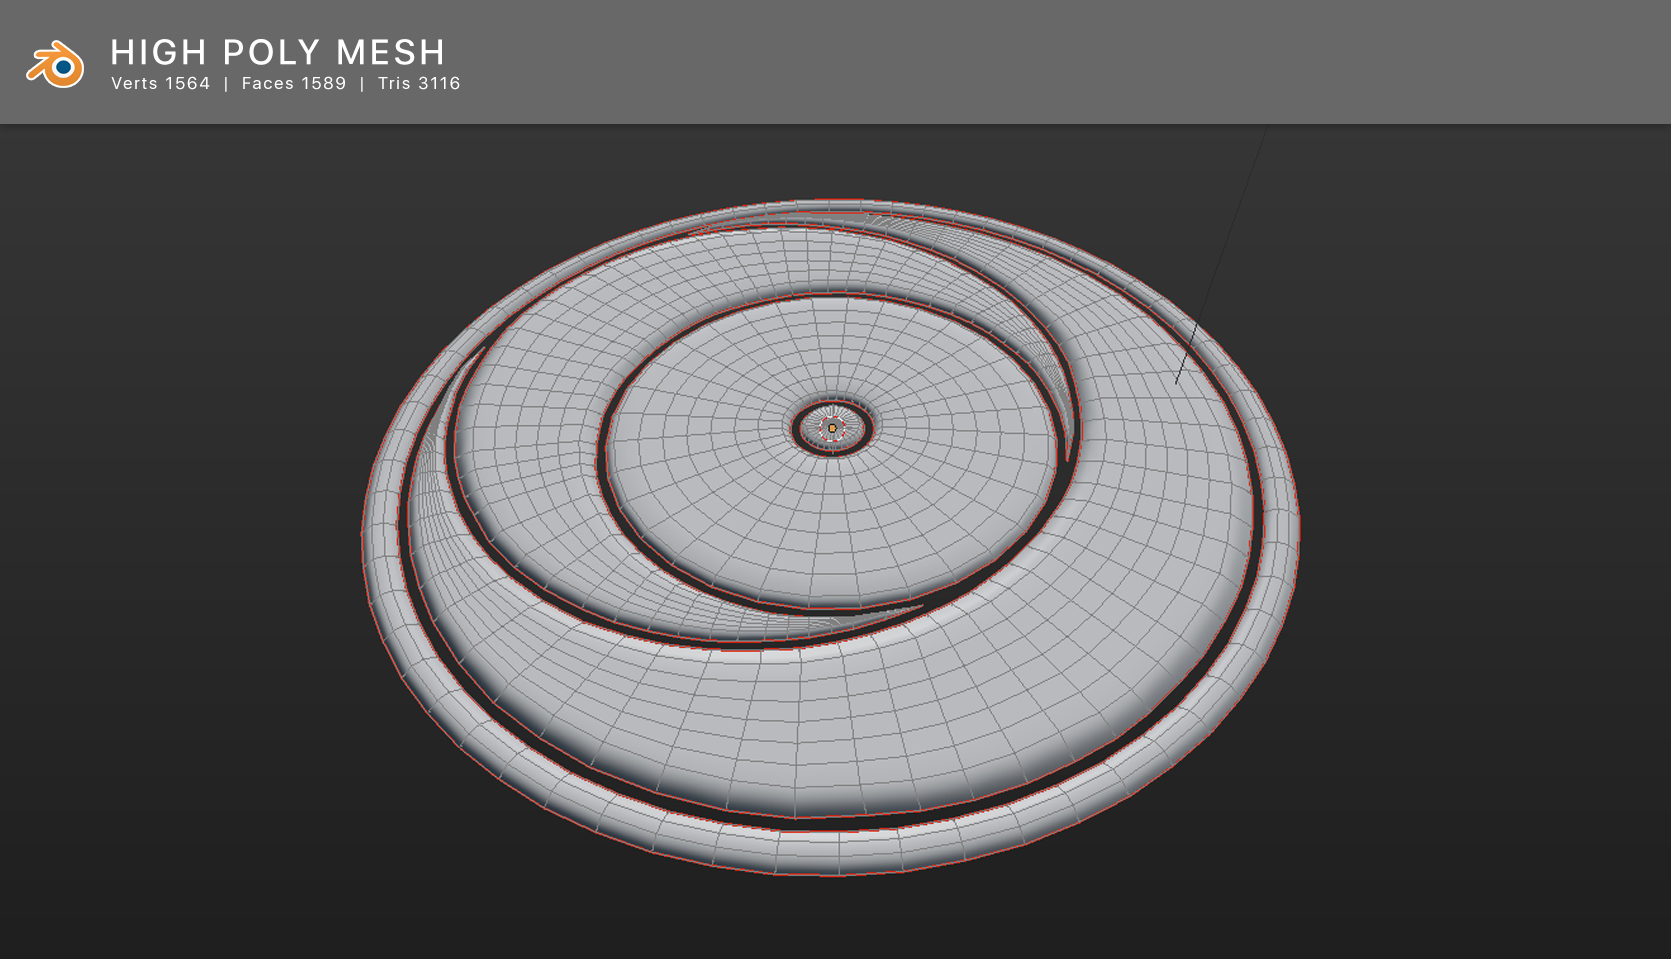
Sent on it about 4-5 steps subdividing. At this point, we grab our blend file, and we'll export it for a suitable format which is appropriate for the appetite of the ZBrush. Personally, I prefer FBX files, but OBJ will work aswell. As I mentioned before, we'll use the dynamesh funcion on our imported geometry. Well, my current PC is not that powerful, so my "high poly" meshes wont be that high, and for the generated textures, I'll work with "only" 2048 x 2048 or 4096 x 4096 resolution.
3. Sculpting the high poly mesh
For sculpting, I used ZBrush. Now this is a professional tool, that never ceases to amaze me. Mostly I used the Clay, Smooth, Flatter and Pinch brushes. For the matcap I set the red wax. It is an experimental project, so I haven't sculpted all the model, I only wished to see how can I create the tessellation based material in UE4.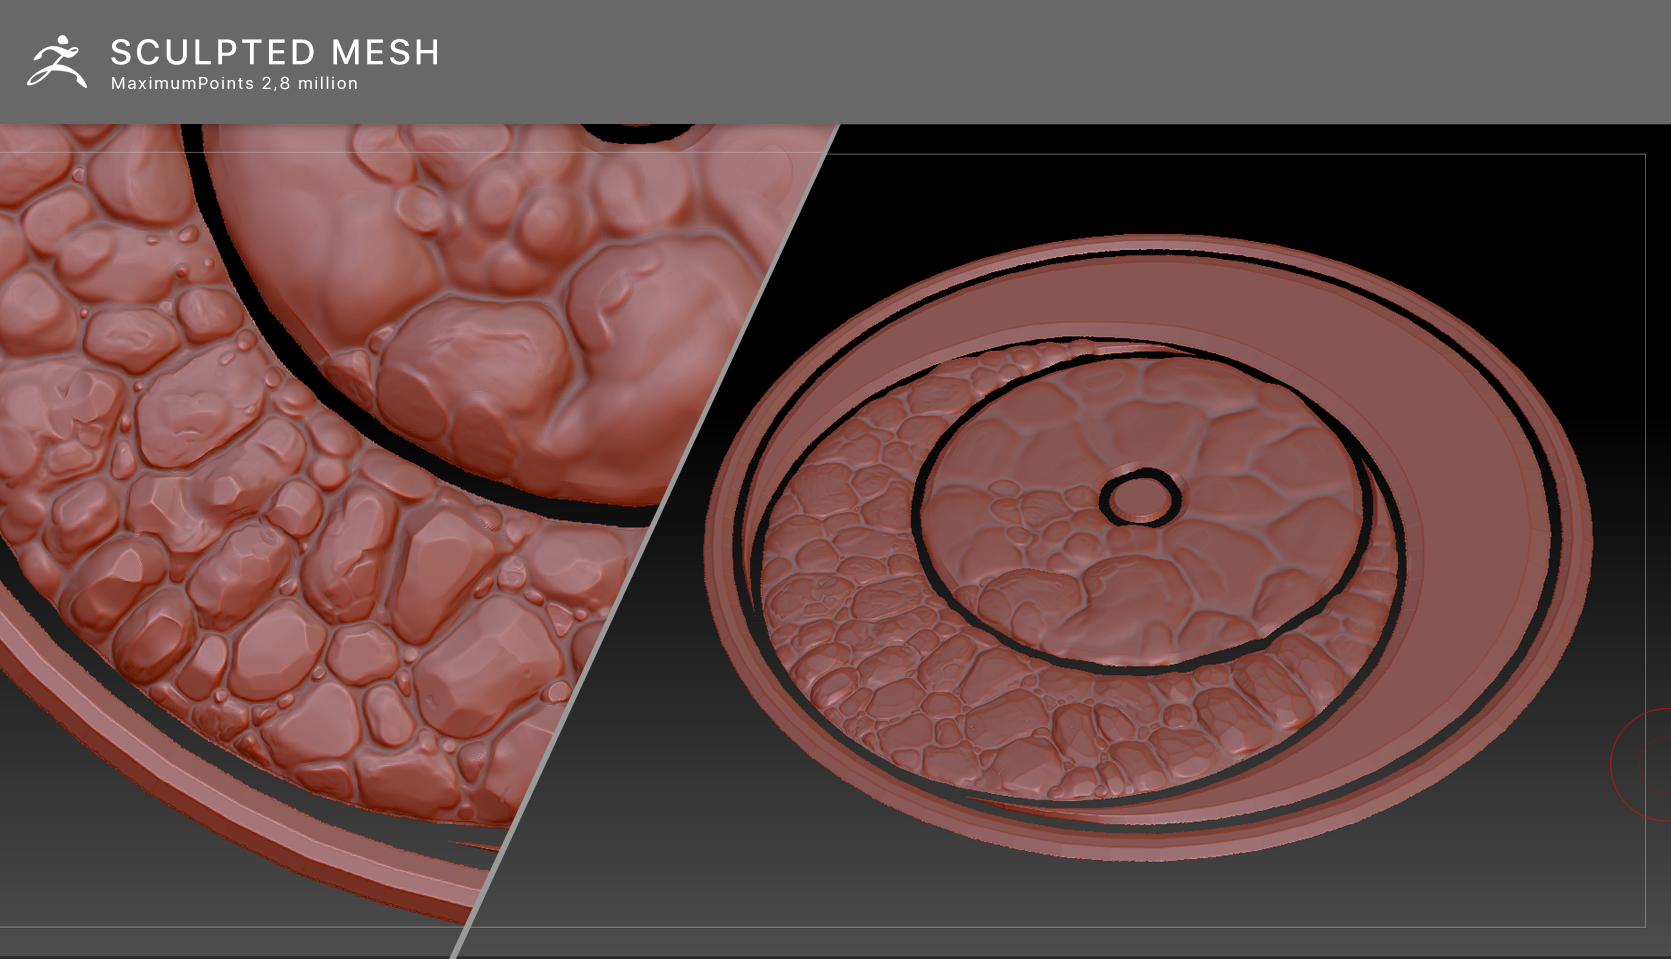
I've exported the high poly mesh, when I was satisfied with my results. We are almost at the fun part.
4. Generating the maps
For generating the maps we need, I use xNormal. As far as I know, ZBrush has the toolset to export some too, however, I haven't tried its featureset yet. Back to xNormal, load in the low and high poly mesh, and change any settings you wish. Usually I need the following textures:- Ambient occlusion map
This one gives your model how its surface is exposed is to ambient light, so its provides some additional realism feeling. - Height map
We need this for the actual displacement. Yaaay! Kind of like giving a half soul to my stones. This will make them sticking out from the low poly model. - Normal map
Moar details right on the top of our main displacement. Yaaaaay for the little bumps and scars and etc. ! - Diffuse map
Now this gives the base coloring of our material. It's like you grab a brush and a bucket of paint, and you let off your imagination stroking on the surface of your model. I guess it's the second part of that soul. - Specular map
These maps are for defineing the shininess and highlight color.
5. Getting into UE4
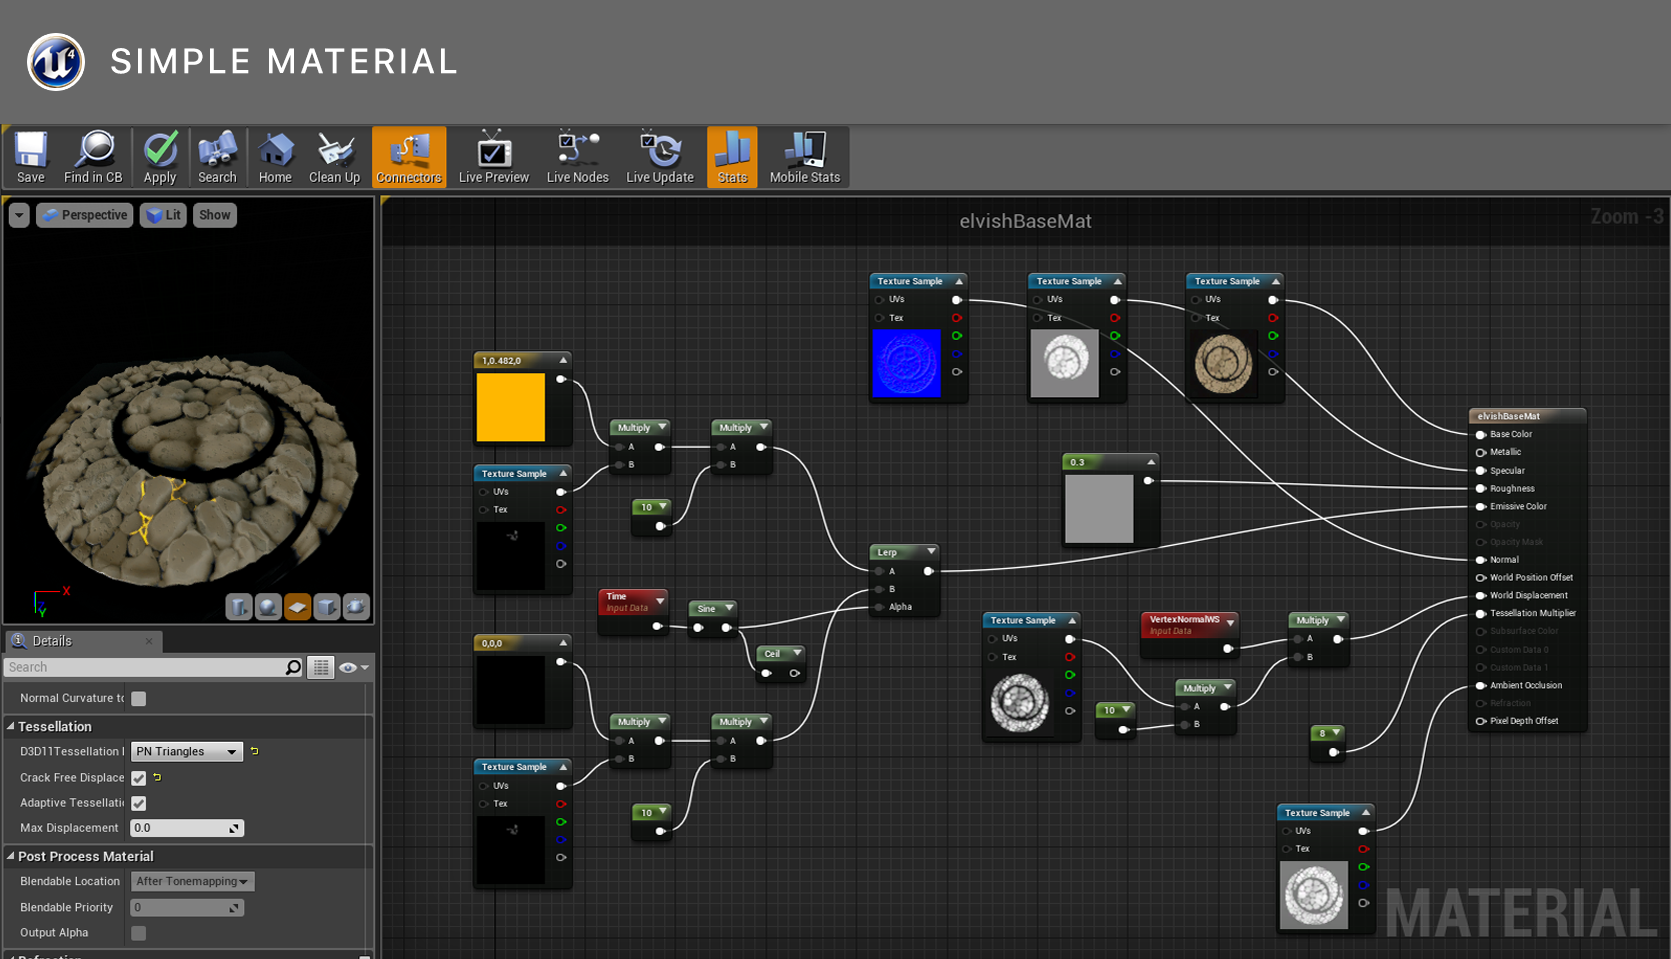
Okay, we got everything we need to reach our goal. Let's jump into our beloved UE4. I simply created a default fps scene, and imported the low poly model. Let's pop it into the scene, with a built in material, which contains a simple color as basic color and some roughness value.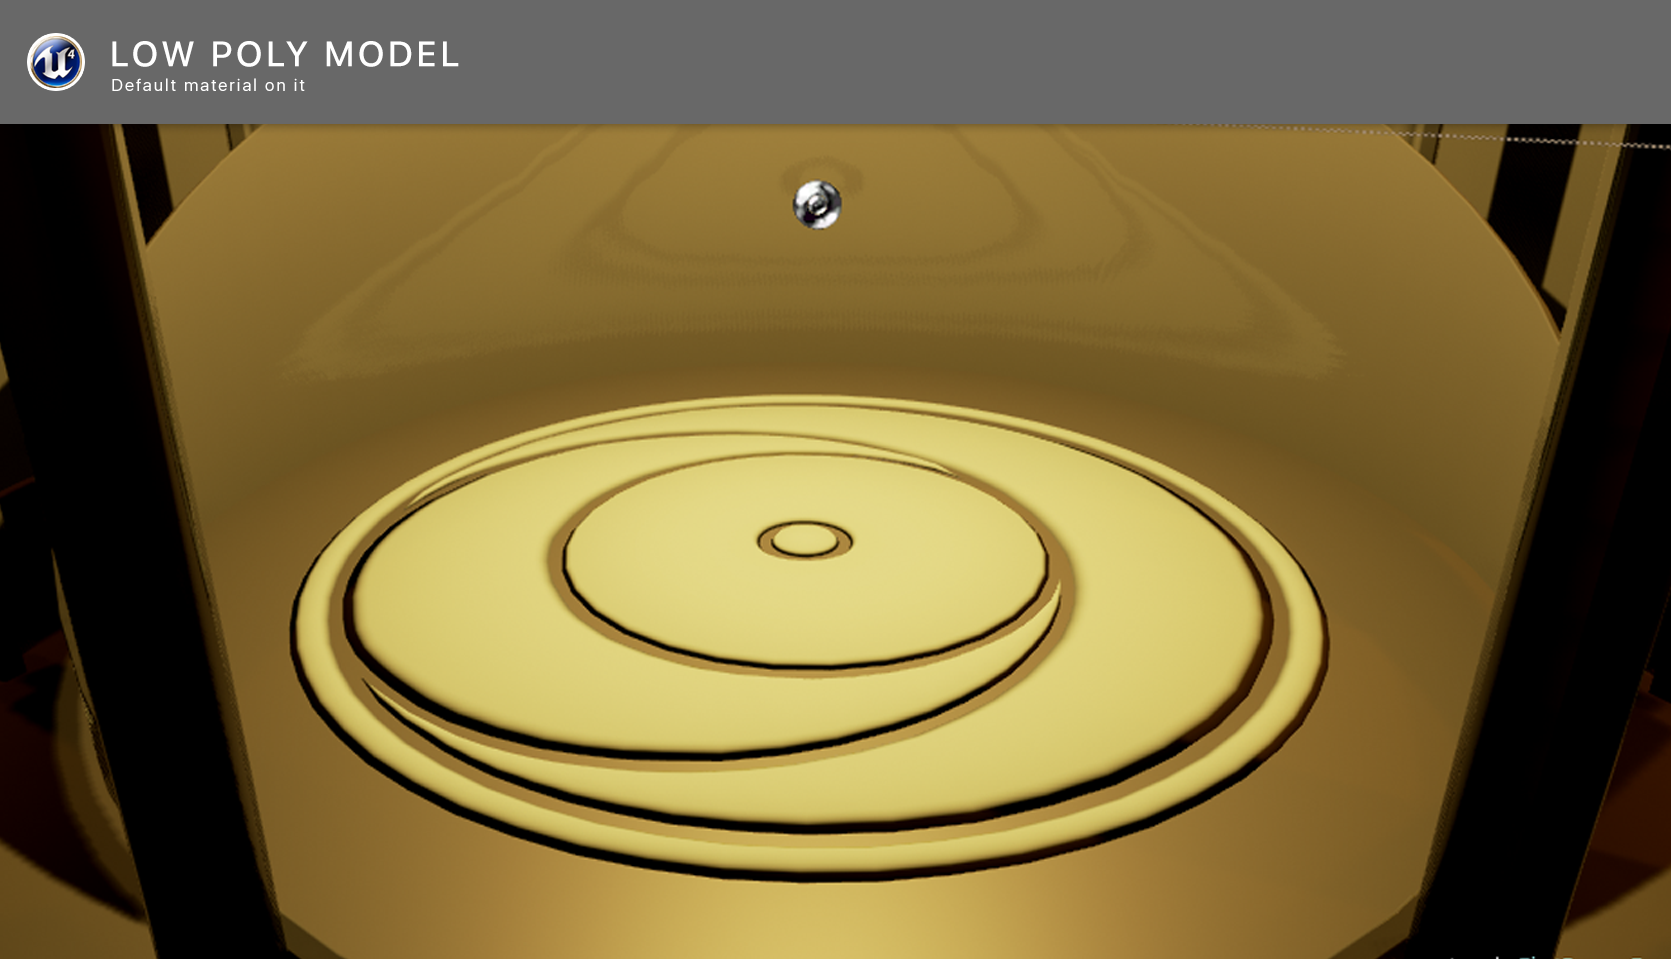
Yay, it's already pretty awesome, right? Lets make it a bit more detailed
