Home Featured Artwork

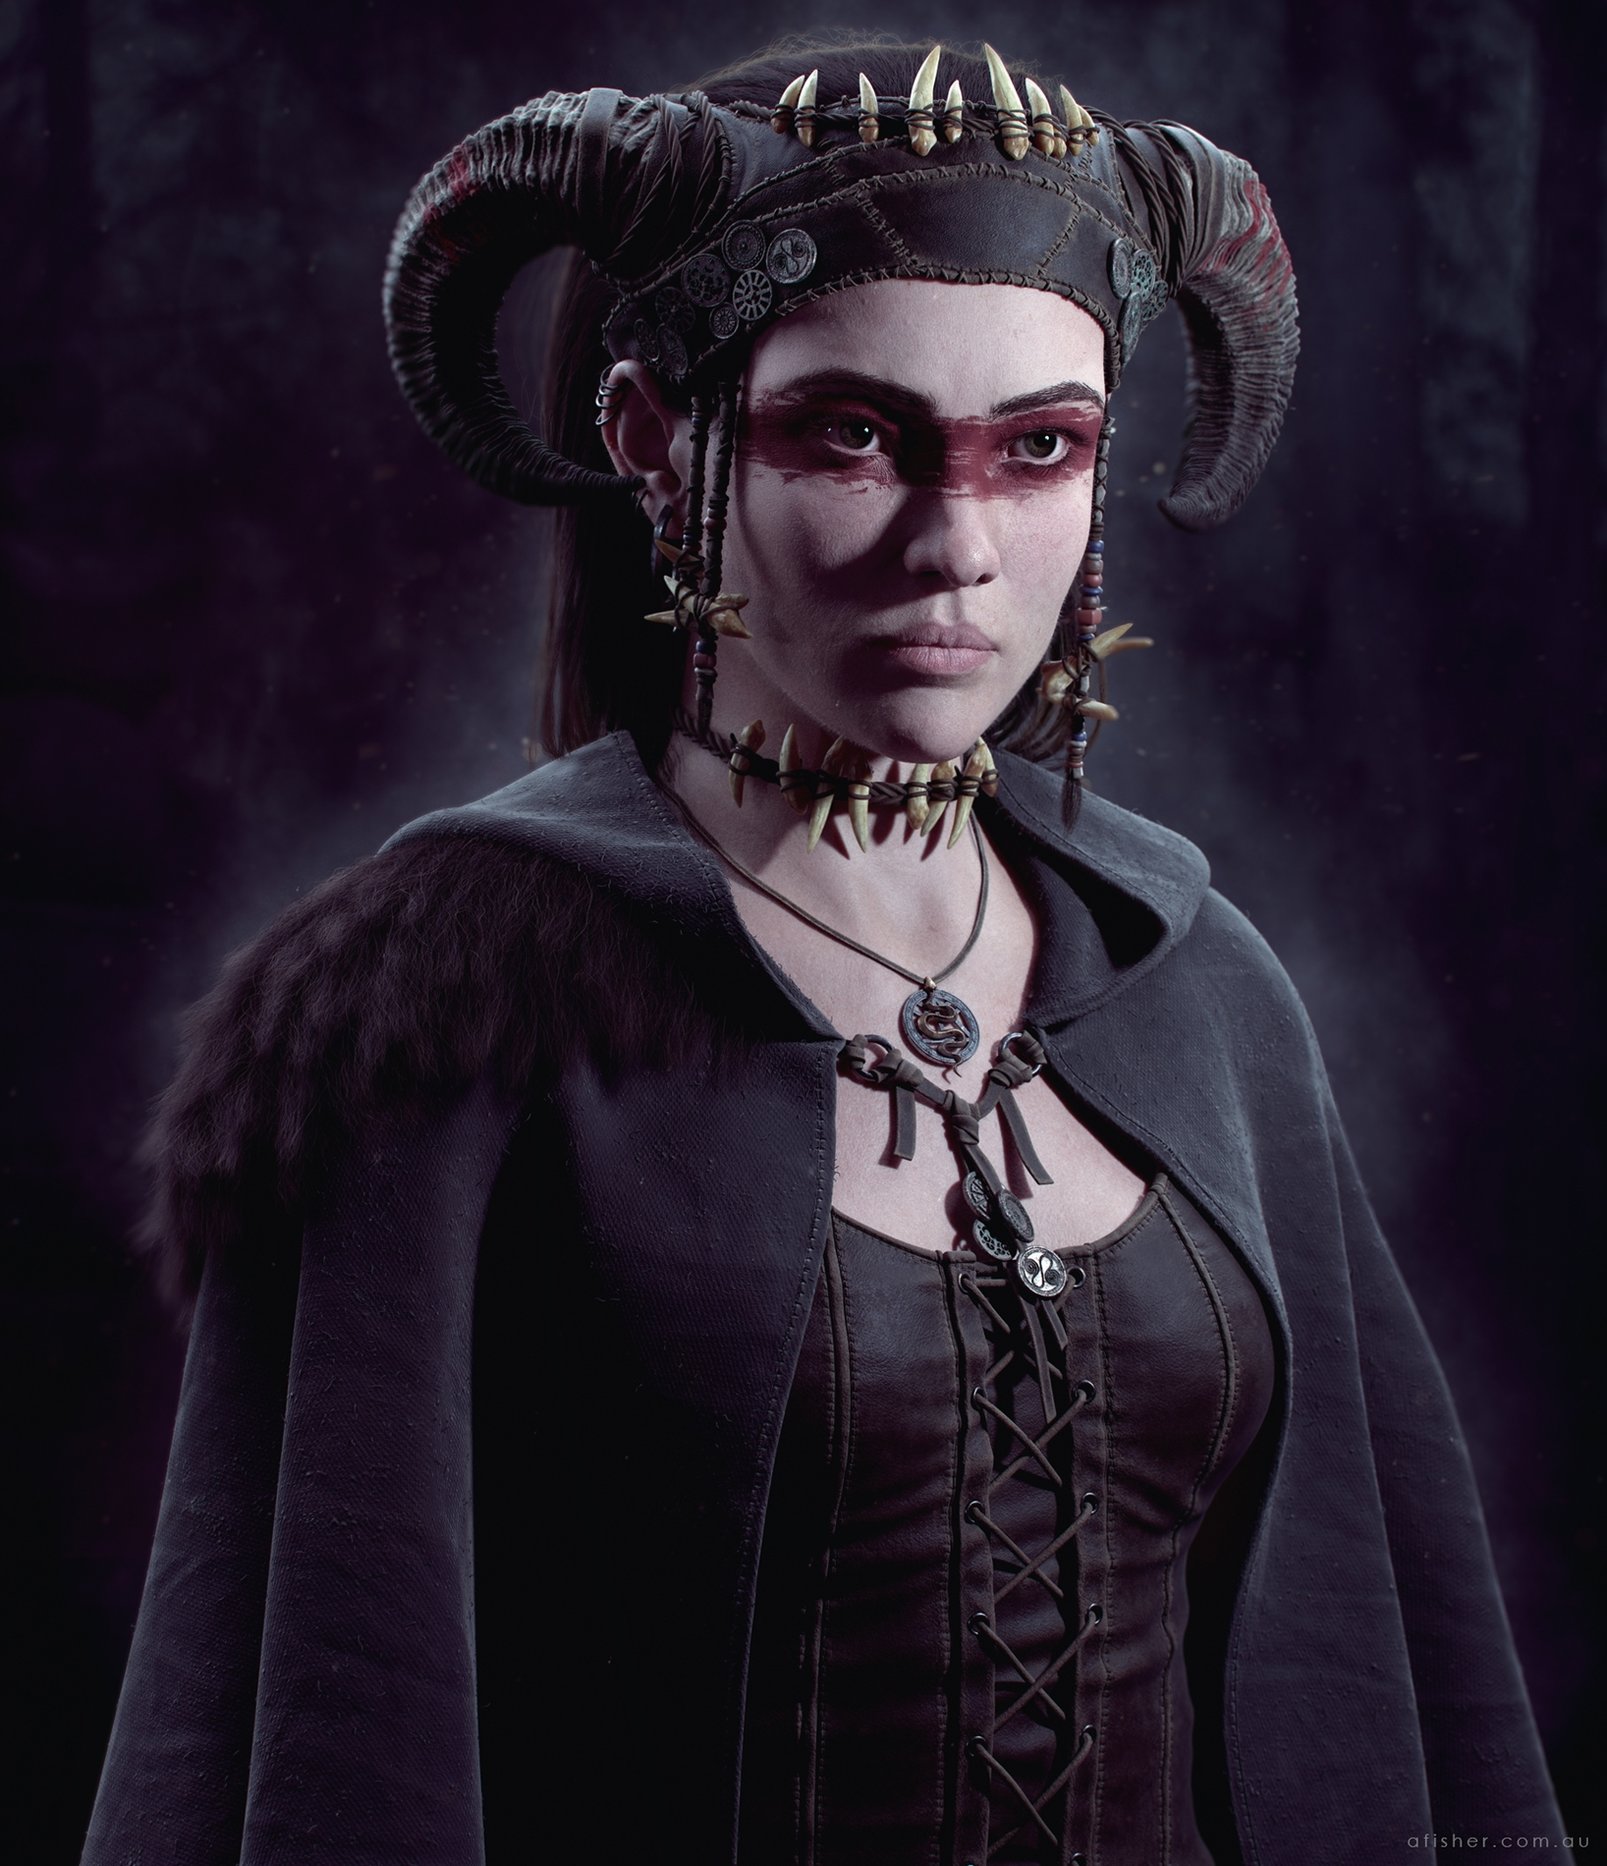
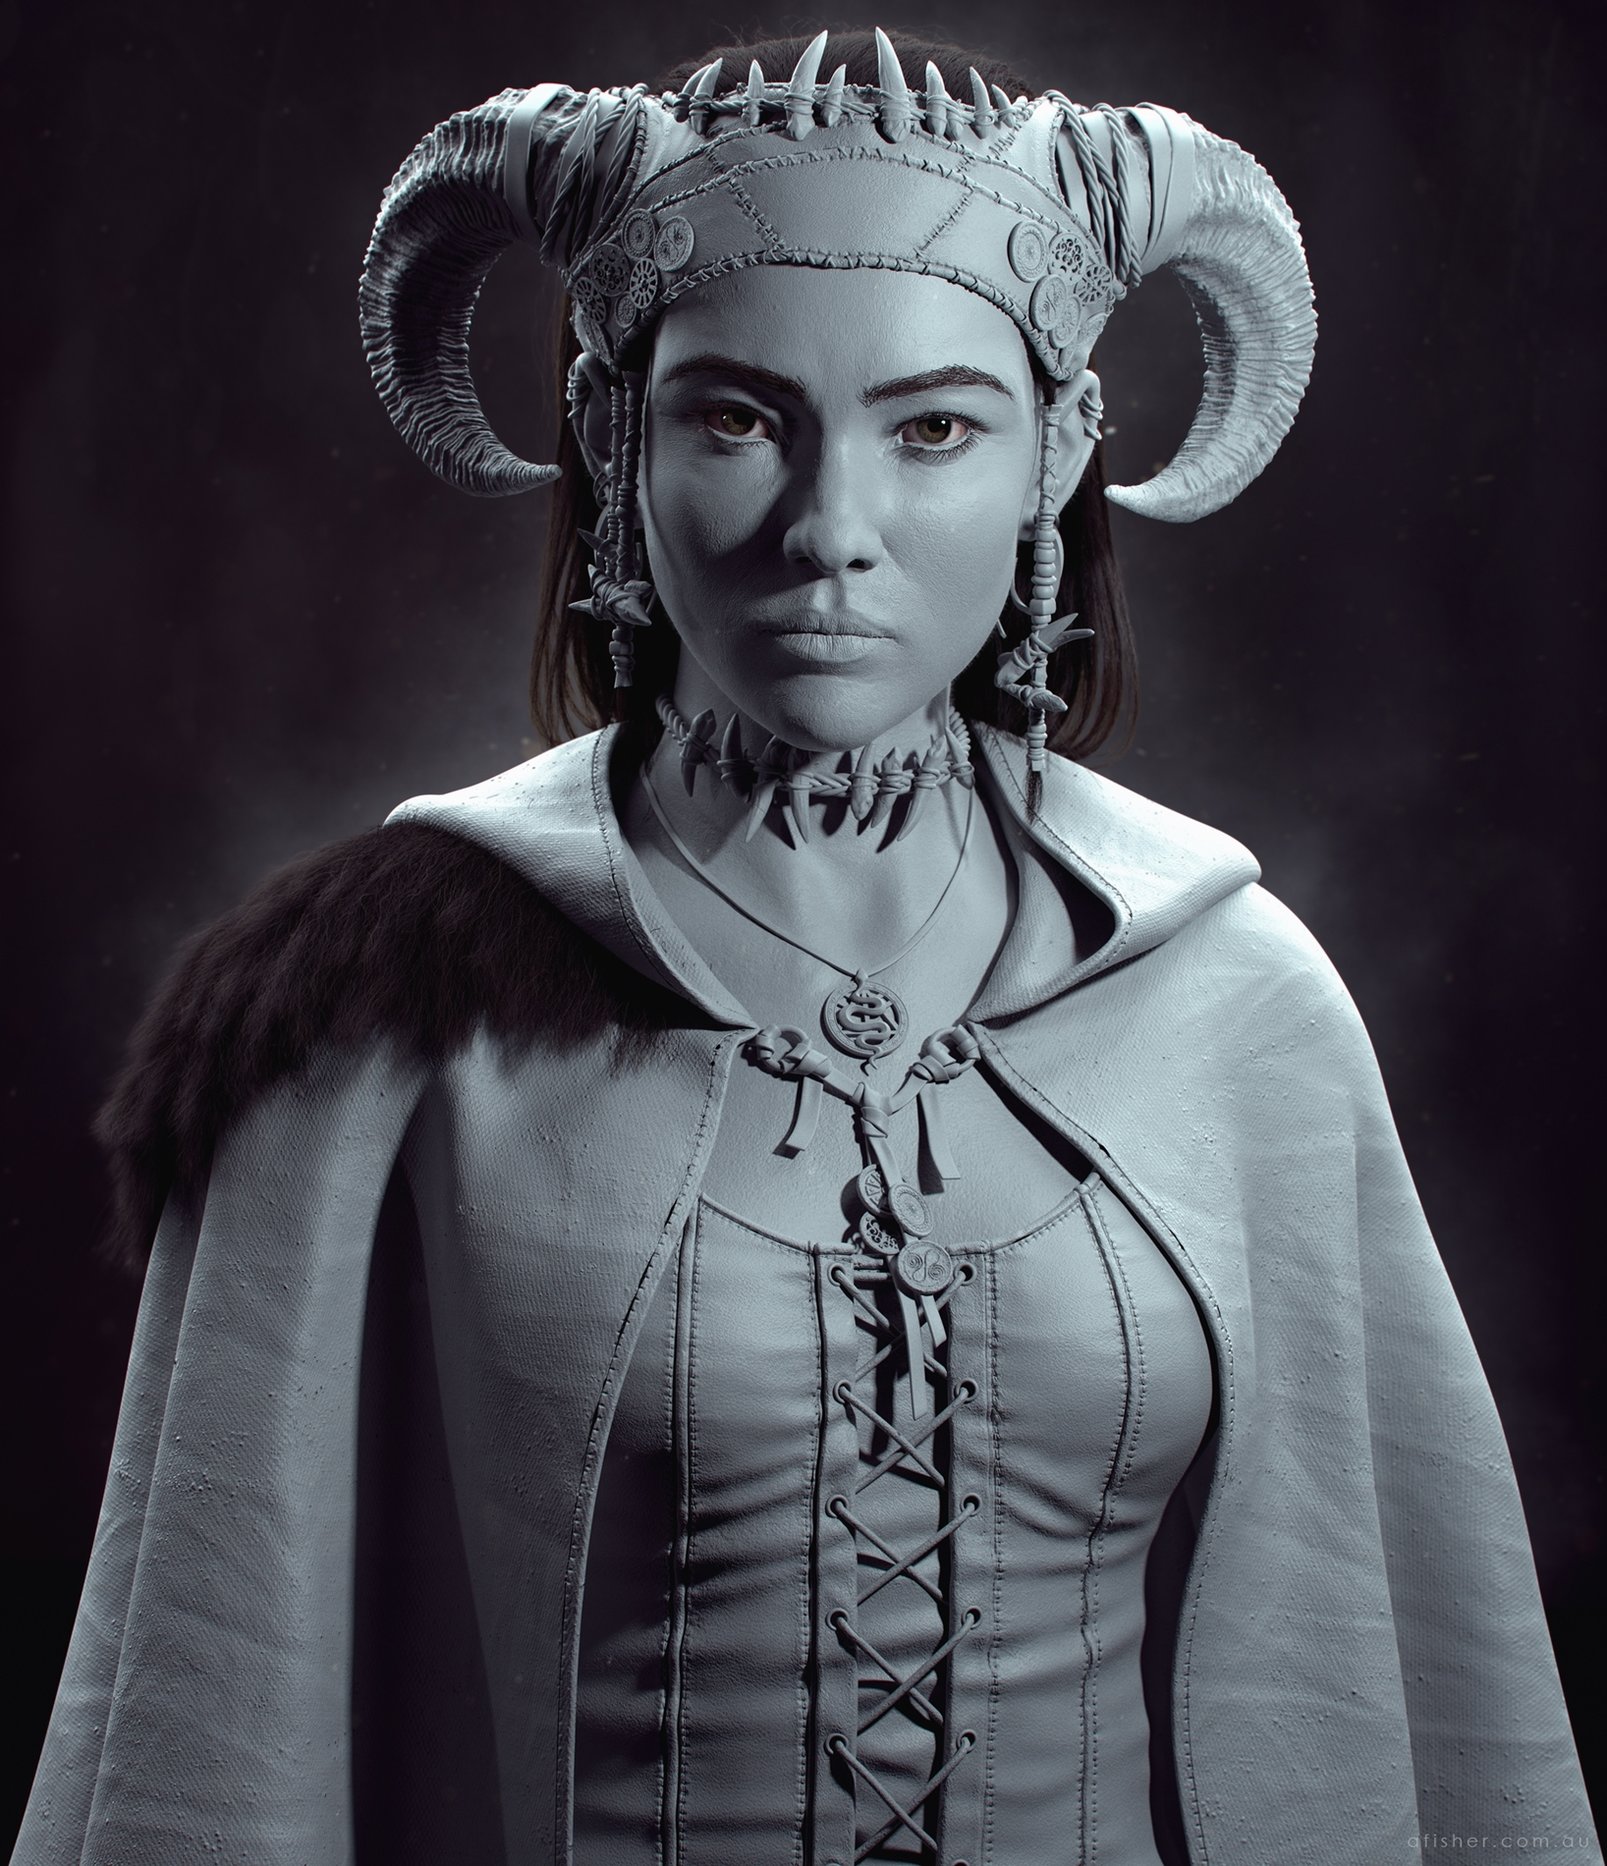
Priestess

polycounter lvl 6
Offline / Send Message
Pinned
afisher polycounter lvl 6
Hi everyone,
I posted a cropped version of this in waywo the other week, but I wanted to create a thread to share the full final images here. 

The model was created in Maya and Zbrush. The hair was done in xgen and I relied mostly on Substance Painter for the textures. The renders were done in Vray with some post adjustments done in Photoshop. Thanks!




Replies

  • kohg
    Offline / Send Message
    kohg polycounter lvl 9
    Sir, you did it again.

    Did you happen to use zbrush's polypaint or was it all substance?
  • Justo
    Offline / Send Message
    Justo polycounter
    Hey Adam, superb work as always. With XGen, I assume you worked with groomable splines? What's your opinion of the plugin when using it to create poly cards for the hair?
  • afisher
    Offline / Send Message
    afisher polycounter lvl 6
    @kohg - Thanks. No I didn't use polypaint. I did a base texture projection in Mari, then did most of the work in Painter with some adjustments in Photoshop.

    @Justo - Thanks mate. I used splines for the long hair and groomable splines for the pelt hair. I haven't used it for hair cards yet, but i think it could work for getting a decent base and then going in manually to finesse it. 
  • musashidan
    Offline / Send Message
    musashidan high dynamic range
    Beautiful work. The character is very interesting. Is it your own design?
  • floon
    Offline / Send Message
    floon greentooth

    Kudos! Very well done!
    Love the depth of the corsage and the details on the headpiece… and pretty much everything else :)!

    Stupid question though:
    This is still quite highpoly right? If so, how did texturing in substance work out for you, given the polycount?
    And did you add the cloth detail in zbrush or substance?

  • Sunray
    Offline / Send Message
    Sunray polycounter lvl 7
    afisher said:
    @kohg - Thanks. No I didn't use polypaint. I did a base texture projection in Mari, then did most of the work in Painter with some adjustments in Photoshop.

    @Justo - Thanks mate. I used splines for the long hair and groomable splines for the pelt hair. I haven't used it for hair cards yet, but i think it could work for getting a decent base and then going in manually to finesse it. 
    Oh dude i love this character so much i was wondering where did you get the face textures from that you used with mari? Did you just use 3dsk faces and tried to edit the lighting out in photoshop. I would love to hear how you did it 
  • afisher
    Offline / Send Message
    afisher polycounter lvl 6
    @musashidan Thanks, yeah it's my own design.
    @floon Cheers mate. Well it's rendered using displacement maps, but the base geometry isn't too high. Substance Painter handled it fine. I just textured things separately to avoid the Painter files getting too large. For the cloth, some of the larger details were sculpted in, while others are applied as a bump map. For example the stitches and memory folds are 1 bump map and the small fabric pattern is another tilable bump map.
    @Sunray Glad you like her :) The base textures are from texturing XYZ. I actually just did a small write up for them you can check it out here: 
    http://texturing.xyz/pages/adam-fisher-making-of-priestess
    If you have any other questions, just let me know.
  • Sunray
    Offline / Send Message
    Sunray polycounter lvl 7
    afisher said:
    @musashidan Thanks, yeah it's my own design.
    @floon Cheers mate. Well it's rendered using displacement maps, but the base geometry isn't too high. Substance Painter handled it fine. I just textured things separately to avoid the Painter files getting too large. For the cloth, some of the larger details were sculpted in, while others are applied as a bump map. For example the stitches and memory folds are 1 bump map and the small fabric pattern is another tilable bump map.
    @Sunray Glad you like her :) The base textures are from texturing XYZ. I actually just did a small write up for them you can check it out here: 
    http://texturing.xyz/pages/adam-fisher-making-of-priestess
    If you have any other questions, just let me know.
    Thanks for the reply man, and the breakdown I'm currently stuck on the texturing my face and body so it really helps. I was wondering about how far you took the texturing in mari before you started in painter. And I didn't really understand this step.

     When painting the skin I like to use some custom scatter brushes with various alphas. In Photoshop I extracted a few areas from the Female Face 20 FullFace #07 maps and created some black and white alphas from them. These alphas were then used in the previously mentioned scatter bush to add a subtle realistic looking effect to the skin texture.

    Could you maybe explain a bit further and did you also got the eye textures from texturingxyz?

    Thanks a lot man
  • afisher
    Offline / Send Message
    afisher polycounter lvl 6
    Sorry if that caused some confusion. Firstly, the initial projection in Mari was just a quick pass. The purpose for this was to mainly get some base values to work with. I wasn't worried too much about any projection errors or if anything was done perfectly. The majority of the clean up and painting was done in Painter. If you are more comfortable in Painter, the base projection can be done there or you can skip this step and go straight to painting. The procedural textures in Painter can help speed this up. 

    The second part is just about creating black and white alphas from the XYZ maps. I chose a few areas and made various alphas to be used in a scatter brush in Painter. You can see a couple of the alphas that I created from the XYZ maps (as well as some simpler mottle alphas that I created ages ago) in the image below :


    And no I didn't use the XYZ eye maps. The ones I used in this project are a modified version of eye textures I created for previous projects.
    Hope that helps to explain things better.
  • floon
    Offline / Send Message
    floon greentooth
    @afisher
    Thanks a lot for giving an insight into your process :). Keep up the good work!
  • Sunray
    Offline / Send Message
    Sunray polycounter lvl 7
    @afisher
    Thanks dude really helpful I'm going to try this, I'm trying to find a good workflow to texture bodies and faces and this looks pretty nice. I had a question when I'm using the paint through tool in mari can I flip the image vertical I can't find it anywhere.
  • le0tard
    Offline / Send Message
    le0tard polycounter lvl 10
    holy shit, i am amazed. Gj mate.
  • afisher
    Offline / Send Message
    afisher polycounter lvl 6
    Thanks guys :)
    @Sunray You can flip the image in Tool Properties>Texture>Scale and change the horizontal and/or vertical input to a negative number.
  • Sunray
    Offline / Send Message
    Sunray polycounter lvl 7
    afisher said:
    Thanks guys :)
    @Sunray You can flip the image in Tool Properties>Texture>Scale and change the horizontal and/or vertical input to a negative number.
    Thanks, man you're a life saver I was flipping images in photoshop and exporting them haha.
Sign In or Register to comment.