The BRAWL² Tournament Challenge has been announced!
It starts May 12, and ends Oct 17. Let's see what you got!
https://polycount.com/discussion/237047/the-brawl²-tournament
It starts May 12, and ends Oct 17. Let's see what you got!
https://polycount.com/discussion/237047/the-brawl²-tournament
Reallusions's 3d Character Design Contest _Hiro_Nakazawa
Hi,
I made an Animation Model by CC Base Model with utilizing low poly 3D Character Shape in the CadNav.com. I' m afraid whether this approach meets the contest rule or not.
DDS Texture format was converted, cloth and accessories were copied and detached for the CC Base body exported from Character Creator.
CC Base Body with Calibration Motion was used to attach and skin the cloth and accessories in the Max.
The basic process is reported in my report. http://hirospot.web.fc2.com/FantasyGirlFairy_CCModel/index.htm
Please also visit my trial Video.
Video: Fantasy Girl Fairy CC Character: https://www.youtube.com/watch?v=JhtNmwda_20
Thank you,
Hiro Nakazawa
Please also visit my trial Video.
Video: Fantasy Girl Fairy CC Character:
 https://www.youtube.com/watch?v=JhtNmwda_20
Thank you,
Hiro Nakazawa

Replies
Thank you very much for publishing my work on the Entry List this time.
I could not post a WIP because I was not sure to keep the Time Limit.
All my working process is recorded in my personal report, http://hirospot.web.fc2.com/FantasyGirlFairy_CCModel/index.htm
however, I will make my work process as a WIP style from now.
Thank you again,
Hiro Nakazawa
2016.9.25
It is not possible for me to create a 3D Animation Character from scratch, so I was thinking to use Character Creator model as a base body.
When I was looking for the Idea in the internet, I found 3D CadNav.com site.
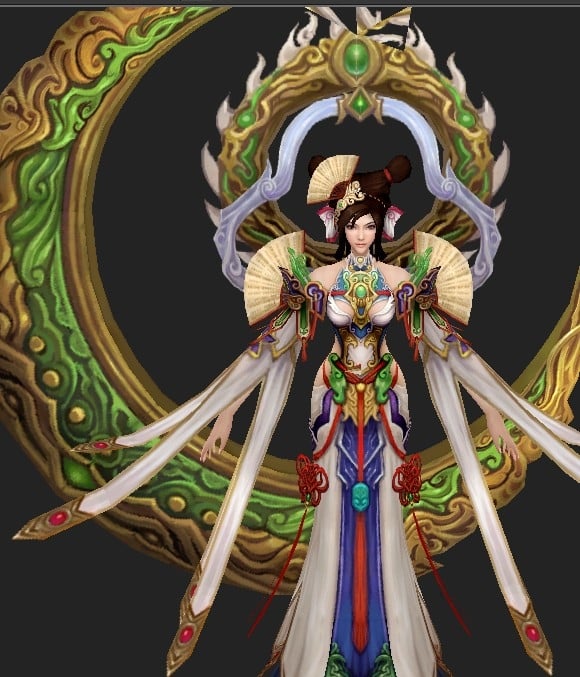
Among lots of 3D data, I found the "Fantasy girl fairy 3D model"..
According to the site notice, free download for the personal and commercial use was allowed and accepted.

This Model was not Rigged and made by .max format with 3900 Polygons. I decided to download and started the process.2016.9.25- - -10.3

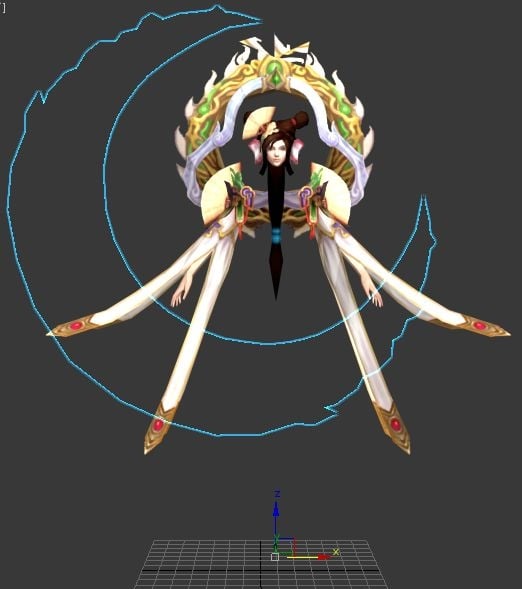
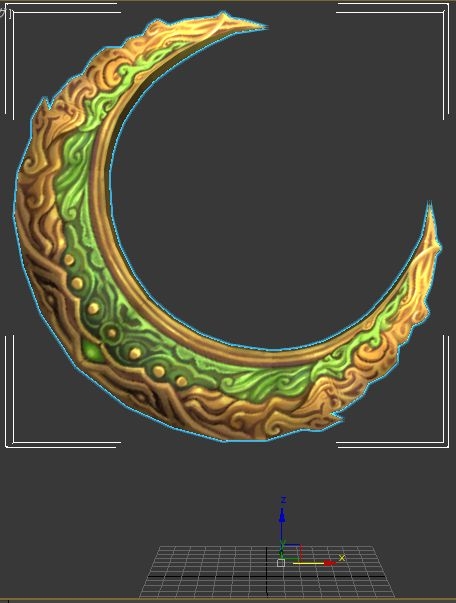
By analyzing the Model in the 3dsMax, it was found the Model was composed by the following three static components.

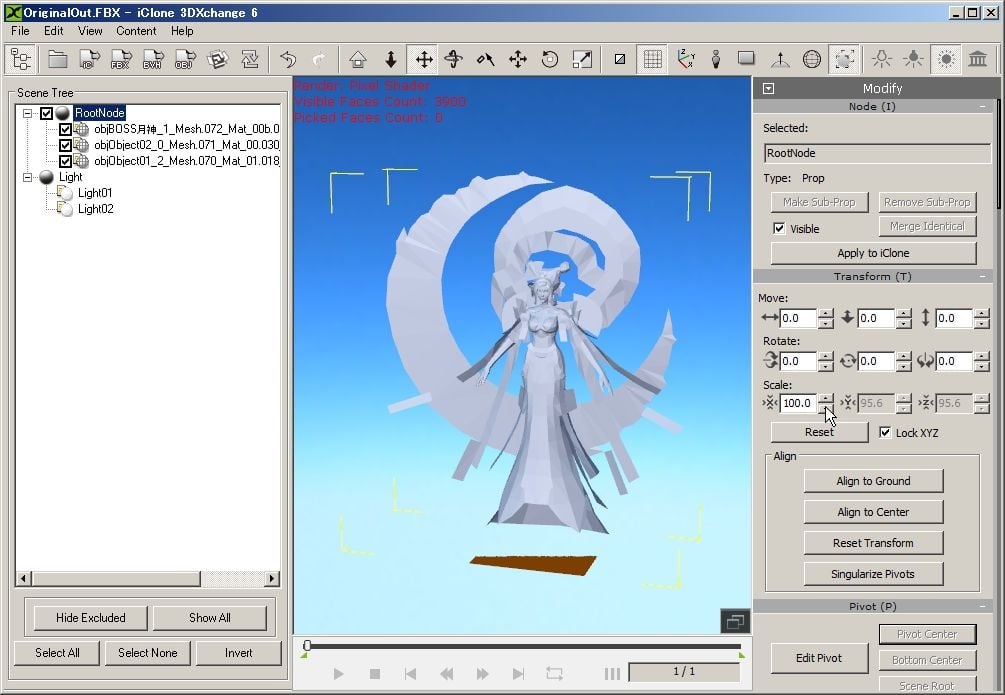
The Model was exported to 3DXchange by FBX format and found the Size was too big and no texture was shown.
The Model texture was found as DDS format and converted to JPG by using Online Converter.Work Flow and major Tools were expected as follows.
The model face has only 398 polycount, and Smooth Modifier/AutoSmooth was applied in the Max.
The model face was enhanced in the FaceFilter 3, pixel size was changed from 512x512 to 2000x2000 for the Reference Image use in the CT8.
By importing the Face Image into CT8, 3D head was created automatically by just adjusting the Fitting points at Fitting Stage.
Head Creation by CT8 was very successful.
The 3D head was sent to Character Creator.
Comea Diffuse Image was replaced for the better insight.
To make the Fairy body line for the Base Body, Image Template was made.
By using the free winthrutouch tool, this Template became translucent.
So, Base Body shape was adjusted to fit the Template.
After Fantasy girl fairy model is loaded, model component was segregated by the expected body parts in Max.
Then, after new name was applied to the each body component, Schematic Diagram was prepared for the connection.
CC Base Model with Calibration motion was imported from Character Creator and placed at the center. Fantasy shape model was moved to the left.
All components were moved to the corresponding CC Body part and attached to each bone on the Schematic View.
Completed Schematic View Attach Table is shown.
The new CC Base body was exported by FBX format to 3DXchange and confirmed the attach status over the Calibration motion on the timeline.
Head part was excluded for hair replacement.
Skin Wrap is needed for the skin, so, select Skin Wrap in the Modifier List.
Same procedure is needed for all the component.
1) Select the component, select utility and Click Reset XForm, then Reset Selected.
2) Select Collapse utility and click Collapse Selected.
3) At Modifier List, select Slin Wrap.
4) Add the CC_Base_Body.
5) Check on Weight All Points and push Convert to Skin.
6) Skin is done to the assigned component automatically.
7) Select the needed Bone and confirm the Skin result..
As for the Fan, detach from the Shoulder component and attach to the Upperarm directly to prevent deformation.
Move timeline and confirm the Skin result by Calibration Motion on the Max and export the Skin Model to the 3DXchange.
Static Ponytail Hair need to replace with the Spring Tail Prop.
This experiment was done by using 3DXchange, 3Dtool and iClone 6.
1) Head Component was exported from Max to iClone 6 via 3DXchange. Hair Ring was attached to the Spring05 in the iClone 6.
2) By using Export Mesh feature of the 3DXchange, Spring Tail Prop was shaped with the Ring in the Quidam 3D and Replaced.
3) Static Hair was removed from Head Set in the Max and exported to 3DXchange
4) Head Set was replaced with new one with spring tail prop.
1) Erroneous UV was fixed by the UVW Unrap Modifier in the Max.
2) Viewport Canvas was also used to paint the details.
3) Editing the CC Base Body Mesh was only possible in the Character Creator.
2) Characterize the model and select [Map to Extend Bone].
3) Spring Bones are selected, activated and setting is confirmed by the Preview Motion/Animation.
1) Viseme Setting at the Expression Editor was not satisfactory and could not set the lip shape properly for each phoneme in the Lip Synching Table at that moment.
It was observed when UpperJaw moved, Upper Teeth was moving, thus not possible to open upper Lips in my test environment. This problem has not been solved yet and could not get the natural lip shape in the iClone.
2) Test Voice was made on the AVATAR TTS ON-DEMAND. Previwe Audio was tested by US Enlish/Female1/Pitch:20~50/Speed:-1~-4 until the expected voice image was produced. The Speech was converted to mp3 and downloaded for the Audio File in the iClone.
3) After the Audio File added on the iClone timeline, the most suitable motion for each part of the Speech was searched in the Content / Animation / Template / Motion library.
The long Audio File was edited by Break feature on the timeline so as to be synchronized with the selected motion. Detailed adjustment was made until satisfied by slowing the speed of Viseme/Voice, this adjustment was done very effectively.
Face Angle was adjusted by the Modify / Edit Motion Layer.
3) Free Back Ground Image and BGM were also applied.
1) Can not adjust Mouth shape properly within the Viseme Table.
2) Attach and skin is not proper on the Upper Cloth bottom part.
3) Soft Cloth setting is not adopted yet.
4) When the preview is running automatically, unexpected display is observed on the Upper Cloth at the timeline 0-1175. This does not happen when timeline is scrolled manually.