Difference between Substance Painter's "Average Normals" baking and a traditional cage workflow?
Apologies if this has already been asked before but I'm wondering how SP (2.3) baking differs from using a cage in any other application (I used Max 2015).

I mostly mean the "Average Normals" box. I did some test bakes with it off, like Tim Bergholz says, but I ended up with seams like in an explicit mesh normals workflow. He doesn't say why he turns it off but his results look right. Wes explains a little about what happens in their bake process and it makes sense; if you don't use average normals you will get gaps in the projection and seams.
So then I tried it with the average normals on and it was a perfect bake. No seams or missed projection artefacts. Match by name also worked a treat.
I wanted to compare this with a cage workflow so I baked in Max using the Projection modifier for the cage. There were missing projections and it needed some extra geo to solve. Not to mention the need to explode the mesh too.
Identical mesh in both programs, was also triangulated before baking. Smoothing groups set by UV shells. Presented in Toolbag 2.
Top is Max, bottom is Substance.
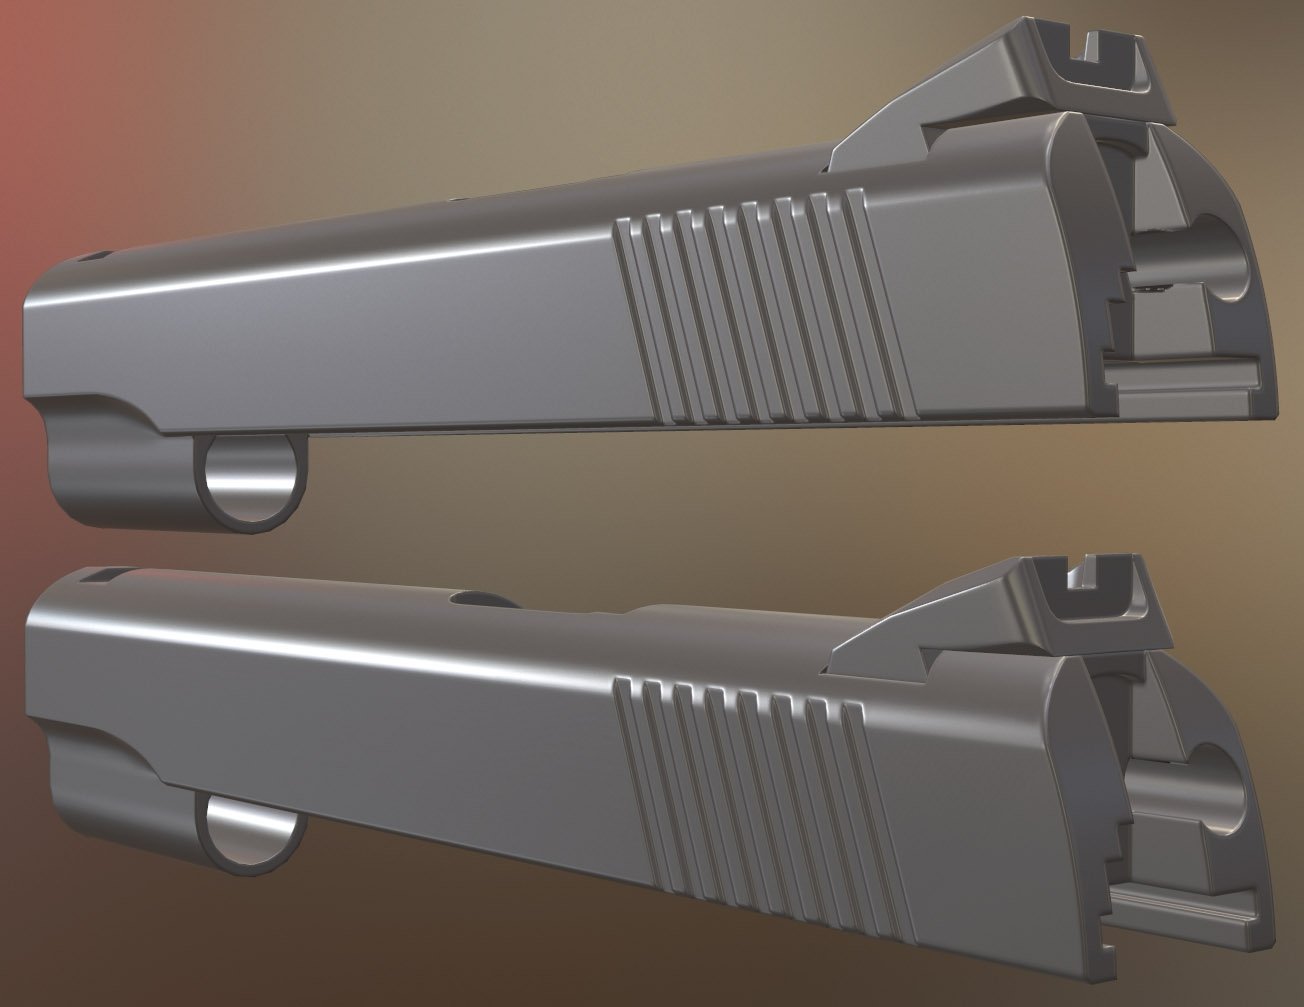
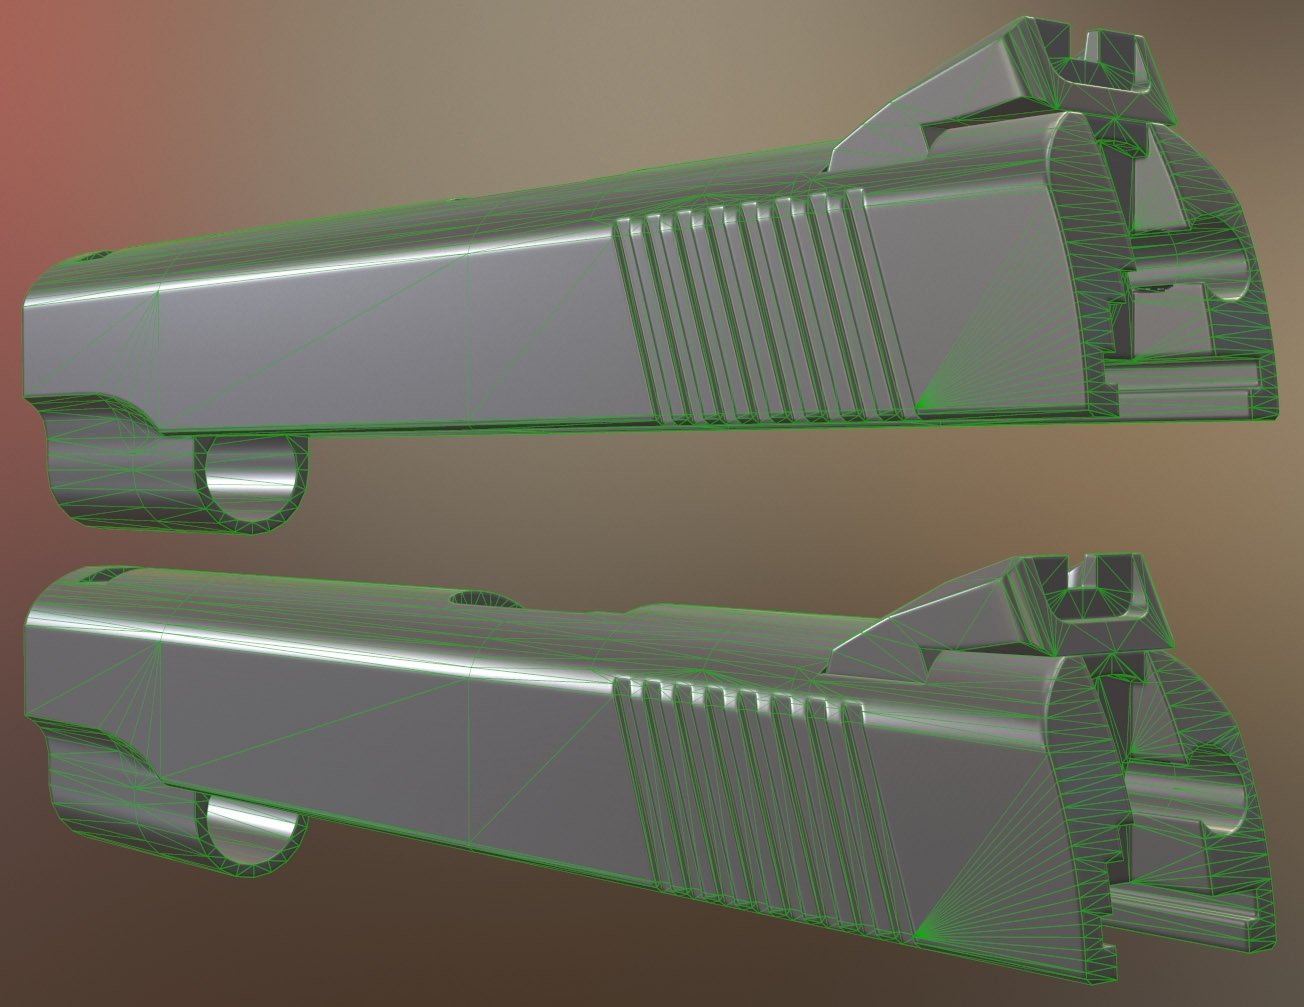
Looking at the ridges, both bakes are clean but Max required the support edge along the bottom to fix the cage projection (see below).
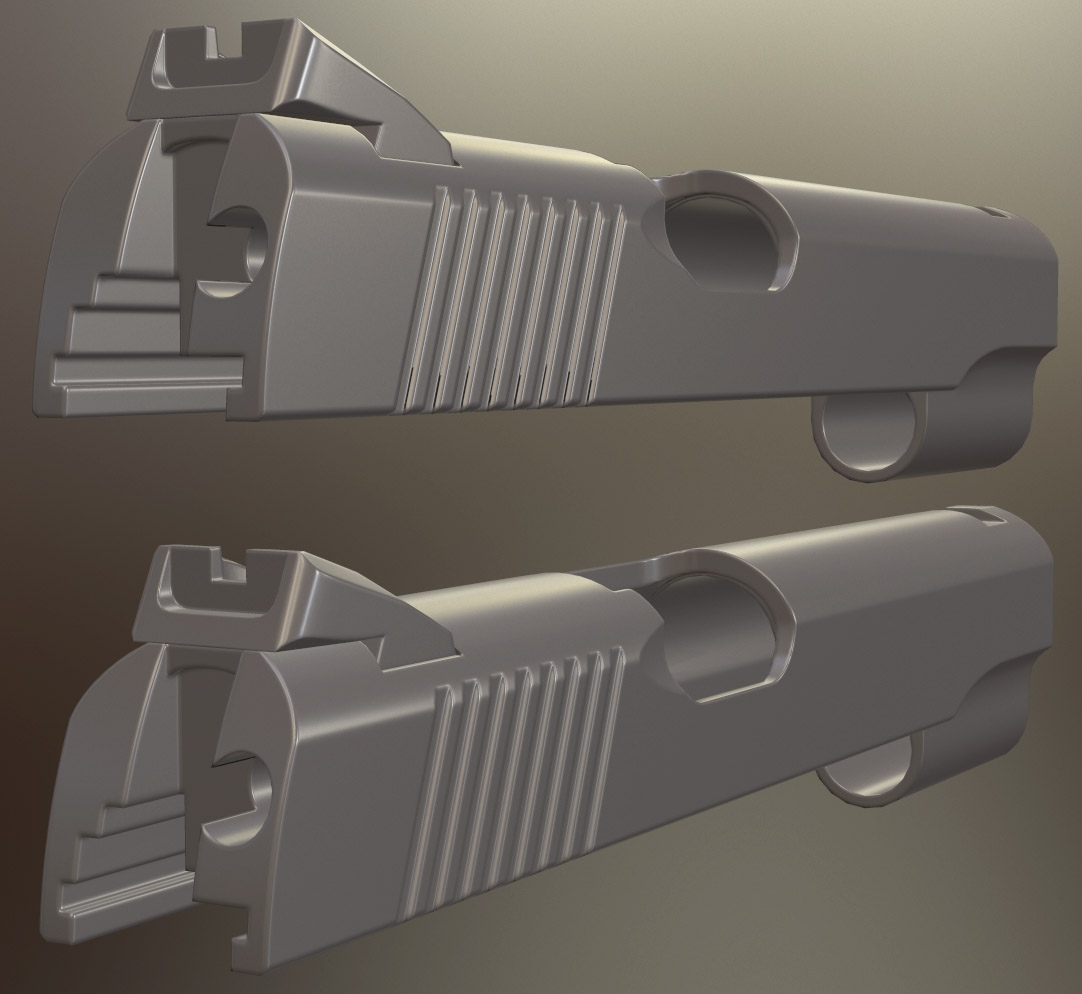
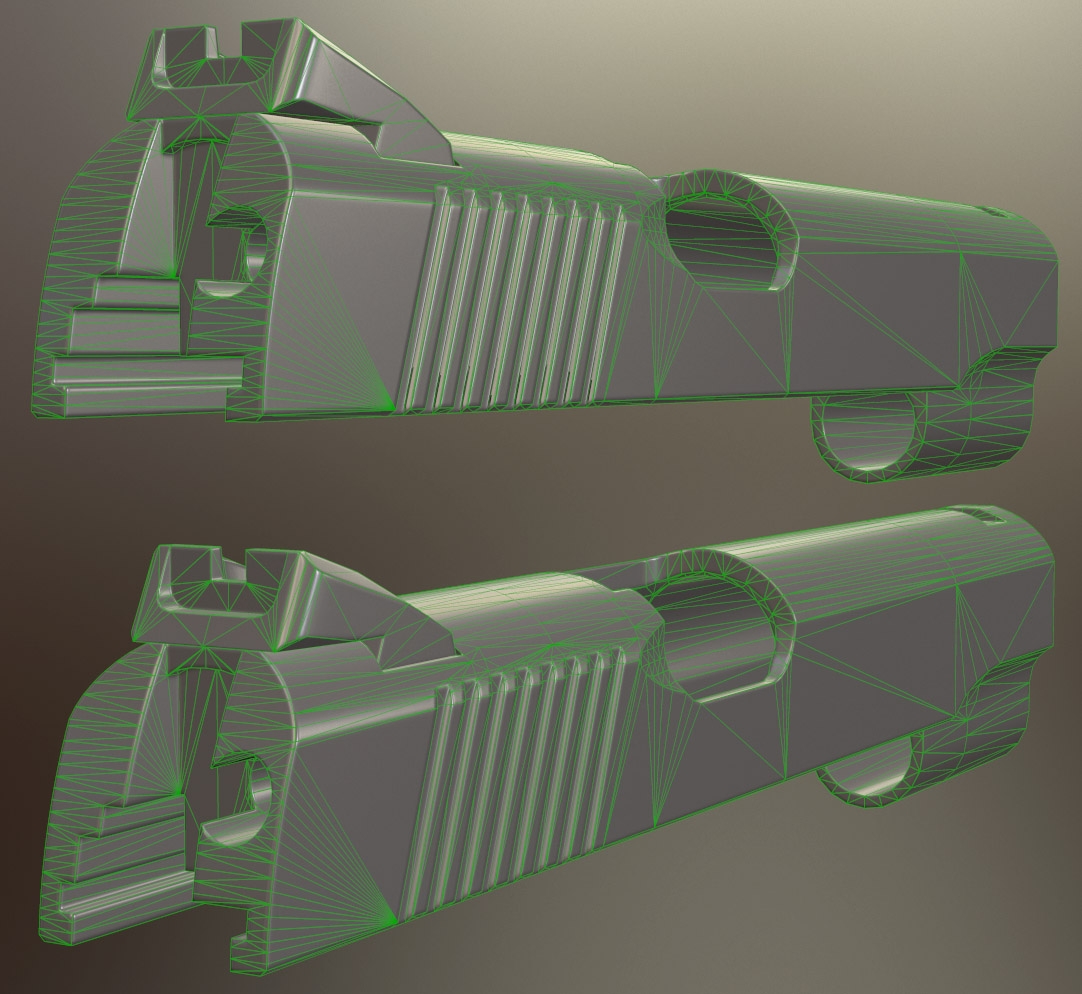
This side doesn't have the extra geo and the errors are clear. But the Substance bake is still clean.
So what I'm wondering is how the Substance bake comes out clean with little effort required compared to a cage workflow and the subsequent fixes needed.
In my head, the "average normals" option means you're essentially using an "average projection mesh". But it's not the same as using one in a 3d program. So what is it? And is it good enough to ditch the cage workflow altogether?
If anyone else has done similar tests or knows more about this I would love to hear it.

I mostly mean the "Average Normals" box. I did some test bakes with it off, like Tim Bergholz says, but I ended up with seams like in an explicit mesh normals workflow. He doesn't say why he turns it off but his results look right. Wes explains a little about what happens in their bake process and it makes sense; if you don't use average normals you will get gaps in the projection and seams.
So then I tried it with the average normals on and it was a perfect bake. No seams or missed projection artefacts. Match by name also worked a treat.
I wanted to compare this with a cage workflow so I baked in Max using the Projection modifier for the cage. There were missing projections and it needed some extra geo to solve. Not to mention the need to explode the mesh too.
Identical mesh in both programs, was also triangulated before baking. Smoothing groups set by UV shells. Presented in Toolbag 2.
Top is Max, bottom is Substance.


Looking at the ridges, both bakes are clean but Max required the support edge along the bottom to fix the cage projection (see below).


This side doesn't have the extra geo and the errors are clear. But the Substance bake is still clean.
So what I'm wondering is how the Substance bake comes out clean with little effort required compared to a cage workflow and the subsequent fixes needed.
In my head, the "average normals" option means you're essentially using an "average projection mesh". But it's not the same as using one in a 3d program. So what is it? And is it good enough to ditch the cage workflow altogether?
If anyone else has done similar tests or knows more about this I would love to hear it.

Replies
Also, in Max RTT you can match by MatID so you don't need to explode.
I have been thinking about it as an average projection cage. But when I use an imported cage, it gives me worse results. So they must not be the same thing. Your video is an interesting one, I'll try some floater details and report back.
I was already using it, thanks for the hint though, it's a great feature.
Also I was still perplexed with Tim's results so I opened up the grenade mesh (from his Gumroad) and applied the final normal map that he created. I also did two bakes myself from his high and low poly with his settings (4k, 8x8 anti aliasing).
Left: Tim's final map
Middle: My bake, non-average normals (Tim's recommended method)
Right: My bake, average normals
Looking at the boxy part and the top of the grenade, the seams from using non-averaged projection are visible on the left two meshes. However, because they are baked at such a high resolution and with the maximum anti aliasing, by the time the map is viewed at a realistic distance, the seams are barely visible, especially once the other textures have been applied. My approach earlier had only been using 2k maps and 2x2 anti aliasing so maybe that's why the seams were more exaggerated.
Using the Max cage in Substance gives the same result as Max so I know the cage is working the same.
I think you're right about the overlapping cage. It wasn't affecting another area of the mesh so the result was clean. I looked again at the cage on that version and it wasn't technically an overlap. It was just intersecting with the mesh and needed more pushing to bring it back out again. There wasn't an overlap between the other ridges but it just wasn't behaving as nicely as the side with the support geometry.
Back to my tests, I thought I had a eureka moment with the "relative to bounding box". I thought that maybe my push values from Max were different to Substance because of this. So I turned it off and tried the same values (and different ones) but the Substance results were still cleaner.
Then I tried a bake with just one smoothing group for the entire low poly, but the result was not good. Normal map had severe gradients and the mesh showed some of them, as well as some areas where you could see the triangulation.
I may not have figured out how Substance works but I may have reached a conclusion.
Sorry if this thread seems to be a bit rambly, it's turned into more of my own thought process and documentation of techniques. If anyone has anything else to add, please do!
The reason why both Substance Painter and Xnormal bakes come out clean and require little effort is because they both follow an established convention, internally consistent between their baker and their viewport but also now widely accepted as the norm (mikkt), which Max doesn't follow as far as I am aware. So, if you triangulate your model before baking in order to get rid of any remaining unknown factors, you will get pretty much flawless shading.
"Stick to smoothing groups for UV splits"
This is not needed and is a waste of ressources, and very prone to errors down the pipeline. What is needed is the opposite - that is to say, making sure that you do have a UV split wherever you used a hard edge. Not the other way around.
Do you mind explaining what errors this workflow is prone to? From what I gathered from the stickies, there's no drawback to using hard edges at UV splits. Also what's the waste of resources? Higher vertex count and lower texel density due to more UV islands? Thanks.
Regarding unneeded hard edges on all islands : Sure, it does work if you harden them all, but what's the point ? If you do that you introduce extreme shading changes that are just more work for the normalmap to compensate, and when the textures get mipped down these hard edges will become all the more apparent. In short : that's probably fine for brute force portfolio work and assets always seen up close like FPS weapons, but a bad idea for an average in-game asset, especially for organics.
As far as resources are concerned the cost is marginal indeed since vert count is not a bottleneck, I should have phrased it better. I just mean to say that it is pointless to make something heavier than it should be to begin with - especially since it is likely to cause visual artefacts.
I'm not sure about the hard edges. I wouldn't do this for every asset because like you say, organics would look wrong with hard edges if at a lower resolution. And if I was going to make the slide symmetrical then I would make sure the curve has the same smoothing group. But the shading changes are less extreme than using a soft edge over a harsh geometry angle right? For example, I unwrap based on angle mostly. If there's a 90 degree corner, I will split the UV islands. I could keep them together or use one smoothing group over them but then the normal map will have a strong gradient. Not wrong in itself but that doesn't look great mipped down either. I'm not always sure if I'm using a synced workflow but I'm going off this:
Maybe I'm a bit tunnel visioned due to this being an FPS weapon so I'd like to hear your approach to an average in-game asset. Thanks.
I think there are two aspects to this really.
First the purely technical side - as in, what is 100% required to get perfectly mathematically accurate results. This includes making sure that everything uses Mikkt, that all the triangle edges are set, and so on. It's great that this thread is going over these points, because they are the principles that everybody should know and follow ... but unfortunately a vast number of game artists are not very knowledgeable on that topic (sometimes out of laziness, and sometimes because they are told that "it's okay if it looks good enough"). Except that good enough doesn't quite cut it anymore when one day one has to make a super smooth hard surface asset
And then there are all the little extra tips and tricks - like the use of hard edges, the addition and removal of extra loops, and so on. Unfortunately it seems like game artists tend to focus all their time and efforts on that rather than on the fundamentals/accuracy. That's a shame because things can go downhill quickly from there.
Personally my own recipe consists of :
- Modeling (and sculpting) with the low in mind, making sure that everything is nicely parallel, the surfaces don't bend, and so on. And from there modeling the low with the UVs in mind.
- When UV symmetry is involved, always using the same side as the master (I tend to use the right-hand side of a model), and always making sure that the UV handedness matches the geometry handedness (that is to say, never flipping a UV island on itself because some shaders and/or some tools might not like that. APEX cloth is one of them).
- Regarding hard edges : only putting them where really necessary, like deep inside a surface bend superior to 90 degrees. And of course, ONLY putting them IF there is a UV island to support them.
(the brute force method of "hardening the edges of all UV islands" is really just a band aid for poor model and UV planning. Useful in case of "emergency" though
- Triangulating everything.
- And lastly, running a normal weighing operation on the entirety of the model to get surface shading to be as smooth as possible. This takes care of some of the "shading gradients" but also comes with the added benefit of locking the vertex normals, meaning that they won't be edited or recalculated by mistake down the line by a rigger/animator or another modeler. Maya does it automatically on the fly now ; for Max/Blender this has to done manually, which I find to be much better.
Here is a rundown. Selective hard edges, weighted normals, and UV islands left soft in order to not introduce unneeded razor sharp edges where they wouldn't be needed :
I hope this makes sense
I read about editing vertex normals before but I didn't fully understand it so I will have to revisit it. Am I right in thinking that the benefit of using them means you can keep more UV islands connected and with one smoothing group, but you don't have the extreme gradients that the one smoothing group brings. So it looks cleaner (like hard edges) but without needing hard edges. And so the bake will have fewer extreme gradients?
Your video is really interesting. I get the idea of straightening the UV edges stop them from becoming badly aliased but it brings a lot of distortion, especially when the island is so large. How do you deal with this?
On my mesh, I could have kept the inside of the ridges attached to the main island for the slide, but I split them to minimise distortion (and because I was putting a hard edge there). Would you still use your method for a hard surface piece like this? Or would it be better to put a slope on them rather than a 90 degree corner and modify the high poly to be kinder for baking but less realistic (back to your first point)? Thanks once again.
In general it's always good to try to think of all this in advance, if only for the benefit of easy UV packing later down the road. For instance if each medium-sized part of a character can be UVed into a few pieces forming squares or rectangles (legs, gloves, accessories, and so on) it makes the final packing very easy since it is just a matter of fitting square blocks next to each other.
One can even mentally split the UV space into an atlas (upper left square for the head, bottom rectangle for the legs and jackets, and so on) which can speed up the process even more.
As for the specific case of the gun, it's a bit hard to tell for sure ! By the looks of it it seems like you found great solutions already.
I'm not certain, but i think some of the confusion regarding the "don't harden all UV island edges" comes from the difference between the mindset of smoothing groups vs hard/soft edges. If you are setting uv islands to be separate smoothing groups then that won't harden all the uv borders they are different things.
For example if you had a cylinder with 3 uv islands (top, bottom, shaft) and you run the smoothing groups from UV islands script, that would only have 3 smoothing groups and therefore wouldn't have a hard edge along the uv split of the shaft. to make that a hard edge in max you'd have to split the edge.
not sure what cases other than this (when the uv edge is with itself rather than a different uv island) Pior would be talking about. Tell me if i'm confused though.
Really helpful, thanks a lot for your input. Now I need to get on and finish this piece!
@Kobalt Kiwii
Yes, perhaps I wasn't being clear enough with my terminology but this is essentially the method I was using. Smoothing groups rather than hard edges. I think Pior is talking about a more complex or organic mesh where you can start using fewer smoothing groups and custom vertex normals.
For a while I've been using the skewmesh method (bake WSN first using a subdivided mesh, then convert to TSN with the actual low) to bake normals, but I admit having thought it'd solve all skewing always, when in fact it sometimes, obviously, does not.
I think this is answered by Musashi's comment, but why does skewing occur in a piece like this for instance? I separated a whole SG for this side, yet screws at the edges begin to skew. The skewmesh method gives best results, and I think that's because the subdivisions are basically holding the details better before they deform. Notice that near the bottom and top, screws begin skewing more, which is caused, I think, because there's not so much geo holding this together.
To correct this, EQ often says to just add a single inset to this area, and that will solve it. That's because it'll change the way normals are being averaged when baking. He goes pretty in-depth with this too in his threads, but in short, I think the reason the skewing occurs is because of the proyection ray's direction:
Much like Nick/Quack! begins explaining in his video, if I wanted something like Ex1, I should untick the Average Normals checkbox before baking.
TL;DR: Isn't Quack's method, or the skewmesh method, the best means available to obtain quick almost-perfect normal maps right now?
When I do hard surface work, I plan my UV islands to specifically coincide with where I want hard edges, so this planning stage that Pior mentions is exactly what I do as well, it's just that a script to set the edges to hard is a lot faster than manually setting them. I think it's important to look at the end, baked result here, rather than fussing about with what the lowpoly smoothing looks like in the viewport before you apply the maps.
Poor planing, and then using a uv island -> hard edge script may result in illogically set up hard edges, that is certainly true, but the cause and the symptom should not be confused. It's the execution, rather than the technique, that is the problem in this case.
https://forum.allegorithmic.com/index.php?PHPSESSID=n99ulrf29qajj6jcspqtidk4u3&topic=12713
Doing this of course still requires the mesh to be built and UV'd appropriately.
Thanks for the clarification. I don't suppose you've got any extra workflow insight (aside from what you wrote in the stickies)?
@commador
Yes, the technique is what Quack! posted, only in Painter. It seems nice but for where I'm at right now, I think that I need to understand the fundamentals more before resorting to blending bakes.