Home Contests & Challenges Archives Reallusion's 3D Character Design Contest 2016

Reallusion Character Design - 3levan

1
polycounter lvl 5
Offline / Send Message
3levan polycounter lvl 5
I'm completely new to 3D so I thought I'd give this a try as it seems like fun!

My character is based on old references and concept I collected but I'll be making some clothing changes and adding gear to improve it.


Unfortunately not having a clue what I was doing with CC I only have one export left on the trial. I couldn't quite get the body shape I wanted (skinnier legs and flat chest) so I brought it into Zbrush as I've been mucking around in that recently.
 I really liked CC for getting a quick base with UV's (because I have no idea how to unwrap..yet!) and how easy it was to make new body morphs. I think eyelids need a lot more options , it was really easy to ruin these in Zbrush because of the lashes but there wasn't quite the control i wanted in CC.


I did a quick mock-up of the base clothes and hair just to make sure the shapes are right. I started sculpting the lips and skin but I need to learn how to export normal maps and bring it back into iClone. Trying to find tutorials tonight.


Looking forward to building awesome hair and seeing how it animates in iClone. I'm saving my final export for the fbx.

Replies

  • 3levan
    Offline / Send Message
    3levan polycounter lvl 5
    Decided to do my hair in maya. I've only used fibremesh before (and not to a great deal of success yet) so I had to learn how to make and edit planes.
    Found this tutorial super awesome!
    https://www.youtube.com/watch?v=M7wJnOaOKzg


  • AdventDestiny
    Offline / Send Message
    AdventDestiny polycounter lvl 2
    3levan said:
    it was really easy to ruin these in Zbrush because of the lashes but there wasn't quite the control i wanted in iClone.
    I ran into similar problems when importing a character into ZBrush, the solution I found was open the Polygroups panel, select auto groups, then go up to subtools, open the split panel, then hit group split, it'll divide the mesh into several subtools, which will mostly be a couple eyes, two halves of a jaw, a bunch of individual teeth, and several pieces of lashes. It'll give you a bunch of separate parts, but at least you can hide or ignore the lashes when sculpting!

    PS: Very cool model!
  • AdventDestiny
    Offline / Send Message
    AdventDestiny polycounter lvl 2
    Don't know how it happened, but this was a repeat post, admins feel free to delete this whenever.
  • 3levan
    Offline / Send Message
    3levan polycounter lvl 5
    I also got repeat posts... can an admin delete please? :)
  • 3levan
  • 3levan
  • 3levan
    Offline / Send Message
    3levan polycounter lvl 5
    3levan said:
    it was really easy to ruin these in Zbrush because of the lashes but there wasn't quite the control i wanted in iClone.
    I ran into similar problems when importing a character into ZBrush, the solution I found was open the Polygroups panel, select auto groups, then go up to subtools, open the split panel, then hit group split, it'll divide the mesh into several subtools, which will mostly be a couple eyes, two halves of a jaw, a bunch of individual teeth, and several pieces of lashes. It'll give you a bunch of separate parts, but at least you can hide or ignore the lashes when sculpting!

    PS: Very cool model!

     You sir, are a lifesaver! I had no idea i could do that.
  • AdventDestiny
    Offline / Send Message
    AdventDestiny polycounter lvl 2
    You're welcome!
  • Alexionna
    Offline / Send Message
    Alexionna vertex
    Awesome progress so far! I'm excited to see the finished project. 
  • 3levan
    Offline / Send Message
    3levan polycounter lvl 5
    Thanks Alexionna!

    Not much progress today as I had trouble finding good hair texture tutorials.. and had a rendering issue in maya that a friend had to help me fix. Finally chugging away at this now, did some test textures but I need to learn to paint hair. Im really struggling with the maya interface and keep finding myself back in zbrush which isnt ideal. 
    I also realised why i never see this haircut used in games that use this style of modelling. Because its a freaking nightmare.. i might start sweeping her fringe more to the left. I wanted it to be choppy but i might try curling in the tips of the fringe as hair naturally does with a looser cut. 


  • Space_3D
    Offline / Send Message
    Space_3D vertex
    Hai friends ...... Look like anime style.
    Face look  ....... so cute with natural hair.
    Happy modelling and animation.
  • Philsip
    Offline / Send Message
    Philsip polycounter lvl 5
    Nice start. I haven't gotten to the hair for my entry yet, but I totally get what you're saying.

    I don't know if you ever ended up finding a hair tutorial that you liked, but this one is pretty good: 
    http://www.3dartistonline.com/news/2015/04/how-do-i-create-real-time-hair-for-games/
  • 3levan
    Offline / Send Message
    3levan polycounter lvl 5
    Philsip said:
    Nice start. I haven't gotten to the hair for my entry yet, but I totally get what you're saying.

    I don't know if you ever ended up finding a hair tutorial that you liked, but this one is pretty good: 
    http://www.3dartistonline.com/news/2015/04/how-do-i-create-real-time-hair-for-games/
    I found that tutorial but got stuck almost instantly. I couldnt get my IMM brush to work properly, it wasnt welding points correctly and i couldnt figure out why. I was going to build the planes in maya then continue with the tutorial but I can already see a few parts I dont understand, its definitely not a tutorial for begginers :/
  • 3levan
    Offline / Send Message
    3levan polycounter lvl 5
    Built my low polys for the top, corset and trousers so im just experimenting with the high polys right now. I really love Hpolish! Its my first time modelling clothes, the only other 2 models I've worked on I gave up on before I got to the clothes so im learning alot. I thought about using the cloth physics in iClone but im not confident enough that I can set that up. Everything still imports okay but her shoulders are a bit messed up, I cant export again though so Im going to try fix it with the weighting when i do my final import.

  • 3levan
    Offline / Send Message
    3levan polycounter lvl 5
    Got a bit carried away with the trousers. I plan on doing stitch detail and add her side pockets but im happy leaving it here and work on the bags and corset for a bit. Tested it all in the character creator and its working fine so Im happy about that.

  • LookingGlassGraphics
    You character is coming out awesome !!
  • 3levan
    Offline / Send Message
    3levan polycounter lvl 5
    You character is coming out awesome !!
    Thanks LGG. Learning loads from this so even if i dont get an honorable mention its totally worth it. Im probably going to need the whole 2months to actually finish. Everyone else seems so fast
  • LookingGlassGraphics
    Hey 311, how are you? I saw your post about the polygon count. You could use your bump maps to show of the seams and creases on your characters clothing. I'm pretty sure the polygon count may be high because of the detail in the clothes. You could get a similar effect by tweaking the bump, and height maps. This may help you reduce you poly count. Keep up the great work !!
  • 3levan
    Offline / Send Message
    3levan polycounter lvl 5
    Oh I'm going to generate normal or bump maps for my low poly from the high poly. My low poly is sitting at 40k at the minute.. just my high poly is getting crazy : I

  • LookingGlassGraphics
    Ok awesome, looking forward to your design.

  • octokitty
    Offline / Send Message
    octokitty polycounter lvl 14
    Those pants are amazing! :open_mouth:

  • 3levan
    Offline / Send Message
    3levan polycounter lvl 5
    Thanks guys!
    I'm nearly done with the high poly for the trousers so I did a quick UV unwrap and generated a normal map to test in CC.
    Unfortunately my character OBJ will no longer import and i have no idea why, losing a lot of my facial work so i've made a proxy mesh until I can figure out how to fix that. Im quite happy with the import and had some fun mucking around with it in CC : D

    Im not really sure what would be better as some of the creases are quite severe.. should I have the topology follow the folds better or create nice verticals (what I've done so far) for easier texturing? What I have seems ok for the normal map but i figure it would be better if there wasnt so much diagonal folds conflicting with the topology?


     -edit-
    Been messing around with my diffuse in photoshop. I think im going to have to do alot of wear around the trim. Ive made the inside pocket and part of the back a thicker leather like on the left.. but I need to get the overall texture matching the thinner fabric I've sculpted.
    Im still downloading iClone so I dropped her into mixamo for funsies


  • LookingGlassGraphics
    Looks good, thank for sharing
  • Philsip
    Offline / Send Message
    Philsip polycounter lvl 5
    She's energetic...

    It's all looking good!
  • Wungun
    Offline / Send Message
    Wungun polycounter lvl 8
    This is coming along really nice!

  • 3levan
    Offline / Send Message
    3levan polycounter lvl 5
  • 3levan
    Offline / Send Message
    3levan polycounter lvl 5
    Made an axe in maya for the backpack and added some other accessories. I really want the kneepad to deform properly when i get around to skinning this so I've broken it up into parts that should look okay.  I wish I could remember why i moved the kneepad to the other leg :P


  • 3levan
    Offline / Send Message
    3levan polycounter lvl 5
    Built most of her combat corset today (I love thats a real thing). This was a real challenge to do a completely different material to the trousers but I think it was quite successful. I made sure to use varying crease thicknesses suitable for the material and a differing stitch style thats more appropriate for combat wear. I got a good tutorial for the molle IMM brush off the zbrush website but find curve placement tricky.  :(


    Also the CC devs got back to me real quick about my import issue :pleased: Brilliant support!

    Turns out the objects in my file were named wrong, I had no idea, my zbrush file is a mess. But now its resolved I can spend tomorrow getting all the finished bits into CC to play around with! I'm already happy with the material editor, I manage to get the trousers looking exactly as I wanted despite the diffuse still just being a lazy texture.


    At this point im a bit worried about how long this is taking me and I still dread the hair. Everyone else is so much faster :0 I hope I can finish in time


  • Philsip
    Offline / Send Message
    Philsip polycounter lvl 5
    That combat corset looks great! Keep it up.
  • 3levan
    Offline / Send Message
    3levan polycounter lvl 5
    Somehow i've broken CC :anguished:
    I keep getting a "failed to load the file" error when trying to import my .fbx file. Even brand new clean exports wont load back in after.. im probably doing something silly but i just cant figure out what im doing diffrently from yesterday.. hmmm
  • 3levan
    Offline / Send Message
    3levan polycounter lvl 5
    So i've gone back to building my hair and honestly really struggling to build 'carded' hair. I can build the planes and texture them but Im just not happy with the quality. I just dont think it looks as good as it could, I got into 3D because I want to build movie quality assets and dont like compromising. So I looked into CC supporting fibermesh and found a few videos where people had successfully used it. Like this:
    https://www.youtube.com/watch?v=-sIPC0YZMcY

    So I've spent the weekend devouring every fibermesh tutorial I could. Sadly the grooming tools seem well conceived for curly hair but not perfectly straight. I figured out I can do a lot with masking and transpose which is awesome because i was pretty close to giving in and creating a messier hairstyle for her. This is where i am so far:


    My only real problem is poly count as she's currently at 80k. If i can keep her under 200k I can still render my turntable and anims okay.. my poor little computer wants to melt but I did a test and it does work :proud:
    I really wanted to try win the vive and this might have made that difficult for me. I was going to build a 3d scene for her to wander around in... but Im not sure how such a high poly count will affect her real time performance. Its going to be down to time to see if i can build a low poly mesh from the fibermesh in maya that Im happy with. 

  • jimklien
    Offline / Send Message
    jimklien polycounter lvl 5
    Whoa....great worrk
  • Philsip
    Offline / Send Message
    Philsip polycounter lvl 5
    Hair has got to be one of the toughest aspects of character modeling. At least we live in an age where there are a lot of neat options! Best of luck!
  • AdventDestiny
    Offline / Send Message
    AdventDestiny polycounter lvl 2
    Wow, really set yourself a challenge first time out, huh? This is really impressive work, keep it up!
  • 3levan
    Offline / Send Message
    3levan polycounter lvl 5
    Thanks guys, I know im not choosing the easiest way to do this.. but I would rather find myself building her in CC and zbrush, animating in clone using a low poly proxy mesh and rendering the final turntable in renderman or even keyshot if it means getting the right end result 
  • 3levan
    Offline / Send Message
    3levan polycounter lvl 5
    Little update on the hair. I followed a tutorial for exporting curves from zbrush to maya to generate nhair and it worked out pretty great. Fibermesh is definately the fastest way to style the hair but mayas curve control is much better for smoothing and editing.. 
    I've been doing some iclone tutorials so once onyx is in i can light and animate her : D


    -update-
    Quite happy with the hair now, took a ton of ref and styling to get it looking even semi realistic. I dont have fly away hairs in yet but i want to keep the poly count as low as possible for now. I need to take it into maya next. The back is a mess but Im going to use xgen/nhair to generate that with physics. I should be able to easilly take that into iclone to weight for animation. I've also been working on my high poly for her body but its not worth showing yet.


    Been thinking about her environment too and so far i've settled on an empty subway. Like this with the lighting really low


  • InfinityComplex
    Offline / Send Message
    InfinityComplex polycounter lvl 5
    I absolutely love the concept art of this character. so creative, and cyberpunk. Can't wait to see the final product!!! :)
  • 3levan
    Offline / Send Message
    3levan polycounter lvl 5
    I absolutely love the concept art of this character. so creative, and cyberpunk. Can't wait to see the final product!!! :)
    Thanks, Im a fan of things like cannibis works, koji morimotos animations, demobaza and 80s anime scifi stuff. 

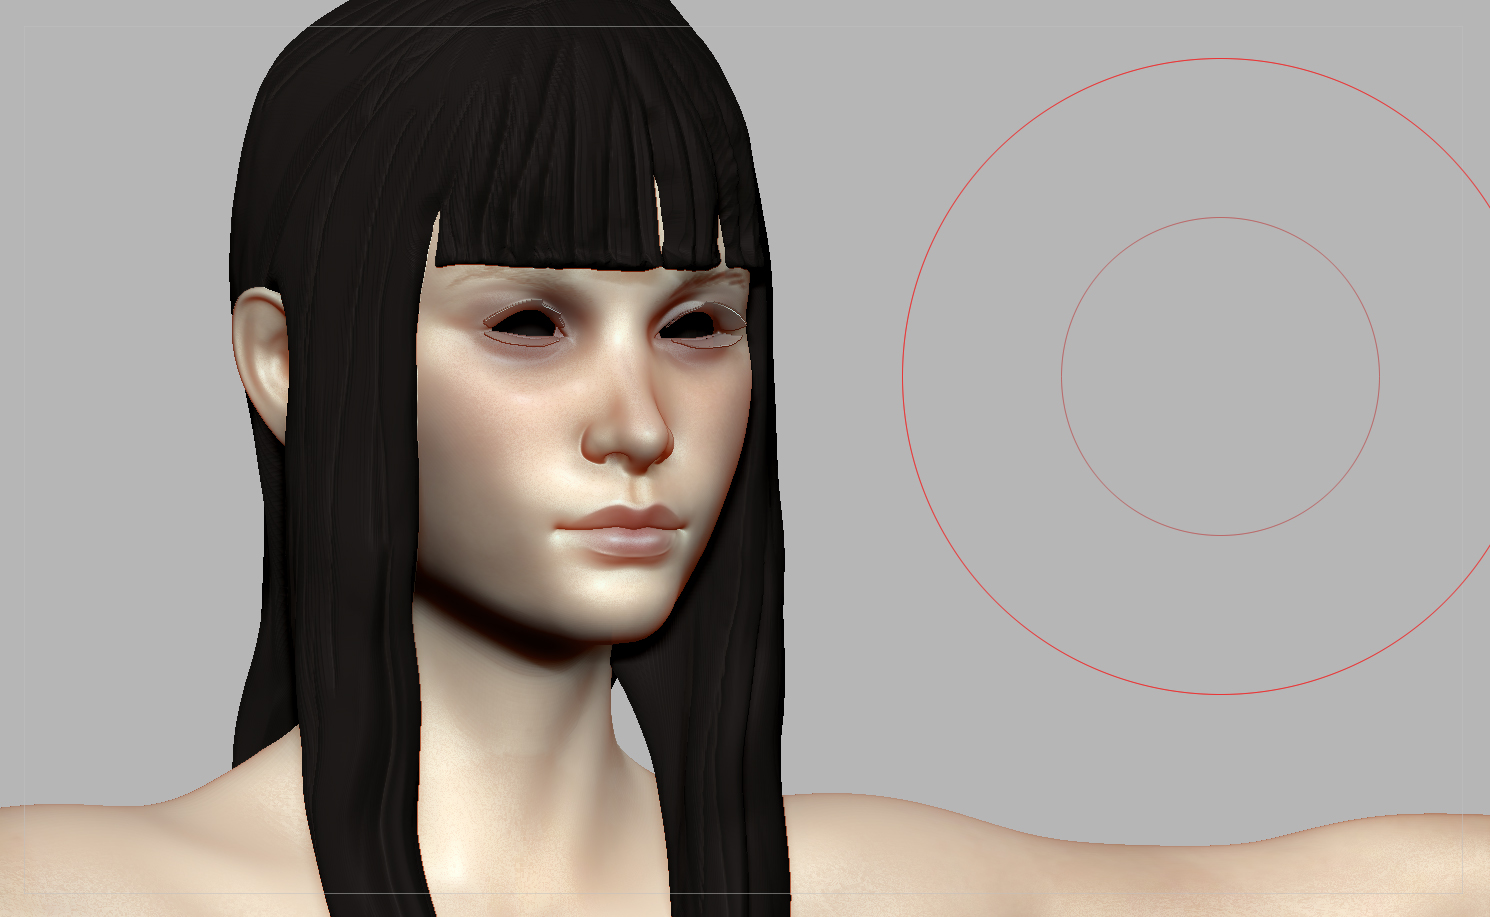
    I'm trying to not do the same lips I always seem to draw, so before I break her symmetry I went back into iClone and messed around with her a bit before bringing her back into zbrush. It looks really different.. a bit wider? I assume this is due to an FOV diffrence, something i still need to look into with iClone. I've started the high poly and given her lips more detail. The pores dont really show up and the eyes still need a lot of work. I used the UV's as a guide and isolated the parts of the head I need to generate a normal map to bring back into CC : D


  • Alexionna
    Offline / Send Message
    Alexionna vertex
    Wow! your work is amazing! I like that you pay attention to detail. Which is a great skill to have. Keep up the awesome work! 

    -Alex
  • dtcartamania
    I am glad you found my tutorial useful for lightning, and very nice character design you have

    D.T
  • 3levan
    Offline / Send Message
    3levan polycounter lvl 5
    Alexionna said:
    Wow! your work is amazing! I like that you pay attention to detail. Which is a great skill to have. Keep up the awesome work! 

    -Alex
    Thanks! I'm super fussy about every small detail but it also slows me down quite a bit. I just hope all the parts come together in time.

    I am glad you found my tutorial useful for lightning, and very nice character design you have

    D.T
    Your tutorial was amazing! I never knew how to work with curves before i found it. Unfortunately I couldnt figure out how to texture the hair in a way i liked using polygon modelling but curves and your final render pass in maya have been really useful :+1:
    An update from tonight. Quite happy with how the skin is coming along. Loads to do! I need to export the eyes properly from CC so i can get the diffuse to edit. Really happy with the lips and eye highlights. the eyelids need alot of work yet though. I want to get the lashes back in asap.
    I think her skin needs more imperfections to look natural. some moles, scabs and spots. I gave her a little nerve damage in her cheeks as if shes been exposed to the elements so i need to show that in other ways. nose ridge needs more definition in the skin modelling.


  • 3levan
    Offline / Send Message
    3levan polycounter lvl 5
    I still cant render hair properly in zbrush, ive asked about it in another subforum on polycount. 


    Just did these to get a feel for the character. She's working in CC again (thanks Reallusion!)so I want want to bring in her normal map tomorrow.

  • AdventDestiny
    Offline / Send Message
    AdventDestiny polycounter lvl 2
    The details are really incredible, great work!
  • 3levan
    Offline / Send Message
    3levan polycounter lvl 5
    Thanks AD!
    Like yourself I keep changing a lot of my work flow as I'm not sure the best route.
    I've spent the last week doing a few pipeline tests and have decided on what I think might be the best course of action for me.
    My biggest problem is that I'm not a fan of low poly geometry, I want everything to be a bazillion polys. Using normal maps just isn't giving me what I want. So I've decided to use a proxy mesh system like what animated movies do.


     I think this just looks horrible, its not maya or CC's fault because my computer would melt if i tried building a high poly character in either and its unnecessary if i dont really care if the character has realtime application. Im more interested in the best possible rendering for animation. But i can still use IC and CC to get everything else i need for animation efficiently.

    So here is my plan:
    - Keep building the character between CC and Zbrush.
    - Use CC to create a low poly mesh. My high poly will be decimated and reprojected onto the low poly for normal maps and ao for the low poly and eventually bringing into maya.
    -Build my environment in maya.
    -Export her hair from zbrush as curves and rebuild in maya.
    -Bring my environment and low poly character into iClone to compose and animate.
    -Use iClones facial animation tools as they seem awesome, especially puppet.
    -Export everything back out and into maya. 
    -Do my final render with renderman in maya using RIB archiving so my low poly proxy will be swapped out with the high poly.
    I've chosen renderman because I absolutely love some of the basic lighting it provides and its free for non commercial use. RIB archiving also provides exactly what i need.

    My only real concern is how well the skinning works as i don't fully understand it, CC has really done all the heavy lifting for me and I'm a little concerned that if something breaks I wont know how to fix it. So over the next few days I'm doing to finish the high poly for her naked body and run it through this pipeline before i continue adding bits.
  • jman86
    Offline / Send Message
    jman86 polycounter lvl 5
    Good work on your project. Considering you don't like the look of the normals, it looks pretty good so far. You could add a little more geo to help pull just a little more detail. But if not, you could touch up the texture/color map to really bring back detail, especially if you use apps like substance painter/quixel/etc. 
  • VinceDN
    Offline / Send Message
    VinceDN vertex
    Looking good Eleven! I love the eyepatch, I'm a sucker for post apoc stuff
  • Chronicle
    Offline / Send Message
    Chronicle polycounter lvl 5
    I'm really liking the progress you've made.  Material detail on that corset piece is awesome.  Can't wait to see the finished product.
  • 3levan
    Offline / Send Message
    3levan polycounter lvl 5
    Thanks guys.. Not much updates lately though as Its been pretty slow going. I've got her head looking exactly as I wanted (shes meant to be korean so I redid her eyes and profile) and have her working in iClone. i've successful brought her anims back in to maya to render so the pipeline works. Now I just have to finish the model :expressionless:

    This was just a basic test to check it worked. I also got renderman working but I have a lot to learn about materials and lighting. Sub surface scattering is giving me problems.


    I've also decided to redesign my clothes, I think I can do a lot better than the original concept. I want the character to be less tacticool and more 80s cyberpunk street gang. I've abandoned anything military and replaced it with streetwear or the sort of armor civilians can buy. Originally I was just going to give her a sukajan jacket and it just sort of developed from there. 


    I also did some work on her teeth because It interested me to make them more lifelike I guess?
    Not entirely necessary but as im still learning it feels like each new object has tons of stuff i need to learn about. Couldn't figure out how to get teeth transparency or SSS but here they are from renderman.


  • InfinityComplex
    Offline / Send Message
    InfinityComplex polycounter lvl 5
    NIce! What inspired the decision to change it up? I like the new character concept, i feel the 80's cyberpunk will make it even more unique, and sounds fun. Just wondering what the motivation behind change was.
  • 3levan
    Offline / Send Message
    3levan polycounter lvl 5
    NIce! What inspired the decision to change it up? I like the new character concept, i feel the 80's cyberpunk will make it even more unique, and sounds fun. Just wondering what the motivation behind change was.
    Well the concept is a few years old and I didn't put a great deal of thought into the individuality of the character. I think I did it in like an hour to test some brushes. I've always liked her but usually I develop my characters a lot more and she never really got that so it's sort of happening now.

    Part of it might just be personal taste changing over the years. Maybe I didn't realise how sick I was of military fashion blends until I had to sit and build pouches and rigging :P I think that's just what I've been most comfortable designing as most jobs I've had request that sort of thing.

    this will hopefully give her a more interesting silhouette for animation. I've also set up the UV's for the jacket in a way that means I can generate planes of the basic shapes and use cloth sim. So maybe I'll do that after the competition as I doubt I'll have time beforehand.
1
Sign In or Register to comment.