The BRAWL² Tournament Challenge has been announced!
It starts May 12, and ends Oct 17. Let's see what you got!
https://polycount.com/discussion/237047/the-brawl²-tournament
It starts May 12, and ends Oct 17. Let's see what you got!
https://polycount.com/discussion/237047/the-brawl²-tournament
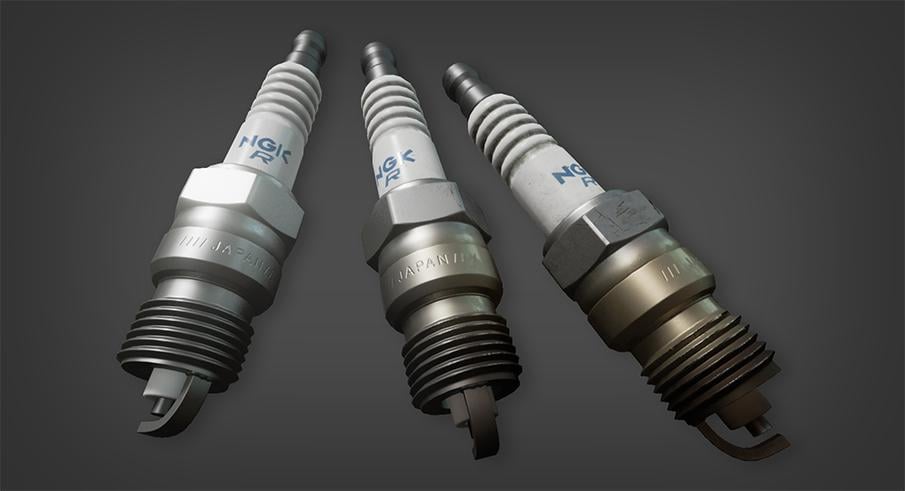
It's a spark plug

I wanted some practice on the high to low baking process for a hard surface asset, so I went with a spark plug. It gave me the chance to model quickly and get to the baking step quicker. It also had a few different surfaces that gave me some more practice on material definition.
I started by creating a clean version of the surfaces and then moved on to a dirty, used version. The two sets of maps were then set up in Unreal using a scalar to allow transitioning from one version to the other.
Mesh : 6,184 tris
Maps : 2048 x 2048 A / M / R / O / N
Tools : 3ds Max / xNormal / Photoshop / Unreal
As always, feedback is appreciated.
As always, feedback is appreciated.
Clean:

Dirty:

Dirty Maps:

High vs Low Poly:


Replies
Original low poly = 6,184 tris
New lower poly = 1,000 tris
1) You'll want to make hard edges/smoothing groups for each uv island. I use 3ds max and have a script that does that automatically.
2) You'll want to make a cage for your mesh that encapsulates the entirety of the high poly. This tells the baker how far the rays should be cast on the low poly to capture the high poly's data (Key thing here is it gets rid of normal map seams along the breaks in smoothing groups).
3) The final thing you should do is make sure whatever baker you're using has "average normals" unchecked. This will allow the baker to use the exported normals from your mesh.
This is a pretty surface level explanation of what you should probably do.
You should really just read the majestic post by the normal master EQ: http://polycount.com/discussion/107196/youre-making-me-hard-making-sense-of-hard-edges-uvs-normal-maps-and-vertex-counts
in-game was 1400 tris but was lowered to 600 because of how the asset was viewed with minimal quality loss, I kept the higher one for renders though
Without a cage you could try Setting Max frontal ray distance to 45 & Max rear ray distance to 5 I've found this normally fixes the cylindrical curving that happens when you bake out
https://www.youtube.com/watch?v=u8nvDgvKbSs