The BRAWL² Tournament Challenge has been announced!
It starts May 12, and ends Oct 17. Let's see what you got!
https://polycount.com/discussion/237047/the-brawl²-tournament
It starts May 12, and ends Oct 17. Let's see what you got!
https://polycount.com/discussion/237047/the-brawl²-tournament
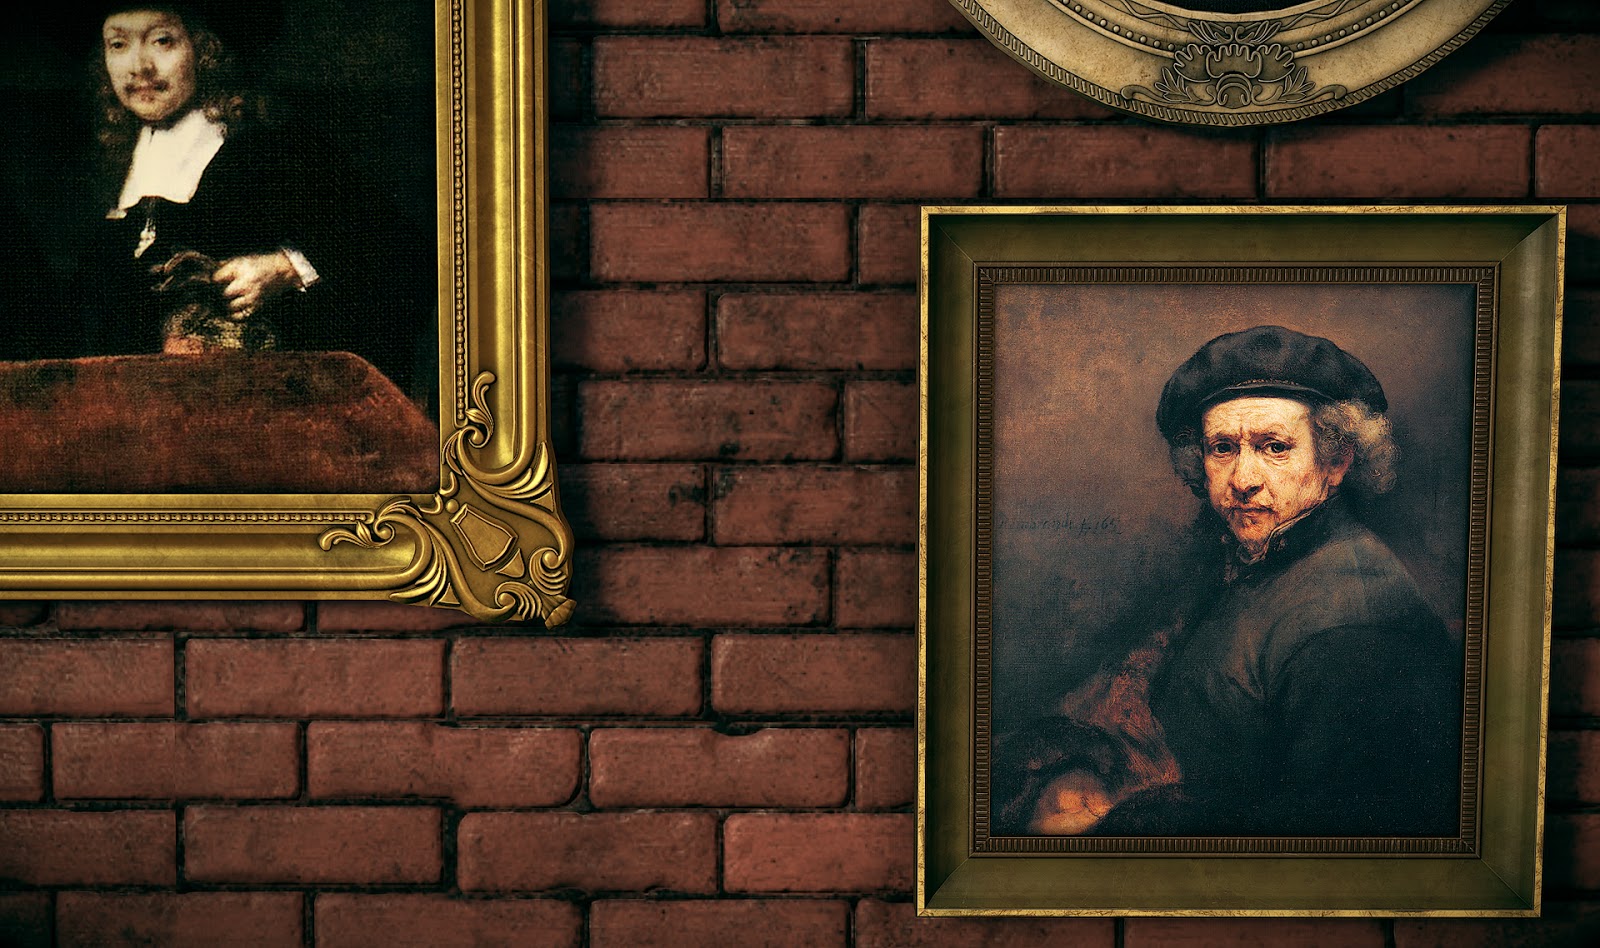
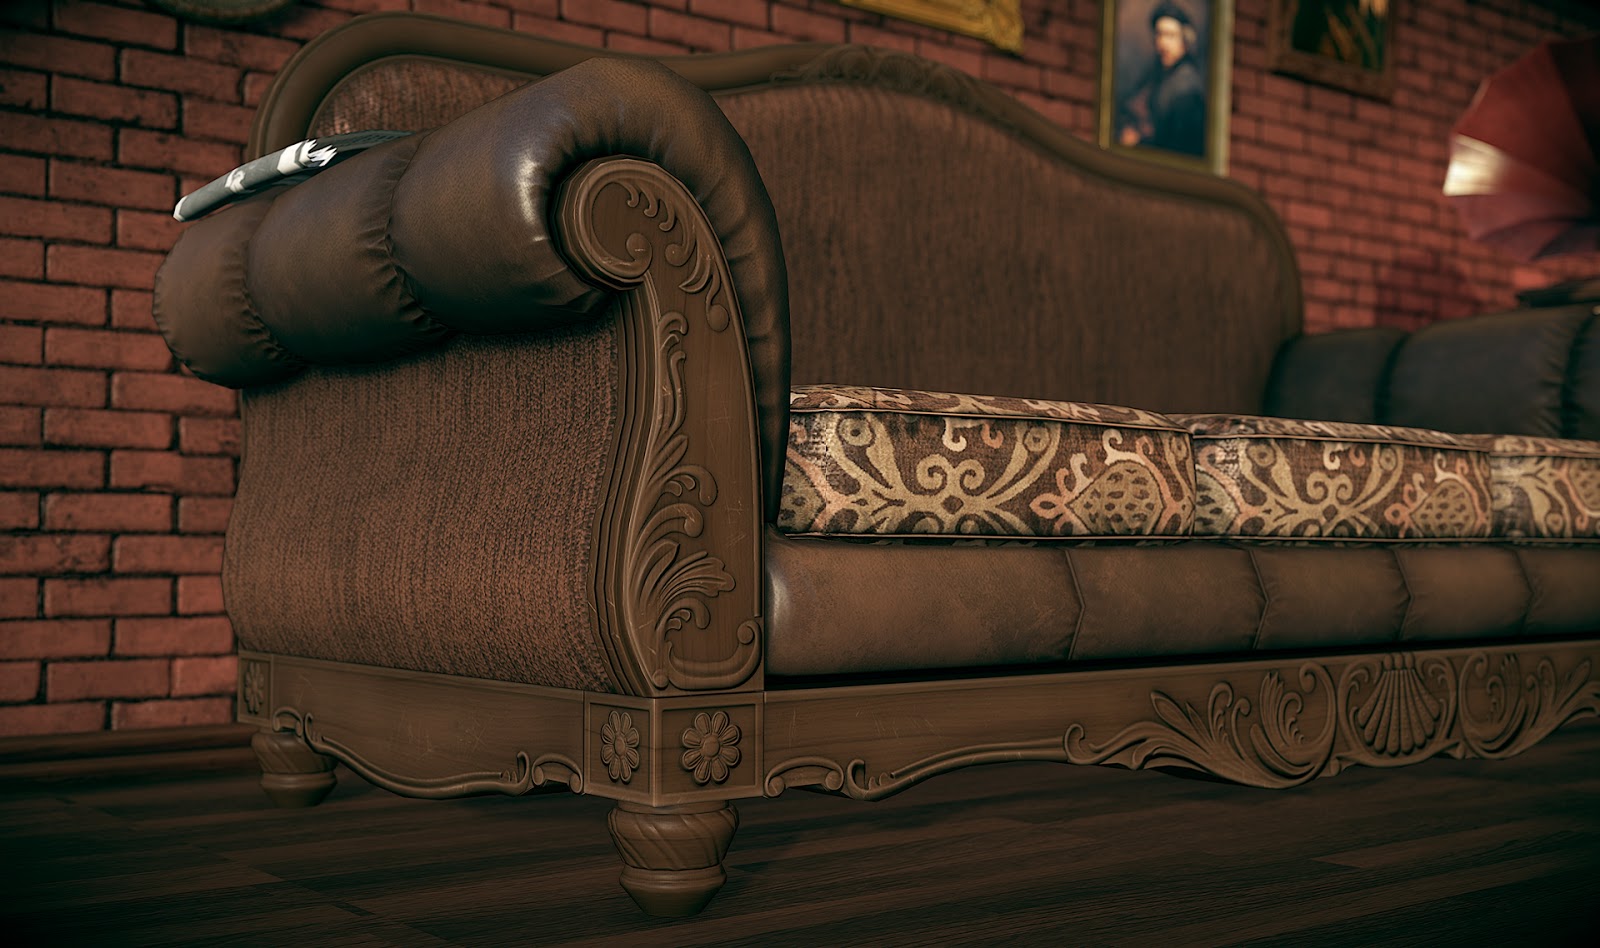
Sofa & Rembrandt
Hello guys!
This is my first thread and second mini-scene (First one is here)
I decided to make some high-detailed props for my portfolio, and here it is. There wasn't any sketch or plan in the beginning. I think that's why my scene hasn't good composition. It looks like a props collection near the wall.
Wall texture made in ZBrush, tiled in Photoshop. Sofa - 3Ds Max and ZBrush. Frames and phonograph - 3Ds max only. Rendered in Marmoset.
PS: Thanks Rembrandt for great textures of paintings
PPS: Sorry, my English is bad, I know that) But Im trying, really.


Replies
2) Scene look flat => add more then one light source and dont use pure white.
Thanks Serriffe and Adij!
Unfortunately this is the best lighting I could achieve for now.
For example, here is a screenshot from CE3. There are two lights on left and right sides. One of them yellow, another one is blue. And also I have an environment probe in the scene. I played about 2 hours with lighting, and I decided to stop on this marmoset variant.
On this screen I increased value from 1 to 3. It looks bad for me. SSAO settings in Marmoset is very poor. It contains only one tweak - Strength. No radius, no resolution etc..
Another trouble - SSAO behavior depends on FOV. The less FOV - more glitches with SSAO.
Детализация правда круто смотрится
Super ultimate lesson:
Right now I have no time to write normal progress shots. Sorry:)
Actually this is more than i need
Thank you
btw, with new ZRemesher i think it's possible to do entire thing in ZBrush, i did some really nice detailing work with it, but not with such complex shapes, have to test it out. But probably it will be possible only to block out main shapes and then tweak them in any software with poly modeling tools. Wish ZBrush to have "cut faces" and "weld points" tools ))
In the beginning I tried to sculpt wooden parts in ZBrush, but result was really bad. I dont know how to achieve clear and straight lines while sculpting. (And I dont have tablet). The result was similar to your Drake Shield, but worse.
Oh, its a pain to work in ZBrush without a tablet. I'd suggest you to get one, it will help a lot.
Shield had not that much really precise details, but looking back, maybe i had to do ZRemesh pass to get really low-res mesh, mesh should look much cleaner when made from solid base.
I did same kind of details you made on sofa(they were less detailed), and i did it in Maya, to get really clean shapes, but i'm looking for ways to improve my workflow, and direct poly modeling from scratch isn't the fastest one.
I think if i will do such details now, i'll get a plane-> subdivide it couple times-> mask out my trim silhouete->create polygroup-> delete subdiv-> hide all but my trim-> delete hidden->Panel Loops(with "double" off)-> ZRemesh it-> Turn off "adaptive" turn on "half", or maybe keep adaptive on and Zremesh untill i'll get a good base mesh, then just export it to maya and tweak there.
it can look like long way, but in practice it can be really fast, but yep, have to try it different ways.