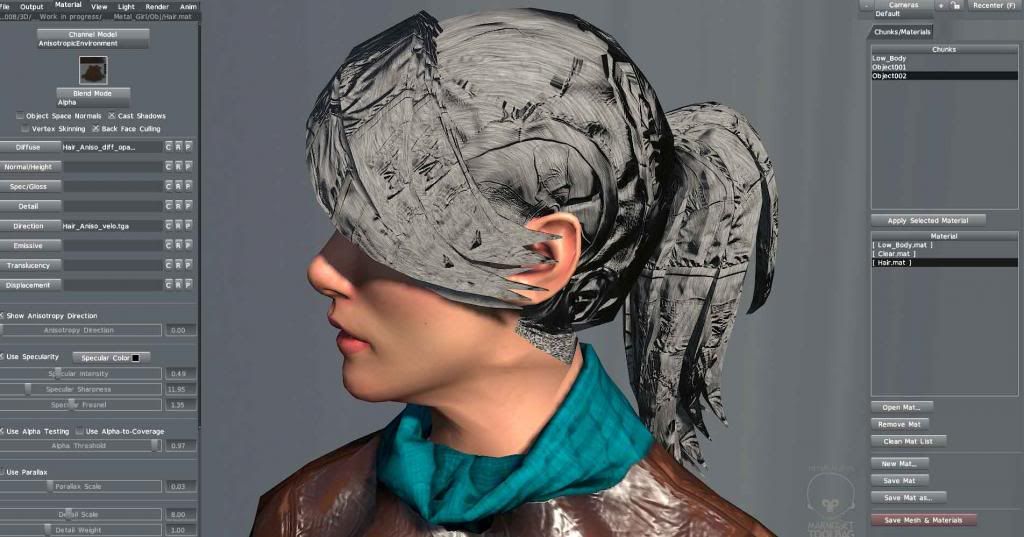
I made a character with 2 objects. The body/head and also a hair piece. They both have their own Mat/textures. The problem I'm getting is the normal map on the body/head somehow shows up on the hair material. You can see in the screenshot there's no normal map on the hair shader.

Replies
2. when you made a material you need to have something in the normal slot. By default they give you flatNorm.tga try putting that in the normal slot, create a new material.
give that a try and let me know
I'm getting another problem now. It looks like there's no smoothing groups on the hair piece only. One thing to note is the hair pieces are the only parts that have different smoothing groups as you can see in the 3ds max viewport:
Check your export settings and make sure "export normals" is checked. Try toggling on and off the "optimize" checkbox as well.
Also, make sure your uv data is sound, if you have items that are oddly uved(or missing uvs), or if your uvs are unwelded or something like that it may mess up the tangents.
Alpha in specular controls gloss/specular sharpness, and should not cause any weird errors. More here: http://www.marmoset.co/toolbag/learn/materials
If you're still having problems with spec alpha/gloss after reading this please post your issues with some screenshots.
I'm now getting another problem. I can see the anisotropic map is affecting the specular but it's not doing much. I tried changing the intensity and sharpness of the specular but I can't seem to get a narrow and long highlight. My aniso. map is already very saturated so I can't boost the effect by modifying the map.
Does my aniso map look ok? Is this how it should look like in marmoset toolbag? (some software uses black and white aniso maps)
Here's a comparison to what I'm getting in UDK.