Welcome to making of "Town square" map in UDK
Welcome to making of "Town square" map in UDK
Introduction:
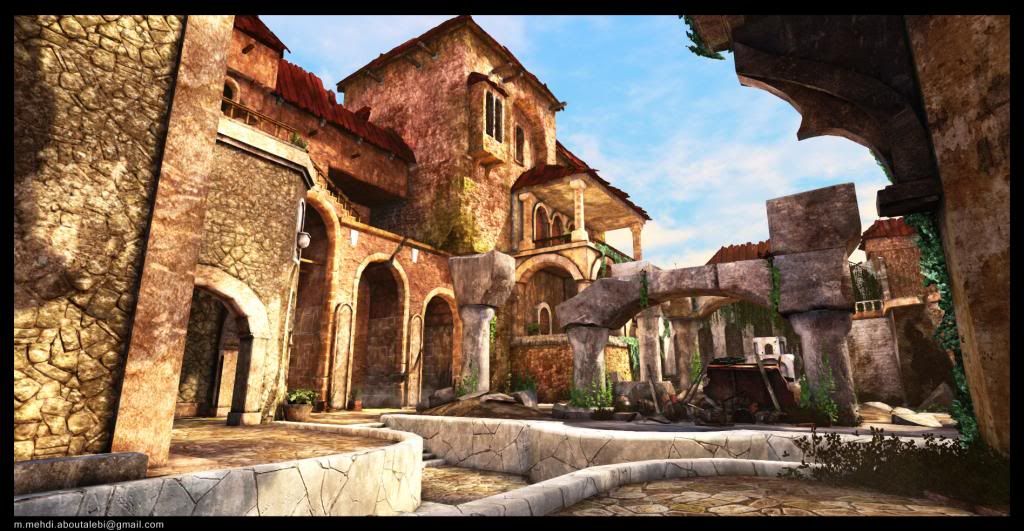
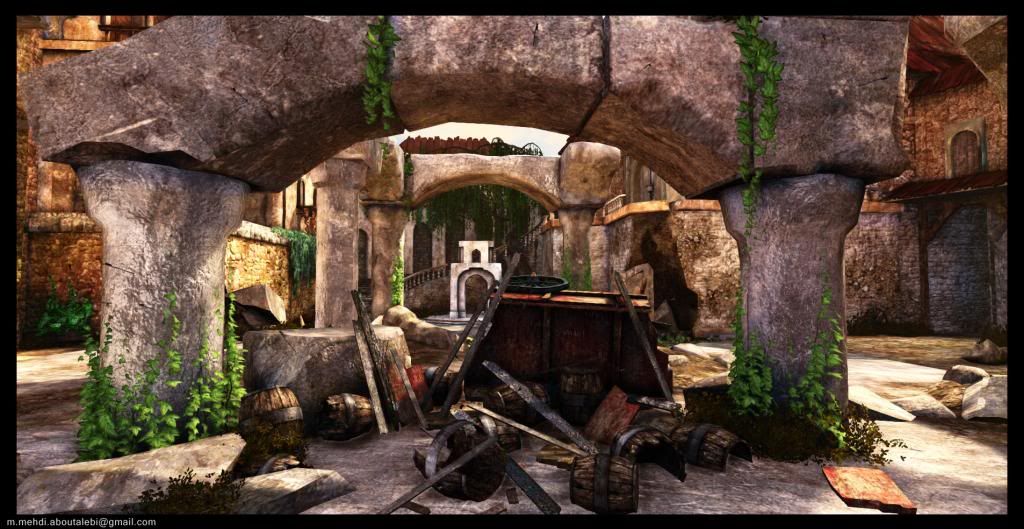
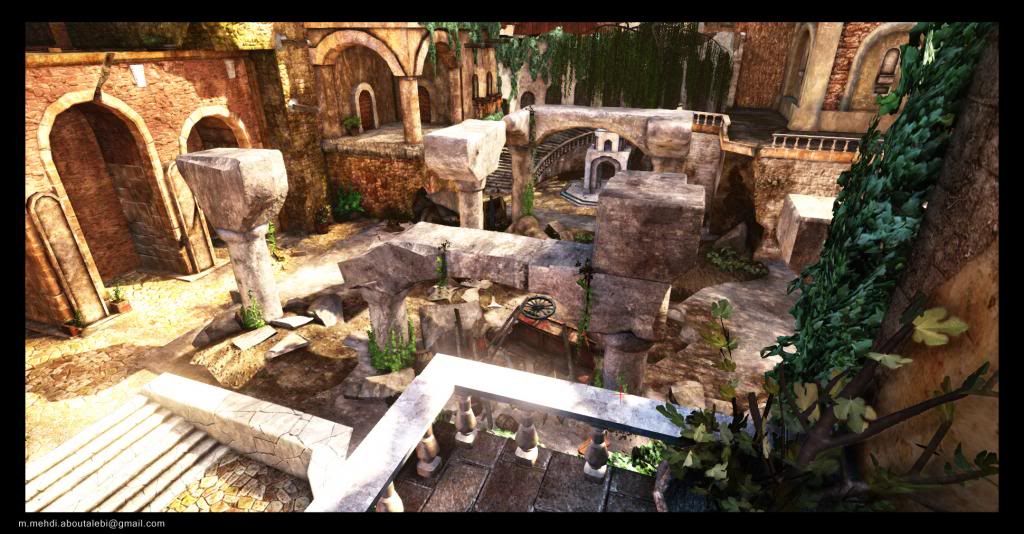
Hi , here i wanna share with you lots of experiences during making this scene named "Town Square" . this is the scene I've done as visual target to start a new project and in this case i should define a process to make an environment fast , instancable and organic without wasting too much time on sculpting . time was my client's basic limitation.
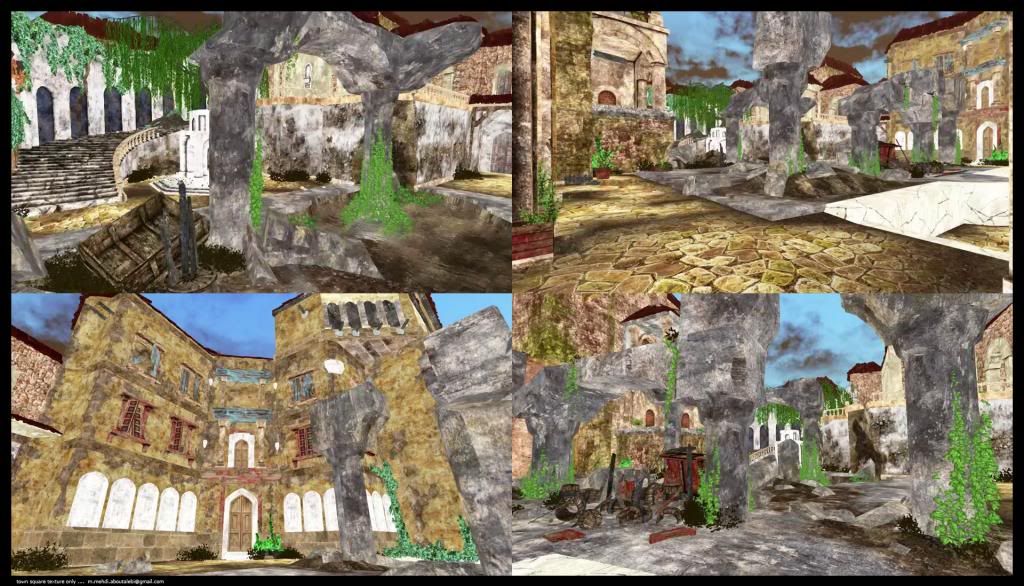
this is final shot video and some screenshots , completely playable with real world size ,based on their concepts and color-scheme that will follow then :
[ame=" https://www.youtube.com/watch?v=UJ6L1kZlmkk"]Town square-Beauty shot - YouTube[/ame]
Hi , here i wanna share with you lots of experiences during making this scene named "Town Square" . this is the scene I've done as visual target to start a new project and in this case i should define a process to make an environment fast , instancable and organic without wasting too much time on sculpting . time was my client's basic limitation.
this is final shot video and some screenshots , completely playable with real world size ,based on their concepts and color-scheme that will follow then :
[ame="
https://www.youtube.com/watch?v=UJ6L1kZlmkk"]Town square-Beauty shot - YouTube[/ame]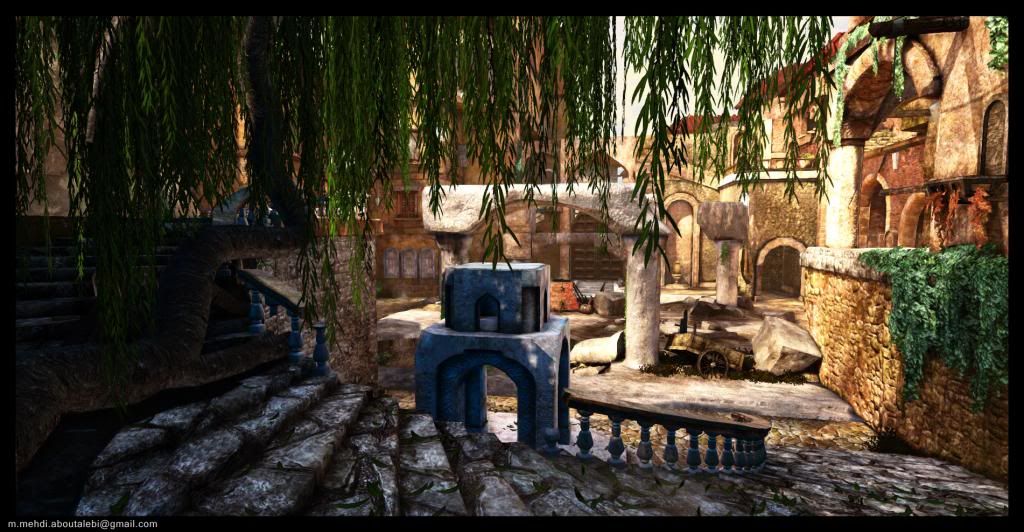

Level Design:
the process for making a scene like this in platforming genre starts with a blockmesh comes from designer . with just simple meshes designer decides what pacing he/she is looking for versus gameplay time and having fun with considering metrics of different mechanics and using them wisely and test their choices with play testing a lot.
some screenshots of our blockmesh done by my friend Mohammad Dabiri

Concept:
after a lot of iteration and playtesting, some screenshots sent to concept artist which decides what are these blocks.
depends on your concept artists this step is so fast and helpful
note: Art director controls visual uniformity as well as manage artists not to cross the boundaries.
in this scene the art director was the concept artist as well
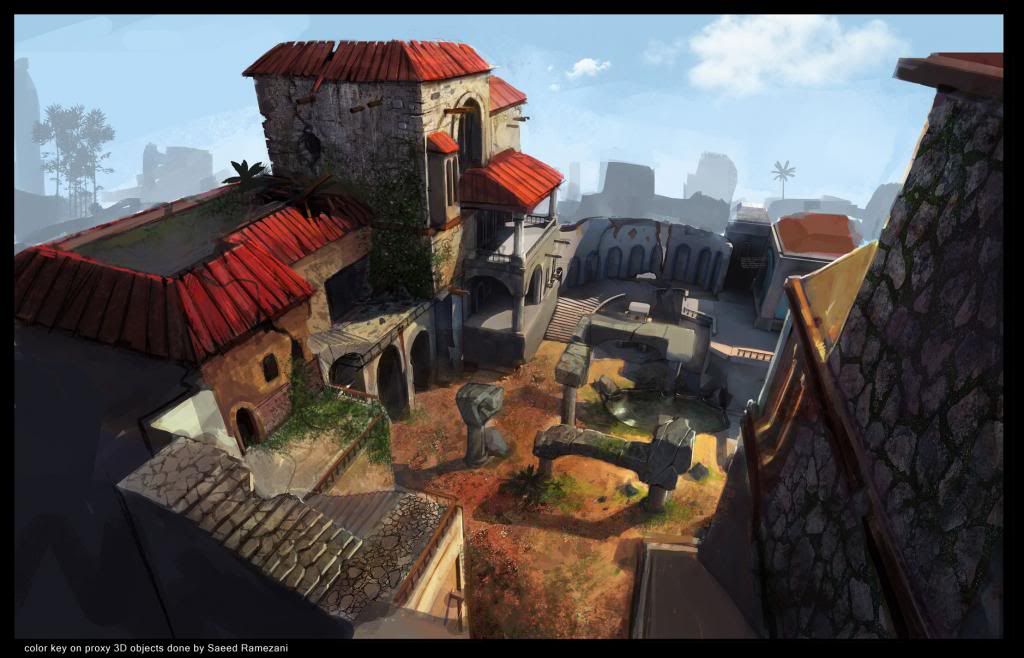
so these are the concepts that i should work with:

note: we have different methods in different studios and different genres about concept in-game
1-you can have some beauty shot which contain taste of the environment , level of damages and lots of possibilities may occur in a level , and environment artists will take care of the rest .
they decide which elements of the shot can be helpful in different parts of their scene
2-like the way that we did , blockmeshes turn to concept and then environment artist will come through.
there are many more methods which all depends on the studio, time and money.
Modeling:
so i got the concepts and blockmeshes as well and start making the scene.
i handled all visual parts like environment,props,textures,shaders,particles,lighting,dynamics(water and movable objects ) as well as post process .
before i started to work,i should make some vital decisions to define a process , process should meet their goals with considering their limitations (Time ,people and money)
so i decided to make low ,simple assets with high quality tilable textures.
the benefits:
1-simple,fast and productive assets
2-UV generation is so fast
3-different textures on simple geometries can give different feels
4-with powerful painting option in udk you can easily break tiling and reach much more organic feel
5-you can use movemods(some geometries feed with the same tilable texture, help to have nice silhouette and organic forms).
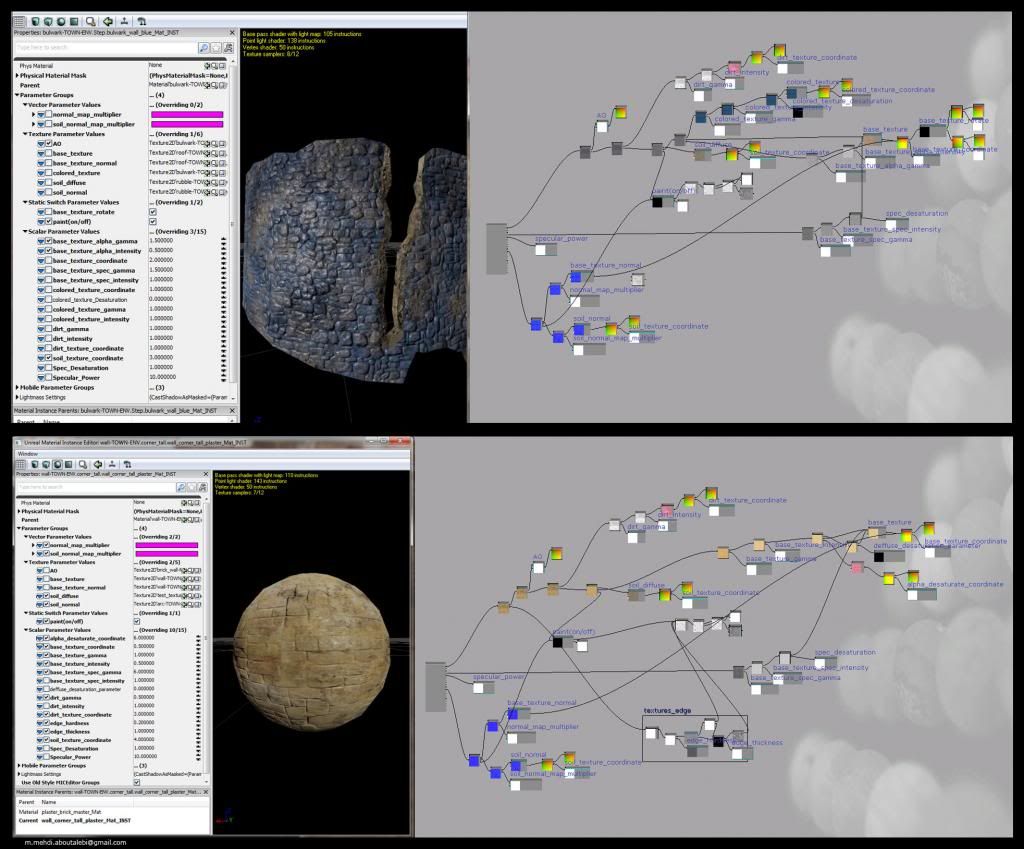
6-for platforming genre ,iteration is almost the most important thing , instead of putting lots of time on sculpting a wall and using it in exact units and exact places , you have a HQ detail texture combined with powerful material editor (UDK) which gives you the ability to have highly customizable shaders . so one HQ detailed wall with single task turns to a nice texture and a shader with lots of variations and usage .
so i started to work based on 2 inputs : level design,concepts
and these are some shots :
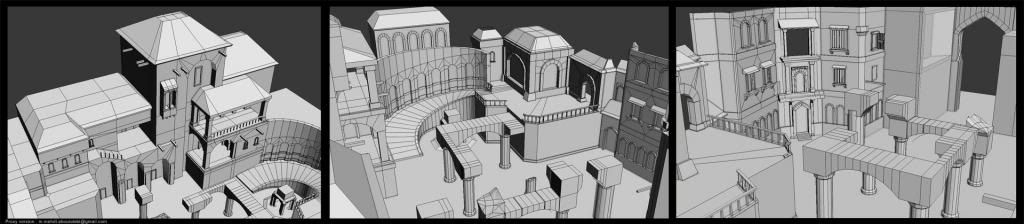
and at first I started with Proxy(very simple meshes)
proxy step helps designer to do last modifications if he/she did sth wrong.
after that, i add some detail to proxies and turn them into final assets .
Note 1 : your scene should be storytelling, if you had a story before creating a scene based on game story or an story in your mind , you can reach too much more organic feel. my story was simple; a group of people attacked to the town and its people try to defend themselves .
Note 2 : before starting to model , think about instancable parts ,,, which part could be a copy of another or just a simple rotation of an existing asset . this save you a lot of time and memory and it's crucial for better performance
[ame="
 https://www.youtube.com/watch?v=yIv3f9QdPV0"]town square-assets only - YouTube[/ame]
[/CENTER]

UV:
because we have simple geometries , UV generation is so fast, with simple projection you can easily unwrap all of them.
Note: it is very important to keep uv size the same for all assets , this will help you to use one material on different assets without copy it and change its uv coordinate and this is a good thing for performance.
TEXTURING:
this is the most important part in my process . while assets are responsible to keep low with perfect silhouette,textures help player to accept environment as an existing place.
for texturing i had a color key concept that another concept artist painted it on my 3d geometries and i should use it as my reference
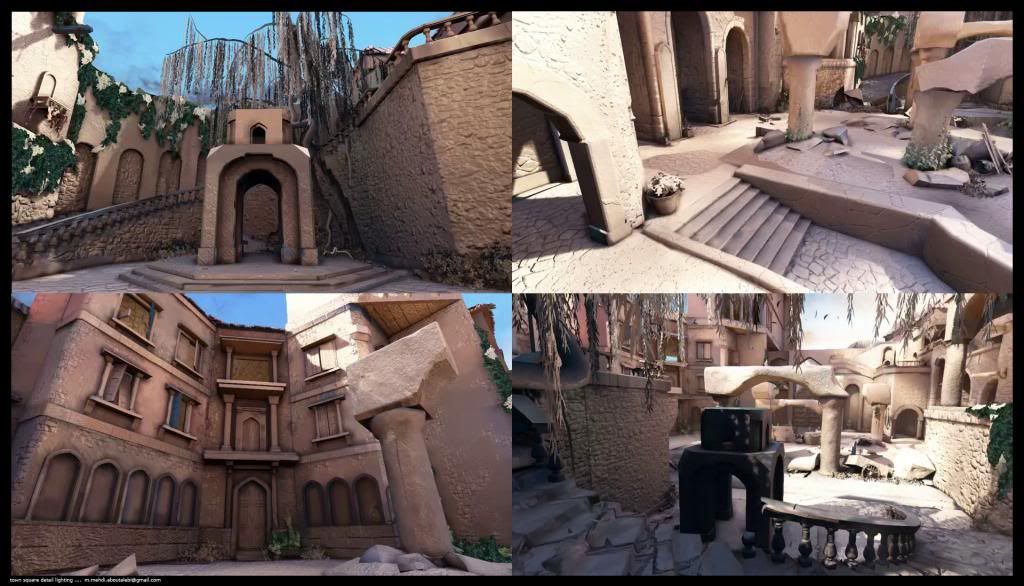
texturing pipeline is vary ,depending on your time and your goals, especially to derive normal map for games ,,, crazybump , nDo , nvidia all have their own benefits and drawbacks but for my own purpose which normal map is very crucial in my process i preferred to use ZBRUSH.
Zbrush do excellent job and derive normal map exactly from actual geometry and the result is awesome.
beside you can have different sets of for example bricks and combine them with udk painting option and the result is awesome. in this video you could see the effect of normal map generated with zbrush in UDK as well as some of my textures :
[ame="
 https://www.youtube.com/watch?v=5ymGxYl0IM8"]Town square-detail_lighting - YouTube[/ame]
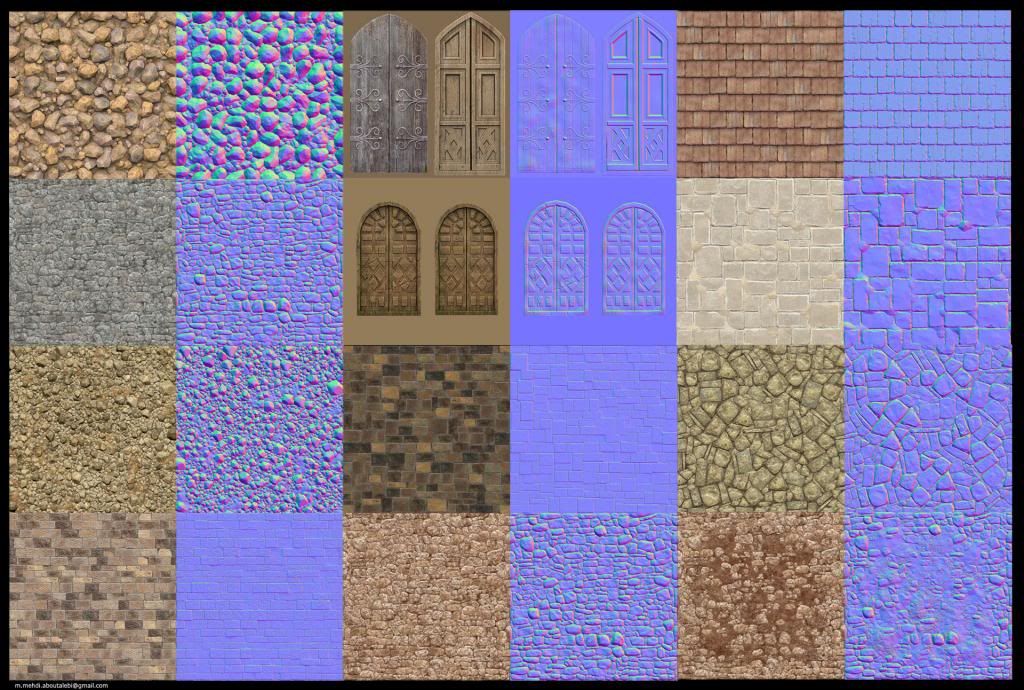
And diffuse:
material editor is so powerful as well as painting option .
in this video you can see how well textures blend with each other and some of my shaders :
[ame="
 https://www.youtube.com/watch?v=2z8e6NHHTXU"]town square-textureOnly - YouTube[/ame]
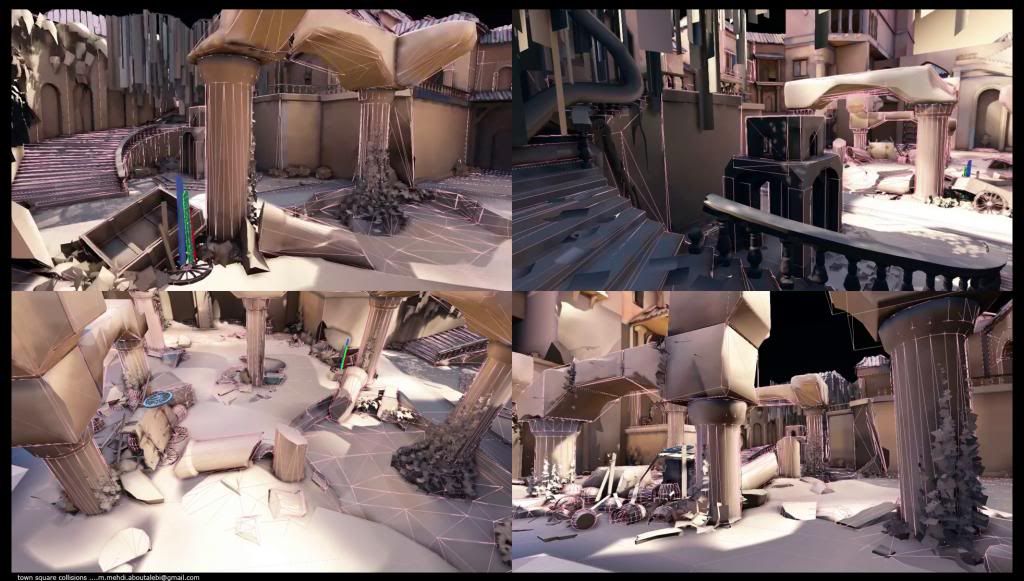
collisions:
i should mention that don't ever forget to make collision for your assets , especially those that depends on gameplay like ground or in my case pillars and some walls . remember,you and your teammates always need to play your scene .
Dynamics:
when we speak about dynamics , first thing that comes in mind is particles and that's true but without movable objects like windows moving with the wind,water ripples or interactive elements , your scene looks very solid .
in UDK you can control dynamic objects with : 1- matinee2-shaders 3-animation comes from external packages like Max or Maya
so i will explain each method with an example in my scene :
my willow tree:
Built in 3ds max, completely organic and Tfrag(stands for time fragment is an asset which is unique without having plan to instance it , i heard this in naughty-dog talk at first )
its movement controls by wind shader and for getting the best result i have used a powerful plugin from Epic called pivot painter .
pivot painter is a 3ds max plugin helps you to paint vertex color procedurally and more accurately .as you can see willow leaves move with the wind quite dramatically and help player to feel more alive.
PivotPainter :http://udn.epicgames.com/Three/PivotPainterTool.html
wind shader:http://udn.epicgames.com/Three/WorldPositionOffset.html
the wind force controlled by matinee, sometimes is calm and sometimes is so powerful
[ame="
 https://www.youtube.com/watch?v=qPd35g_BhpA"]town square_willow tree_PivotPainter - YouTube[/ame]
Rope and plants:
ropes move with wind shader and thanks to Epic and its powerful plugin named pivot painter.
plants move with wind shader but no more vertex color , i thought that was not necessary .
[ame="
 https://www.youtube.com/watch?v=MeUMSj3vKqs"]town square-Rope-pivotpainter - YouTube[/ame]
wheel and windows:
control by matinee, just a simple animation.
water:
for water I implemented Valve technology called Flow map,it's not sophisticated, just wrapping normal map uv coordinate based on RGB map represent vector direction helped me to slow water around edges and back and force ripples near the edges ,very subtle very effective.
[ame="
 https://www.youtube.com/watch?v=hC39eA16cLE"]town square_flowmap - YouTube[/ame]
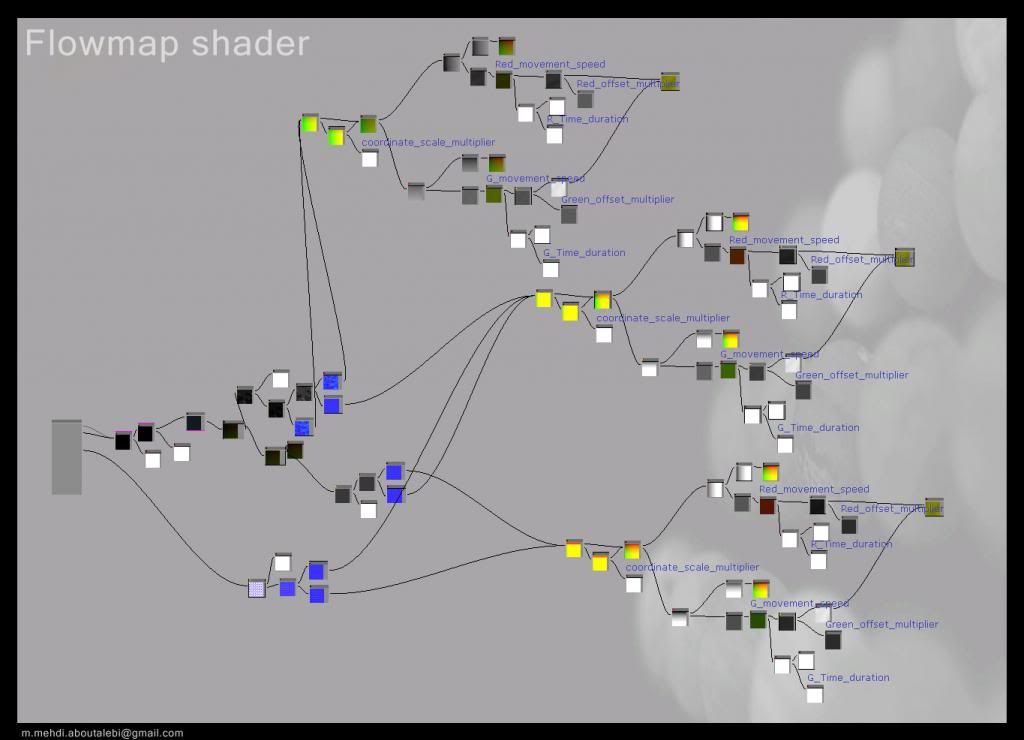
Particles :
thanks to very Powerful particle editor (Cascade) in UDK, I made wind particles with some variation , dust with leaves , falling dust and stone and loop them in cascade or with matinee .
Lighting:
some people think that lighting is quite simple in recent engines with differed lighting and GI calculations and real time AO but in fact they think completely wrong . you should know exactly what you want , how can you compensate lack of GI in some areas , where does color bleeding happen and do you want it or not or try to exaggerate that .
but in this case UDK does a very good job and you can handle whatever you want with its lighting tools.
after that with Post Process you can meet whatever is in your mind.
Don't forget to have a proxy light rig at first to see the result of normal maps.
After all this is the last video of Town Square map again for those who want to see article contents visual again:
[ame="
https://www.youtube.com/watch?v=UJ6L1kZlmkk"]Town square-Beauty shot - YouTube[/ame]I hope this was helpful for you
I love to see your comments and love to answer your question if I can
thanks for read
[/CENTER]
Replies
Something is off, and its hard for me to place my finger on what it is. I feel like there is a grunge layer of some sort that is hurting the consistency here. I see it in your unlit shots. It is like a cloud filter mask that is overlayed on top of your materials? Whatever it is, its breaking up things to much and doesnt feel very natural. Its like your awesome textures are `smeared` with black stains. Any idea what that could be?
I actually think your normal detail shots are the best, as they hide this effect.
The post processing seems very starky (contrast). Some areas are extremely dark, and in a daylight vista like this, it doesnt seem to fit.
Otherwise great work, i love your texture work, and making the textures in zbrush is defiantly the way to go! Use height maps if you arent (some areas seem very flat).
Cheers!
Find whatever Ref you want, yet take a look at the texture work(below), you can make out the different materials, Not everything has the same amount of wear, distress, or dirtiness. The brick patterns are not covered up by the grunge patterns, the dirt is applied to the edges of the brick and in the mortar.
You've done an amazing amount of work here, keep pushing, it's almost there.
I see what the others are saying and I am inclined to agree, I don't think it quite holds up to the standard of the top games out there. I think the uniform grunge issue is a good observation, and maybe the environment props come off as a little too simple? I'm comparing to the drake screen shot here, but if its the style you want/need to have for you particular project,more power to ya! I also agree that you are very close to something awesome. Sounds like you have pretty extensive knowledge in UDK.
Much better than what I can do atm, but inspiring and informative, thanks again.
yes ,you're right, some textures are not good as they are in unlit mode , and that's because of my shaders , most of them has paint option on/off but the others made my materials combination of two and because of that normal maps are not great as they really are but because that was not noticeable as player, i ignored them
comparing my shots with uncharted makes me feel happy ,,, my references came from uncharted , it's not excuse guys but i had to do all parts from modeling to vfx and i had no time to revise all of them
thanks for your attention , i love to hear your ideas