The BRAWL² Tournament Challenge has been announced!
It starts May 12, and ends Oct 17. Let's see what you got!
https://polycount.com/discussion/237047/the-brawl²-tournament
It starts May 12, and ends Oct 17. Let's see what you got!
https://polycount.com/discussion/237047/the-brawl²-tournament
[WIP] Jurassic Park inspired Velociraptor
Greetings Polycount, for my Uni assignment i am going to be constructing an accurate representation of a velociraptor as based in the Jurassic Park films and any current video games, in other words its not going to be 3 feet high with feathers :P
Here is the base mesh currently ready for importing to zbrush:


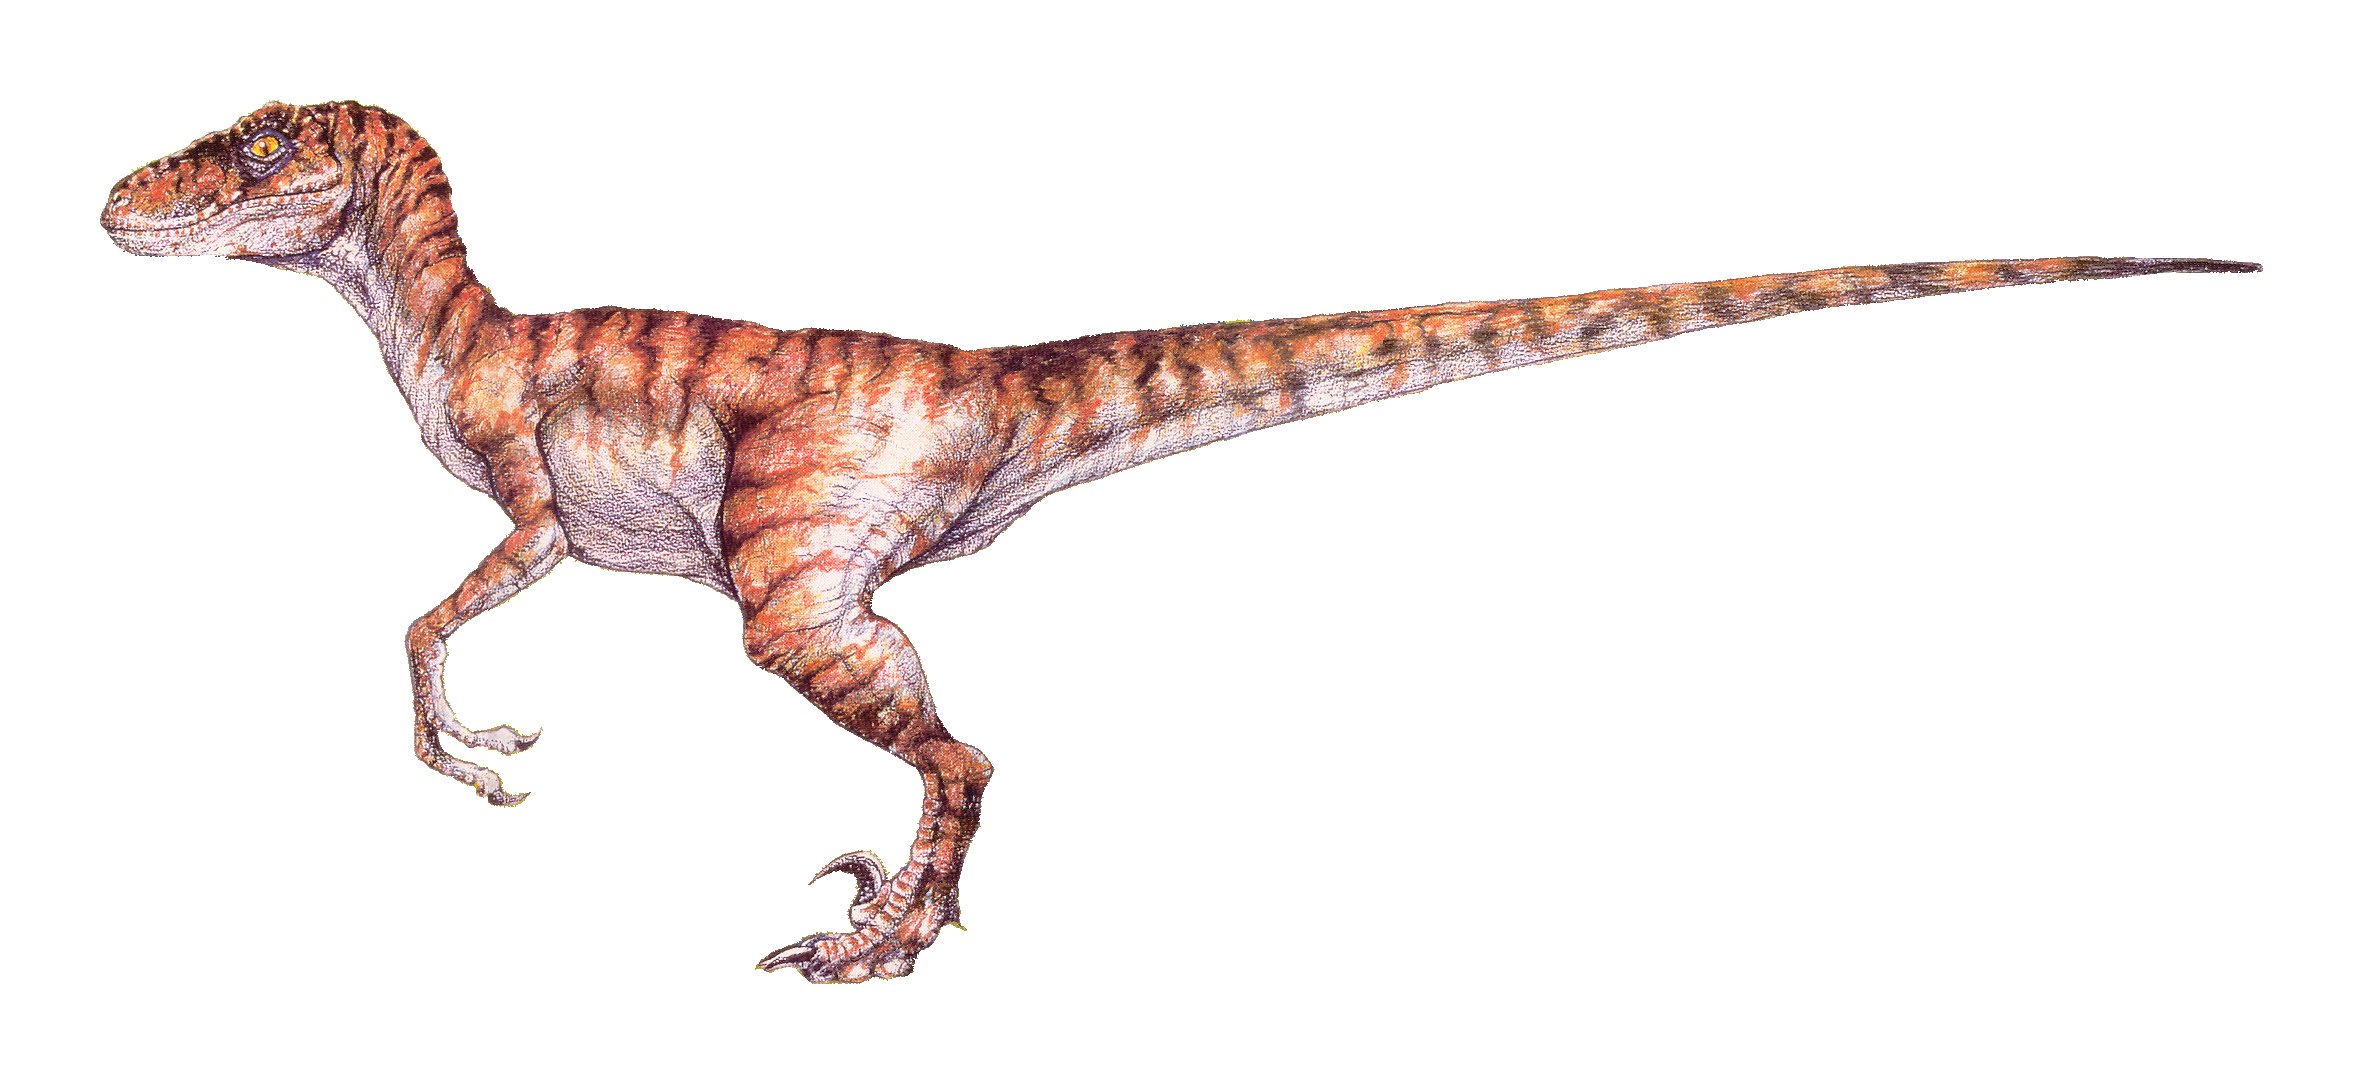
Here is the side image reference that the base mesh was based on:

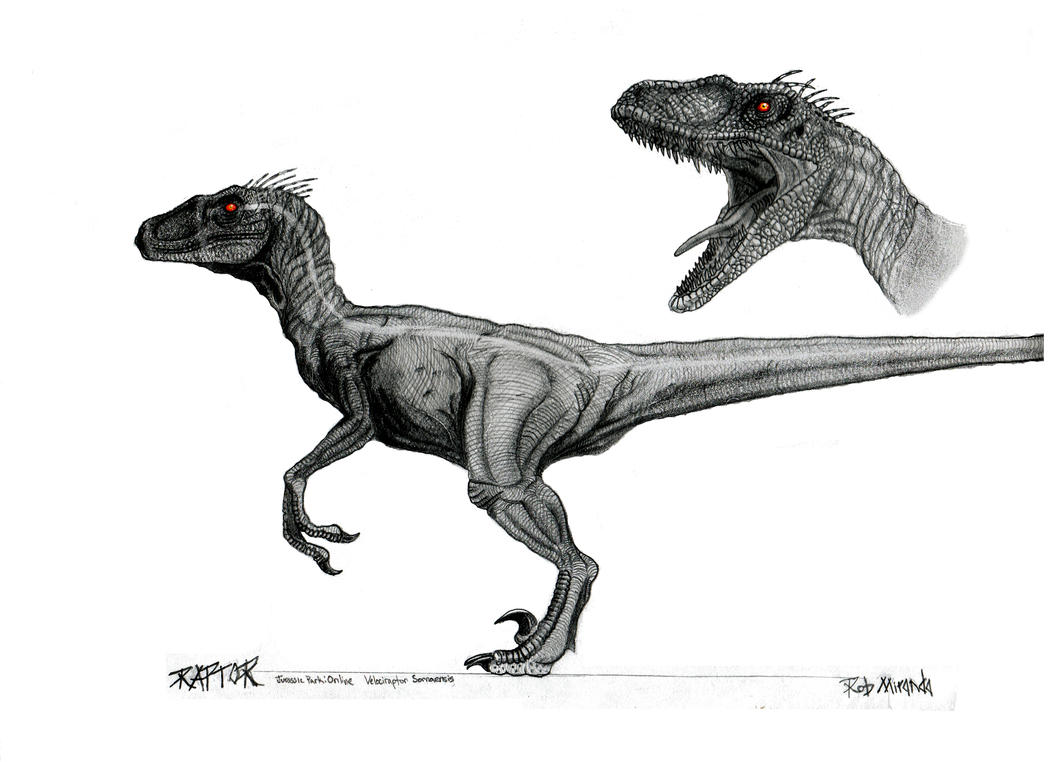
I am currently struggling to find any decent reference for muscle forms for a raptor. The best i have found currently is only a concept and still a side view:

If anyone can find any useful reference i could use that would be great. Any critique on the current base mesh is greatly appreciated.
Here is the base mesh currently ready for importing to zbrush:


Here is the side image reference that the base mesh was based on:

I am currently struggling to find any decent reference for muscle forms for a raptor. The best i have found currently is only a concept and still a side view:

If anyone can find any useful reference i could use that would be great. Any critique on the current base mesh is greatly appreciated.
Replies
DWalker with regards to the legs are you referring to the underside of the legs or the thigh area?
Production molds and the behind the scenes footage could be invaluable to get a good view from different angles.
http://www.yourprops.com/1-1-Resin-Velociraptor-Bust-other-replicas-movie-props-Jurassic-Park-1993-prop-31980.html
https://www.stanwinstonschool.com/blog/jurassic-park-evolution-of-a-raptor-suit
Also, I would step down a few sdivs and nail the big shapes first before going too much into details.
I had seen that ostrich picture after one of the above comments but i didn't quite realise the shape at the top thanks.
I'll get to work on some of this
A little unsure how to quite get the shape of the chest and underside.
Thanks for all the help so far everyone, hopefully i'm not too far away now so i can start on the scales xD
I have also been looking a lot more at the bust of the head from the jurassic park movies and working on adapting my sculpt to better match that, here's where i'm up to so far:
Still a way off yet, mostly working on the inside of the lip and the gums. Teeth etc need to be re-positioned so are hidden for the moment :P.
If anyone notices something i might have missed please let me know asap before i start detailing
If I have one critique it's that the fingers are all the same length. I'm pretty sure the middle finger is longer than the other two. If nothing else, it would look more interesting if they were of different lengths.
A more realistic portrayal would look more like those of their descendants:
If anyone else has some critiques on the scales and if i'm going the right way with this that would be great
EDIT: I'm using a similar reference to that first image in your post for the sort of "loops" for the scales and such.
Link = http://img16.imageshack.us/img16/8637/26670004c.jpg
No way do i intend to hand sculpt the whole thing though o_O, i actually have very little time left to get this sculpt finished before retopping for my assignment hand in end of tomorrow : /. Planning to use some form of alpha or the scale brushes within zbrush for the body, what i am unsure about is the best way to get the cracked skin look you get across the whole body easily. At first the only thing i could think of was the rake brush but its far too destructive and creates too wide cracks for what i was after.
If anyone could help by directing me to how i can a similar effect to the skin detailing in this example that would be a huge help:
http://www.zbrushcentral.com/attachment.php?attachmentid=318198
But anyway the head is nearly finished, then i need to find a much quicker way of doing the body, more than likely going to use scale brushes within zbrush unless i need my own alpha.
Any advice for how i can finish quicker would help haha :P
Though this only seems useful around the eyes and mouth areas, and it may look repetitive.
Maybe using masking for the shapes of the scales and then a deformation modifier to make them inflate or something.
Hopefully this helps at least a little, I'm pretty new to zbrush myself so I don't know too many tricks/shortcuts.
Ive used the ScalesLizard brush from zbrush to create a base for the faint scales on the body, i will turn this down on the layers settings to make it just a light surface noise.
Next i will go over the top of the body using a standard alpha in zbrush with the standard brush to cut in some wrinkles. I found with the slight randomness of the alpha and the sharpness of it it is much more effective than rake or slash3 to get the cuts i want
Effect with some slight smoothing applied:
Alpha used:
I'm sort of stuck at the moment with colour theory for the polypainting process, i'm not by any means a good texturer and i haven't done a lot of painting in the past but i would like some opinions on the sort of colour styles i should be going for.
From the reference i've been looking at i have a general idea on the sort of patterns i should be following but like i said how to utilize these with the sort of colours i want is proving difficult. I'm after a blend of some deep blues and vibrant greens as these are my favourite colours and they compliment eachother so why not? :P
Underneath is an example of some of the patterns i am trying to replicate and then a couple of my attempts for colouring:
Body stripes reference:
Attempts:
One of the main comments i got after this one was that the colours were perhaps a bit too saturated, so i quickly tried another iteration with a change of blue and green colouring with some additions of some purple shades.
Like i said i'm pretty inexperienced with this so feel free to be as critical as you can, it didn't take too long to generate either of these as you can imagine. I have about a week left to sort out the whole texturing process for this and finish up my progress on a CAT rig and some simple animations ^^. I will post some shots of the retop mesh and what i have for the rig soon hopefully.