Need Feedback on Uni Assignment - 3D Facial Modelling
polycounter lvl 9
Hi there
This is the first time I have posted on this forum so I hope that this is in the right place. I am a 2nd Year Computer Games Design student at Staffordshire University and have been working on a 3D Facial Modelling assignment to model my own head for a current generation games engine, using 3DS Max, ZBrush and UDK.
I could really do with some feedback from people, what you think of it and any improvements that could be made.
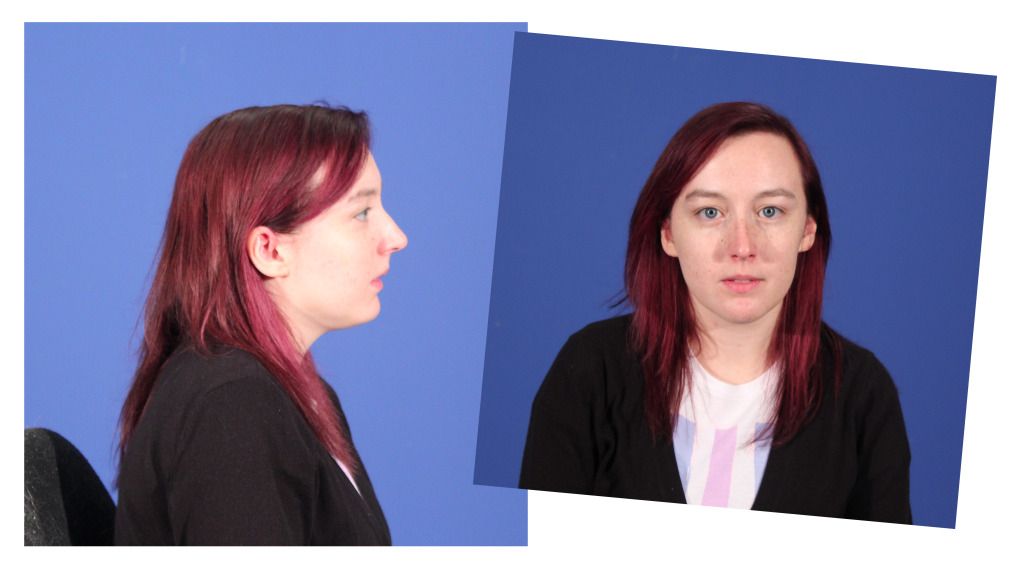
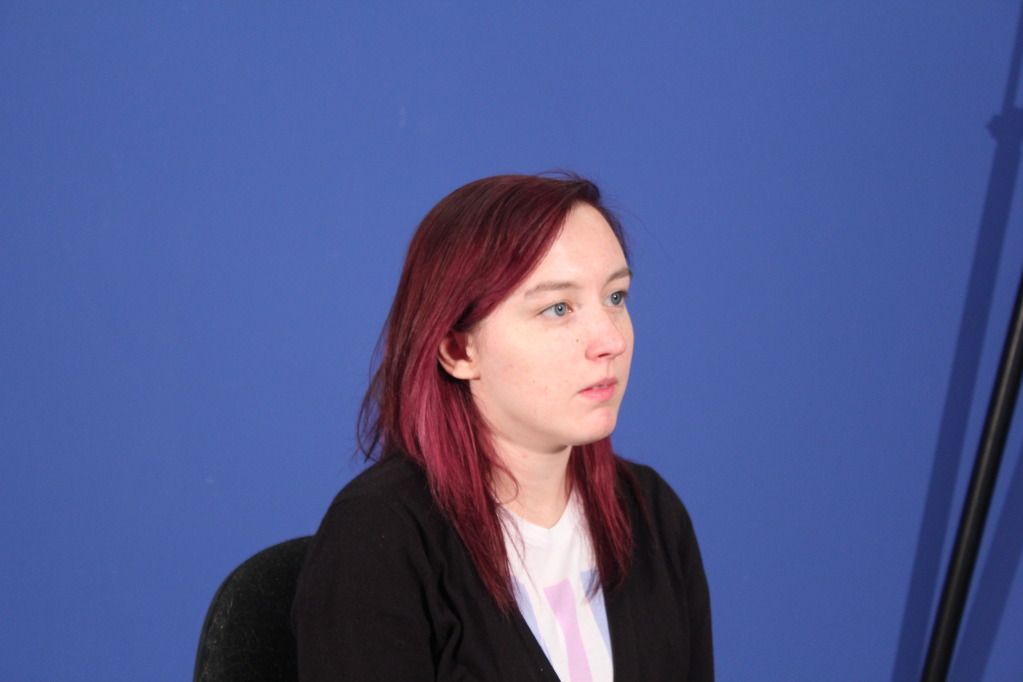
Photo References
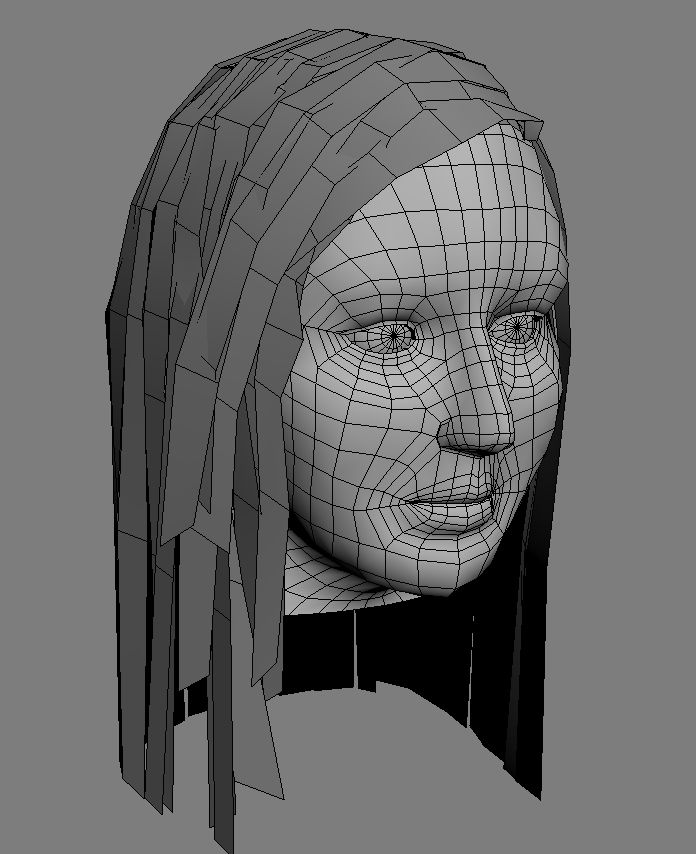
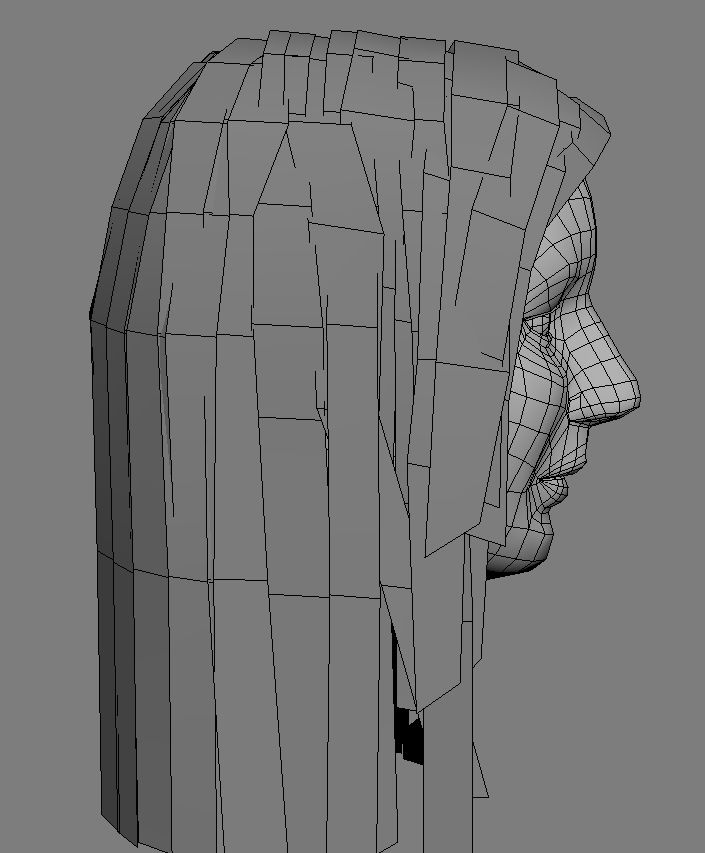
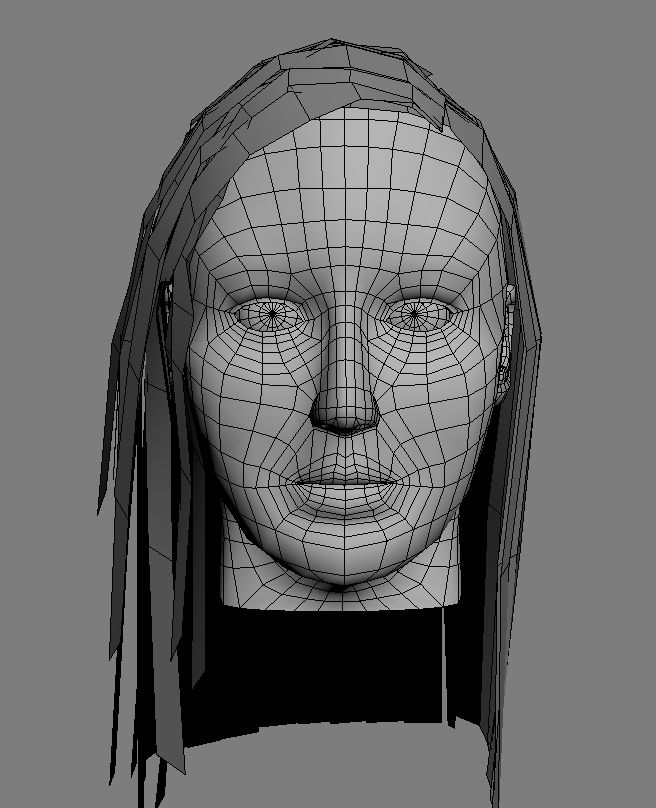
Base Mesh
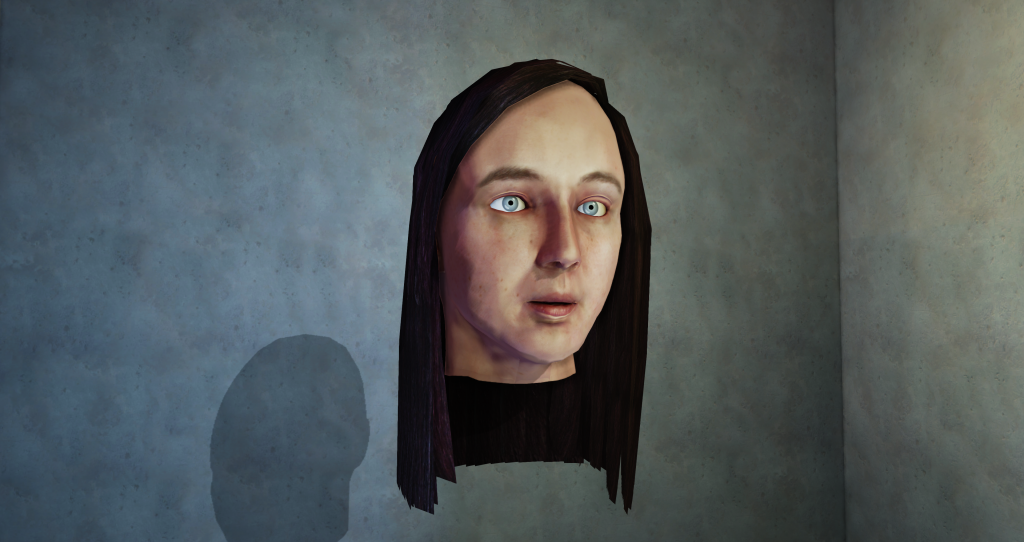
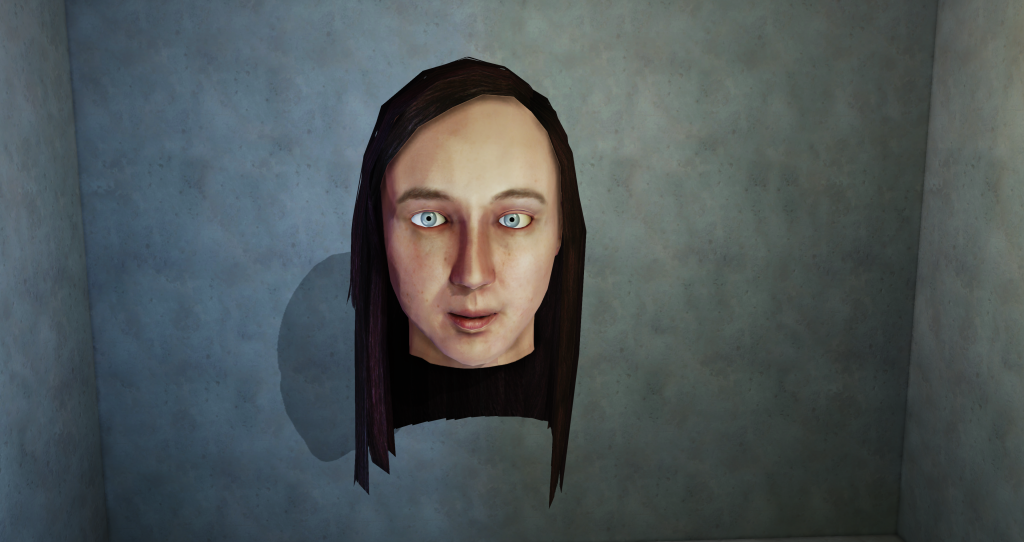
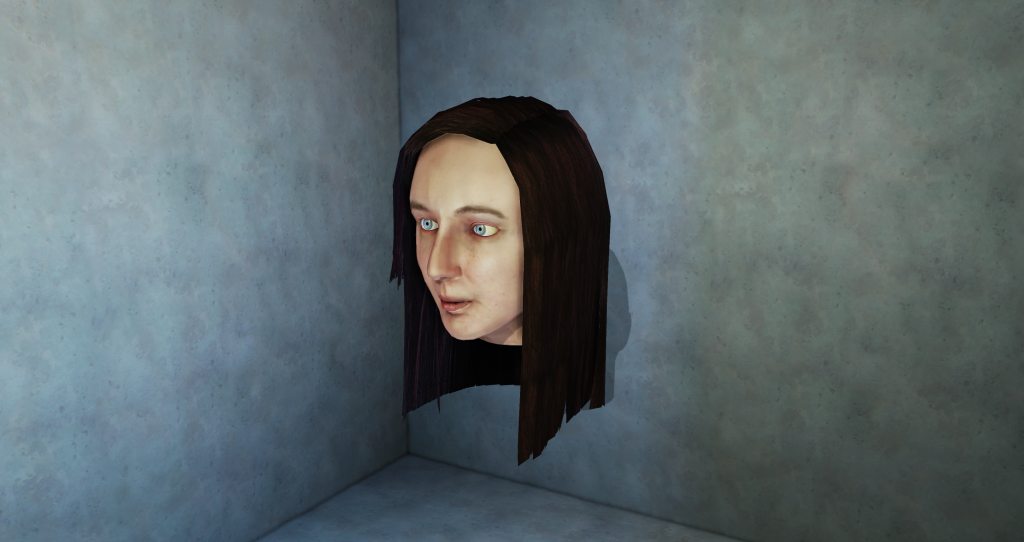
Textured with Diffuse, Normal, Specular and Opacity maps in UDK
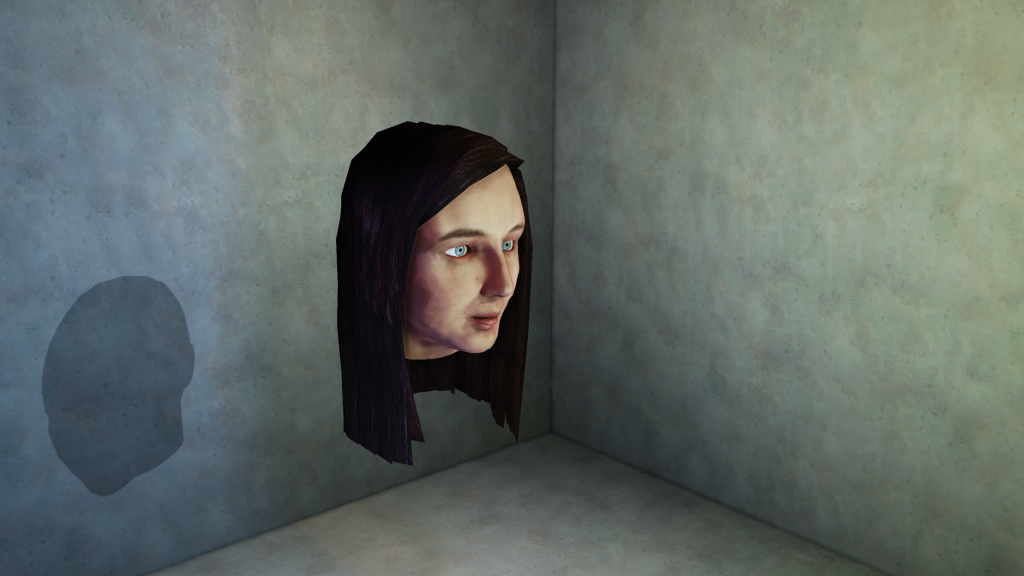
This is the first time I have posted on this forum so I hope that this is in the right place. I am a 2nd Year Computer Games Design student at Staffordshire University and have been working on a 3D Facial Modelling assignment to model my own head for a current generation games engine, using 3DS Max, ZBrush and UDK.
I could really do with some feedback from people, what you think of it and any improvements that could be made.
Photo References
Base Mesh
Textured with Diffuse, Normal, Specular and Opacity maps in UDK
Replies
Eye shape is off, close, but a bit too large. Eyeballs set just slightly too far back in the sockets, move them forward so that there isn't as thick a dark line around it, or move the lids back. Also paint some shadowing and veins around the edge where the eyeball meets the lid, it's too bright right now leading to that "deer in headlights" look on the model.
Don't shy away from doing ears, it will add more character if you do the ear and have your hair behind it as your photo has. It's also good practice, and pushes the mass of the hair back and out, giving it more form to work with instead of the flat alpha strips you have currently
Speaking of which, model, or paint in your hair line, not just the lengths. Right now it looks like your forehead is much larger than it really is.
Check the cheekbone, or rather, the area under the cheekbone (forget the name). You still have some definition there even if it's hard to see. The cheekbone height and size seems accurate.
Check the mouth, remember that there's teeth and a jaw behind it. Looks like you might have the sides of the mouth pushed too far back.
The upper lip, from the front, will often appear wider due to the shadow cast by the sides of the lip. Try to get that shadow in somehow as right now, the lack of it makes the model's lips look smaller than reality, even if it's accurate. Also, your upper lip lifts at the center, in the model it's flat, which looks really unnatural.
The bridge of the nose is too far forward. The nose shape is also off. The flow from the bridge to the tip just kind of blobs into a tip. Your nose, however, does stay defined up until near the tip where you have the separate patches of cartilage creating a more rounded shape. Also don't skimp on nose definition.
Are you using only poly modeling on this? Have you done a high poly and bake?
As for the ears I have modelled them, I just forgot to post up the pictures without hair.
We had to use edge loop modelling to create the base mesh, take it into ZBrush to sculpt in the detail, then retopologise using the tools in 3DS Max and create the normal maps etc from ZBrush
Lowpoly shots of the actual polygons don't mean too much nowadays since so much detail is determined by the highpoly and the bakes. Unless you're doing handheld of a specific art style. In this case, you're doing realism, which means high poly. Showing the isolines is good for getting feedback on poly flow though.
Then more can help you since my stuff is still pretty primitive.
You've modeled the head too low an angle, the one in the photo looks to be closer to a natural resting angle.
Everything else got skewed from that.
Step back to lower subdivisions to smooth out the clearly incorrect wavy surfaces on the side of the cranium and jaw/cheeks.
Go ahead and sculpt in jaw, cheek, and bone detail in, even if you're going to smooth over them later, it will help you by placing those landmarks in.
Fix the ear.
Fix the temple area, it will seem smooth, but it has some very subtle plane changes coming off the eye sockets and cheek bones.