UV layout of large objects (Buildings, etc)
polycounter lvl 5
hey guys. I am trying to get started on some work here, but I have hit a block when it comes to creating my assets.
Say, for a large apartment building, how is the unwrapping handled? I asked a sort of similar question to Lewist in his thread here but figured i'd start my own thread. How would you handle the texturing of an object like Lewist's hut? Lewist's first texture has multiple 'tileable' textures on it, but how would the UV's be laid out to utilize that texture correctly? The only way I know to do tillable textures is like this:

But that wouldn't work with his texture, unless all the sections in his main texture (Wood/roof/rock) were split into their own separate texture files.
Secondly, using this approach would mean I would have to make everything a separate object - the roof, the walls, the wooden trimmings, etc. That just doesn't seem right?
If I instead try and pack everything in to one texture, then I wont have a very crisp looking mesh ingame. A wall that is massive on screen will only be using a portion of the entire texturemap. (Imagine an apartment building, for example)

So again, that doesn't work ether..
Say, for a large apartment building, how is the unwrapping handled? I asked a sort of similar question to Lewist in his thread here but figured i'd start my own thread. How would you handle the texturing of an object like Lewist's hut? Lewist's first texture has multiple 'tileable' textures on it, but how would the UV's be laid out to utilize that texture correctly? The only way I know to do tillable textures is like this:
But that wouldn't work with his texture, unless all the sections in his main texture (Wood/roof/rock) were split into their own separate texture files.
Secondly, using this approach would mean I would have to make everything a separate object - the roof, the walls, the wooden trimmings, etc. That just doesn't seem right?
If I instead try and pack everything in to one texture, then I wont have a very crisp looking mesh ingame. A wall that is massive on screen will only be using a portion of the entire texturemap. (Imagine an apartment building, for example)
So again, that doesn't work ether..
Replies
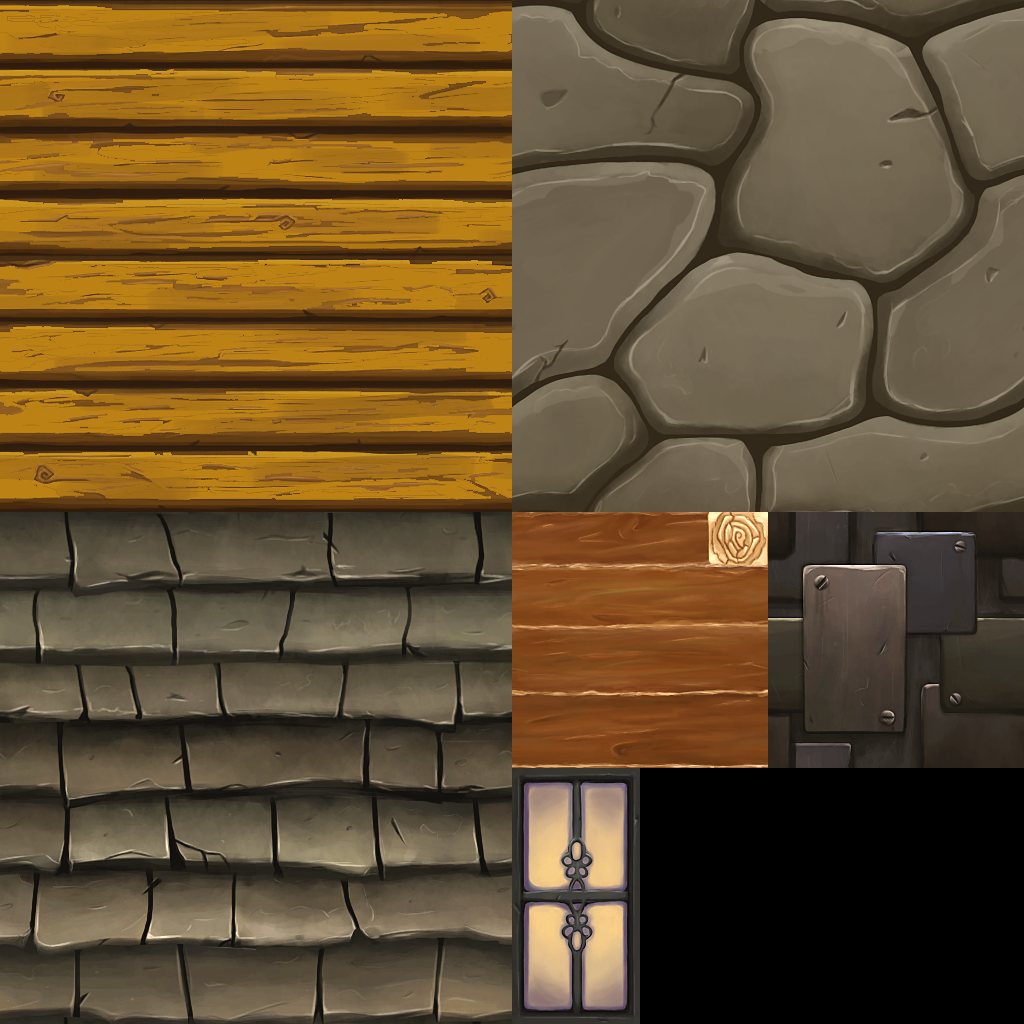
I posted this image yesterday in another thread, perhaps it will help:
And the actual thread:
http://www.polycount.com/forum/showthread.php?t=104238
Well, is there any steps to take to unwrap my texture like that? There must be more to it then manipulating the UV's by hand. I'd imagine that it would be a massive pain in the rear to try and make sure the UV layout maps the texture without distortion if someone was to attempt to do this by hand!
it all just boils down the project, I've worked on games where assets use multiple tiling textures and one or two "bits" textures that contain things like windows, doors, lanterns, signs, etc...
I've also worked on games where environment assets could only be one draw call - so just one texture sheet.
read through the wiki and try out the various techniques. And yes, you will have to move around uv islands by hand.
There's no manipulating of the UV's what so ever. In the example I posted I'm duplicating the mesh, which in-turn duplicates (thus overlapping) the UV's. The same result is achieved via face mapping on a surface with square polygons.
Not sure how to embed this on the forums (or if I even can?) but here's a maybe/maybe-not helpful video that shows the same results via a different method.
http://www.garydave.com/jing/FaceMapTile.swf
You can generally get away with cutting shapes out of those polys, ala windows:
Provided you don't skew the original UV's, you don't need to mess around with them at all.
Also, it's worth noting that if you are in a situation where you need to move UV's around on an atlas, it's not a job worth worrying over as 99% of the time you can complete the task with numerical inputs, as opposed to any real "manual" tweaks.
Work smart, not hard.
GeeDave, that plugin you posted a link to almost allows you to just build however you like and then 'bakes' in the extra verts at the appropriate intervals to give the UVs something to bind to.
http://www.scriptspot.com/3ds-max/scripts/texture-atlas-generator
Or, in theory you can build your original asset, UV map it with a repeating tile texture, and do what the above tool does but do it manually.
It's a bit of a messy looking approach but lets you model something more complicated and then essentially you just slice it up where you want UV coords to go to allow tiling off an atlas texture.
You just then have to do the equivalent chopping up of the UV grid and combine it all later.
I'm generally surprised that workflow isn't supported already in 3DS Max like the script above allows.
It seems really sensible to add geometry to tile textures to allow tiling AND atlasing to reduce render costs.
I suppose that is quite specific though so any dev team will write their own tool to optimise stuff down appropriately at the end.
My lesson from yesterday was that it's still relatively easy to atlas later even with just UVW tools in Max, and easier to tile/build per texture/material initially.
Get your assets looking first is key, THEN worry about crunching/optimising down for your final delivery needs.
Otherwise you simply plan too much before building and build in optimisation into your assets. Problem then is if you decide you can run a bigger texture atlas, or need more details, you are stuck finding space to fit them in etc
Obviously keep the optimisation in mind but try ignore it more than be a slave to it at first I guess
Dave
Before the bake, using 4 separate tiling textures, unwrapped on a second channel using groups and auto-pack with zeroed padding + no rotation/scaling:
And the result:
I am using Blender myself, and I don't seem to have some of the features you do. I could only work out one way of getting the same results as you. First, I have to mark seams for ALL the edges, Unwrap the mesh, and then position them face UV's properly. Marking all the edges ensures all the faces are separated. The unwrap wont keep the faces as squares though - the faces will unwrap to the shape they are, and I have to organize it all myself. Here is a video:
https://dl.dropbox.com/u/21307579/Modelling/tiling.swf
Fast forward 10 minutes, and I get this:
So I guess for this method to work on a large, flat, building wall, I'd have to subdivide the wall to give me more UV's to work with hey? Makes a lot more sense now
I may have skipped over a little something though, my fault for providing a bad example but non-square faces should have non-square UV's to avoid skewing. By which I mean... err, See image:
Green lines = UV's
There are a few ways to get the result on the right within Max without much hassle. Like preserving UVs when editing a mesh in a sub-object mode, or copying the UV's from an existing tile, or starting with the tile geometry and just cutting into/out of it.