The BRAWL² Tournament Challenge has been announced!
It starts May 12, and ends Oct 17. Let's see what you got!
https://polycount.com/discussion/237047/the-brawl²-tournament
It starts May 12, and ends Oct 17. Let's see what you got!
https://polycount.com/discussion/237047/the-brawl²-tournament
Level Assembly and Lighting
*UPDATE*
Here are some final shots. Please remember that everything from concept to post-production was done in 1 month by me.
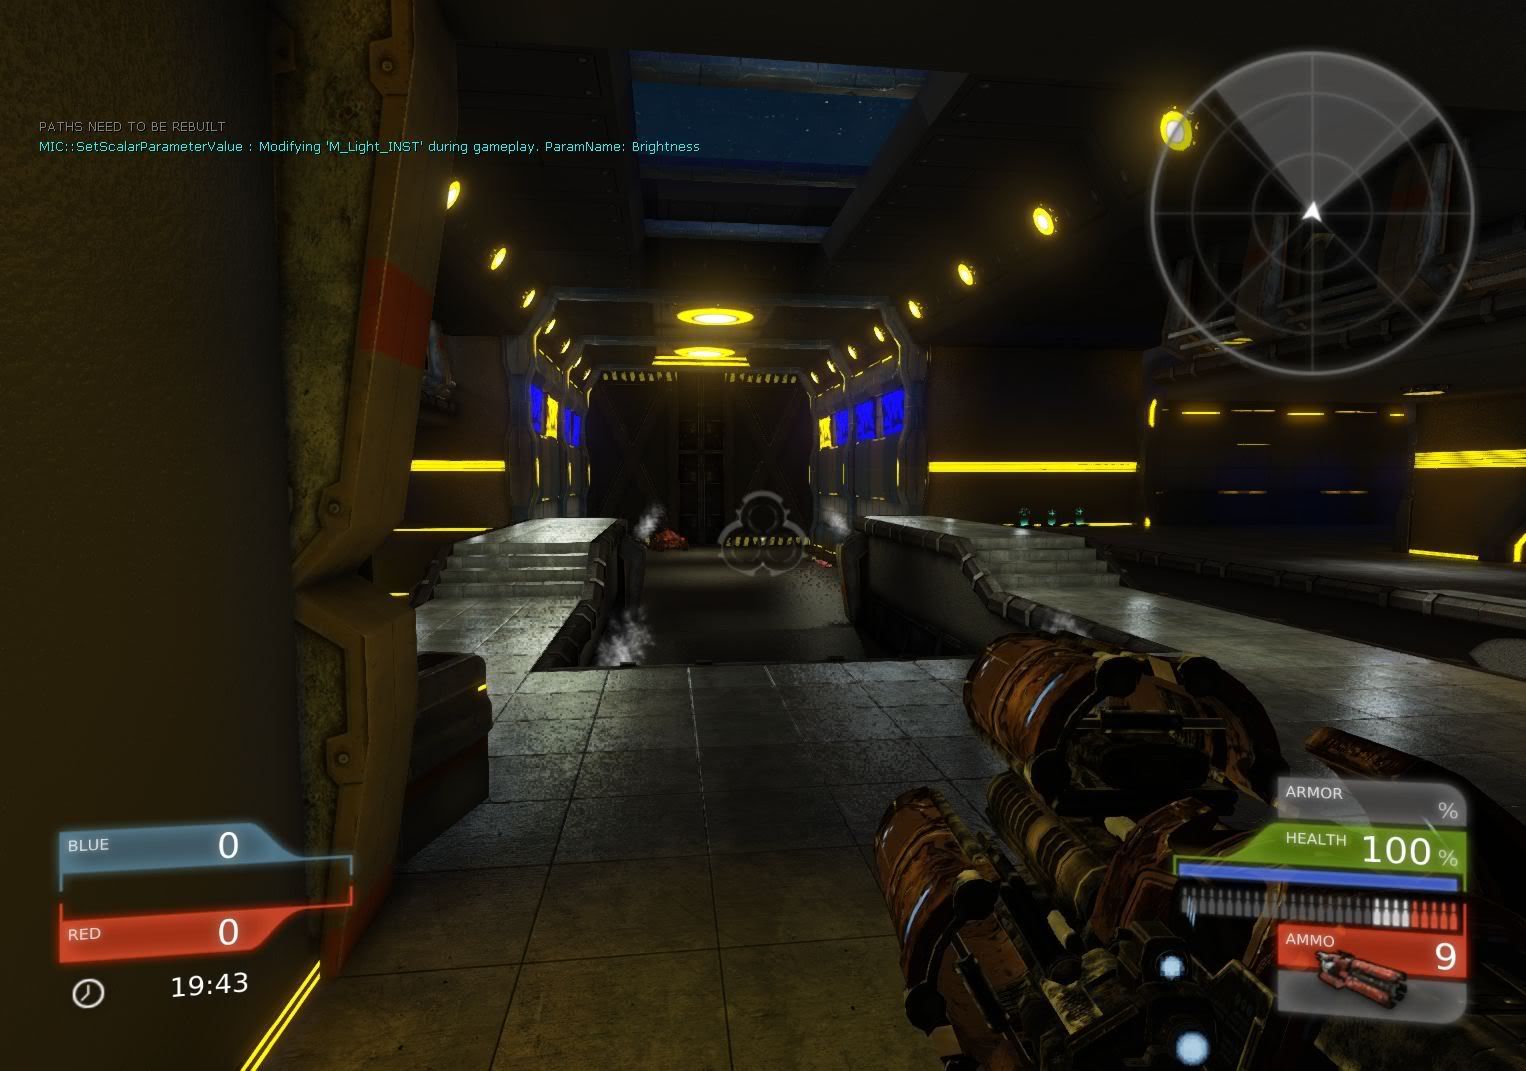
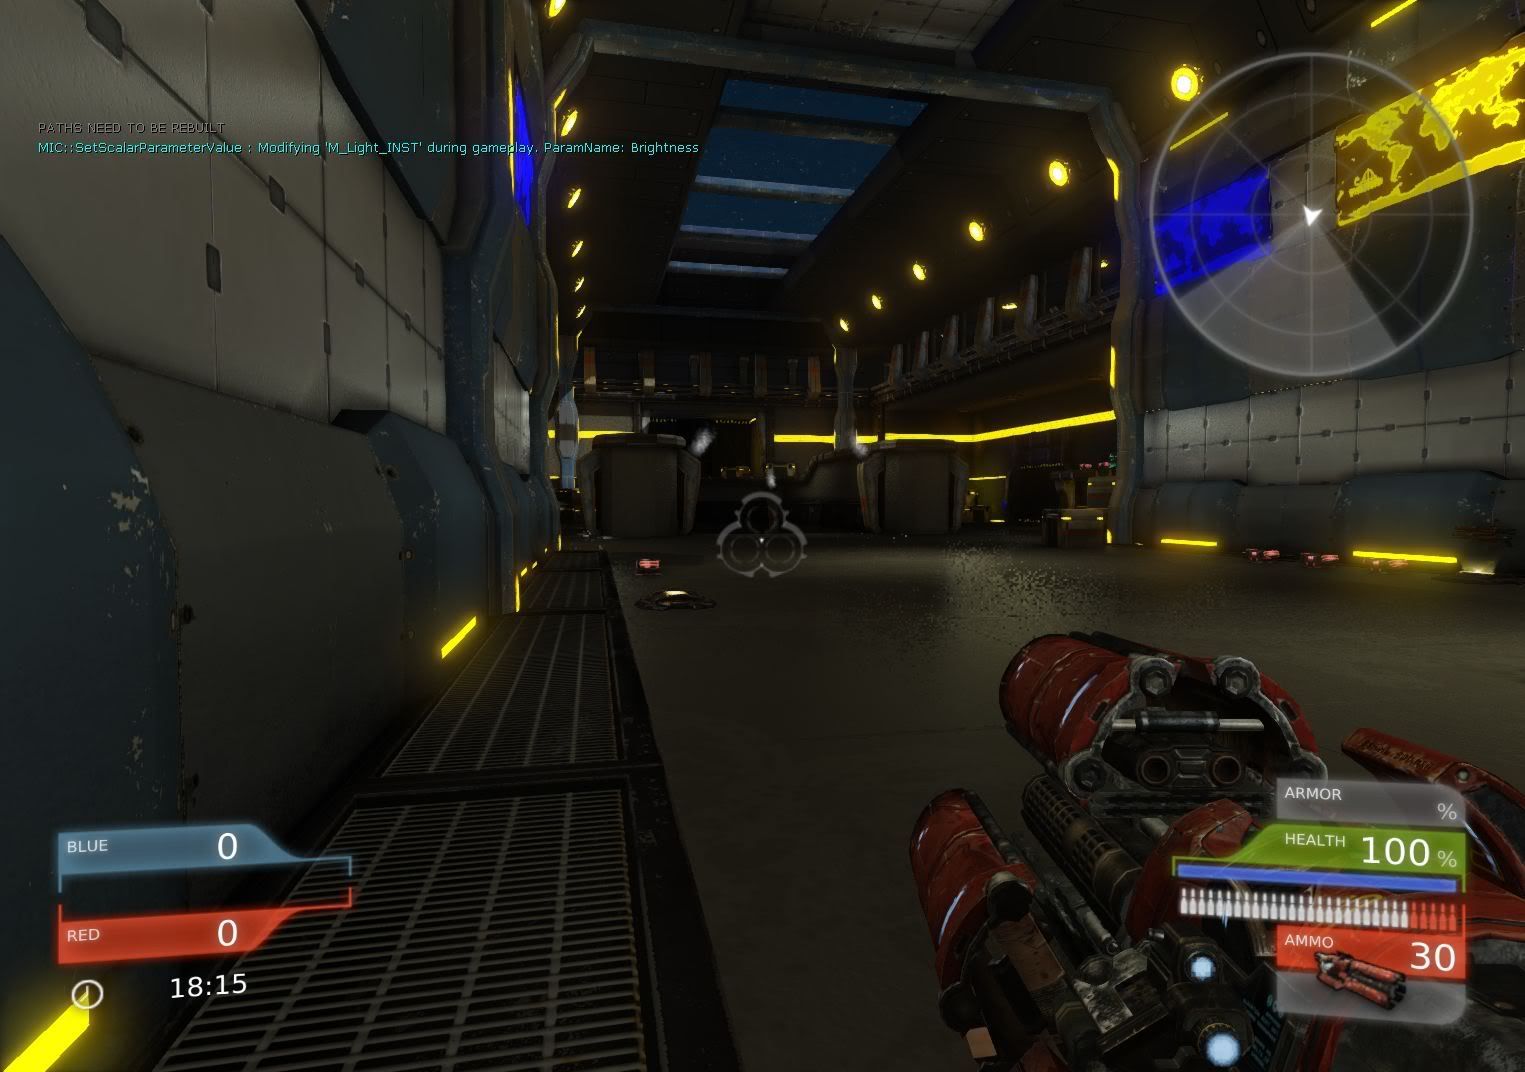
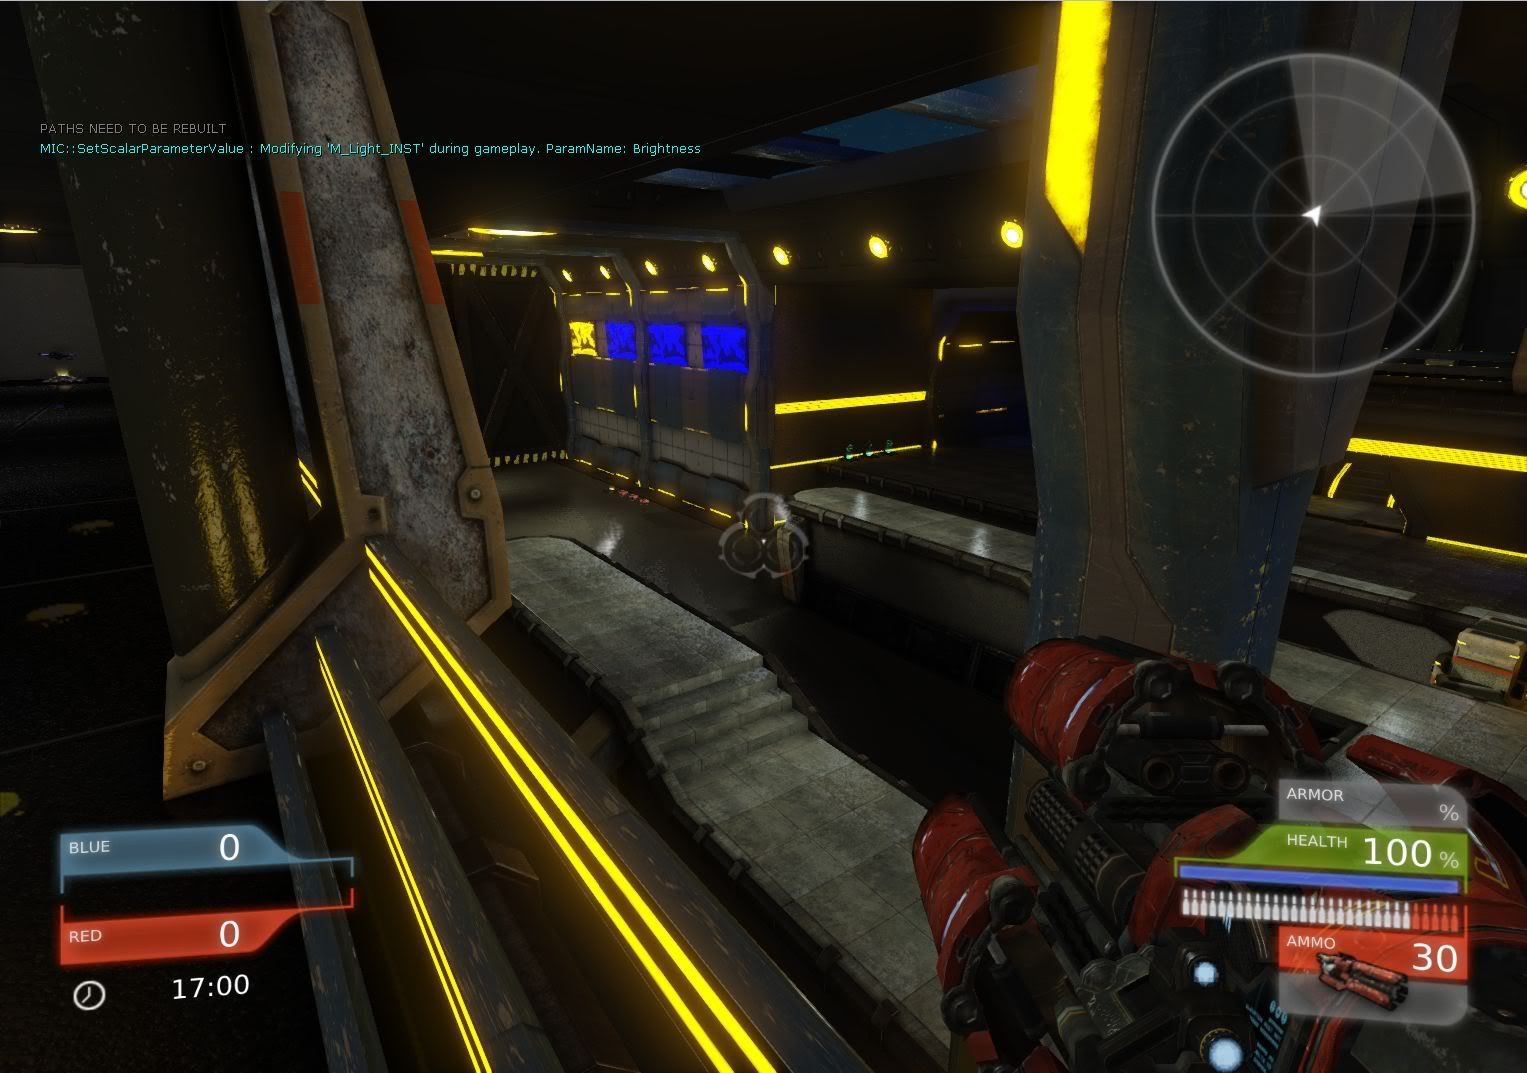
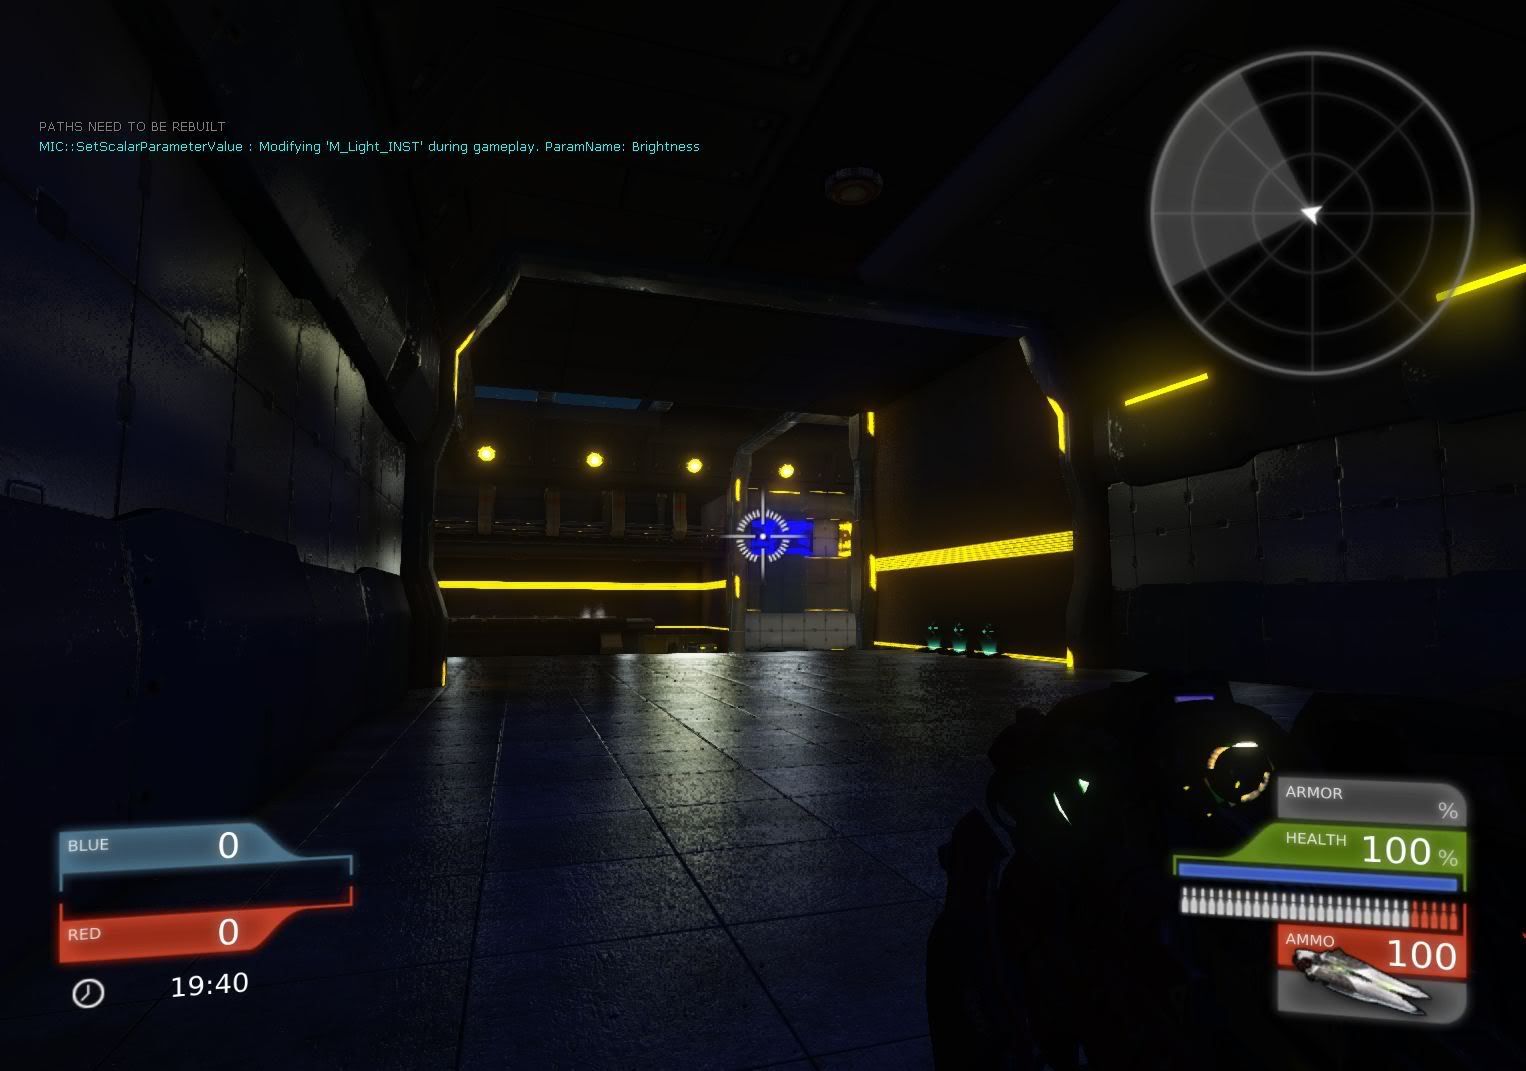
Also here is a link to my public dropbox where you will find an EXE file to install the level.
https://dl.dropbox.com/u/59589536/UDKInstall-DM-LoadingDock.zip
*ORIGINAL POST*
I'm starting a new class tonight called Level Assembly and Lighting. Here are some of the details:
Class theme - Futuristic Science Fiction (Sci-Fi)
Create 6 assets:
A Decorative Break up object (ex. Boxes, crates, pipes, debris, ect..)
A Light practical ( something that gives off light)
A Wall
A Pillar
A ceiling piece (rafter, archway, or something that changes the silhouette)
A Trim (a part that can be used frequently and to cover up problem areas like seams)
For now my question is what/who do you visit when looking for interesting sci fi ideas. Anything from movies, books, games, and/or artists, etc.
I've been reading around and someone mentioned Feng Zhu Design has pretty cool stuff. Anything else would be greatly appreciated! This class looks like it's going to be awesome.
Thanks,
Tony.
Here are some final shots. Please remember that everything from concept to post-production was done in 1 month by me.


Also here is a link to my public dropbox where you will find an EXE file to install the level.
https://dl.dropbox.com/u/59589536/UDKInstall-DM-LoadingDock.zip
*ORIGINAL POST*
I'm starting a new class tonight called Level Assembly and Lighting. Here are some of the details:
Class theme - Futuristic Science Fiction (Sci-Fi)
Create 6 assets:
A Decorative Break up object (ex. Boxes, crates, pipes, debris, ect..)
A Light practical ( something that gives off light)
A Wall
A Pillar
A ceiling piece (rafter, archway, or something that changes the silhouette)
A Trim (a part that can be used frequently and to cover up problem areas like seams)
For now my question is what/who do you visit when looking for interesting sci fi ideas. Anything from movies, books, games, and/or artists, etc.
I've been reading around and someone mentioned Feng Zhu Design has pretty cool stuff. Anything else would be greatly appreciated! This class looks like it's going to be awesome.
Thanks,
Tony.
Replies
Some of my favorite Sci-Fi work in the past while has been: http://www.ilyanedyal.com/bladerunner.html Ilya Nedyal's portfolio.
Blade Runner has some of the best sci-fi design around. I think it is definitely more approachable than Feng Zhu.
I would also recommend checking out as much Deadspace 1, 2, & 3 concept art as possible. They have lots of pillars, and that game is like 90% wall modules.
Just play some sci-fi games. It would probably be worth your time to go pick up a few and take a look at them. One great one that comes to mind that is free is Valve's Alien Swarm on Steam.
*edit* be sure to keep us updated!
Here is some general reference that caught my eye:
In this class we are not matching a reference image, we are creating everything from scratch. So all my reference is more to help shape my idea, not a mirror image of what I'll be making.
Here is my first assignment due Monday - Decortive Breakup Object:
*edit* The top two images on my reference sheet are images I found online
My lack of concept skills are really killing me at this point. I plan to add a lot more detail to this, but lack of ability/time to pull it off inside photoshop. I need to create the hires, lores, bake maps and texture this fella as well as my light practical. I also need to create reference sheets for all 6 items by Monday.. oh boy.
Any crits would be greatly appreciated. I will be posting images along the way.
Thanks,
Tony.
Here is a quick update..
HiRes:
GameRes:
Because of the tight time constraint I'm under, I am going to add small details in Photoshop with a height map. Seems a bit quicker to me.. we'll see.
The game res is 1.6k tri's and we are allowed 3k per object.
Crits are encouraged!
Thanks,
Tony.
LoRes with noramsl:
And UV's:
If you guys see anything I'm doing wrong, just let me know. Entire object is mirrored (UV wise) as well as a few individual pieces of the clamps.
Off to texture now.
Thanks,
Tony.
low poly looks a bit too dense. I can see at least a couple places where you could have cut out some geometry without impacting the silhouette, which is extremely important on an asset that will be instanced very often like this.
uvs look pretty good; items are packed well for the most part, though I wonder if you just jammed all the small things on the side in at the last minute
I usually UV from bottom left to top right. I start with larger/important pieces first.. so yeah, the smaller stuff usually ends up on the edge or in holes somewhere. How do you UV? Do you group pieces together? Because to me, once they are a UV island, they can go anywhere! hah. Probably not the best option?! But I don't know.
Block out Color:
Wires:
I'm going to go through tonight and overlay real materials, scratches, grunge and all that fun stuff.
Again, crits are strongly encouraged here.
Tony.
Update:
Still have lots to do and only a couple of days to do it..
Thanks,
Tony.
mr.craft - I appreciate that. I will go around and add dirt in at the end. How would use you an AO map for dirt?
PixelMasher - The last project I did I had the UV's packed in way too tight! hah. I guess I over compensated this time around. I'll work on them for the next 5 objects I have to create. Thanks!
Marmoset Renders:
One thing that bothers me about this is it's just not a practice object. It's the size of a dumpster and would be used in a loading/repair dock for something large like mechs. You can't really reach in to grab tools out of it... I was thinking of throw a bio-hazard sign on it (like it holds chemicals or something) because that's really the only useful thing I can think of for it. What do you guys think?
Right now, I'm about 90% done with this object. I need to stop for now so I can work on the rest of my prepro and create my hi and lo res light fixture before Monday. Another weekend of no sleep!
Thanks for all the feedback so far.
Tony.
Finish my light for Monday.
Concept Light:
HiPoly:
LoRes with normals:
UV's:
I'll start texturing tomorrow night. I tried to pack them all in there better this time. Baking normals on cylindrical objects is a bit harder to do. Not sure if it is as good as it could be.
Thanks,
Tony.
Breakup Object:
Light:
I also had to get the rest of my concepts done..
Concept dump.
Pillar:
Wall and Ceiling Trim:
Did I mention I'm not a concept artist.
Crits are welcomed! Especially on my concepts.
Thanks,
Tony.
*EDIT* Blockout so far..
So, come to find out, this class is more about learning UDK, not creating assets and building a level.. I guess I'm taking it too far.
Sorry for the lameness - we were only given a month to come up with our own concepts, blockout, model, UV, Texture and do post processing - all while learning UDK.
Also, for those willing, I've baked an EXE if you would like to take a peek. Add '-D3D11' to the shortcut if you would like to see a bit of DX11 lighting.. just playing around with the new features.
http://dl.dropbox.com/u/59589536/UDK_AMann1207-Beta_EXE.zip
Thanks,
Tony.
UDK:
Maya Viewport 2.0:
I'm curious if there is a better way to export/import or create normals for use with UDK. Right now I'm using maya transfer maps, but xnormal gives me the same results.
Thanks,
Tony.
Not sure if you are building your lights in UDK with or without lightmass on; but if you are, your mesh will need to be light mapped as well. This is another channel of you UVs that don't overlap and are arranged in a way where certain sections of the mesh gets the most UV space for lighting.
There's a quick and dirty to do it within udk when you double click on your static mesh in the content browser...I believe its the last option under "window"...don;t have udk up anymore :P
dpaynter - Yes I am - I msg'd you.
btw, the way you laid out the color pallets before texturing...is that your doing or was it required by your instructor? aynways, thats a neat way of approaching the texture process
I've updated my first post with new images and a link to download the EXE if anyone wants to take a closer look!
Even though I'm done with this class, I would still appreciate critiques for the next level I create.
Thanks,
Tony.