The BRAWL² Tournament Challenge has been announced!
It starts May 12, and ends Oct 17. Let's see what you got!
https://polycount.com/discussion/237047/the-brawl²-tournament
It starts May 12, and ends Oct 17. Let's see what you got!
https://polycount.com/discussion/237047/the-brawl²-tournament
First go at a gun: The holy boltgun
Heya all, this is my first thread on this forum.
I've been modelling in 3DsMax for about 1 year and a half now and thought it was time to tackle something every modeller trying to get in the game-industry should be able to make: a gun. But not any gun, as a 40k fanatic I've chosen to pick the cornerstone of the space marine's equipment: the holy boltgun (cfr.Thread title) So after looking up some ref online and digging through my collection of 40k artwork, I started modelling. About 2 evenings later, I've almost got the entire high-poly model done. Only some details and nit-picks are left. (and the winged skull down the side) After that The next step will be making a low-poly model by recycling the high-poly, then comes unwrapping, normal baking and finally texturing.
Below are two viewport grabs of my current model.
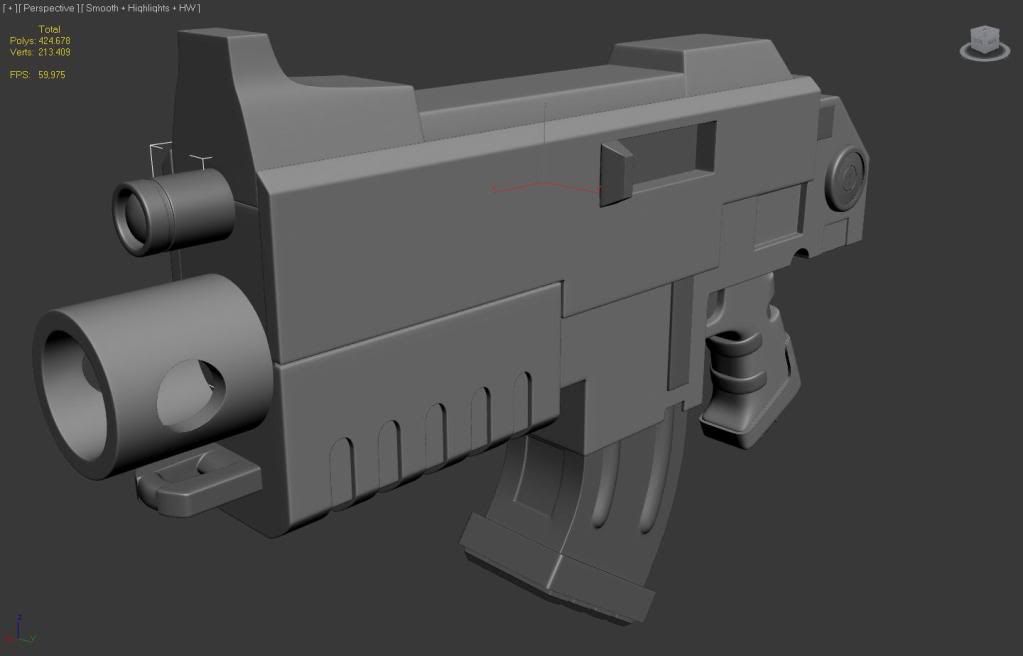
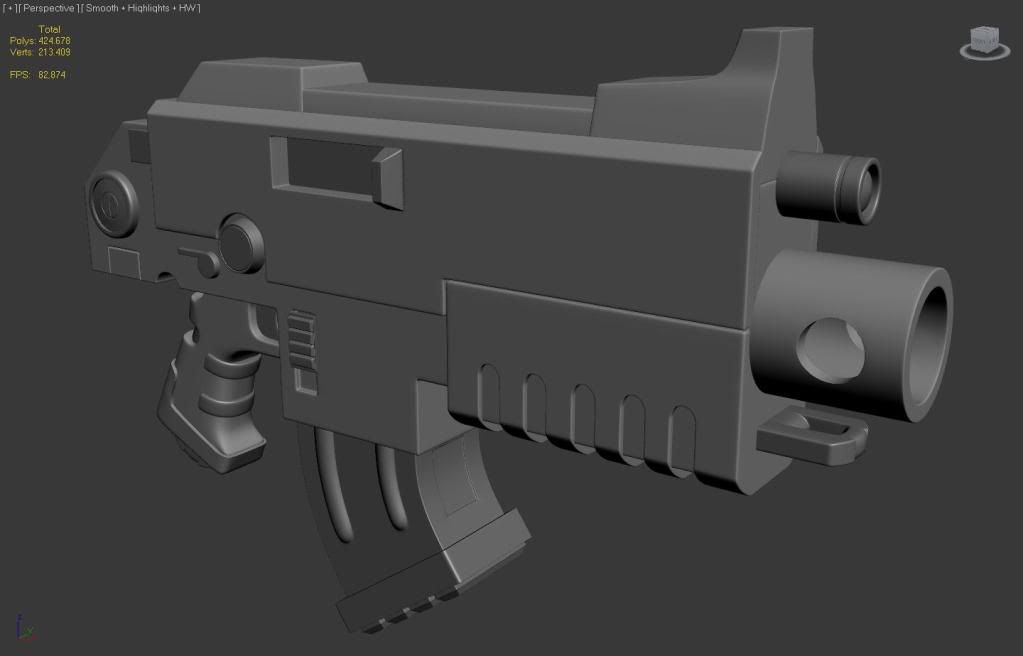
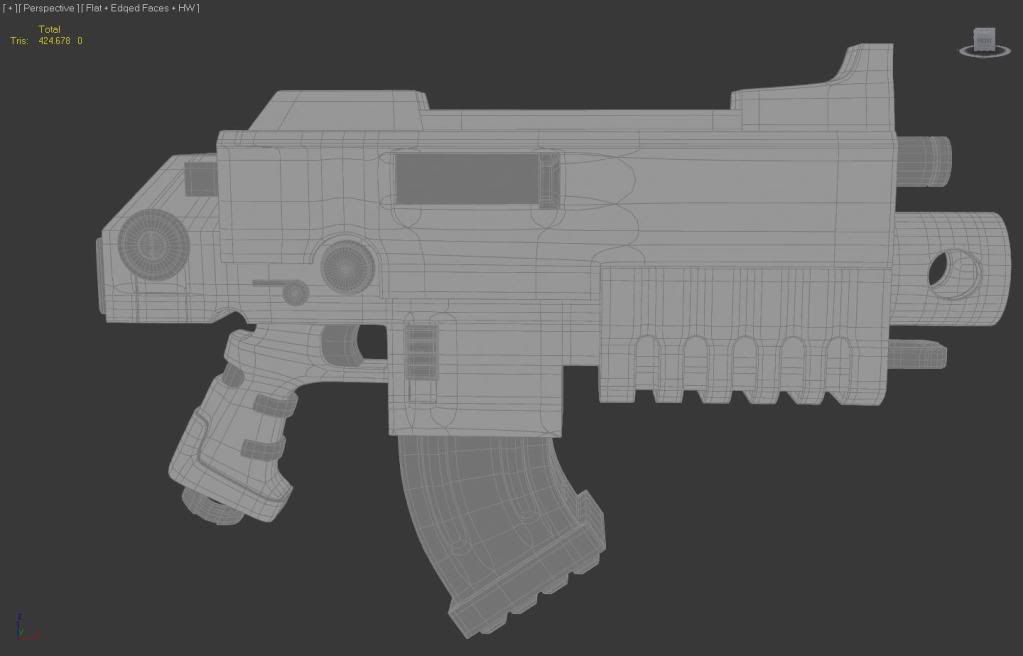
And here's the wireframe (turbosmooth w isoline display checked)
Any comments and/or criticism are welcome.
I've been modelling in 3DsMax for about 1 year and a half now and thought it was time to tackle something every modeller trying to get in the game-industry should be able to make: a gun. But not any gun, as a 40k fanatic I've chosen to pick the cornerstone of the space marine's equipment: the holy boltgun (cfr.Thread title) So after looking up some ref online and digging through my collection of 40k artwork, I started modelling. About 2 evenings later, I've almost got the entire high-poly model done. Only some details and nit-picks are left. (and the winged skull down the side) After that The next step will be making a low-poly model by recycling the high-poly, then comes unwrapping, normal baking and finally texturing.
Below are two viewport grabs of my current model.


And here's the wireframe (turbosmooth w isoline display checked)

Any comments and/or criticism are welcome.
Replies
http://wh40k.lexicanum.com/mediawiki/images/e/ee/Bolter_-_Astartes_MK_Vb.jpg
http://www.bitzbox.co.uk/images/space_marine_boltgun_1_large.jpg (I also used a real life version of this one)
http://www.flickr.com/photos/ultramarinesthemovie/4795769851/lightbox/
and some other random pictures
http://dicemonkey.net/wp-content/uploads/2011/01/warhammer1.jpg
http://4.bp.blogspot.com/_NkHGlMpVtMI/TDHUdDPMGiI/AAAAAAAAE5Q/O97FtbBSxGM/s1600/warhammer_art.jpg
thanks!
Here's the wing, with turbosmooth on (ignore the skull)
And then a viewport grab with the wire of the skull. Now I know, I hadn't thought it out well enough before I started, but do you guys have any advice on the flow or other stuff? Or should I rather start all over from scratch?
As always, comments are very welcome.
Any hints on how I should start off for a better result?
What Ive got done now is the lowpoly Boltgun. It all adds up to just under 4000 poly's, so I might adds some more detail at places since I'm aiming at max 5000 poly's. But don't forget that I also need to add two more buttons and the ornament... speaking of which, I've finished the skull. Not that happy about it, but since it is my first try... I might replace it with another winged emblem or a plaque of some sorts.
I mainly need your opinion now on how I could improve my lowpoly model. I know I might have to add some detail to the rear and top area as it is meant to be used in a 1st person environment. Also any other way of criticism is welcomed.
so all that remains is unwrapping, baking and texturing. Currently working on the unwrap, tomorrow baking starts and for everything else, we'll see!
http://www.youtube.com/watch?feature=player_detailpage&v=t7ENobuS7a8
Quickly mock up in Max and detailed in Zbrush and then I'll baking back down....Zbrush can make it easier to get some character into your model, especially with your skull, but depends on what you're using it for....
In this something like this post http://www.polycount.com/forum/showpost.php?p=1469125&postcount=10901 You can see the big solid shapes and the little areas of detail that make it awesome.
It doesn't need to be exactly precise, but you're missing the forms that are the hallmarks of the human skull.
@Der Hollander: You are right, my proportions are fairly off. This was because I tried to mimick the typical 40k skull, but it didn't work out right I guess... back to zip again it is then =D
I'll start texturing in a day or two, so stay tuned!
As always, comments and criticism are very welcome!
Comments and Criticism are still welcome
Is it intended to be a first person weapon? if so, what does it look like from that view?
Also, you could probably cut quite a few tris on all your symmetry seams (on the handle and magazine, also have a few ngons on the front where it's inset)
Show us some textures next!
@Cheese_Shinobi: thanks, and have patience, the texture will come this weekend!
Second pass will be battle damage and the likes
And just for the hell of it another wireframe
What are your thoughts and/or comments? They will be appreciated so much =D
mr gelmir
Comments and Criticism are very welcome =D
thanks for everyone who gave me feedback, it's very much appreciated.
Below are the two final renders I made.
Any remarks are still welcome, as I hope to put this in my portfolio one day.
highest regards, mr Gelmir
Keep at it, wanna see you nail this!
@Cheese_Shinobi: Thanks for the remarks, I will keep them in mind. Sadly I won't work on this model for a while... When I will touch this up to put in my portfolio I'll try to fix it!
Agree with everything Cheese_Shinobi said, what I would do is delete the texture and do it over again when you get back to it, and apply everything you have learned in the mean time.
Often it's hard to start over again on something, but more often that not it really works out, cause you get a fresh start without trying to fix your previous attempt.
Texturing is a lot about logic trying to make sense of what happens with a model and how that affects the texture.
Here is a few thing that would be smart to look at.
Brief Considerations About Materials
Creating a Next-Gen Video Game Hot Rod: the Complete Workflow by Laurens Corijn
The Top Ten Tips of Texturing
Hard Surface Texture Painting by Stefan Morrell
Texturing Tutorial by racer445
Polycount Wiki
Keep on working