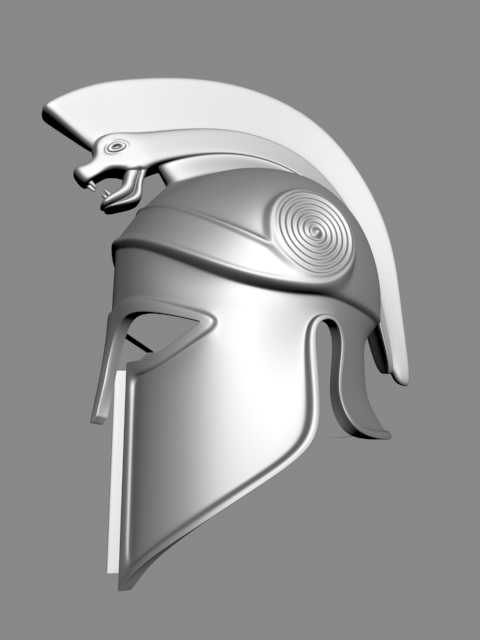
Macedonian Helmet
Hey everybody,
I'm working on this hi poly model of a roman helmet in 3dsmax. I'd like to use it to create a detailed normal map I'll later put on a lower poly model. If anybody could offer up some advice on how to flesh out the detail I'd greatly appreciate it. I'm kind of stuck on the snake head right now and don't know where to go with it.

Reference:

I'm working on this hi poly model of a roman helmet in 3dsmax. I'd like to use it to create a detailed normal map I'll later put on a lower poly model. If anybody could offer up some advice on how to flesh out the detail I'd greatly appreciate it. I'm kind of stuck on the snake head right now and don't know where to go with it.

Reference:

Replies
Macedonian helmet
Roman helmet
I suggest taking the model into zbrush and sculpt in some damage/ornate detail.
As far as zbrush goes... I'd love to try that out, but this is actually a project for a class and the challenge of the assignment is to model out as much as we can within 3dsmax. Propably not the most efficient method, but I know it's definitely doable.
I decided to go ahead and make the low polygon model. There seems to be some smoothing group issues, and possibly things about the topology I could fix. Any suggestions?
http://cf.mp-cdn.net/01/32/49146f1b0ad5583fb0954917bb79.jpg
If anything, the bottom would flare out. The model is fairly true to the reference, though the point where the bottom half of the helmet meets the top in the rear should be a flatter connection, with the part that would sit against the neck should be flared out more
Here's an update on the bake I made... not sure if I'm completely happy with it. It's still a little sharp in some areas.
This is it in UDK with the material applied.
This will give you more definition in those areas... Once an hard surface guy said that piceces that are separate in real life should be separate objects. Also the embossed edge could be more regular in size but that's just personal opinion...
For the texturing try to have the rust not just placed all over it but think where it might form more (usually more on large flat areas than in indents on bronze which seem the metal your going for)
keep it up
That's a compliment by the way.