Home 3D Art Showcase & Critiques

stray sod wip, needin some thoughts.

polycounter lvl 10
Offline / Send Message
stimpack polycounter lvl 10
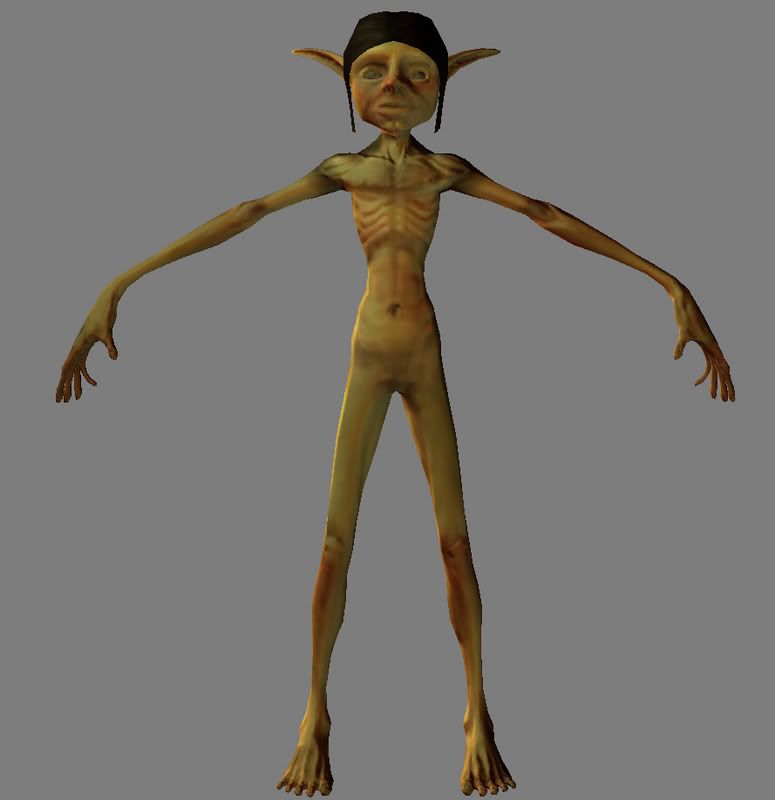
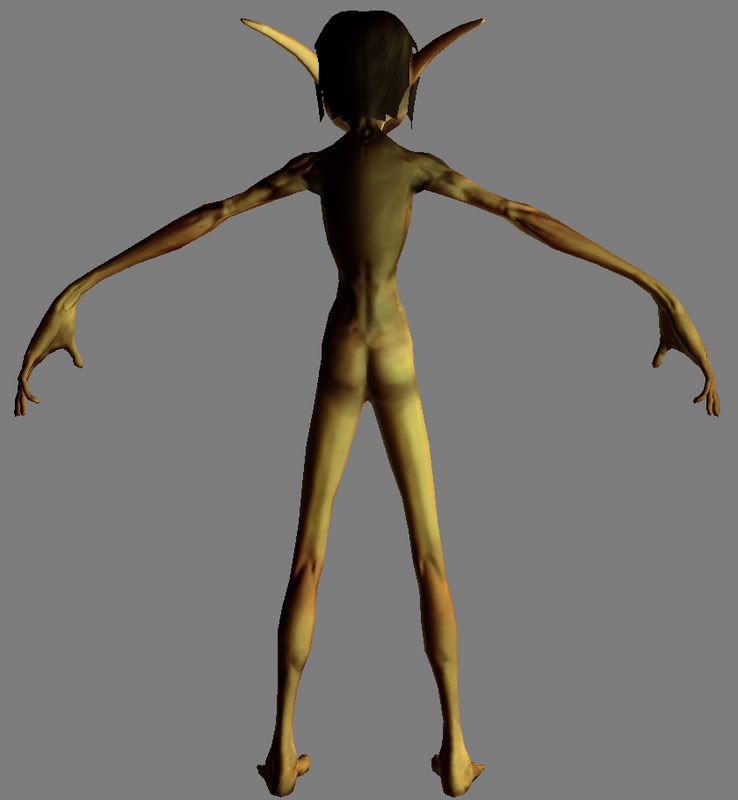
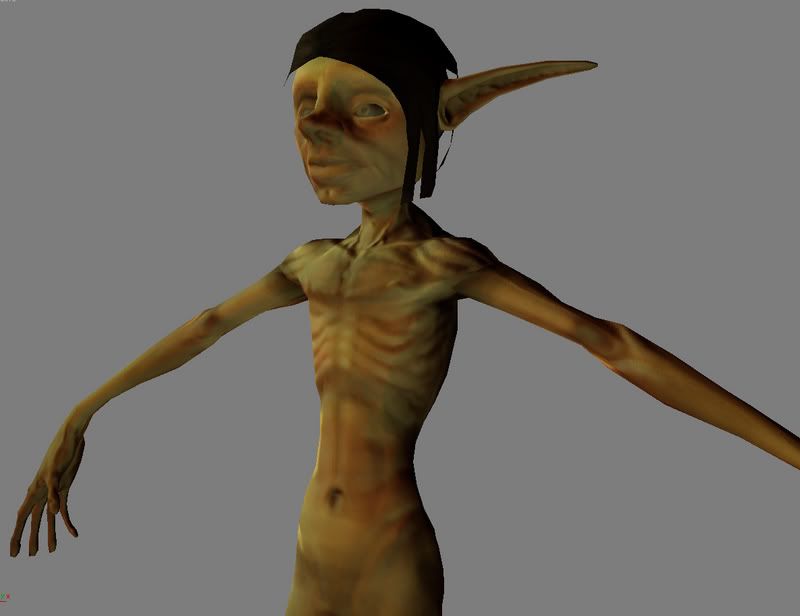
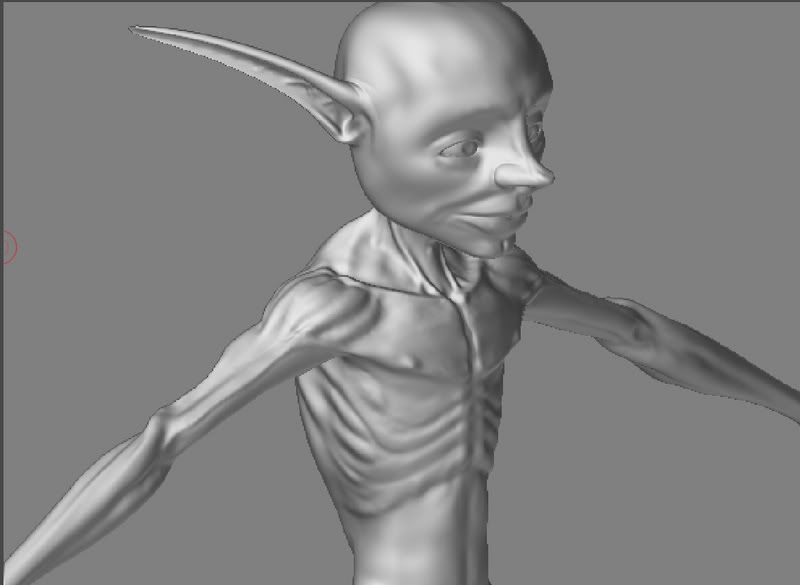
So im making a little brian froud character called the stray sod. Its a little fairy guy that has a bunch of grass that grows on his back. Ive got his body done and im fighting with the textures. Id love some good crits so i can get this guy finished up.

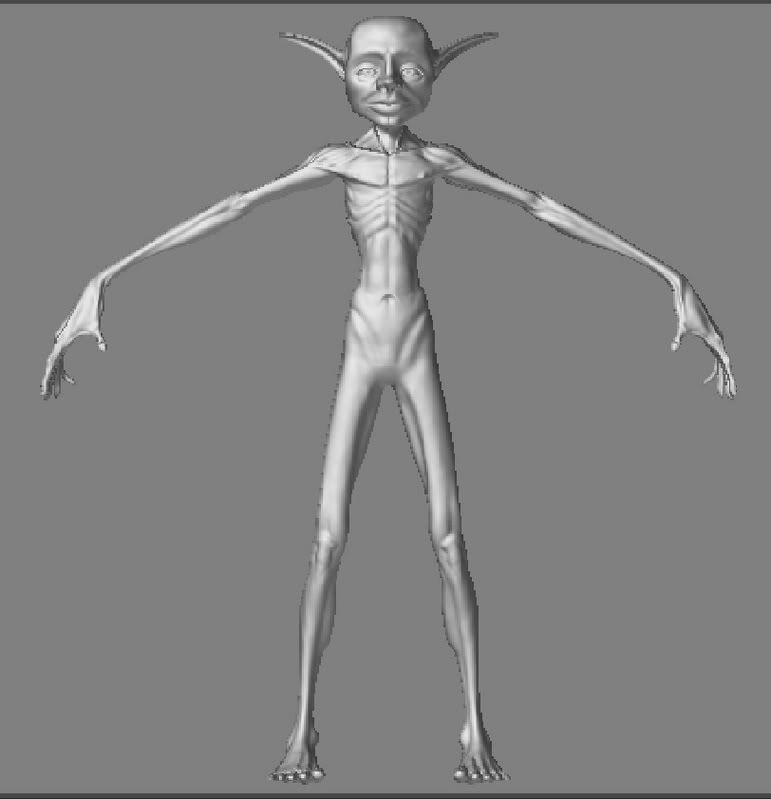
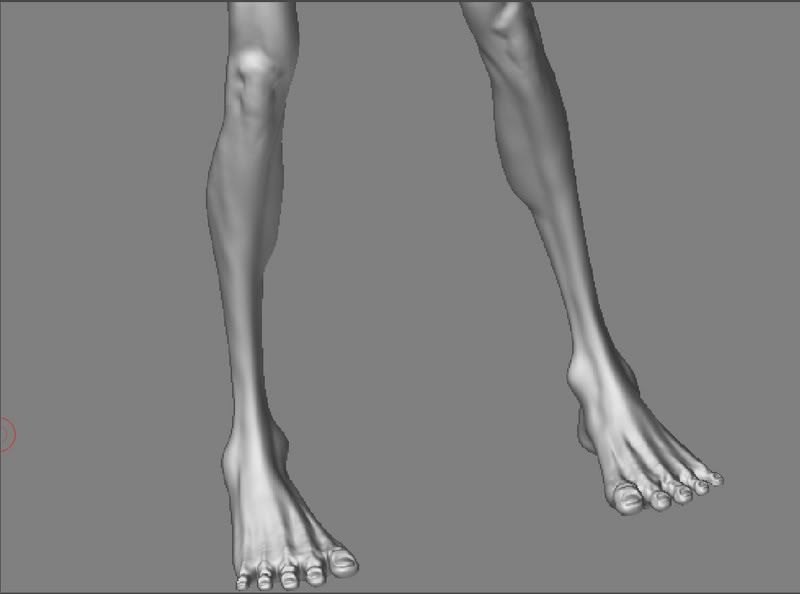
here are some screen grabs out of max. Im using a direct 9 shader so screen grabs are all I can do (i think). Ill put a few pics of the scupt for his normal as well.

sod1.jpg
sod3.jpg
sod2.jpg
strayfront.jpg
strayclose.jpg
strayfeet.jpg

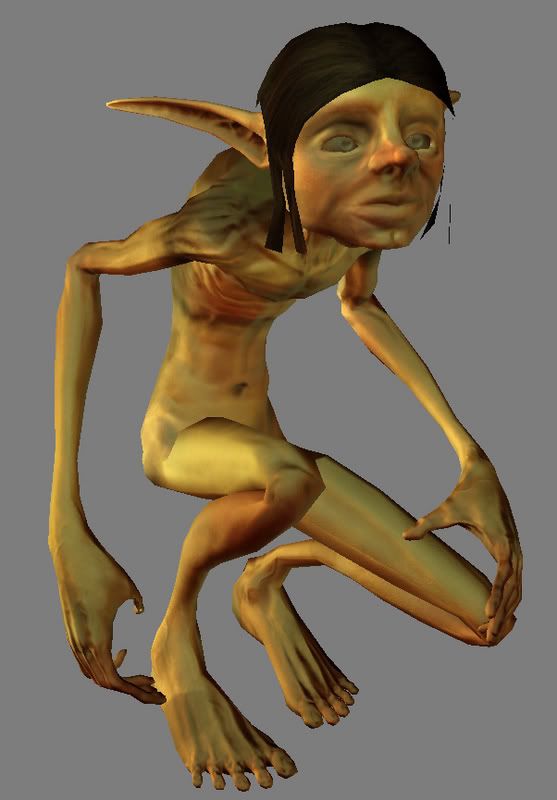
and of cource i get bored and like to pose them for fun =D

sod4.jpg

Replies

  • moose
    Options
    Offline / Send Message
    moose polycount sponsor
    try to stay away from adding too much dark splotchy stuff to the texture, unless it is part of a pattern or design, it really muddies up your normal map and complicates things. Your diffuse and specular should compliment the normal, and the normal needs to work with the diffuse and specular smile.gif it is a fine balance. Let the normal map do the shading work for you, otherwise you're just fighting yourself. you can add some shade stuff, but keep it subtle.

    Instead of thinking of shadows in the texture, think of surface tones and areas of interest. If he's got grass on his back, maybe adding a little dirt around his shoulders, or some mud under nails, etc. Use colors to define things, not shades.

    and if these comments are solely from the renderer, im sorry, meant no offense smile.gif

    Also, don't be afraid to touch your normal map and add additional texture to him, ala a surface bump for skin, dirt, scaly skin, cracks, callouses, etc.

    What is this for? you could possibly bump that low poly mesh up and add some definition to areas, and give him some big ass 2048 textures smile.gif
  • J O T
    Options
    Offline / Send Message
    I would play around with the form of his head some more. Something a little more inline with his body, bony and narrower, bend over ears maybe.
    The screen-graps are not doing your normals any justice, why not use the renderer.
    He needs his clothes and bit'n pieces before his character will come through, but he's lookin good for now.
  • EricElwell
    Options
    Offline / Send Message
    EricElwell insane polycounter
    I would agree with JOT, the face is looking a lot healthier and fuller than the body. In the first and last shot, his cheeks almost look a little plump. Also, the last posed shot shows that his torso is very long (which is not necessarily bad, as it fits the character) but his belly button is way too low. Judging by the jaw and the back of the head, his head is feeling almsot spherical, that doesn't really feel right to me, especially given the long proportions of the rest of the body. I also might suggest widening his hips a little bit. Other than that, I like it, I think that when you get some clothes on this sucker he'll really have some character!
  • stimpack
    Options
    Offline / Send Message
    stimpack polycounter lvl 10
    Thanks for the fast replys guys! i see what you mean with the normal spec balance. I had a feeling i should do something more along those lines, but i was taught to paint in shadows/hilights so im having trouble breaking that habit.

    im gonna give those crits a shot and ill post back up when i make the changes =)

    again, thanks guys!
  • stimpack
    Options
    Offline / Send Message
    stimpack polycounter lvl 10
    Here is a small update. Im liking the color pallete alot more with this one. On a down side, i broke my wacom pen =( so i cant really work to much on him right now, the updates ive done to the difuse was with my mouse....it was hell...

    sodfront.jpg
    sod.jpg
  • stimpack
    Options
    Offline / Send Message
    stimpack polycounter lvl 10
    so im runnin into some big probs. im tryin to make his little alpha plans but i keep getting a halo around them, so they look absolutely horrible. Ive even painted the entire texture black and i still get the halo. there isnt any feathering in my alpha either. Any advice would be appreciated!

    badgrass.jpg
    badgrass1.jpg
    badgrass2.jpg
  • sevadox
    Options
    Offline / Send Message
    We'd have to see your map but it could be because your painting within the UV's on a white background. It's always a good idea to give a bit of a bleed when painting textures; Also make sure you're using a really hard brush around the borders.

    edit: whoops didnt read your post carefully enough, sry i dunno
  • rooster
    Options
    Offline / Send Message
    rooster mod
    hm I assume the black one is just a black image and its a display problem. how does it render?
  • stimpack
    Options
    Offline / Send Message
    stimpack polycounter lvl 10
    Ive given the map alot of bleed over with local color, it should fade in color if its gonna fade at all. The one with the image black, i just did a fill of black ontop of the entire texture. As for rendering, its just a simple scan line, tho i have tried mental ray too. i cant figure it out.

    here is the texture i was testing the alphas with.

    planlifewire.jpg
  • HonkyPunch
    Options
    Offline / Send Message
    HonkyPunch polycounter lvl 18
    Okay, the model's great. I'm not sure if it's the textures, or the normals that are screwing up the face, but I believe the model could do for some improvement, texture wise.
  • rooster
    Options
    Offline / Send Message
    rooster mod
    ok for the purposes of rendering take your alpha channel and save it as a bitmap, then delete the alpha from your tga (or what format you're using) then load the bitmap into the opacity channel- see how that works?
  • arshlevon
    Options
    Offline / Send Message
    arshlevon polycounter lvl 18
    your background green is much much lighter than any green in the texture, either darken the green in the background to the same color, or select your alpha channel and contract by a pixel or 2 and fill those pixels with black in the alpha.. its caused by the liner filtering. you can also change your viewport driver setup in max to view textures at nearest, and not liner..
  • rooster
    Options
    Offline / Send Message
    rooster mod
    arsh I got the same result drawing some white lines on my alpha channel with a pure black diffuse, and it was fixed when I loaded them in as seperate maps instead of imbedded alpha- I dont think its his maps that are the problem although you could still have a point about the lighter green
  • arshlevon
    Options
    Offline / Send Message
    arshlevon polycounter lvl 18
    hmm might be a videocard problem then rooster.. i have never had this problem before. when i make an alpha there is no border around it.
  • arshlevon
    Options
    Offline / Send Message
    arshlevon polycounter lvl 18
    i think i replicated your problem with the scanline renderer... in the diffuse bitmap turn the image alpha sorce to NONE opaque.. then keep in on the opacity..

    like so
    alphavy3.jpg
  • fogmann
    Options
    Offline / Send Message
    fogmann polycounter lvl 17
    If it's problem with the texture, this little tutorial shows a quick alpha mask trick and how to fix the background.
  • JKMakowka
    Options
    Offline / Send Message
    JKMakowka polycounter lvl 18
    [ QUOTE ]
    If it's problem with the texture, this little tutorial shows a quick alpha mask trick and how to fix the background.

    [/ QUOTE ]

    I think he has done that already, but as a sidenote to that tutorial: wouldn't it be actually be better to decrease the alpha shape by one or two pixels?
  • arshlevon
    Options
    Offline / Send Message
    arshlevon polycounter lvl 18
    i found his problem, it has nothing to do with adjusting the alpha, its some weird crap that only happens in the scanline renderer. if you dont turn the alpha channel off in the bitmap settings it will render it out as grey, so any area that is not 100 percent opaque will be grey in the render. i dont know why it does this but if he sets his setting like i have above scanline renderer will ignore the alpha in the diffuse and there will be no halo..
  • stimpack
    Options
    Offline / Send Message
    stimpack polycounter lvl 10
    ahhhh you boys are a life saver! i turned off the alpha source in the difuse and turned it on in alpha, now it works perfectly! I cant thank yall enough!

    Yes jimmies i agree, my textures are lacking. It is deffinately the weakest part of my game. Im tryin tho =) if you have any suggestions please let me know! Im always tryin to improve.
  • stimpack
    Options
    Offline / Send Message
    stimpack polycounter lvl 10
    I poked around a bit more at the maps, and I made more vegitation, oh and i made a loin cloth. nothing is waited, but i like to pose him b/c T pose is just boring to look at =)

    lend me your thoughts! oh and another question, how do u set ur alphas so that they cast a alpha shadow? mine just show up as planes =(

    soddyrender.jpg
    soddyrender1.jpg
  • EricElwell
    Options
    Offline / Send Message
    EricElwell insane polycounter
    haha, that's very cool with the foliage. I would suggest that you cull the normal maps and bake in some lighting in the texture. Asside from the grass, the texture is not really helping the character too much. There is still a lot of clarity that can be happening in the texture. Big details, like major muscles, and bumping the facial features. Play around with "big colors", for example, the way the shadow hits the chest makes the head pop, try to achieve that by the coloration and brightness in texture and not in the render. Just some thoughts, really dig'n the plants, and the character is starting to come through on this guy.
  • Toomas
    Options
    Offline / Send Message
    Toomas polycounter lvl 18
    [ QUOTE ]
    lend me your thoughts! oh and another question, how do u set ur alphas so that they cast a alpha shadow? mine just show up as planes =(

    [/ QUOTE ]

    Raytrace, i think you can set it if you make a light and toy with its settings.
  • Jarrod1937
    Options
    Offline / Send Message
    Jarrod1937 polycounter lvl 15
    [ QUOTE ]
    i found his problem, it has nothing to do with adjusting the alpha, its some weird crap that only happens in the scanline renderer. if you dont turn the alpha channel off in the bitmap settings it will render it out as grey, so any area that is not 100 percent opaque will be grey in the render. i dont know why it does this but if he sets his setting like i have above scanline renderer will ignore the alpha in the diffuse and there will be no halo..

    [/ QUOTE ]
    sweet, thank you.... i've also been having some trouble with this, so everytime i've wanted to show someone i had to do a viewport grab or else they would see these horrible halo's around my tree leaves.
  • Jarrod1937
    Options
    Offline / Send Message
    Jarrod1937 polycounter lvl 15
    [ QUOTE ]
    [ QUOTE ]
    lend me your thoughts! oh and another question, how do u set ur alphas so that they cast a alpha shadow? mine just show up as planes =(

    [/ QUOTE ]

    Raytrace, i think you can set it if you make a light and toy with its settings.

    [/ QUOTE ]
    yes, Toomas is correct, raytraced shadows will cast light through alpha test textures... although its really slow. i use raytraced shadows though to simulate the hard edges of stencil shadows if i am doing a quick preview render in 3ds max. if you want alpha texture shadows and a blurrly edge use advanced raytraced shadows.
  • arshlevon
    Options
    Offline / Send Message
    arshlevon polycounter lvl 18
    if you want to try and dig into mental ray, mental ray shadow maps also respect alpha i believe, and the render much faster than raytrace..
Sign In or Register to comment.