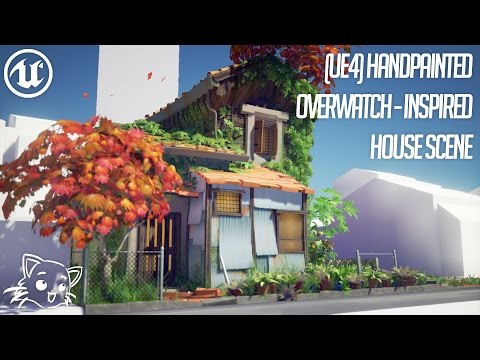
(UE4) Handpainted, Overwatch-Inspired Japanese House Scene... thing
polycounter lvl 14
Hi All!
It's been a little while since I last posted, but I thought I'd share what I've been working on the last few weeks!
 https://youtu.be/N80UC7JOUVE
I've been playing a lot of Overwatch as of late and adore the art style, so I thought I'd use some of my downtime between projects to sharpen my Unreal 4 skills.
It's been a little while since I last posted, but I thought I'd share what I've been working on the last few weeks!
https://youtu.be/N80UC7JOUVEI've been playing a lot of Overwatch as of late and adore the art style, so I thought I'd use some of my downtime between projects to sharpen my Unreal 4 skills.
The main technique to achieve the style is to use an instanced Master Material with a high roughness and low specular value as a default for most surfaces that I can then interchange between textures with.
The textures themselves are all done from scratch in Photoshop, sometimes using photo reference for colour-picking.
Lastly, the entire scene is dynamically lit using Light Propogation Volumes (To get the feature enabled, put "r.LightPropagationVolume = 1" into ConsoleVariables.ini and (re)start the engine) to achieve the realtime global illumination.


Cheers!
Edit: This new forum is swish!
Cheers!
Edit: This new forum is swish!
Replies
When I blocked out the environment originally all of the buildings looked like those background ones. Although rather than overstretching myself trying to do everything at once, I thought I'd concentrate on just one house at a time.
Now that main one is pretty much done though, I'll probably start to flesh out the other buildings in turn
One piece of feedback, the window on the top left doesn't seem to quite fit. it looks more like it is stuck on or hovering in front of the wall rather then being in it like the other windows are.
@Marshkin - Good point on the window. Looking at it a bit more closely I think the way I've set up UVs in the area give the impression that its intersecting too many metal panels. It should be an easy fix by adding another geometry panel to frame it better.
Cheers for the feedback!
I hadn't really considered taking shots from head-height.
I want to achieve something similar to this in Unity. What maps did you use, and how did you make the vegetation? Looks amazing by the way
I've had a few messages asking about the water material, so I thought I'd post a pic of my basic shader graph for the main effect.
https://s31.postimg.org/624p91v7d/Basic_Water_Shader_Graph.jpg
To be honest, real-time rendering of water and refraction effects are one of my favourite things in games so I took a bit of inspiration from a few places when authoring the Material.
For instance, the overlapping textures scrolling at different rates was something I noticed in shallow water on Gears of War; the hard-edged ripples and soft refraction were inspired by Mario Sunshine (and most GameCube/Wii-era 1st Party Nintendo games) and the glittery surface sparkles were inspired by the 2D Sonic title screens.
@dmitsuki - The foliage is pretty low-poly, made mostly of two-sided alpha cards. A good trick to get nice results with clusters of leaves/flowers is to have a lot of negative space in your texture, rather than piling everything in the centre. This makes it harder to notice where one alpha plane starts and another ends.
I could clip a bit more of the alpha out of geometry to reduce Overdraw, but apart from that it's pretty unintensive.
It's also worth altering the normals of your cards using tools such as Maya's "Mesh > Transfer Attributes" in order to shade foliage as a whole, rather than the individual planes.
For instance, the canopy of this Acer tree was combined into one mesh and I transferred the normals from a hemisphere in order for the leaves to shade evenly.
The grass cards also had their normals oriented towards 'world up' so they they would shade similar to the ground that they would be sat on.
Hope that helps!
All textures in the scene are 512 or smaller, with most of them tiling.
The main texture I used besides the tiling diffuse and height maps was a 512 Utility Texture I've made for various effects:
Red Channel - Contains a Render Clouds map generated in Photoshop.
Green Channel - Contains a Noise map.
Blue Channel - Contains a Difference Clouds map.
Alpha Channel - Contains a Radial Gradient which I ended up not using in favour of Unreal's RadialGradientExponential node to avoid artifacting.
Here is a OneDrive link to the full-size .psd if you're interested.
I actually posted the shader graph earlier in the thread, but here it is again.
https://s31.postimg.org/624p91v7d/Basic_Water_Shader_Graph.jpg
Using the drop-down menu you can change the material from it's default (Opaque) to Translucent.
I'm really new at the UE4 and i appreciate all the help.
1) How did you get the water to have color when you are underwater; Is the object a plane that light goes through it, or is it a cube that is filled in somehow? I have a cube with the material applied and I made it translucent but it didn't really change anything.
2) For some reason the glitter sometimes just appears as black bits, not sure if that is because my computer can't handle it or if I did something wrong with the setup.
The basic set-up for making a Master material is to create a new Material and plug any diffuse texture into the 'Base Color' slot. Right-clicking this Texture box will give you the option to 'Convert to Parameter'. What this will do after you've named the Parameter is expose the texture variable in any Material Instances that use this as a base, so you can swap out the texture as you see fit.
In conjunction with this, I will usually place some Vector 1 nodes (1 + left-click) and plug those into the 'Roughness' and 'Metallic' slots. You can convert these to parameters, and whatever values you set here will be the default for each material instance you create.
After this has been saved and compiled, you can right-click your material in the Content Browser and click on 'Create Material Instance'. Opening up this new material will show all of your exposed variables, such as Diffuse Texture, Metallic, Roughness etc.
Creating Parameters out of your material nodes also has the added benefit of being able to see directly in the game-view what you are altering - so you you slide the roughness values between 0.0 and 1.0 and see it update in realtime.
I'm aware that you've no-doubt found your answers elsewhere but I figure someone may find this useful if their Google searches lead them to your post. I hope this helps someone, regardless.
Apologies for the lack of supporting images - I'm on a laptop without Unreal installed so I'm doing this from memory!
@CGSN - Aw thanks, I'm glad that you like it!
1) The way that I got the image to alter when the camera goes below the surface of the water was to use a 'Post Process Volume' (left-hand column, under 'Volumes'). The bounds of this start at the water surface and cover everything underneath. These Volumes are great for altering the post process effects in a very localised area and I tweaked a few of the Bloom, Depth of Field and Colour Grading options to give that blurry, blue and over-bloomed underwater effect.
Post process effects are exactly that - effects that are applied to the image on your screen after pretty much everything has been rendered. So the game is pretty much rendering above and below the water in the exact same way - but the image is altered by Post Process effects before it is sent to the screen.
Applying materials to a cube won't necessarily work to get your desired result as the game generally doesn't know the difference between a camera inside a 3D polygonal object and one outside.
When creating CG materials, you may hear them referred to as 'Surface Shaders' and I find this useful to think of when picturing how an object will look in a 3D world. The materials that you assign to an object, such as a Cube in Unreal, will only apply to the very surface of that object. That is, the polygonal face.
For all intents and purposes, this shader does not apply to the 3D space inside the object - that's where 'Volumes' come in.
2) Hmm, it is difficult to say exactly what is wrong with your setup as it's been a little while since I last looked at the scene and I can't see your current material. As we add the grayscale glitter maps to the main base colour of the water, it should never produce any black areas as adding black pixels to any other colour pixel will make no change to the colour (think of the colour values for a greyscale pixel as a number from 0 to 1, with 0 being black).
The only thing I can think of is perhaps that you are Multiplying (or Dividing/Subtracting) the Glitter nodes with the Base Colour before it plugs into the Emmissive channel of the Material.
If that's set up fine, it may be worth putting a 'Constant Clamp' node before adding the Glitter to Base Colour, with the Min set to 0 and the Max set to a ridiculously high number such as 9999999 (you don't want to clamp this to 1 as it will kill any Bloom effects... and they're super nice).
This is just in case you have any minus values in your Glitter map that is causing the black holes in the shader.
I hope that helps!
Give me a shout if you have any other questions and I might actually be able to get you some screenshots next time :P