Search
-
Re: Space Vagabonds Assaulter - WIP (crits needed)
 The only crit I can think of is the pack in the middle of him (it's darker in the concept art) might need to be a little more vertical if you're trying to match it exactly. But seriously, this is fantastic :D I can't wait to see you take it to game-rez, along with several others I'm sure (the pressure is ON)
 -
Re: David's Improvement Thread : CC Welcomed!

 Looks cool, remind me of dark souls a lot. I notice you have a tendency to stretch everything out vertically. basically everything is super tall and skinny, I took your illustration and just stretched it about 10-20% horizontaly, and I think it looks way more natural.
 -
Re: "rime flame" custom shader

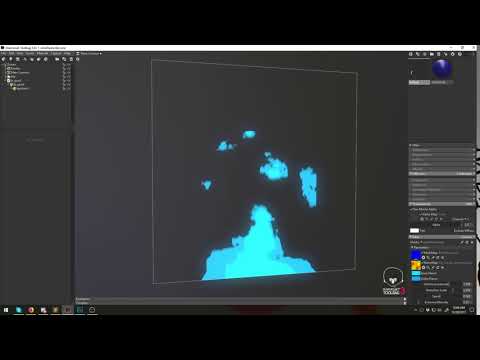 this is how i'm currently passing in the distortion. i can't figure out a "right way" to do it and any other combination breaks the shader. doesn't fix the texture looking squashed but did make it vertical like it should be. vec2 tc = finalDist.xy * s.vertexTexCoordSecondary.xy + s.vertexTexCoord.xy;…
 -
Re: I NEED HELP WITH THE CAGE PLEASE SOMEONE
 The Cage needs to be the exact same mesh as the low poly. What I normally do is duplicate the low poly and scale the vertices enough to cover the high poly as that is what it will bake within. If you have multiple pieces then you can explode the mesh into its different parts to stop it projecting normals.
 -
Re: Small UV question...
 As Bek suggested, you could do a 1x2 (i.e. 256x512) or even a 1x4 texture (i.e. 256x1024), where the blade shell is in vertical position, and the remaining space is filled by the other pieces. You'll be able to minimize the wasted space, without the need to scale the smaller shells (bad practice in my opinion).
 -
Re: Smoothing errors in Max
 I'm not exactly sure how to do that though. If I target weld to surrounding vertices it will mess up the shape when looking from the front and leaving them as quads would still have the problem I think. I'll mess around with it and see what results I can get though.
 -
Re: Polypaint Workflow
 Both of the workflows you explained are valid. Polypaint is vertexcolor so all you need is an even topology and enough vertices. Both dynamesh and Zremesh create an even topology. So I don't really see what your problem is. Could you share screens of these areas you can't polypaint?
 -
Re: Learning how to model an XM8....
 looks like ur making it too complicated. IMO just use a cylinder matched up with the reff and either use olssons method or use vertice snaps to match your edge loops. then take that whole cut out polygon and bevel, then cut out the profile and target weld it all together!
 -
Re: How you got into the games industry
 combination of everything. School just helped me time frame the whole thing, modding gave the background and then it was working up (although "horizontal" (from outsourcer's intern to artist on site) not "vertical" (QA to CEO)). There's a whole lot of Magic attached to it as well, getting the right connections at the right…
 -
Re: Problems with polypaint texture.
obj export is probably the culprit - each face will be detached and flipped vertically about it's centre. sad to say there's not much hope for you but to re-unwrap and hope it doesn't happen again. does Maya's obj export have settings? if so, copy what the max gw:obj exporter settings are for the zbrush export
>7637 results