Search
-
Re: Paint Skin Weights in Maya 2011 causing vertices to move?
 Well I've dealt with this kinda problem also. This problems happens because the vertex has no "weight" painted on it and this causes it to move to the world Origin (0,0,0). To deal with this when painting low poly meshes you can simply "transfer" the weight from the joint to the desired joint. So another way to fix this…
 -
Re: 3ds Max Orientation Constraint Bug Open File workaround?
 I got the file that you PM'ed me. I'm using 3ds Max 2014 with Service Pack 5 and I don't see this issue. Everything is lined up as soon as I open the file. I noticed you said you were using Max 2012. Do you have the latest service pack? For me 2012 was one of the most broken versions of 3ds Max ever released. As evidenced…
 -
Re: Seriously Maya? Is Add Divisions that hard?
 You can create a custom hotkey you know based on what ever procedure you want.The advantage is that this line of code won't change your tool prefs anymore. All you have to do is setup edge loop prefs to your liking then execute on an object and just record the line of code from the script editor (turn on echo all…
 -
Re: Getting a job as a graduate and staying motivated/inspired
 I had this impression as well back in 2015. Especially when it came to the mudbox/zbrush stuff. I almost tried to convince myself that I should just stick to just making simple stuff like Fire Hydrants or Oil Barrels. But this thinking went away quickly when I realized I'm not a person who ever wants to set low standards.…
 -
Re: Wireless N routers WTF?
 Get the dlink dir-615 instead - it's $40 I think. The 150 isn't a full speed proper N roputer I think, so saving $10 isn't worth it. I just got the other one and it ran perfectly. Used the wizard and it set it all up correctly - I just went in afterwords to tune a couple things (pre-set IPs for each machine linking to it,…
 -
Re: How do hair cards render into hair & fur in game engines?

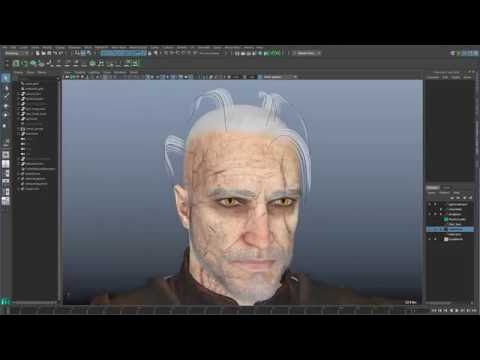 I dont have much experience with 3ds and especially hair in 3dsmax. However what i have seen most people do is generate hair clumps, which then get baked to polygons with an alpha map. With these textures already baked you then create your actual hair using polygon strips. Maya has tools to create spline based hair and…
 -
Re: cheap ambient occlusion
 Only problem with this is it will darken any wide bevels you have, which isn't exactly what you want. A faster way is to just copy the blue channel and do an Auto Levels on it, then gaussian blur it by about 0.5 or something. Less effort than doing the fade/multiply thing a few times. I also like the technique of using…
 -
Re: UDK Yet Another Scifi Corridor (with glowy bits)
now that color change really is a no1 improvement. looks much better now. while every piece looks stunning for itself i don't like how it looks when it's connected. there's neither an expected shadow where the two pieces intersect nor the according detail in the wall material to show that these 2 pieces are somehow… -
Re: New site!
 haha very nice site and work Fletcher, just the other day this site was empty and I was cock teased by you. Now its full of win, I think my fav has to be the shield. Keep it up man stuff is great you can also add that your work is displayed in the ga montreal art gallery. Someone took a snapshot of the open house. This…
 -
Re: ULURU!
 I will be keeping the legs. The topology I have now is from a low poly box/edge model, and then adding a meshsmooth to it. I turn the smoothness down to 0.5. Even at 1 the body is still less than 3K tris. However, I think I just need to spend more time in there; adding to it. Adjusting the tris myself. Instead of looking…
>3762 results