Search
-
Re: Archviz swimmingpool in UDK
 JordanW is right. Just a basic, static, opaque phong for a water body might look a bit weird, so when you add more to the shader the amount of instructions and nodes rises quite fast. But i have to say a lot of the materials you see on the web have so much redundant nodes in them.
 -
Re: Baking lighting-Normal mapped object (maya 6)
 actually another trick is to run your normal map through an rgb>luminance node and apply the output of that as a bump map which would work with convert to file texture. . .or you could just use the out alpha of the normal map's file node as a bump map too, not sure if the results would be that much different.
 -
Veteran Game Artist Available for Work

 Name: Ariel Chai Portfolio: www.arielchai.com Email: contact [at] arielchai.com Notes: currently not looking for unpaid work, thank you. Hello, I've worked on numerous commercial games for the last decade. Whether you need stylized art direction or just some assets, I can help push your game to the next level. Please don't…
 -
Unity 3D Character Shader Tutorial - Shader Forge
 Just uploaded my first tutorial contribution, open to suggestions / feedback. It covers creating a custom lit character shader in Unity using a node based system. In this case shader forge but could just as easily be applied to Strumpy or UDK's node system. [ame=" https://www.youtube.com/watch?v=kSfHFApl6PI"]Unity…
 -
Request - High resolution screenshot option for SD?
 I'm not sure if there is a way to do this already, if not; would it be possible to implement a high resolution screen shot option for the Substance Designer node area? I see a lot of screencaps of people's workflows, however, they're always too small to see what actual nodes are being implemented. Maybe an option that just…
 -
Re: A few questions about normal maps
As far as i know. "My (limited) understanding is that when you are painting "normals" you are actually painting grayscale height maps, and that information is being converted on the fly to normal maps. Is that correct?" -Yes specifically in substance painter we are painting in height channel because its easy to work in… -
Re: Mortal Kombat: Dead Pool Remake
 It looks pretty solid. My first question - how is the area lit? I see a lot of torches in the scene, but it doesn't look like they are contributing to the lighting at all. It also looks like you have a single, cold-white directional light instead. Try adding warm orange to magnolia spot lights (hold 'L' and click) at the…
 -
Re: Character Practice – Personal Training Project
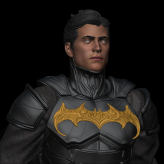 Thank you very much for the feedback and for sharing these resources, it really helped. The notes about anatomy and lighting were especially useful, and I’ll keep them in mind moving forward. This piece is still part of my learning process, so comments like this make a big difference. Thanks again for your time and help!
 -
Re: Partial transparent geo in Maya????
 For me it happens when you use a PNG as a diffuse. At times Maya will attach transparency to the material making it turn out really weird. Removing the node in the hypershade fixes it for me. Why it shows it differently in different angles, I don't know. But when I see that I know Maya attached a transparency node again.
 -
Re: (Solved, sort of) [Blender] Unpack normal map
 What's with this complex node setup for your normal map before the "Normal Map" node, and odd channel organizing? Why not just plugging a regular normal map (RGB) as an image texture and set it to use "Non-Color Data"? :D It's simple as that. Or am I missing something, since I don't get what's the reason behind this...
>37266 results