Search
-
Re: Block in Diablo scene
 About warping the window I think it was a good idea and no worries about the polycost, you are still very low on the overall scale for a scene, i'm trying to help you cut poly's here and there so that you can afford to do things such as model the cracks on the kiln :) so that when it gets a little crazy it's okay. You do…
 -
Re: MAYA: Chamfer edges like in MAX?
 You aren't going to get anywhere near how max handles chamfers and proceedurally control of it etc. But yes bevel is how it's done in Maya. smoothing groups in max is a good way to handle making the selections, imo hard edges are often as well in Maya. some just set them manually or with a combo of by angle. And once you…
 -
Re: [Realtime] Head UV, most texel density
 https://knowledge.autodesk.com/support/maya/learn-explore/caas/video/youtube/watch-v-s-KLbTUdKms.html In the above video, pay attention to the parts where they straighten the shells. You just do the same thing for the edges of the head. For instance, grab the UV's along the top part of your shell there, up until they start…
 -
Re: how to change the black side to normal in maya ?
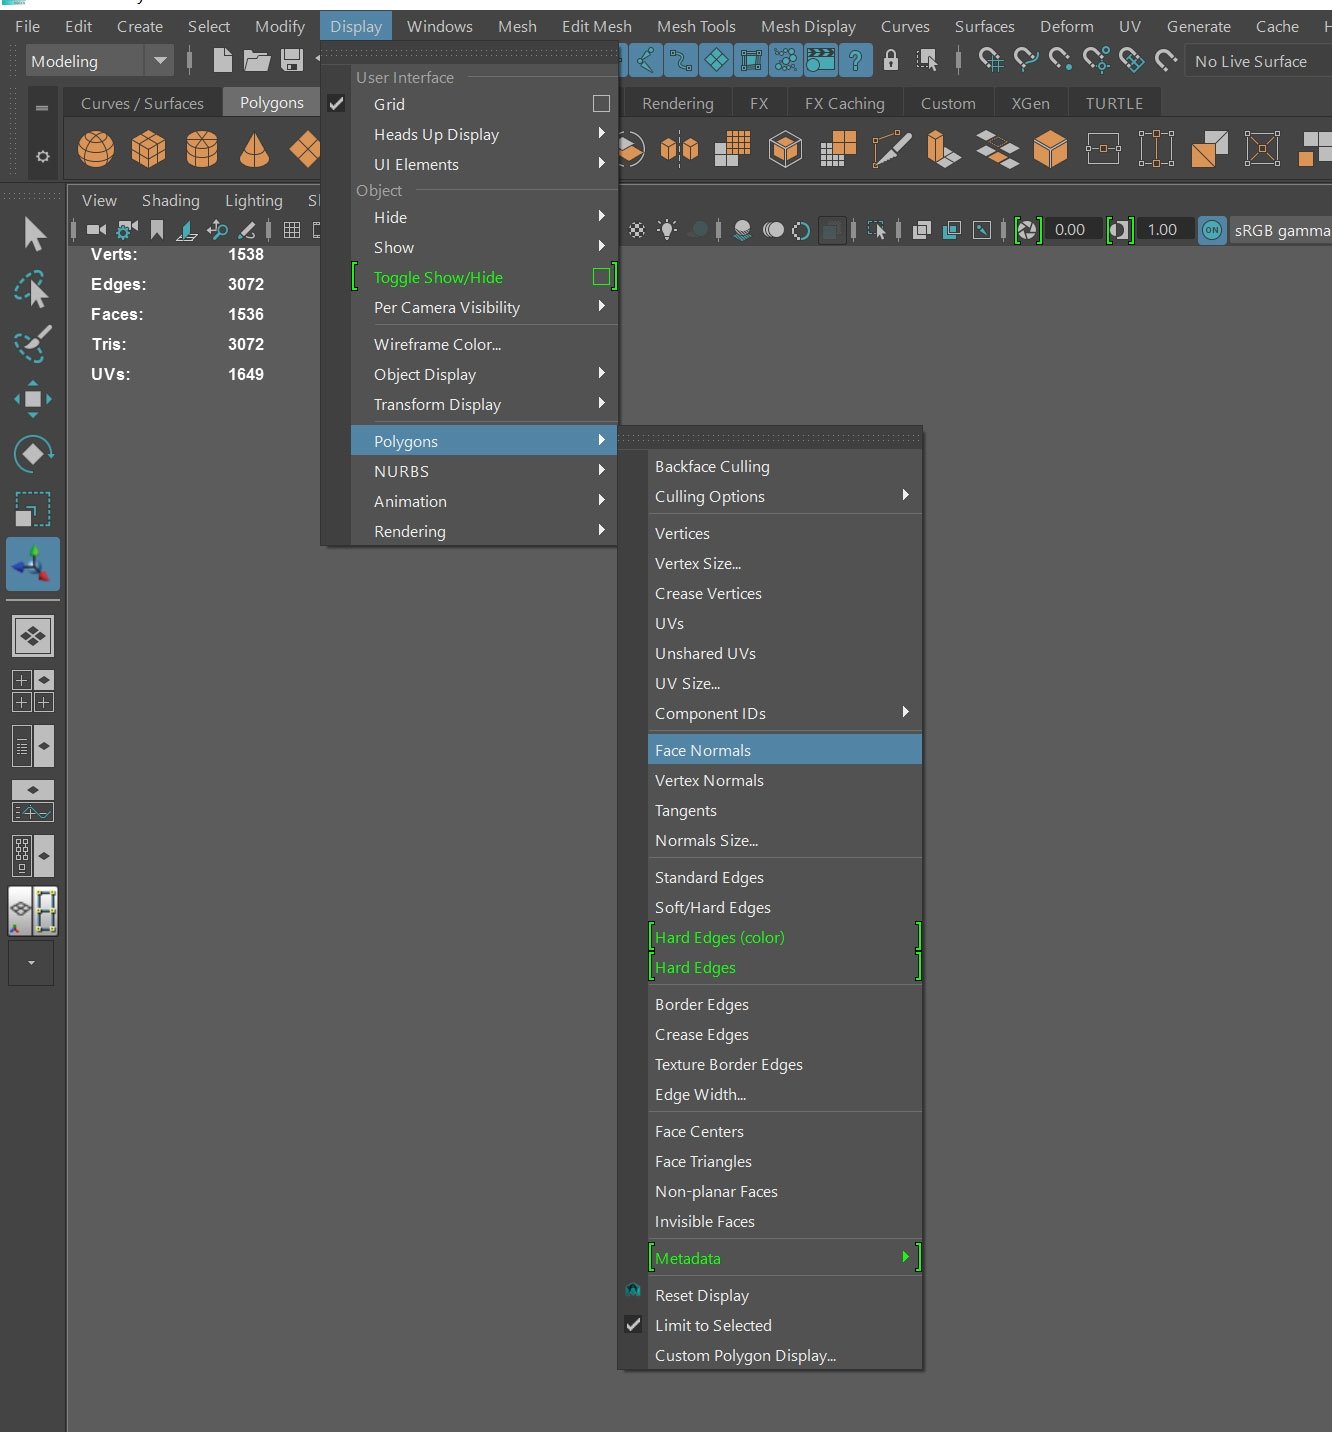 Sorry about the delay. To view your surface normals, go to the Display Menu and under Polygons select Face normals. Your mesh should look like this. Notice how the green hairs extend outwards from the mesh. If you have any inverted normals, the faces may appear black and the hairs will point in the opposite direction.…
 -
Re: psMaskSync (Photoshop Script)
I've had a bit of time, and I've made very fast a small panel that will check every 1 second to list the main groups in the current document. How I see it is like this, every time the user selects a group in the panel it will update the document metadata with an array containing the names of the groups selected in the… -
Re: Retopologizing, shrinkwrapping sculpted heads in Maya
 Well you do have Transfer Atrributes tool you can easily start off with to retopologize your heads to your sculpted decimated heads. Simple steps: 1. Export decimated / semi-high res sculpted head 2. Import in Maya as .obj 3. Import/load the "proper topologized head" in maya (with the one from zbrush) 4. [can't remember…
 -
Re: FF7 Character Modelling - New to modelling
 It looks to me like you are doing fine. Just finish up modeling as a whole. Show us the wireframe. Then you can combine and merge the center line vertices. To do that is pretty simple. Just select the two halves of tifa's body combine them into one. Then take the two opposing vertices on each side and merge them. It helps…
 -
Re: Consolidate Materials into a MultiSub Materials - 3ds Max
 Here's a real quick script I wrote. It doesn't have a lot of error checking but I dont have the time to spend on it. Just select some geometry and run the script. It will loop through the selection, add a material modifier, sets the mat id of that modifier to a number, takes the current material and adds it to a multisub…
 -
Re: nDo2 BETA
 Ive been experiencing A LOT of crashes with nDO resulting in a very very large error window popping up. Ive tried to reproduce it on its own but it seems to only happen in various PSDs that ive already made. Ive been able to replicate the error by trying to convert a selection to a normal that is outside the NORMAL group…
 -
Re: Zbrush - hide subtool under mouse cursor
 I actually got it working. It's definately not perfect. There is a bug which is based on Alt + LMB subtool changing. I hacked a solution by changing a subtool to a one above on the list and then back to the one that is selected = it does nothing. It only fixes the Alt + LMB issue. Also because of this hack when you use it…
>15388 results