Search
-
Re: How would I go about creating textures similar to the game Solarpunk?
 looks to me like a soft woodgrain texture that's been projected in Painter (or w/e) to wrap around the edges. Its very low opacity, and there's a subtle curvature highlight and AO shadow.
 -
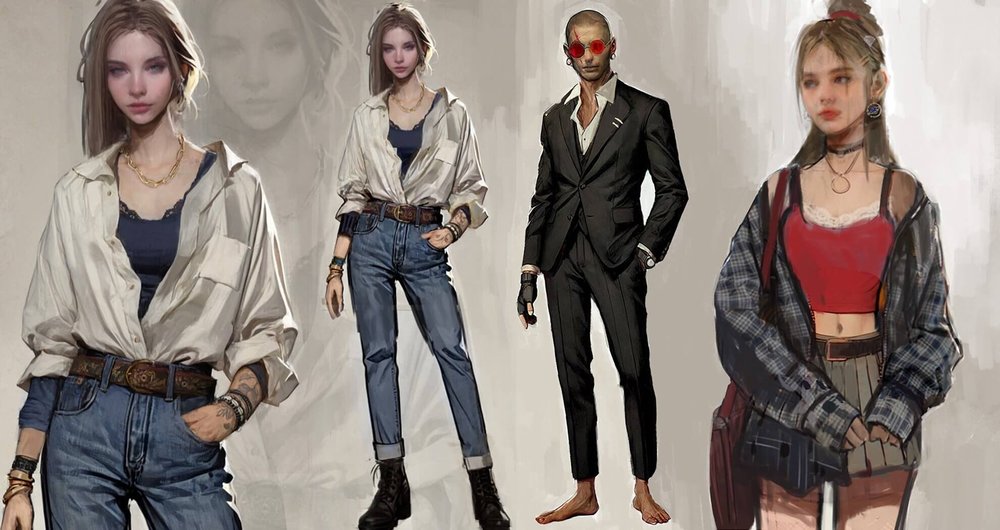
Re: (Critic Welcome) ConceptArt Portfolio

 That's another wrap, I finished a recent project, check the complete case study, process breakdown, and how I collaborated with my latest client to get their needs met with character design:
 -
Re: [Technical Talk] - Max Plugins
 Hey guys, does anyone know if a script exists like shrink wrap / conform wrap or expand wrap to work with the projection modifier (specifically the cage) adjusted properly. This would save a tone of time in some instances and I would really love to have something like this.
 -
Re: Problem with HLSL in max 2008
 Max 2008 requires that you set addressU and addressV in your texture sampler. Try changing your sampler to this: sampler diff_in_sampler = sampler_state { Texture = <diff_in>; MipFilter = Anisotropic; MagFilter = Anisotropic; MinFilter = Anisotropic; AddressU = Wrap; AddressV = Wrap; }; If that doesn't work, set them to…
 -
Re: My 3D Character Improvement Thread
 You might want to rework how the cape hood wraps around her head or the skull shape underneath it maybe, it's hard to tell. The hoodie looks like it's floating above her head instead of wrapping around it. Also, look at the reference at how the knees are indicated, the wraps are placed intentionally. Love the rest so far!
 -
Re: Sun WuKong
Dude, continue to move away! This is awesome! :D I like the pose without the tail wrapping. Tail wrapping is a cool idea, but I think it flows a lot better without. The way the eye travels it needs a direction (beginning and end) and I think the circle with the tail wrapped doesn't work as well. Love it though, the spit is… -
Re: Show your hand painted stuff, pls!

 Finally got around to wrapping up this guy. Higher res images in my THREAD Artstation
 -
Re: [FINISHED] Jedi Realtime Character - Metahumans in UE 5.6

 Wrapped up the expression sculpts. If I were doing a likeness, I would try to spend more time here but I'm happy to just keep working through the pipeline for now. I booted up the Metahuman for Maya Expression Editor and loaded in my metahuman DNA file where I keyed the 5 expressions I'd be updating to match my sculpts.…
 -
Re: Attaching separate meshes and retain skinning data. Help. (3Dsmax, but open to other software)
 1. Duplicate the meshes in place (select them all then press ctrl+V). 2. Combine them, and add a Skin Wrap modifier to the resulting mesh. 3. In the Skin Wrap modifier add the already skinned meshes, and change settings as needed. 4. Convert the Skin Wrap modifier to a regular Skin modifier. 5. Delete old non-combined…
 -
Re: transfer uv / skinning between meshes
 wow.. skin wrap is da hit! the other tools where nice but capitulated at the given task.. or they needed too much extra work (many separate meshes combined to one object) but skin wrap was fast and doing the job perfectly the fail of the uv-transfer could be due my old max version though thx both of you! and vig.. thx for…
>5414 results