Search
-
Re: Hardware to improve Video Rendering?
 Thanks for that. I noticed that when I select GPU for the Denoise option under "Output"(both for Image and Video), that the "High" setting is not selectable but when CPU is chosen, I can select the High setting. Any idea why? Should I be using the GPU option instead of CPU?
 -
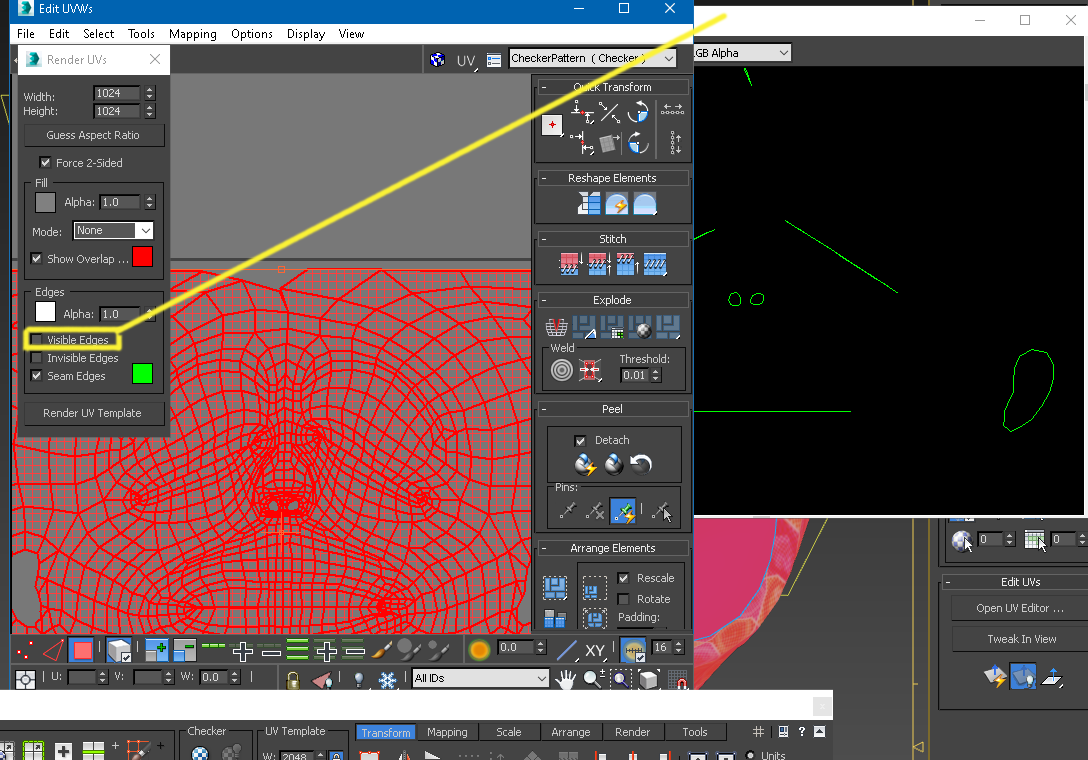
Re: 3dsmax Invert UV's
With your inverted UVs selected, in the UVW editor go to tools -> Flip Horizontal and then Mirror Horizontal to align em where they were before. To check if this has worked go to Select ->Select Inverted polygons again, repeat the process if necessary -
Re: Head Topology
 For some of the problem areas, you can go into vert mode, turn on soft selection and relax just those areas. It will often relax better on a selection rather than the whole thing and the soft select will help it blend into the surrounding area.
 -
Re: Problem - Wireframe projected in the normal map
 You should have a Normals menu in Maya. Select your whole object and choose Normals > Soften Edge then go through either manually or with constraints (Select > Select using constraints...) and use Harden Edge along UV seams.
 -
Re: How to properly merge vertices and edges in Maya?
 After you run mesh cleanup and have it set to "select" not clean, press ctrl+1 to isolate the selected problem spots. If there is a lot you can even make a quick select set so that you dont got to find them again.
 -
Re: Exporting textures to hand paint in photoshop

 Yes like Joopson said, you just overlay your Exported U.v.'s over the textures in say Krita or "photohop". In max there is an option when exporting wireframe "u.v.'s" , you can take away the inner lines of the wireframes and keep the outter wireframes. Do not have 3dsmax in front of me nor on this p.c. but its selection…
 -
Re: 3Ds Max UV Unwrapp Disappears after adding smoothing groups to the object !
 Do you have faces selected in Editable Poly before applying the Unwrap? Because the stack modifiers will apply to your selection only (if anything is selected) - so exit Face Mode, then apply the Unwrap and your existing UVs should be visible.
 -
Re: Bevel using 'Smoothing Groups' in Maya?
Maya is not really built around modifier operations like max. The quickest way is to assign hard edges, then use selection constraints to select them and bevel those. You could maybe use crease sets to store some edge selections. -
Re: ZB3
 I hope ZB 3 lets you select polygons a little bit like Maya/Max/Lightwave in a way that makes more sense than paint select your selection with quick masks that dont work yada yada yada
 -
Re: Zbrush3 Annoyances... need a little help please.
 you can rotate around your last brush stroke, by turning on 'local' you can hide selection by selecting whilst pressing shift and control, then deselect shift key. the selection should turn red. takes a while to get the hang of.
>15388 results