Search
-
Re: Kyoto Modular Houses – Tsushinikai & Sonikai
 Hey, this looks cool. I think you need to create a height blended material with a few layers, for the streets and roofs and stuff, so you can break up the monotony and paint in some fun grunge. It would help bring this environment closer to a professional level.
 -
BRAWL2 [Vehicle] Rust Rhino, Hang Li

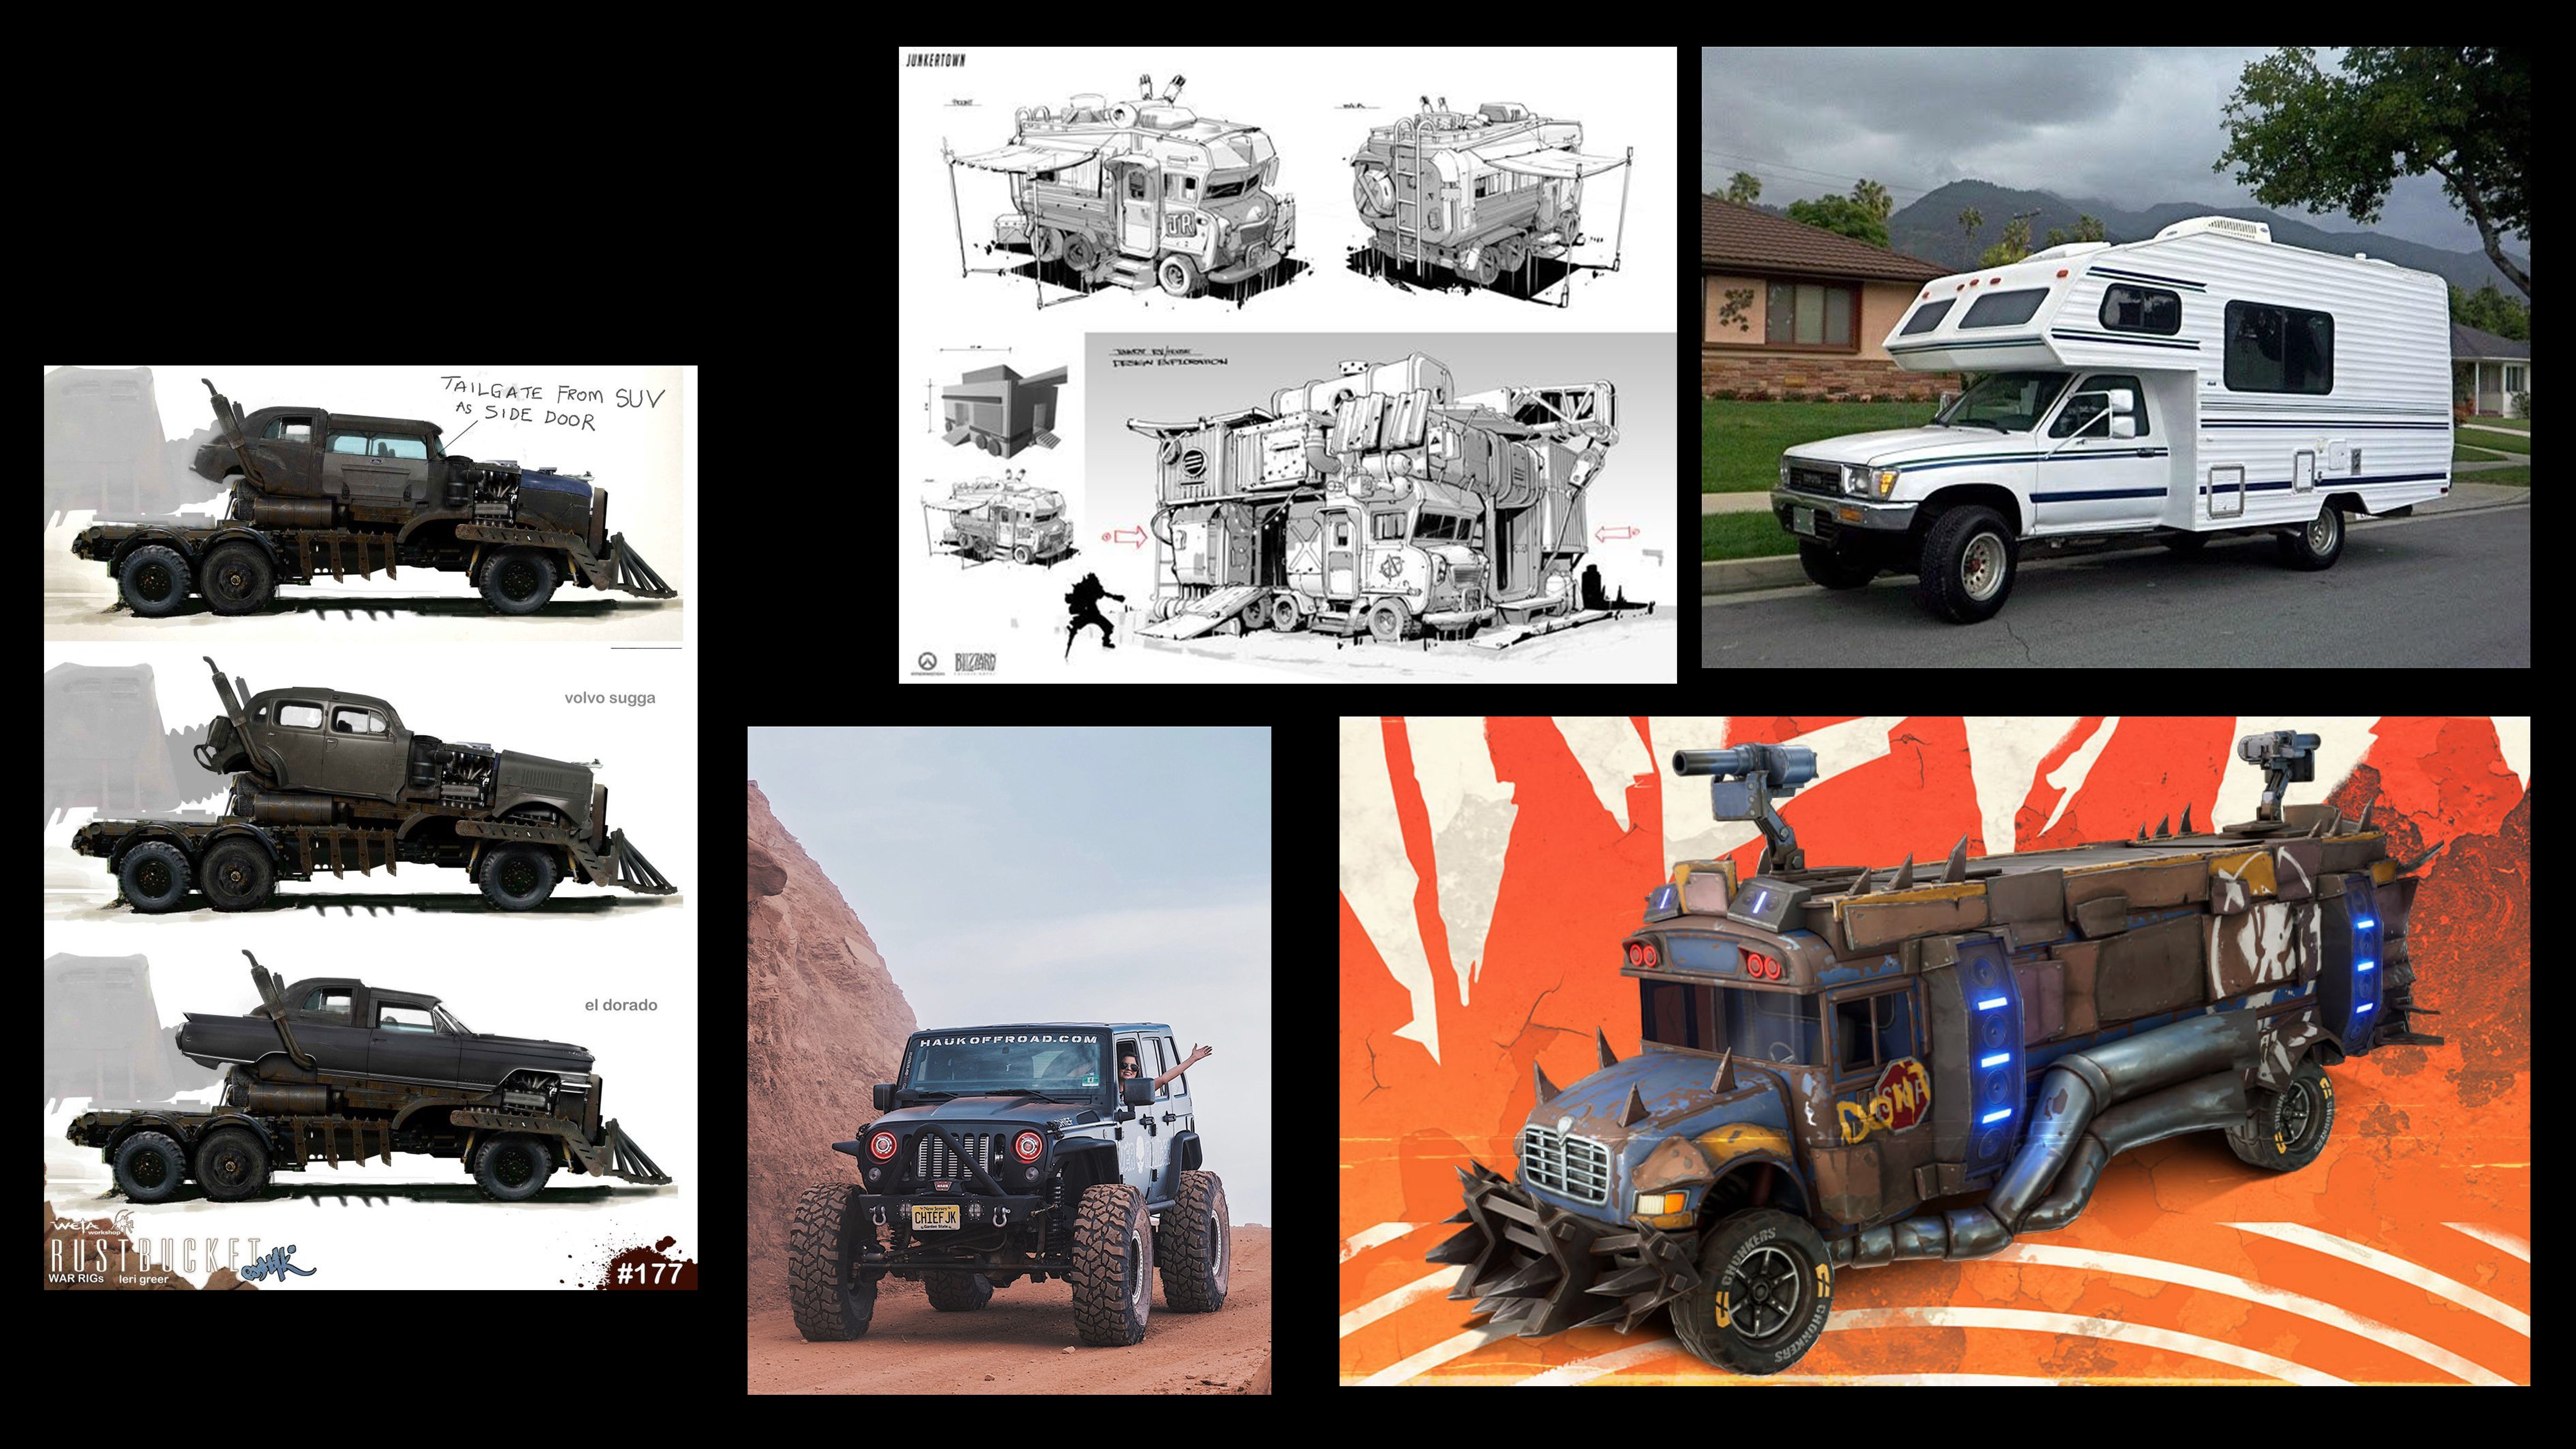 I chose Mad Max as the theme for my vehicle design. It’s a hunter’s rig built for brutal off-road performance and devastating stopping power. In terms of style, I’ll take Overwatch as a visual reference and blend it with my design language and ideas. Reference
 -
Re: Japanese Room- Feedback
 Looks cool! So I feel the walls are decreasing the quality of the image. If you used a "paper wall" where you could light the outside of the wall and have light bleed in, that would help sell the scene; Everything on the dresser, ie the sword and incense, look pretty realistic. Whats taking away from the realism are the…
 -
Re: Can someone check real quick of I'm making Normal maps in a proper way? Thanks.
 About blending normal maps. Generally, doing a flat overlay or blending mode from one to the other is not going to be the best way. The reason is the way the different channels are read. Red and green are your x/y direction, and are read from 1-127 as negatives (I think), and 128-255 as positives. Blue works differently.…
 -
Face sculpting

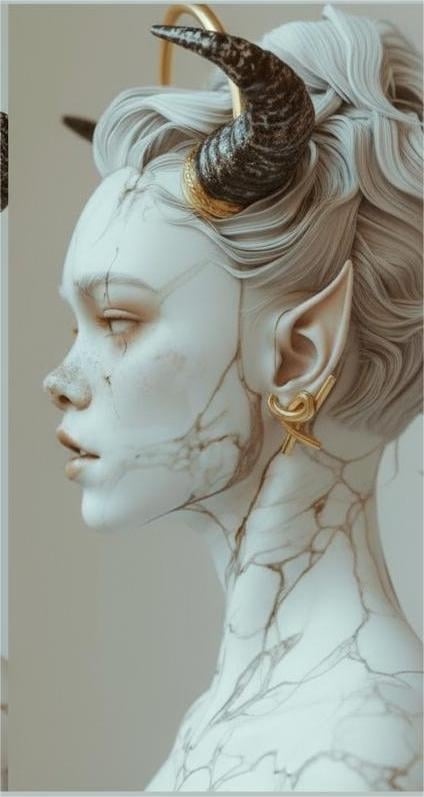 Need help improving my female face model Hi everyone, I’m working on a 3D female face model, but I’ve run into a problem: my model looks noticeably older than the reference images I’m using. I’m not sure what I’m doing wrong, and I’d really appreciate it if someone could take a look and point out my mistakes. If it helps,…
 -
Re: Photoshop - How do you add a levels adjustment inside a layer mask
 Photoshop does not support mask stacks or erase blending mode as some other image editors ( Affinity Photo, Photoline) but it still could be perfectly done non-destructively with clipping groups and "blend if " dialogs Make black pixels gradually transparent through "blend if" dialog on Level 1 smart object and add…
 -
Re: [Unreal 4.12.5] Sample grundge map gets darker with each LERP connection [SOLVED]

 Well, if you think of layering these blends you can get what I think you're after. You can also use whatever sort of alpha you want doesn't have to be 1 bit. Something like this: You have to think of the order which these things blend, I emulated what you had in your graph which is dirt over the base, then light, then…
 -
Re: UV trickery

 Found it, https://www.artstation.com/artwork/PmEB41 This is by Polycount member @Emalphi who might shed some light on how this was made. I think the grip is just a planar projection, the edge strip was then detached and UV'd separately into a rectilinear strip. Then the UVs for the handle and grip are not welded, that's…
 -
Re: The Bi-Monthly Environment Art Challenge | September - October (98)
 Thanks a lot for the thoughtful feedback! =) Those are really solid notes, especially the comments about wall UVs, geometry sharpness, and texel density. I can definitely see what you mean about the high-frequency detail and the carved-rock feel. I haven’t tried a triplanar setup yet, but I’ll experiment with that next…
 -
Re: Substance Designer Testing (Ryan Griffin)

 Looks like a great beginning! Designer is super powerful, it just takes some time to fully master the various nodes. Here are some tips for each material: 1. The normal map here looks quite intense, when you might want to use a combination of height and normal. Height for the big shapes, then normal to add smaller details.…
>11460 results