Xhaz the Battle Scholar - WIP (C-n'-C/Help Appreciated)
Weeee, I've started something for my portfolio/demo reel, as I'm on break from school and finally have some time to work for m'self.
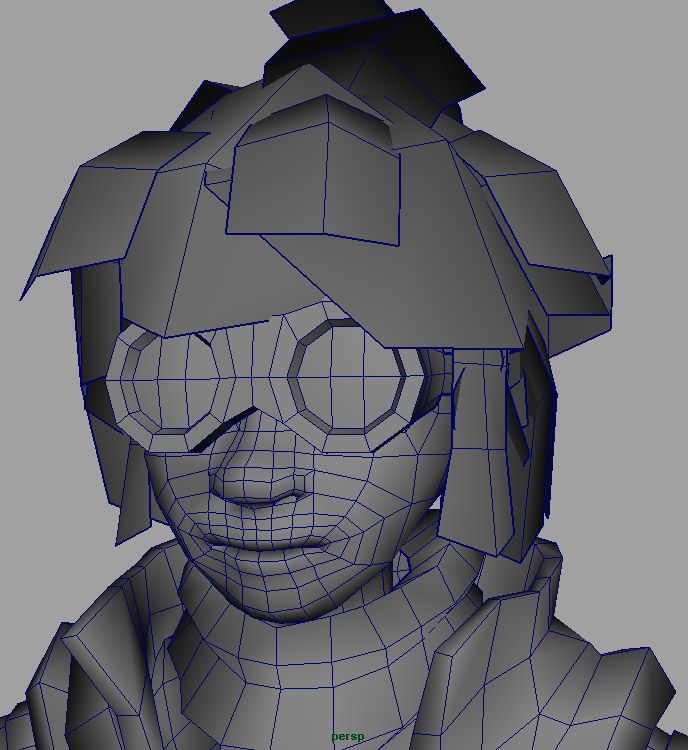
3/5: Cleaned up the face, freeing up 3-4 extraneous edge loops. Widened the mouth a touch due to the extra room.
3/6: Added his satchel, hair, and nearly completely laid out all the UVs.
---
UPDATED AS OF 3/6/09:
3/12: Beginning texturing
---
UPDATED AS OF 3/12/09:
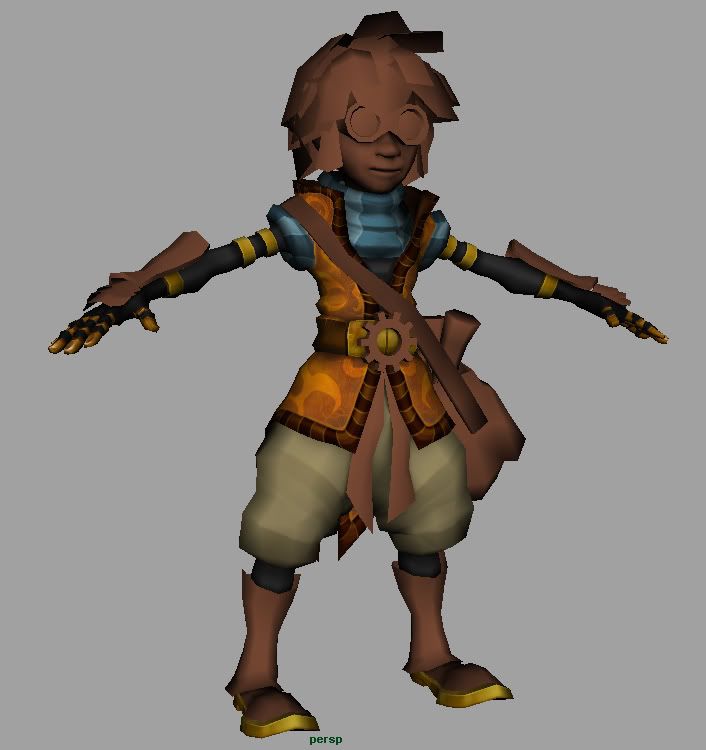
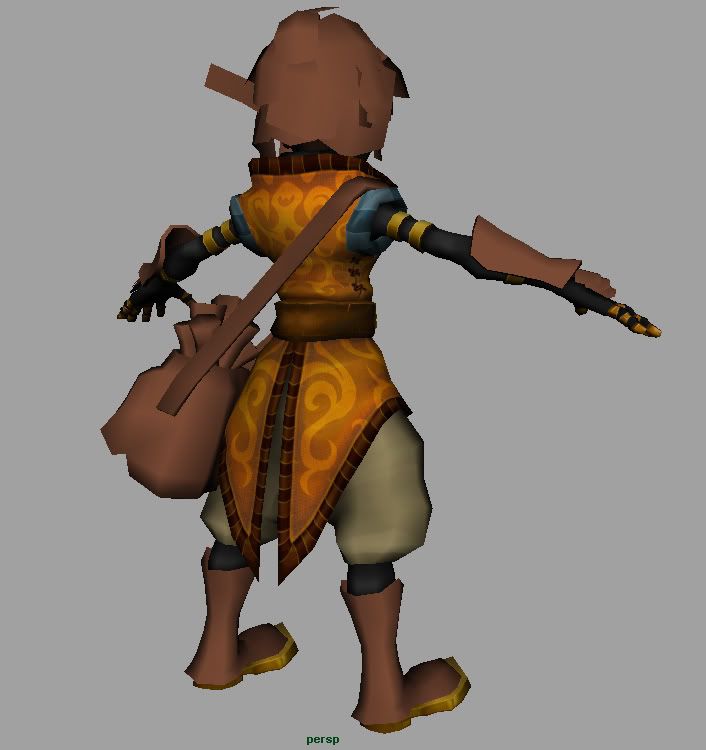
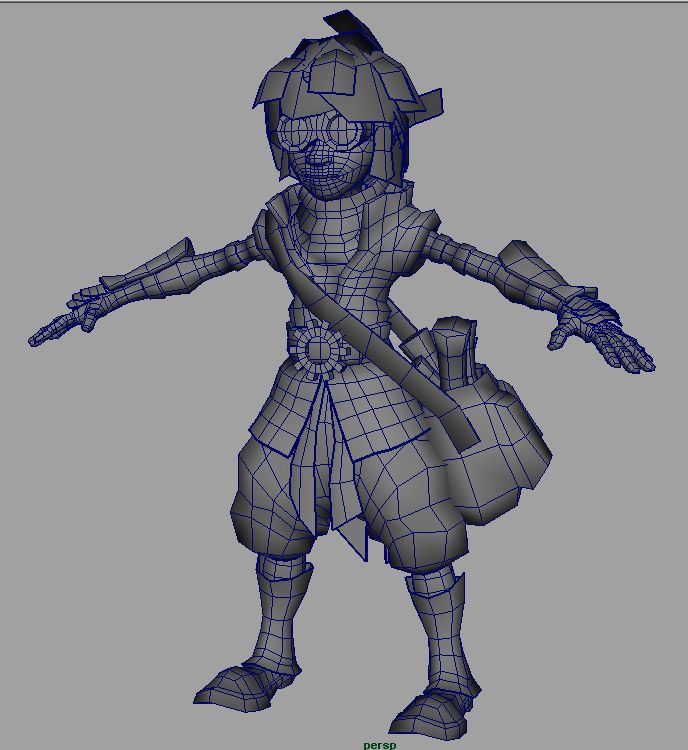
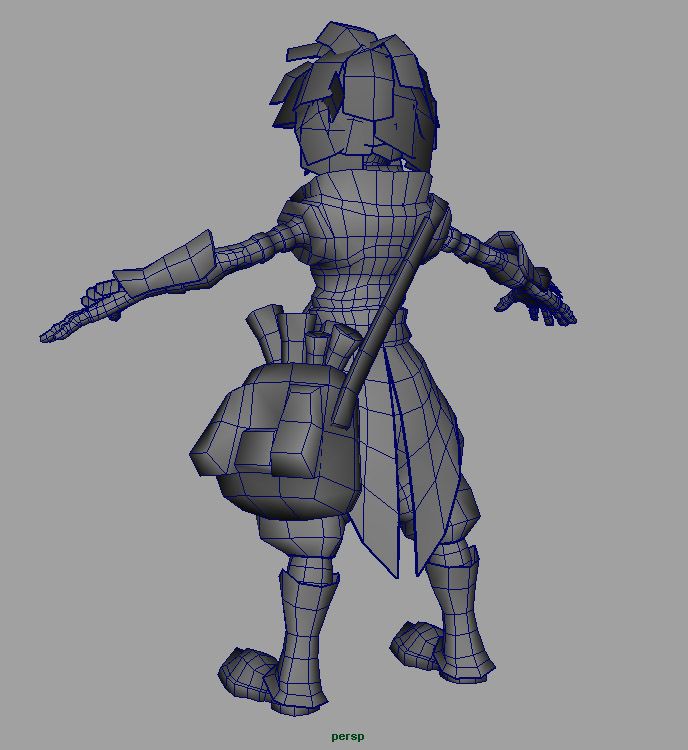
----WIRES:
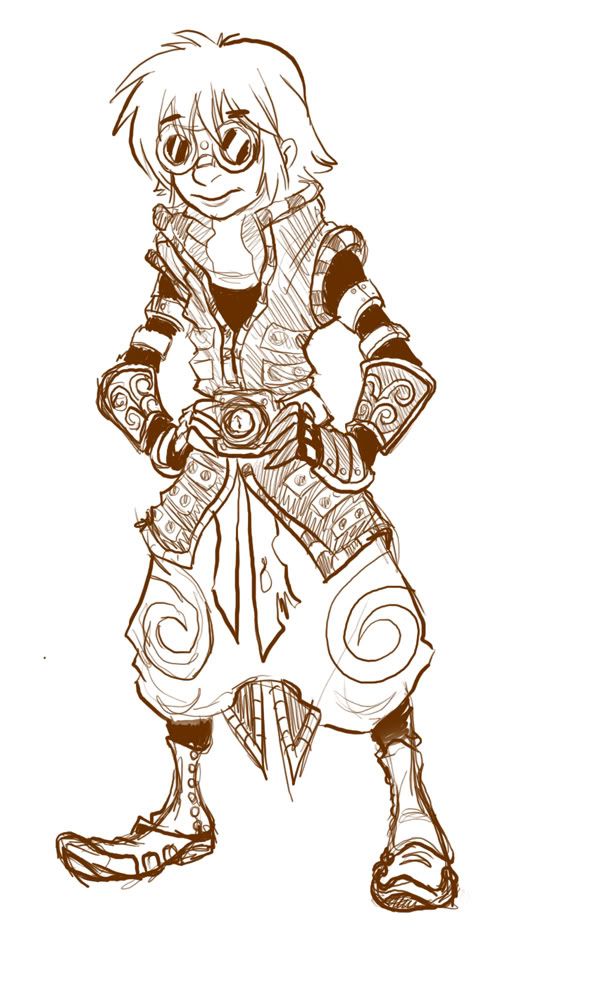
working off of this concept:
Please let me know what you think!
3/5: Cleaned up the face, freeing up 3-4 extraneous edge loops. Widened the mouth a touch due to the extra room.
3/6: Added his satchel, hair, and nearly completely laid out all the UVs.
---
UPDATED AS OF 3/6/09:
3/12: Beginning texturing
---
UPDATED AS OF 3/12/09:
----WIRES:
working off of this concept:
Please let me know what you think!
Replies
I'm gonna give Mudbox a try on this model, but I've never in my life really applied a normal map to anything. This character here, for the sake of time, is going to be mirrored exactly as far as his texture goes. What I've done in the past is UV mapped half the model, duped it over, and sewed it all up. This is standard fare for people who do mirrored textures.
The thing I'm not sure about is...
If I use this same approach for the normal map, wherein half of it is mirrored, how do I prevent the model from having a backwards normal map on one entire side of his body? As I lurked the Dominance War Generals mini thread, I saw a lot of people have that problem, but as far as I read, the only solution was to re-do the UV mapping so that it wasn't mirrored.
For some reason I have a feeling there's a "mirrored normals" workaround other than having to lay out everything on the model as if it's asymmetrical. I just haven't found it.
As far as specifics with mirroring and normal maps, what you want to do when you bake your normal map is take the mirrored section(one side) and offset it by a value of 1 in UV space(so that its outside of the 0-1 UV space) this will make sure you dont get any weird errors when baking, and will get you past the problem of having a seam if you were only to bake half the mesh(your mesh normals would be different if you deleted half the mesh to bake).
I have another question regarding moving into sculpting. I haven't laid out the UVs on this guy yet, because I'm unsure how I should do them. I've read several workflows, but I'm still grappling with understanding how many times I'm gonna be laying out UVs, I've never retoplogized...ugh, it's just really confusing starting out..
Could anyone give me a play-by-play of how you'd do a game character?
Such as:
1) Low poly in Maya
2) (Do you layout mirrored UVs here..??)
3) Import into Mudbox and sculpt
4) Export hi-poly?
5) No idea how to retopologize..
6) Bake maps, I assume
Another thing I'm real perplexed on, is that I'm likely going to have two texture sheets, one for most of the character, then one for like hair and accessories and props. Should those be combined (to let Maya know they're on the same sheet) and then export as say... "mainbody.obj" and "hair-and-extras.obj"? Is that pretty standard? Just treat them as two things? Because when I get to a posing rig, I'm not sure how the program interprets it all as one character.
There were so many holes in my schooling. I'm sorry for so many questions. Just as I start to feel real good about my low poly modeling, another brickwall hits and makes me feel so confused. I guess that's what learning is all about.
Answers to some of your questions, maybe:
- Lowpoly in Maya? I tend to do a "base mesh" first if I'm sculpting something. That way you don't get locked down into final topology, or spend ages modelling something that you then throw away or rework heavily once sculpting is done.
- I don't usually bother with UV layout before sculpting unless I'm planning to do 3d paint on the sculpt. Which isn't really necessary a lot of the time, especially for game characters.
- Yep, import into Mudbox/ZBrush and sculpt away until it looks nice.
- Yep, export highpoly back into whatever app you're going to be doing the "final" lowpoly in. Often you don't need the highest subdivision while doing this since it can run slower than you want, usually one or two sub-d levels below the highest is fine for getting all the major shapes and forms.
- Retopology can be easy or hard depending on how you go about it. Usually what I will do is take either my original "base mesh" (done in step 1) or one sub-d level up from that and use it as a starting point, and either add or remove geometry as needed. Use multiple objects and separate meshes if it makes life easier. You don't need to keep everything as one mesh.
- Lay out the UVs of the final lowpoly and then bake the maps, using Maya/Max/XNormal, whatever. I'd recommend XNormal over Maya for Ambient Occlusion maps because it's much faster.
Regarding two texture sheets, yes, you will probably have to split up your mesh into separate objects, since you need to bake one map down per object. You could technically do it with multiple UV sets on one mesh, but that's just going to be fiddly and probably not supported in most game engines. Best to just split up the mesh and UV each main part separately to fit in with whatever layout you think is best.After this character is finished, I'll probably be doing a sketch a day in Mudbox on some of its default models just to keep practicing. Then I'll move to sculpting for my own models