The BRAWL² Tournament Challenge has been announced!
It starts May 12, and ends Sept 12. Let's see what you got!
https://polycount.com/discussion/237047/the-brawl²-tournament
It starts May 12, and ends Sept 12. Let's see what you got!
https://polycount.com/discussion/237047/the-brawl²-tournament
JesterBox's Low poly practice.
polycounter lvl 20
So I started a model thats in the higher range O' polys and began to unwrap, only to realize I suck at texturing. So I say I says, Why not practice on a low poly, better yet why not make some!
Blingo bongo - frog assassin manifesto!
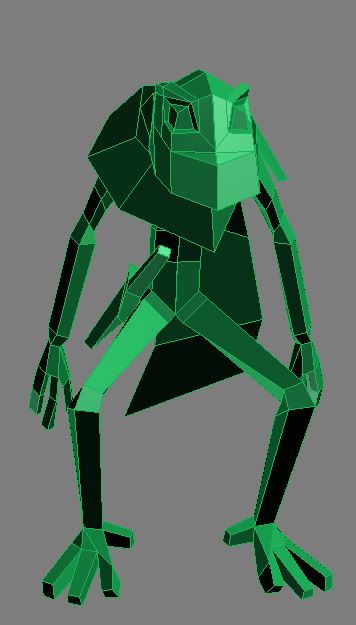
When I started it had the polys already green, weird huh?
Old pic I made

I rather like low poly modeling, it's relaxing and leisurely. Didn't use side panel references woot!
Thoughts?
Where's the dang trangulate command in 3ds?
Blingo bongo - frog assassin manifesto!
When I started it had the polys already green, weird huh?
Old pic I made
I rather like low poly modeling, it's relaxing and leisurely. Didn't use side panel references woot!
Thoughts?
Where's the dang trangulate command in 3ds?
Replies
If you want to make a model that doesn't rely on textures as much then you'd be better off doing high poly as low poly requires more texture detail - that is unless you are doing an awesomely complicated normal map!! Your painting skills don't look half bad, I think your kidding about the texturing really:poly141:
Wouldn't bother trying to triangulate anything, you could convert to editable mesh (game engine [tri] format) but that wouldn't help you. If your planning on porting to an engine the model will be converted into tri's anyway.
Hmmm... thing is I was thinking that I was I could get practice making textures in a simpler, maybe not easier way. I see a lot of terms on this forum about baking textures, normals, I see high poly things (excuse my noob terminology) being made to do low poly textures, and quite frankly I don't know what they do., and from tutorials it seems daunting to try to juggle that as someone inexperienced in anything texture related. I know I need to learn it eventually. The technical aspects of 3d is a big downfall of mine.
I've tried texturing once, using some tutorials from a unreal 2004 disc.... It came out looking like I painted it with farts.
Should I be texturing a box right now?
I remember doing this is maya and clicking cylinder meant you get a cylinder not a stepped on, stretched out can, please help! Driving me bonkers!
No matter were the faces I select are they just keep coming up behind his butt.
I used Symmetry Modifier on the main body before starting my UV unwraps, is it to late to get them to mirror, so I'd only have to texture and layout one leg and stuff?
I Also need a better way to cleanup my UVs
Is there a display I can turn on to show were Cylinders are splitting the faces?
I'm pretty sure there's something I can do to get my Uvs symmetrical, (like making the Uvs for the faces symmetrical, or should I unwrap it again?) other than doing it by hand but I don't know what it is.
Questions questions, back to Google digging.
you can collapse the stack and put another symmetry on top to mirror the UVs for the whole mesh. or if you just want part of the mesh to be symmetrical you can detach that part and apply the symmetry modifier before reattaching and welding the vertices
You are a very helpful shoop wooper!
Take bodypaint for a whirl, it's fantastic!
neat model btw
@Hawken, I'm almost done getting those goddamn checkers to not be stretched. I'll give it a whirl, from what little experience I have laying out UVs its not fun. If I use them demo is it going to let me export?
@Ancieto, I didn't have a green line until like five seconds ago weird. Can't help but think your magic.
@GCMP, You have made me aware of the best align button, I thank you. I'm not sure what you mean be flatten manually.
Is there a quick way to make 3DS, not have lighting hit edges so hard, and not have so much darkening and highlighting effects? I tried fiddling with menus and google searching but I don't really know the what I'm looking for. Or setup a quick low poly game lighting scenario. It's making parts difficult to see.
Forgot not to mirror the eyes, and completely forgot the shoulder pad.
Didn't get to try Bodypaint on him, I can't seem to get the plugins to work.
... goddamn its ugly right now!
Began texturing from the belly out for some reason, wrist, are in the process, still need to do everything but the torso and upper arms.
I want to do some tears, In the cape and mask so I'm off to find a tutorial on that. WHOOSH!
I'm beginning to see that low poly art, is an art in itself. I realized I've probable been over generous with my texture space, and I learned a lot about how to spend my UV map better.
Since textures need to be flat it's weird for me to decide where light should be hitting it.
I've been going off this tut,
http://www.bakaneko.com/howto/computer/3d/character/page24.html
and figured the bit about hair texturing could easily be used to put rips in the cape and mask, however. When I get to the point were he says click 2-sided option. No such option appears under any list.
Please help.
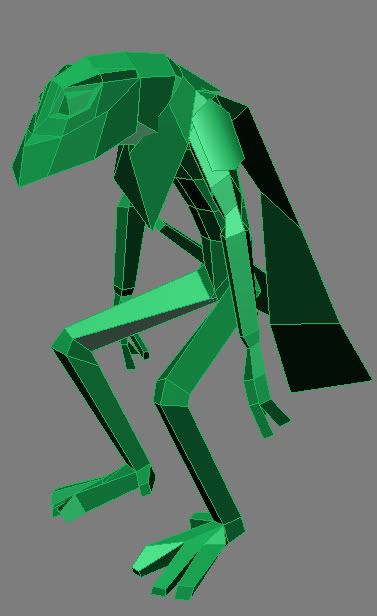
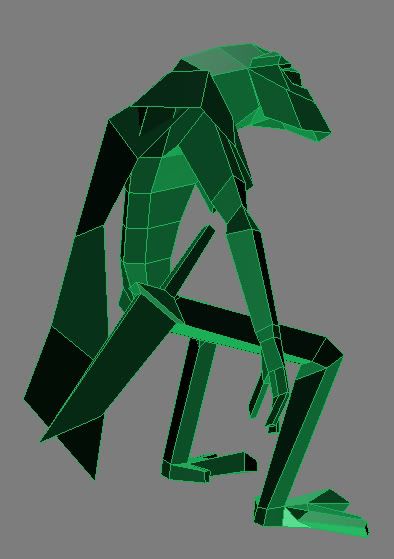
ACTION POSES!
Made with all natural crappy vertex dragging.
I know... back to work.
I took the liberty of scribbling on your screengrab a bit to illustrate a few points. Mind you, this could have been done much, much better, but I hope it's useful anyway.
The main point is that you should give your shadow and highlights a colour as well, and that your rendering is inconsistent with the lightsource. Ofcourse you won't be able to paint in the light the way I did (you could shoot for top-down lighting with a bit of ambient lightsources), but again, I hope it's still useful
edit: I went overboard with colouring some of this stuff, so instead of it looking like ambient light it looks like there are coloured spots pointed at him. Something to look out for. I did it on purpose to point out the dangers! Honestly.
@Killingpeople, thanks I think I figured out the bit about the alphas, although I'm not sure what an edge paint pass is, for you, I'll texture the tongue an knife.
@MightyPea, Thanks I've never really been clear on how to texture, in regards to light/shadow. So, in low poly I should color as if I have mainly an above the character light source, because in a low poly game there would be less lighting affects? (am I in the ball park? I'm new)
Not be so quick to black and grey, got it.
Right now I have my lighting set to "self Illuminate" and minus glossiness and reflectivity. Is that a good choice? Or should I have some sort of lights setup? (I've yet to watch any tuts on light setup)
That's good idea Banana
Progress has been slow, my bro broke his foot, and I can't get this god damn alpha thing to work.
What am I doing wrong? I made an alpha, and as a test I just made a bid circle on his face. I save as TGA, bring it in through bitmap yet nothing happens!
If I may qoute Yo Simitty Sam "razzfraggerfraraggingbazar fuuu fruuginn!"
@alexl, I'm assuming you've got everything else in the materiel editor as default?
I can't find the options list under "2. Material in The Materiel Editor in 3DS"
I found the second one.
DAMN YOU ALPHA!
And to get to the third option set just click the button next to the opacity check box / numerical input box.
Sorry if this is something really simple I'm just not getting.
Here's my list of roll out when I open material editor
Still not finding maps.
That's how my alpha is saved, as a test.
Now I realize that when I save as TGA any alpha in the picture is gone when I reopen it.
Thanks for the help.
next to where it says '18-default' in the white drop down, there is a button with 'Arch & design (mi)' on it, click that, and in the subsequent popup, pick standard material. Than you should be on the same page as the helpful guide before and it should work for you.
good luck!
I've got it down exactly in the tutorials now, this is what happens.
Is it bad that if I reopen a TGA that had an alpha channel saved, its not there when I reopen?
Thanks for everyone's help, I'll get it eventually... I hope... *quietly sobs*
If the alpha disappears it's because you saved it as a 24 bit instead of 32, save as 32! and if you want to display in the viewport, right click the viewport name and make sure "transparency is set to best".
alexl, told me about using a greyscale images instead in the opacity box.
No I can actauly start progressing on this guy again woot!
Thought It'd be more interesting to make the eye wound fresher.
Fun with backgrounds and photoshop.
I will probably redo the cape, a lot and make the knife into a single alpha plane.
Once I'm done I will make a little stand and texture the tongue attack, for Killingpeople.
I've learnt a lot about how to plan out your UV's and what should take priority. I realize know I've wasted quite a bit of texture space, and I could have made texturing a lot easier on myself.
I wish I could get the damn body paint demo to work.
Also, try to give more shape to your texture. What you have now (on his body) depends almost entirely on black lines to describe the shape, whereas you could be painting folds etc. with actual volume and shading.
I realise I'm not actually being enormously helpful here, but I hope you find it to be of some use anyway.
Oh, another tip for texturing, but as you say you've learned a lot already you might've figured it out: Keep things as straight as possible in the uv's, to aid in texturing. Even if you use 3d painting software, at this resolution it can matter for other reasons than ease of use, such as getting nice crisp horizontal and vertical lines for instance.
To expand on his interpretation, yes I mean to correct UV seam issues, but also, I meant to suggest you should better define your forms by focusing on the edges. Anything that could be considered an edge. There are areas that have been allowed to be left undefined and blurry. It can be a challenge on some forms, but try to see the blurry areas your mind is letting you ignore.
Good job on learning alpha maps man, that's really important you did. You should now consider learning up on smoothing groups, it looks like his smoothing groups have been neglected. They're important to know about for game art as well.
It seems like having a 3D paint program would help a lot In the department of seeing how a texture is actually wrapping around the model, I see what you mean about the body, it looks pretty brick shaped. I might try and get Bodypaint up and running again.
@Killingpeople, hehe, great now I gotta go find out what smoothing groups are.
A lot of areas came out pretty muddy, especially areas like the wrist, for some reason I used a pretty small texture space on them, thinking that because the limbs where thin and gangley I didn't need as much space. Its a mess.
Thanks for the tips.
Doing a pair, Joker and Harley Quinn, based of the WB animation.
It bothers me to see the Joker in such a dull pose.
I think I'll make a pose and maybe a boxing glove gun to go with it or something.
A on the same edge
B around a gap in the mesh
check if there's not accidentally a poly inbetween them or something