UE3 Shader to mimic SF4 (WARNING LONG POST!)
polycounter lvl 18
ok Ive been dealing with this on my off time for a while now and I cant take it anymore, ive asked alot of people personal questions online (and thank you for all your support and sorry for being a hassel to you!) But I cant take this anymore
so let me cut to the chase, many of you saw me working on a street fighter character next gen not to long ago.
on my off time between freelances ive been working on him on and off in unreal 3.
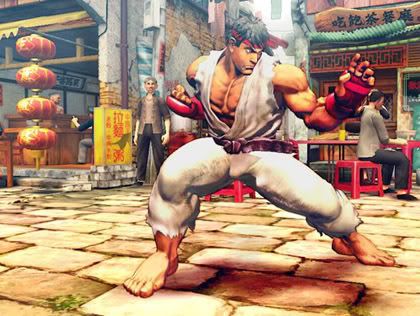
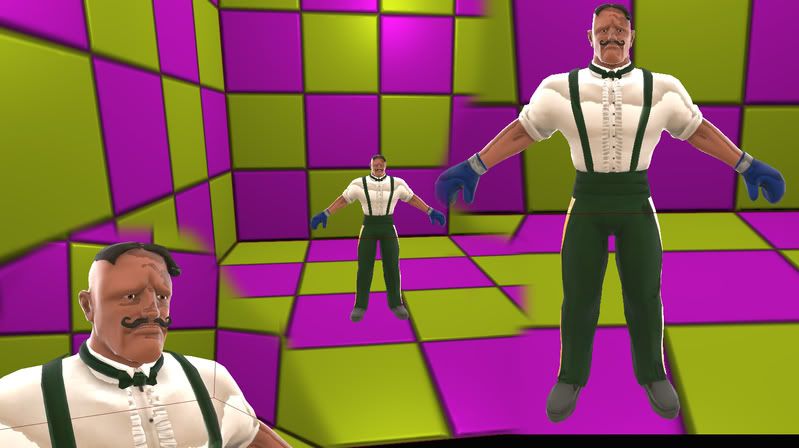
my goal was to achieve a faked Street fighter 4 look, which was mostly a flatisky style somewhat semi desaturated look.
A example of it is here
now I was directed to neox's shader tutorial to recreate team fortress style characters in unreal 3 which was in a direction I wanted to go( And neox thanks man that tutorial helped ALOT!)
But ive been running into weird issues I just cant seem to figure out, I figured the culprit to be a few things.
I believe the ambient since I was using a color is acting as a shadow but for some reason its creating blotchy patches on my character as oppose to acting as a faked shadow on his lower points.
So Following the Team fortress shader and modifying points so it wasnt as FLAT or as cell shaded I made a semi hybrid version.
But im running into other issues where asside from the blotchy points the character also gets weird gagged highlight points in him when I rebuild the light.
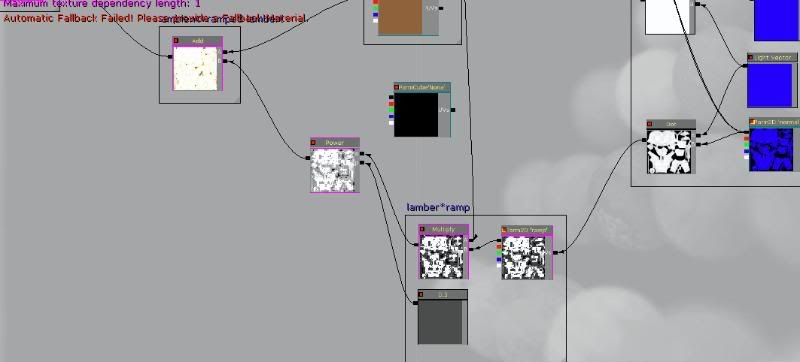
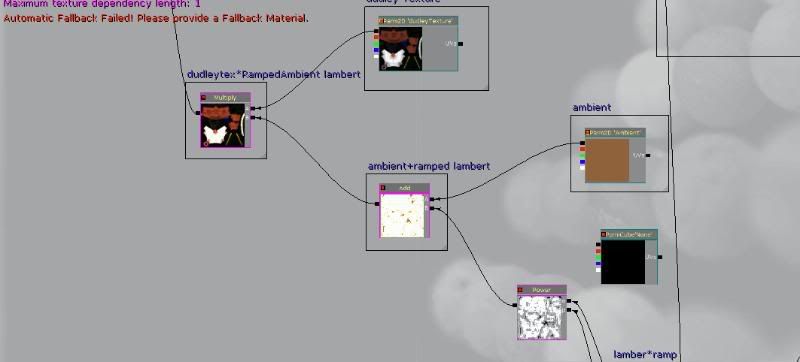
I have screenshots of everything I mean below along with my current shader....
At this point any help or a step in the right direction is better then no step at all!
(PS - YES I want to do this with a shader in unreal I want to learn shader work!)
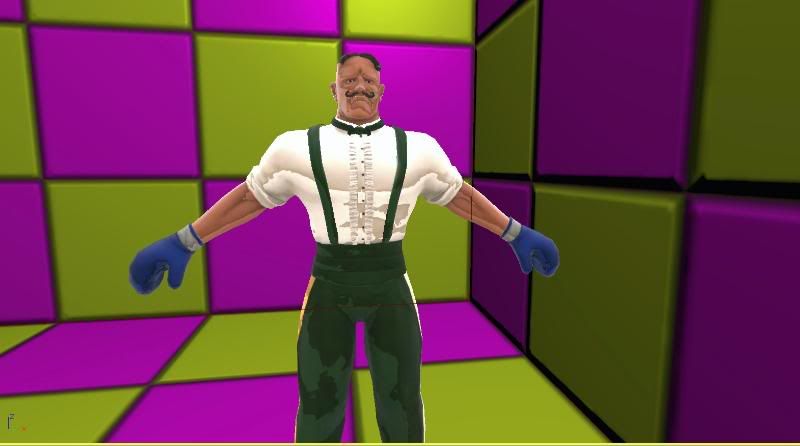
(no lights built)
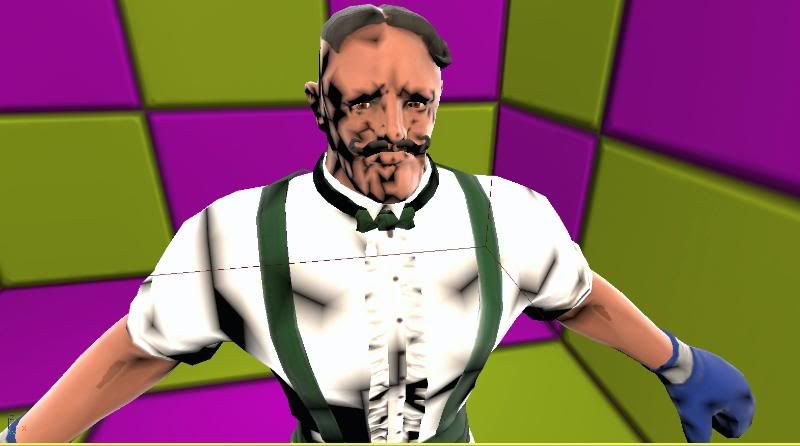
(lights built)
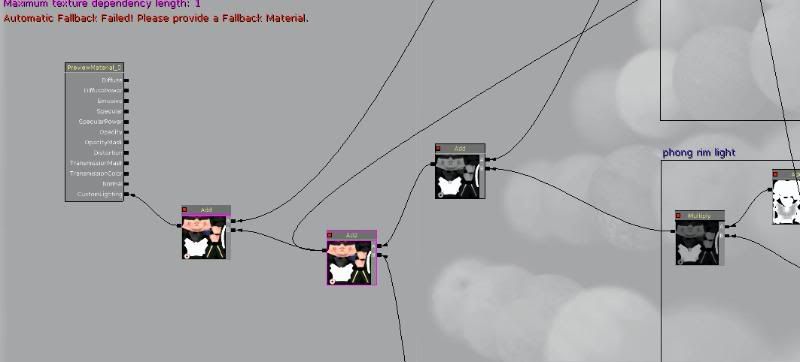
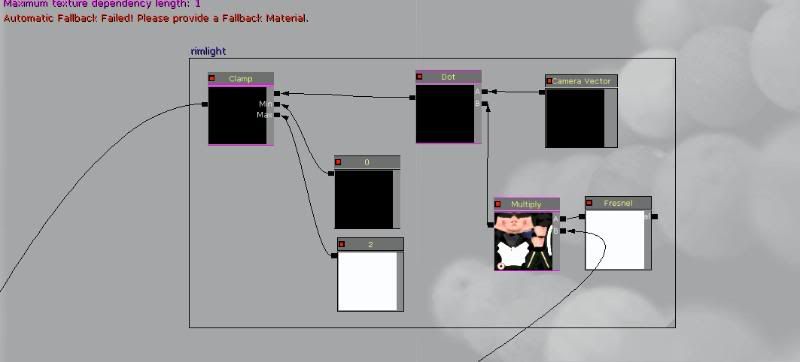
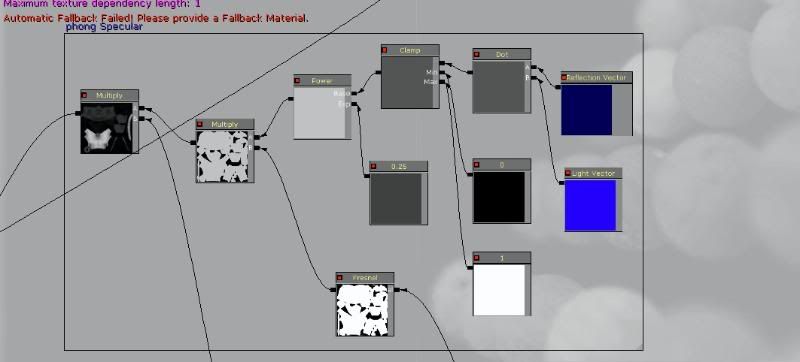
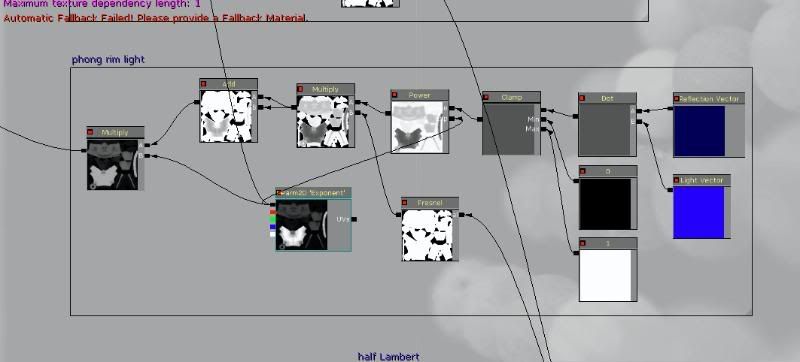
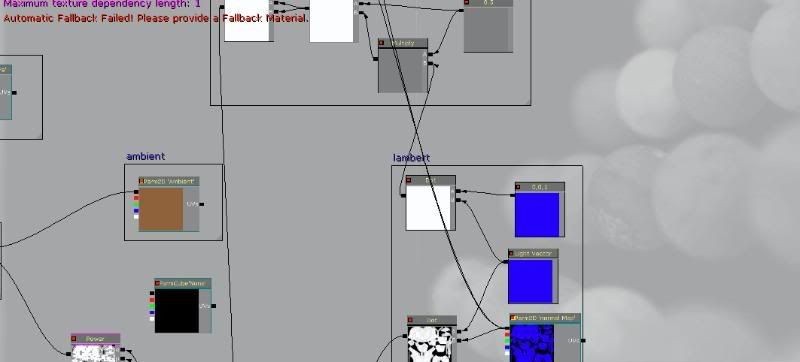
(shader)

(close up of blotchy points I speak of)
so let me cut to the chase, many of you saw me working on a street fighter character next gen not to long ago.
on my off time between freelances ive been working on him on and off in unreal 3.
my goal was to achieve a faked Street fighter 4 look, which was mostly a flatisky style somewhat semi desaturated look.
A example of it is here
now I was directed to neox's shader tutorial to recreate team fortress style characters in unreal 3 which was in a direction I wanted to go( And neox thanks man that tutorial helped ALOT!)
But ive been running into weird issues I just cant seem to figure out, I figured the culprit to be a few things.
I believe the ambient since I was using a color is acting as a shadow but for some reason its creating blotchy patches on my character as oppose to acting as a faked shadow on his lower points.
So Following the Team fortress shader and modifying points so it wasnt as FLAT or as cell shaded I made a semi hybrid version.
But im running into other issues where asside from the blotchy points the character also gets weird gagged highlight points in him when I rebuild the light.
I have screenshots of everything I mean below along with my current shader....
At this point any help or a step in the right direction is better then no step at all!
(PS - YES I want to do this with a shader in unreal I want to learn shader work!)
(no lights built)
(lights built)
(shader)
(close up of blotchy points I speak of)
Replies
http://www.moddb.com/games/unreal-tournament-3/tutorials/tf2-shading-in-ut3
I hope you get this sorted out, I'd like to see you get there in the end. I don't think the tf2 look is an ideal starting point, though. Have you spoken to Neox personally? He's bound to be able to help you.
Also, when importing your textures make sure they're using the appropriate compression settings or artifacting could happen.
As far as helping you figure out why your shader is broken I recommend going through each element and see how it's affecting the shader and evaluate if that's what it should be doing. One way to do this would to be go to different parts of the shader and hook that node directly to the custom lighting input and see what the result is. For instance just hook up your phong lighting to the custom lighting input and see if you see an accurate representation, if you got crazy shading then your error's in there. do this for the major elements and it'll help you narrow down what's wrong.
If you're just coping what you see from Neox's tutorial I recommend trying to learn the math/code behind these shaders, it'll help you create them even though you never write any actual code in UE3. I referenced the following books when I was learning shaders.
[ame]http://www.amazon.com/Programming-Vertex-Pixel-Shaders/dp/1584503491/ref=sr_1_1?ie=UTF8&s=books&qid=1225379667&sr=8-1[/ame]
http://http.developer.nvidia.com/CgTutorial/cg_tutorial_chapter01.html (this one's free online now!)
I also recommend reading whitepapers and tutorials that nvidia and ati provide. There's already a lot of legwork done one non photorealistic shaders so it'll definitely help to read what other's have done and see what their math is.
Taking a quick look at some things I see wrong
in your rim light box you're doing a dot of the camera vector and what looks like fresnel multiplied by your diffuse...why? Fresnel is already a rimlighting term. Manually creating a rimlighting term would be Dot(Normal,Camera) and would put that in a One Minus and put a power either before or after that to sharpen it.
You're multiplying your Specular calculation by a fresnel component, this means you'll only get specular on the edges of your model (this may be intentional?)
Also, custom lighting doesnt work with static built lighting very well, the lightmaps have shading models built into them which is why you'll get black shadows despite your shader avoiding them.
to iterate on the spec, yes I was figuring only on the edges of this but with a soft ambient (acting as shadows) this could make the spec pop more as oppose on the entire model. But that was more testing then anything else
well heres a question How Do I display this character with this shader correctly in the editor built if static meshes is a bad idea?
A clamp of 0.1 to 0.9 seemed to work for mine.
Edit: It really helps to test this stuff on a more simple object so you can tell what the lighting is doing.
Edit No. 2: Looks like you can set the texture to clamp instead of wrap when you import it.
Yea I did he gave me some guidance but Im sure hes a very busy guy so I cant keep pestering him about this stuff
but im running into some bugs, im trying to get this to work in the actual editor itself, where when I play the game and view it in the engine itself but everytime I put the mover in the level it shows up all black?
But in the editor windows the mesh shows up like its suppose to so until I can get it in the editor to test I can not continue testing out the shader to see how its effecting the model...any suggestions?
Thanks in advance (FYI Shaders involve alot more math then im comfortable with this programmer had to bust out a visual calculator and it started to make my head spin)
One other thing... incase your using a skylight in the future, custom lighting doesn't seem to accept lighting from the skylight type light source as far as I know.
Glad your starting from a more simple shader.
Hope that fixes it.
-Lee
heres the current shader....I still have yet to add in the spec or anything ...I kept running into the issue that every time I tried to deepen the normals enough, I would lose my nice soft ambient/diffuse look, but every time I darkened it the normals would either artifact with weird black spots or just literally make BLACK points on the normal maps (way to harsh) so I dunno, heres where im at right now suggestions at this point are appreciated..
and the cool mess ups
Even though no diffuse is showing at this stage, that looks very close to the SF4 screenshot I think. Stop short at that point and see what it looks like with Diffuse.
(points to image in what you are working on section
I achieved close to what I was working on now Im repainting the diffuse to do justice to this piece.
this is dependant on light in the zone to act as the spec pass and acts as its own darken of line work (outline of the character)
once I paint the diffuse to have nicer shadows highlights etc this will pop ALOT more
AE: are you talking about my old shader to make rainbow bright man ? or neoxs?
and the shader
On a intresting note I found out a way to mask out areas of the outline (well my programming friend explained to me a way but made my head hurt)
If I can find a way to make parts of it black outline/brown outline I think it might add some flavor to this.
I still need to find a way to make my diffuse pop more because right now im painting it up and noticing that my diffuse isnt poping as much as it is when its in 3d's max 100 % self illuminated.
I think I'll be working more on this later. friday or so.
I'll post progress soon (Im still making teeth for this guy + other characters im currently working on for personal/ work)
Here is a stab at getting the rough shadows on the character. I just need to spend more time to mask out the high-lighted areas and have it multiply better. Don't ask to see shader network, messy as hell. Brain no work good now. Must go to sleep... 7am..
Thanks for the challenge. I will work on it more later today. I think once I mask out the middle bits with decent falloff (with controls for said falloff) , get a better cross hatching source, better texture to use (maybe a better model) and get the rim of the character done it will be damn near close.
If anyone wishes to donate a CLEAN normal mapped character (as little stretching as possible) I'd love to get it so I can refine this. This one was given to me by a buddy, but to go further, I would like something more refined.
Played around with it a bit bit didnt post any pictures here (been busy with a art test last few days and the new year and holidays and all that jazz)
Oh yea dude if you were trying to get ahold of me you can always just PM me