Home 3D Art Showcase & Critiques

[WIP] Mavica FD71 - Floppy Disk camera

triangle
Offline / Send Message
illumisanic triangle
Looking for feedback/critiques during posting ;).
After getting massively rejected on the job hunting in the last months it made me insecure. I've wanted to make sure that I really know to model cool things and get a better portfolio in the process.
After searching what catched my attention was a camera that ussed floppy disks. It has curves, so more difficult.
Here is the high res version:

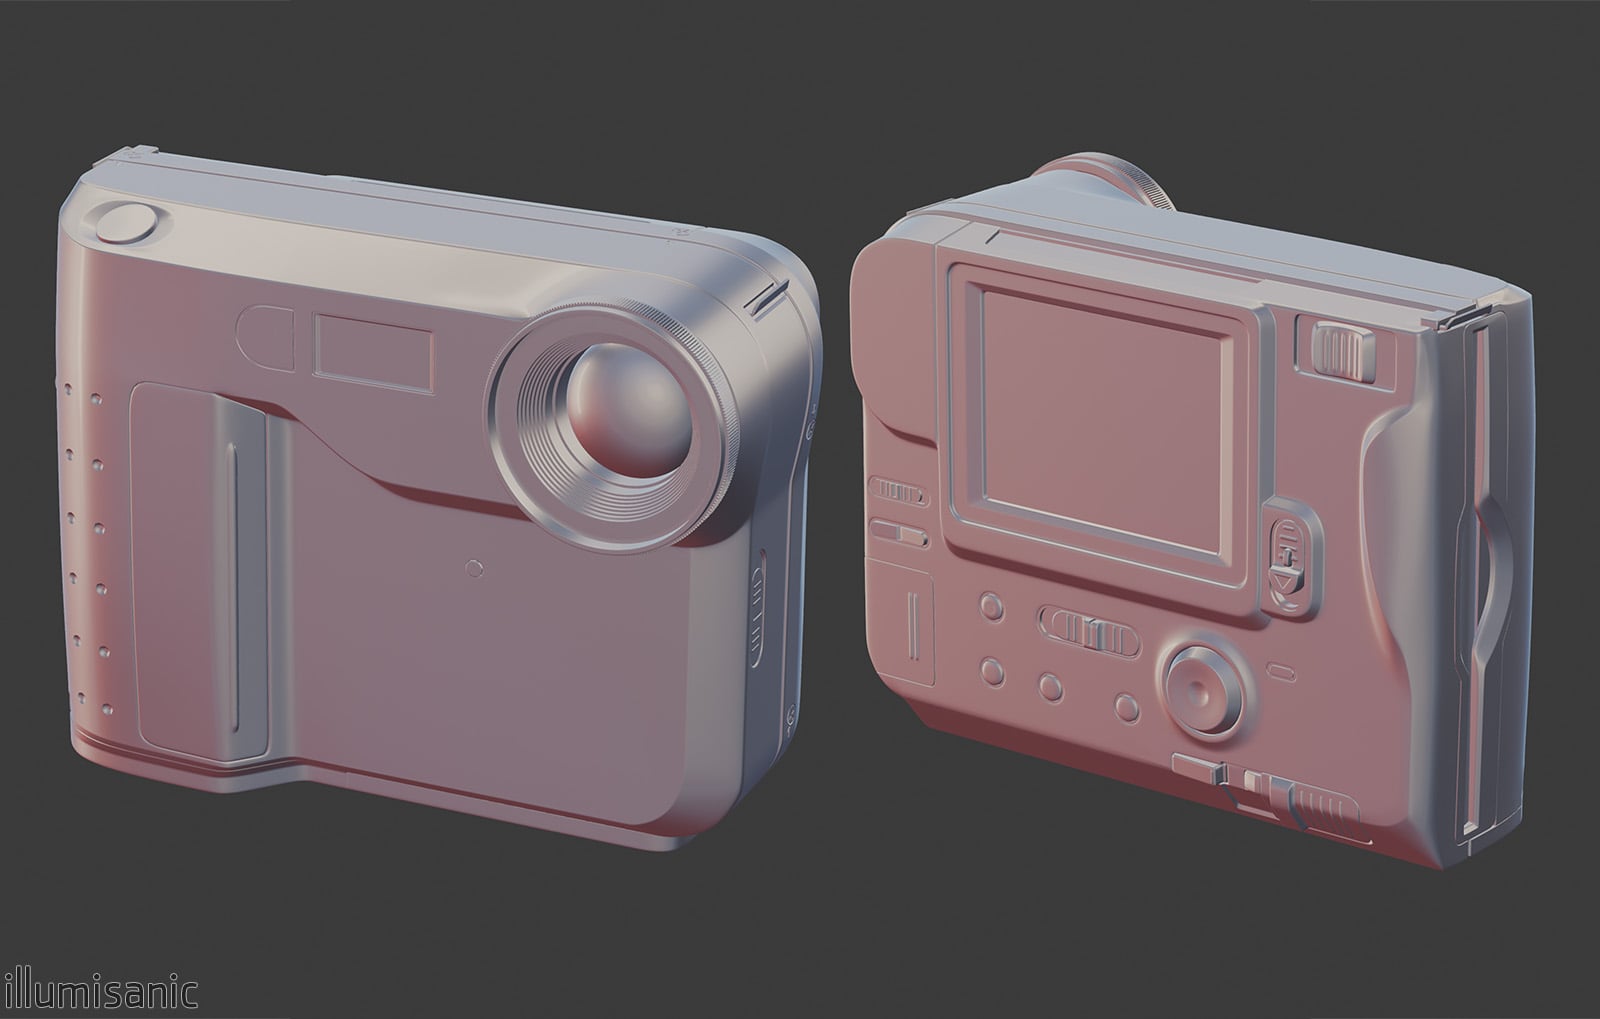
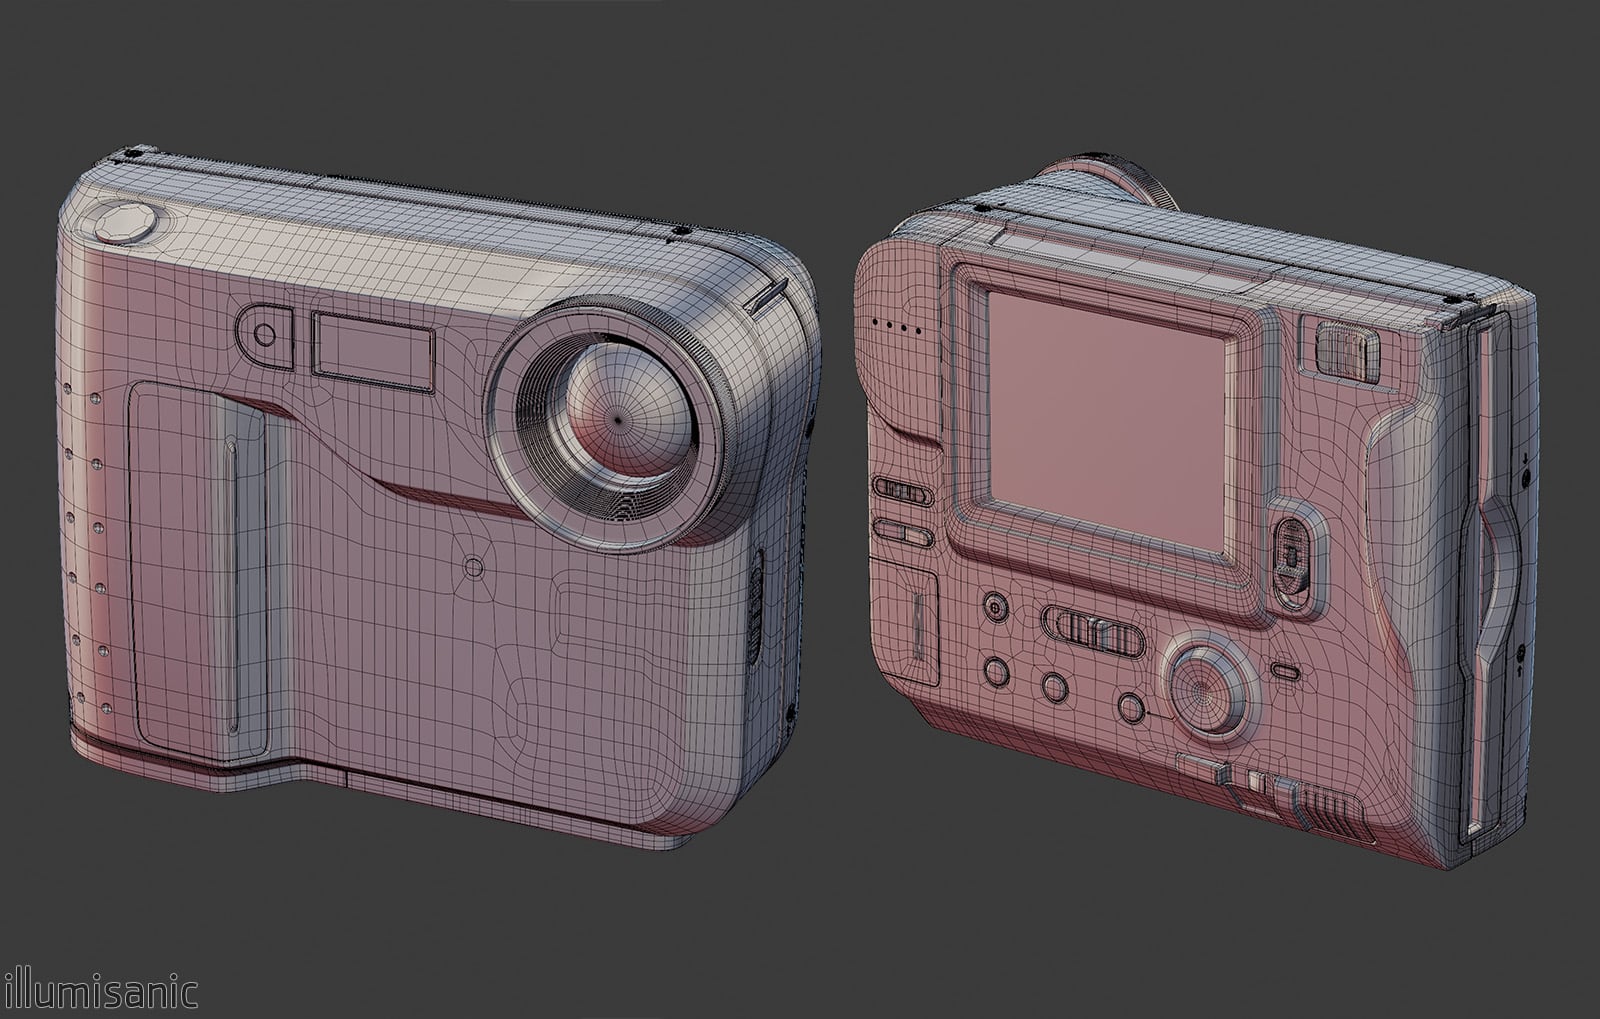
I've used floatters >:3

Getting references was horrible. 70% of the modelling was made with proportions and comparing images in photoshop

Replies

  • illumisanic
    Offline / Send Message
    illumisanic triangle
    Here is the low poly version, the model is supossed to be "hero asset", seen closely. One of my persistent fears is not using enough vertices to have good circles, shapes and holes.
    I'm not so sure if I've used too much or too little edges in general.
    Current triangle count: 11.100


  • illumisanic
    Offline / Send Message
    illumisanic triangle
    In the low version should I add the grip and steps on the lens or directly bake it on the smooth surface?
    It looks better, but for a portfolio game piece I'm not sure it's bad for "optimization evaluation"

    I'll be uv unwrapping. I don't know why everyone hates it, I have a blast doing it
  • Joao Sapiro
    Offline / Send Message
    Joao Sapiro ngon master
    looks pretty cool ! was just wondering why all quads in the HP :P 
  • Eric Chadwick
    Does look good so far. 

    I tend to like more conservative lowpoly meshes, but it’s really not a big deal. You’re demonstrating a good understanding of modeling already.

    But I would not model the grips, that’s small enough a detail that normal mapping makes more sense. 

    Also a lot of the detail on the back could be flat and use the normal map.


    But this is all nitpicking really. Only if you wanted to heavily get into optimizing.
  • illumisanic
    Offline / Send Message
    illumisanic triangle
    looks pretty cool ! was just wondering why all quads in the HP :P 
    Thank you : D
    There are some "concealed" parts that are ngons. After seing some posts of Jordan Cain, I stopped being so skeptical about them.
    I think it came out mostly as quads because I've applied a subdivision modifier before going into smaller details, like holes, booleans and that stuff.

  • illumisanic
    Offline / Send Message
    illumisanic triangle

    But I would not model the grips, that’s small enough a detail that normal mapping makes more sense. 
    Also a lot of the detail on the back could be flat and use the normal map. 
    Thanks  <3
    I want the buttons to pop out more physically, but I see your point, there is some unnecessary density.

  • illumisanic
    Offline / Send Message
    illumisanic triangle
    Reduced the triangle count from 11.100 to 9.684.
    While UV unwrapping I've stumbled upon this. Big island but with good stretching and no problem in baking.
    What do you say, should I cut it down a little or it's fine?
  • illumisanic
    Offline / Send Message
    illumisanic triangle
    Reduced triangle count from 9.684 to 9.313
    Everything is now baked and unwrapped (ignore the back screen please)


  • Eric Chadwick
    Looks like some possible aliasing/jaggies, or maybe just that the render was poorly resized?


  • illumisanic
    Offline / Send Message
    illumisanic triangle
    Looks like some possible aliasing/jaggies, or maybe just that the render was poorly resized?

    A mix of both of them.
    I have this problem, unless I split the normals (In blender I mark the edges as sharp), the tangents of the normals become very visible. I've tried using weighted normals modifier but I can't make it work


  • Eric Chadwick
    Splitting normals before baking is a good process. 

    We have a bit about why this is important: http://wiki.polycount.com/wiki/Normal_Map_Modeling#Smoothing_Groups_.26_Hard_Edges

    Also some great examples here, along with info on why those extreme gradients are best to avoid
    https://polycount.com/discussion/107196/making-sense-of-hard-edges-uvs-normal-maps-and-vertex-counts/p1


    Weighted normals works well... but only if the model has bevels. I did a mini-tutorial on face-weighted normals. This works very well for mechanical assets. It can even let you avoid baking normal maps, but it does also work really well when you need to bake and also reduce harsh gradients:
    https://github.com/KhronosGroup/glTF-Sample-Assets/tree/main/Models/SunglassesKhronos#modeling-with-face-weighted-normals
  • Eric Chadwick
  • illumisanic
    Offline / Send Message
    illumisanic triangle
    Thanks for the forums, I've learned a lot from them the first time I read them. I think we had the same chat the first time I've posted at this website xD.
    I've ended up creating a vertex group from the back faces, setting their Face Strenght to Strong and adding a Weighted Normals assigning the created vertex group.
    Stacked a triangulate before it because the model would get ruined after exporting with triangulation.

    I've also discovered that the baking cage and auto triangulation don't like doing this thing (EDIT: I had to set quad method to beauty) and had to manually triangulate some parts. specially on rounded parts.

    But finally, I suppose that finally, the minimum viable baking it's done


  • Eric Chadwick
    Nice job, looks great!
  • illumisanic
    Offline / Send Message
    illumisanic triangle
    Basic and factory new materials made, time to add the wear down and more details like prints, logo and stickers.
    I'm having an issue. I cant make some materials (like the back part) "glossy" enough.
    Using Substance 3D painter
  • illumisanic
    Offline / Send Message
    illumisanic triangle
    Printed, because the text tool is very limited I had to individually export every piece of text

  • sacboi
    Offline / Send Message
    sacboi grand marshal polycounter
    Looks good so far, I'm also curious if you don't mind how the texel density was calculated?
  • illumisanic
    Offline / Send Message
    illumisanic triangle
    sacboi said:
    Looks good so far, I'm also curious if you don't mind how the texel density was calculated?
    I've had in mind making something equitative distributed, planes like little cavities or  inside holes have less density. 
    The most dense part is the camera ring, which has double density, I didn't want that part to look jagged.

  • d1ver
    Offline / Send Message
    d1ver polycounter lvl 18
    Great progress @illumisanic! Love to see it textured and thank you for the breakdowns for others. 
    Once you add the stickers as the little pops of color I think it will definitely feel ready. 

    It's obviously a bit late but I made a made reference board tool that will automatically generate modeling sheets for you. They are not 100% perfect but hopefully could have saved you some time at the start.

    Let me know if you would like to try it out for your next project.

    Although I hope someone sees this and you'll get snatched up on the job front 🙏
    Best of luck
  • sacboi
    Offline / Send Message
    sacboi grand marshal polycounter
    Oh, correct me if wrong think my question wasn't that clear? indeed sorry about that bad habit/s  : #  

    Had initially meant texture resolution and as I understand this is a hero prop? so was just wondering if the texel density was either 4096 = 20.48px/cm or perhaps 2048 = 10.24px/cm...etc?  hence out've personal interest I'm always on the lookout for helpful tidbits, other artists would tackle preparation issues/processes creating content. Might also add because my own 'down time' art involves large scale vehicle type background props, guess one could say somewhat akin to set dressing via a hybrid trimsheet workflow. 

    Et al: working with tiling textures I'll typically calculate by real world dimensions in meters using metric calibration, for example figure out how many times to tile across a surface to achieve an envisioned target TD which would go something like this: 


    TD - 1024px/m

    Edit:
    When first getting into game art, these resources helped me out a lot actually still do from time too time amidst an inopportune brain fade  : /  


  • illumisanic
    Offline / Send Message
    illumisanic triangle
    d1ver said:

    It's obviously a bit late but I made a made reference board tool that will automatically generate modeling sheets for you. They are not 100% perfect but hopefully could have saved you some time at the start.

    Let me know if you would like to try it out for your next project.

    Although I hope someone sees this and you'll get snatched up on the job front 🙏
    Best of luck
    LOL thanks a lot, I would travel back in time and give this image to me, it would've been very useful, amazing tool! The most struggling part of making this model was getting the proportions right because the references I've found were very poor, had poor lighting, bad perspectives and were very distorted.
    Once I'll stick some stickers to it (including the polycount face) I will trash down the textures, tear down the stickers, to make the model look like it had its good times.
    I've completely skipped the lens protector  :s
    Thanks for the good lucks  <3

  • illumisanic
    Offline / Send Message
    illumisanic triangle
    @sacboi Yes, it is a hero asset. I didn't make any fancy math or think about the texel density taking in mind the big scene.
    But the average texel density in 2k is 6,05 px/cm and in 4k is 12,1 px/cm (I'm using Texel Density Checker 2 addon in blender). 
    When I make the uv unwrap, after marking all the seams I globally unwrap the model and then I calculate the average texel density. I don't know if I'm using the tool as intended, but then I uv unwrap every island individually and (depending on the model part) I rectify it, reduce stretch, etc...  After that I set the TD so it respects the average scale.
    After having all ready I pack it, sometimes there is a lot of space left and sometimes not, I adjust the scale of everything depending on the results. Most of the time I have to re-tweak or re unwrap, but putting that aside that is my basic unwrap process.
    I don't have many experience in TD, sorry if I'm being dumb in this field, I hope I explained myself better.
    Thanks for the info, I will devour it  <3

  • sacboi
    Offline / Send Message
    sacboi grand marshal polycounter
    All good you're right on the button, thanks for the explanation :+1:  
  • illumisanic
    Offline / Send Message
    illumisanic triangle
    Okay I'm gonna talk about the stickers because they were a pain. I haven't found any good resolution picture of them I've had to improvise.
    They needed to be perspective free, so I open an image on photoshop, rotate it, use the camera raw filter and delete any perspective, cut them and export it as png. Once exported I used an image upscaling tool.

    Once that is done I paste the stickers in a folder, recreate the diferent material layouts and then in the  Folder I play with opacity in a paint layer to tear them down. Finally I add an imperfection layer.
  • illumisanic
    Offline / Send Message
    illumisanic triangle
    And after adding the "personality" I think (I THINK) it's done, thanks sell posts for the references. 
    I'm sure that it can get more perfect, but I've already spent much time on this and I would like to do more proyects, if you have feedback I would appreciate it.
    What is left is preparing a file for screenshots on the portfolio.

  • d1ver
    Offline / Send Message
    d1ver polycounter lvl 18
    Great progress! You need a reflective environment to properly fine-tune the specularity of the plastics and the glass. Roughness separation will go a long way in making this feel juicy!
Sign In or Register to comment.