The Bi-Monthly Environment Art Challenge | March - April (101)

quad damage
Welcome everyone to the 101st Bi-Monthly Environment Art Challenge for the months of March and April!
This challenge is a way for real-time 3D artists to test their skills and create a piece of work based on concepts provided. It's open to those of all skill levels and we do our best to provide meaningful feedback along the way so everyone can come away from the challenge with actionable points on which they can improve their craft!
- ENVIRONMENTS -
HARD SURFACE ENVIRONMENT:
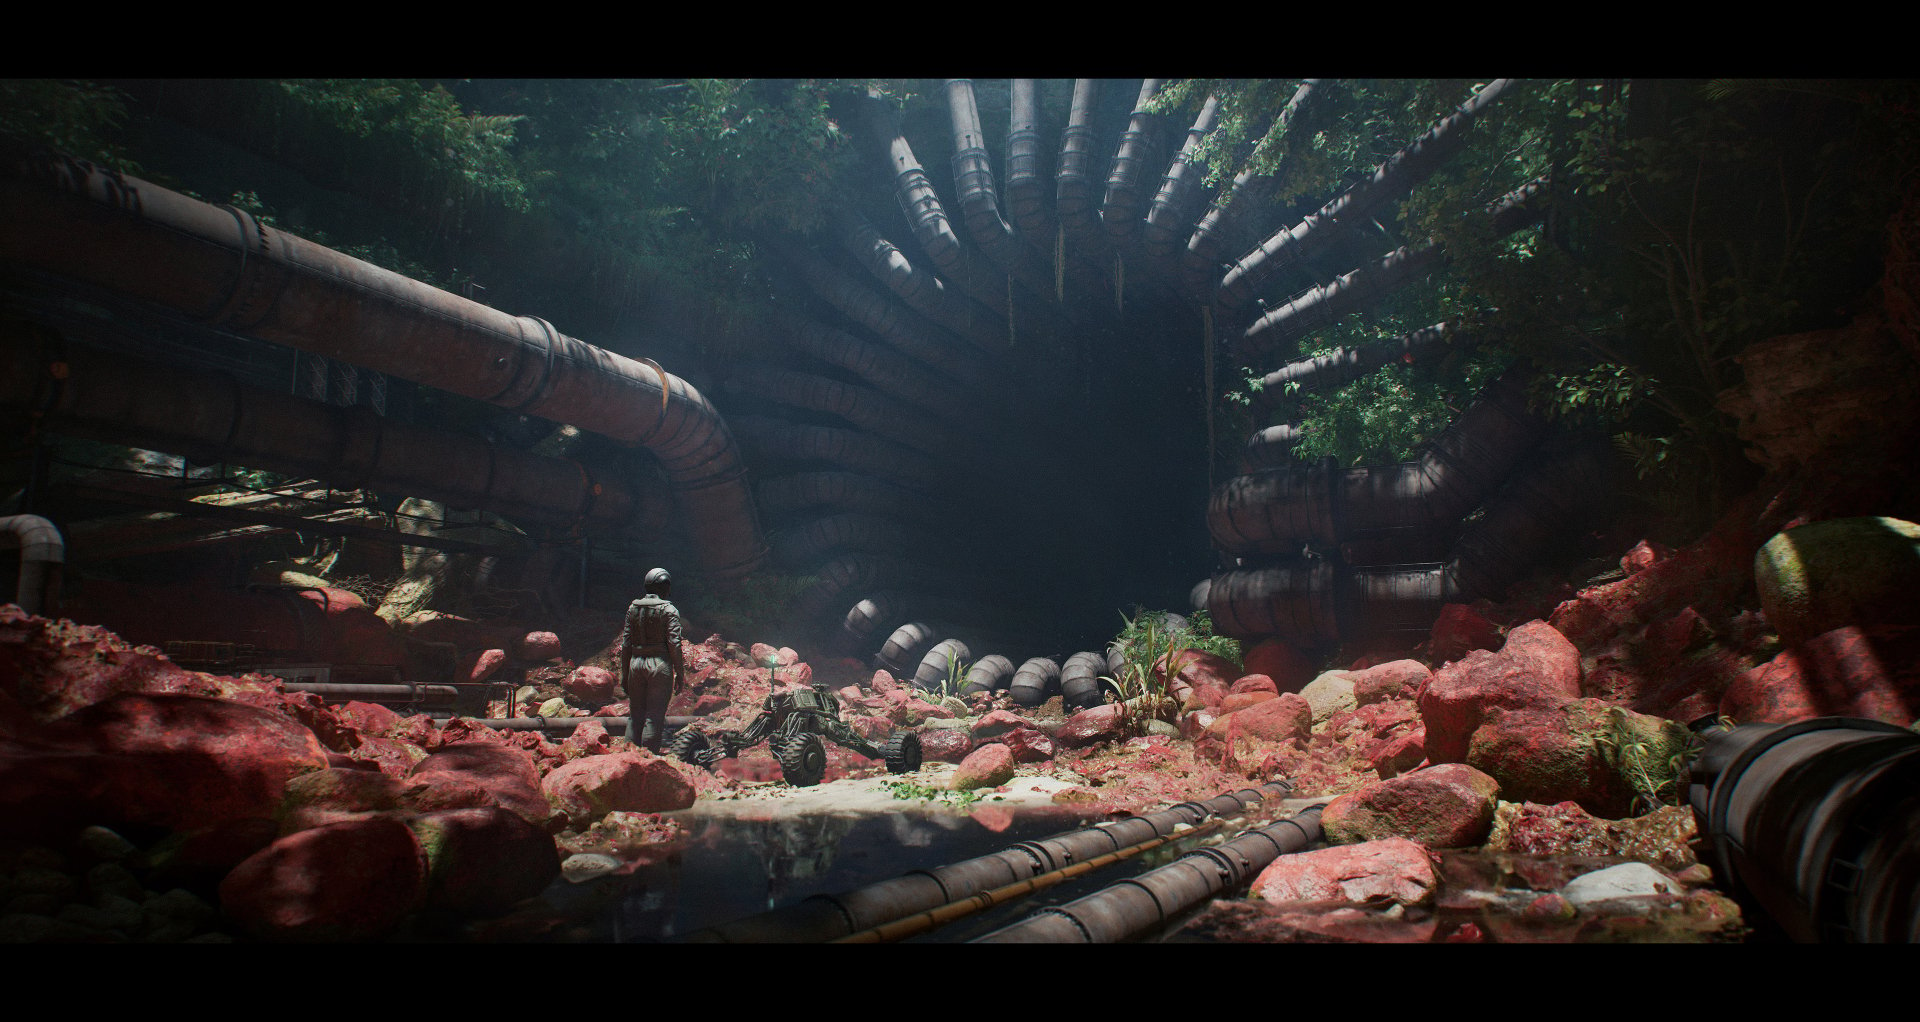
The Forgotten Industry by Abrar Khan
https://www.artstation.com/artwork/9EXmdo
https://www.artstation.com/artwork/9EXmdo
STYLIZED ENVIRONMENT:
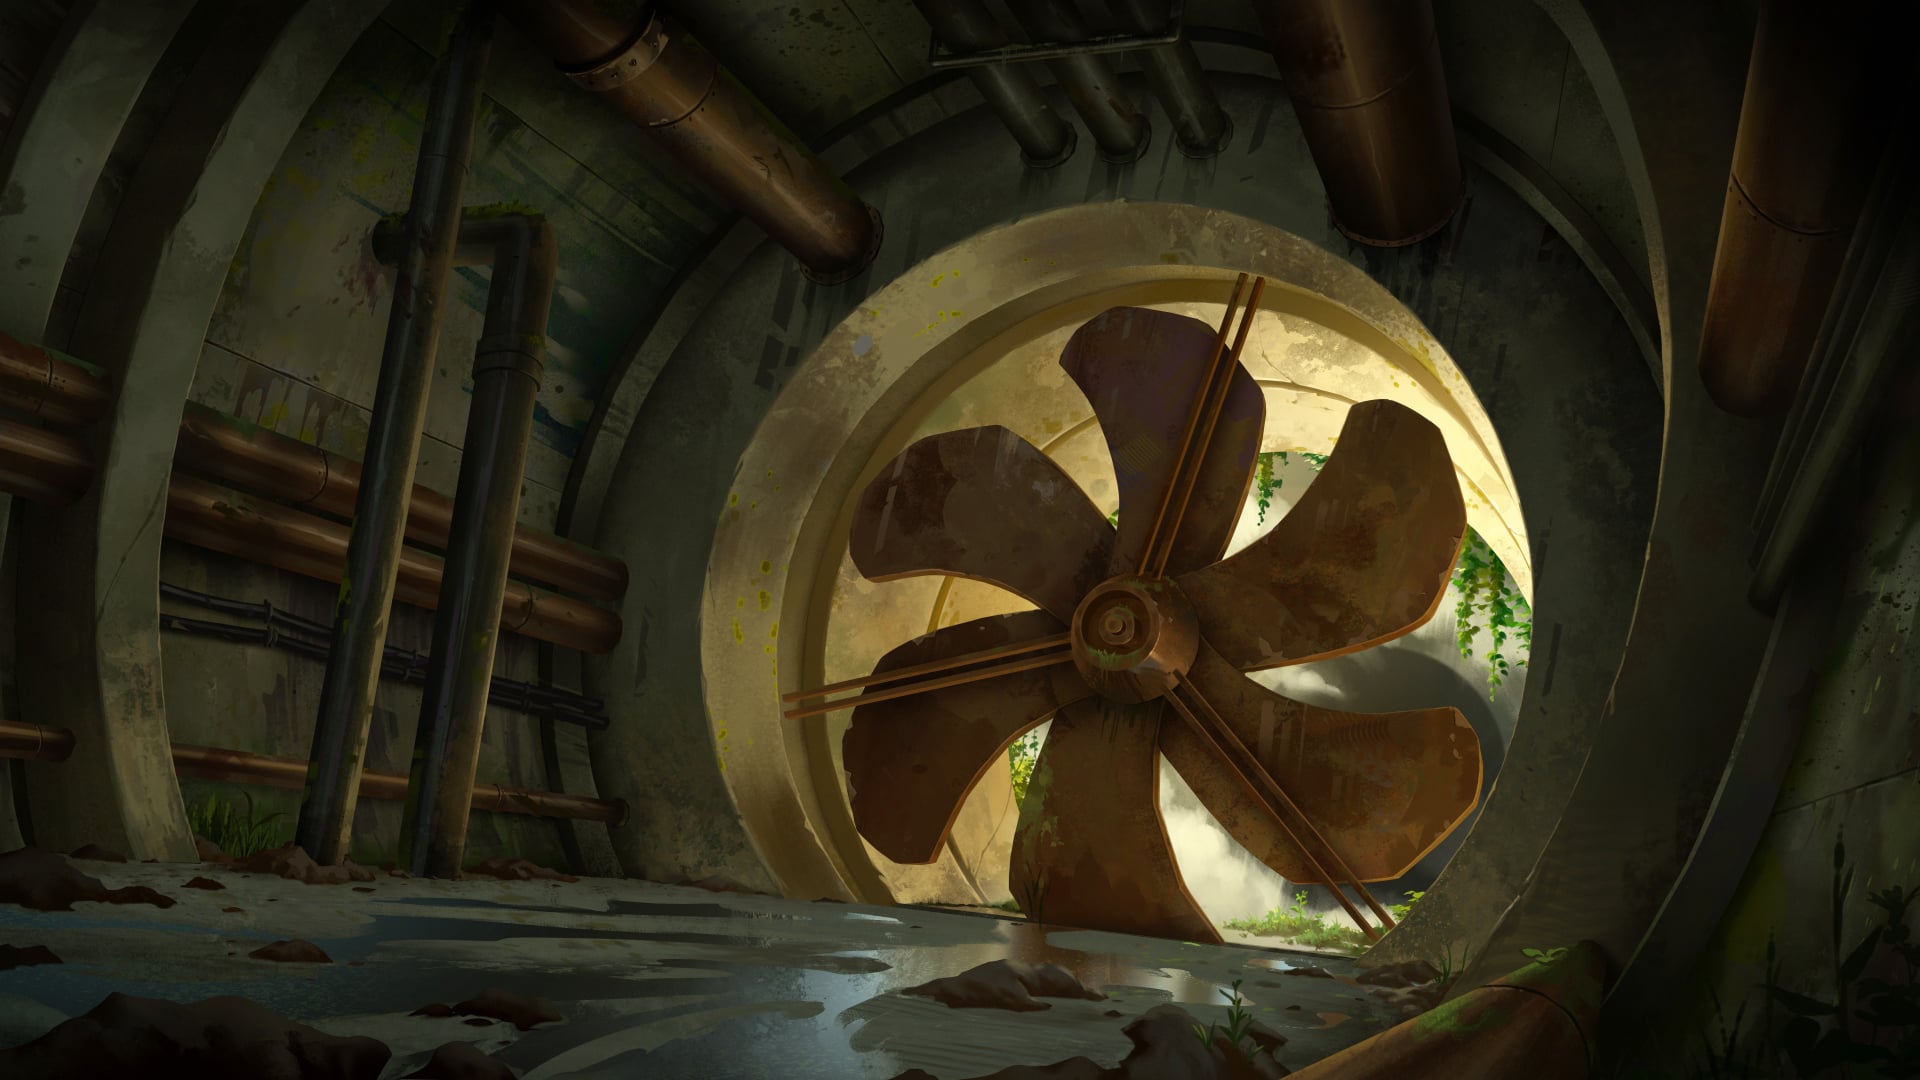
Urban Sewer Background Painting - 03 by Adrien Gonzalez
https://www.artstation.com/artwork/x3GrOO
https://www.artstation.com/artwork/x3GrOO
- PROPS -
HARD SURFACE PROP:
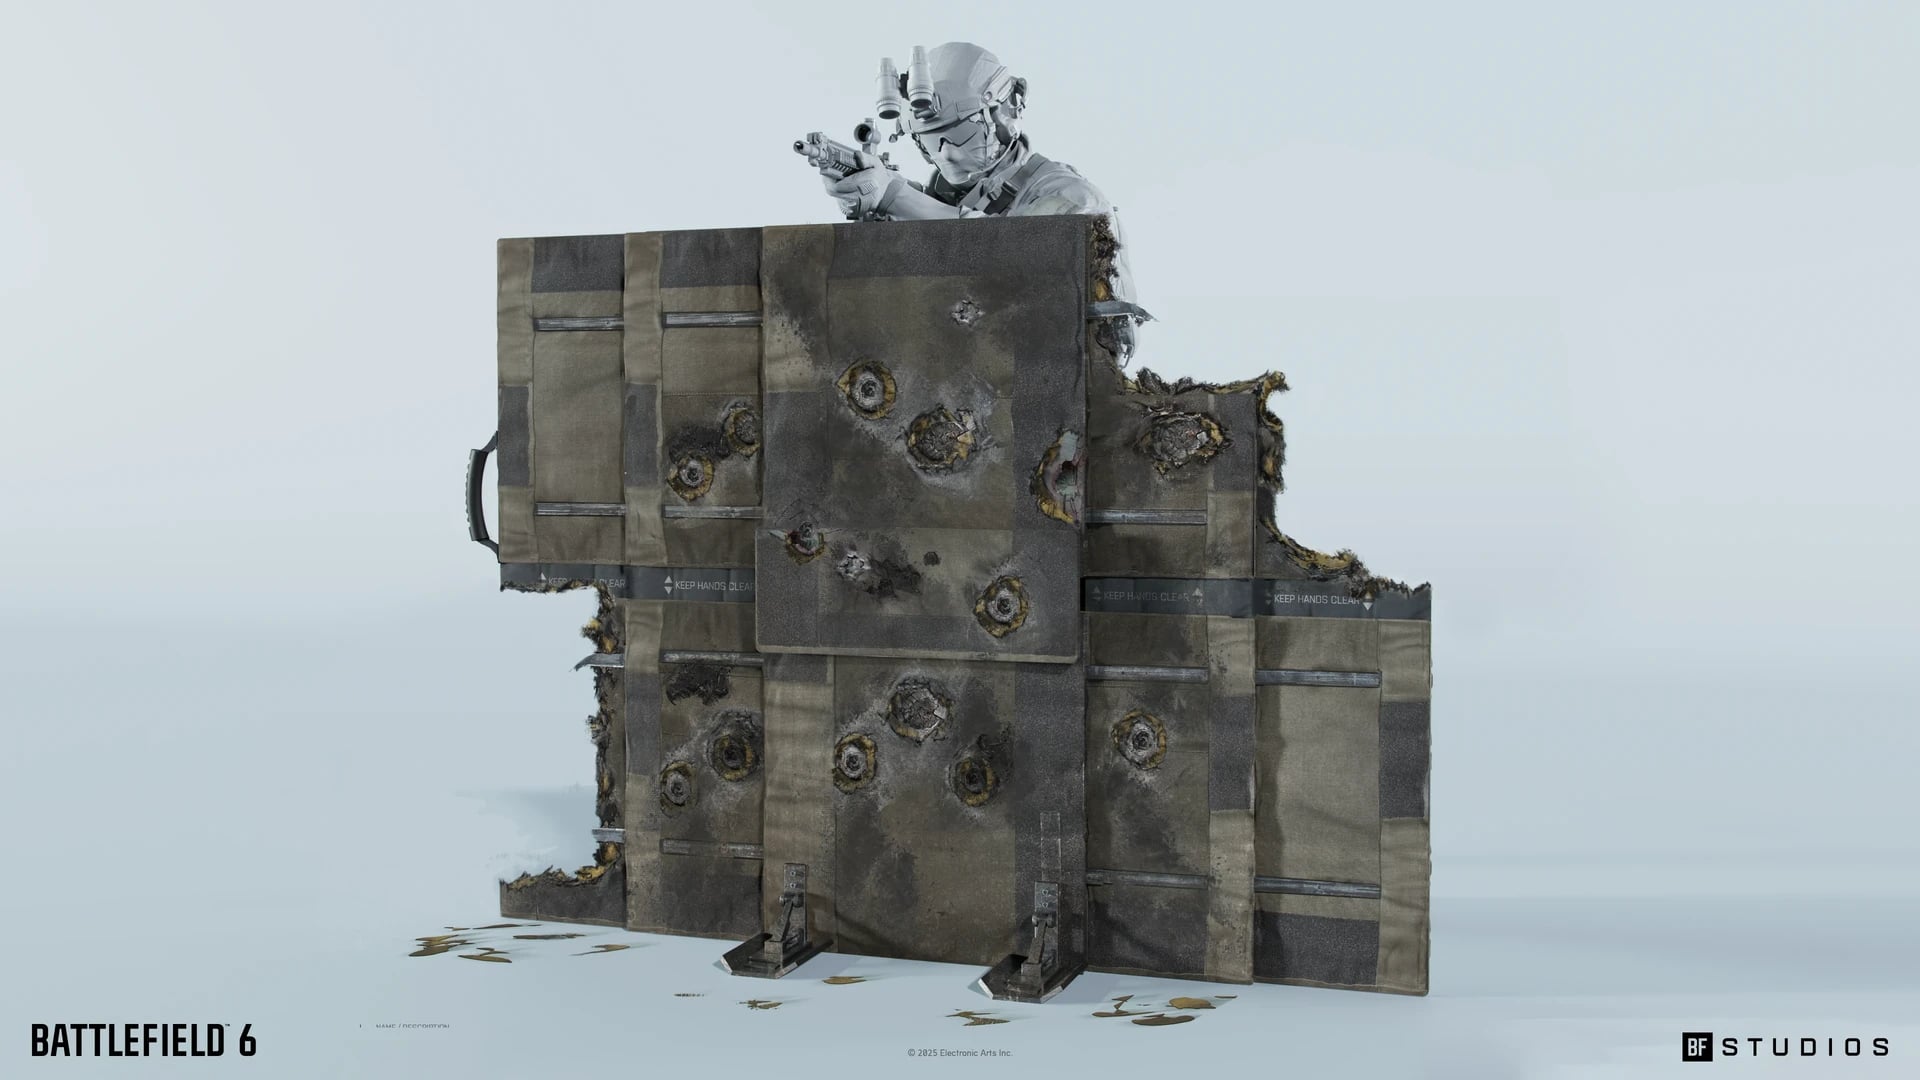
Battlefield 6 - Deployable Cover Concept Design by Joakim Englander
https://www.artstation.com/artwork/YGDkAX
https://www.artstation.com/artwork/YGDkAX
STYLIZED PROP:
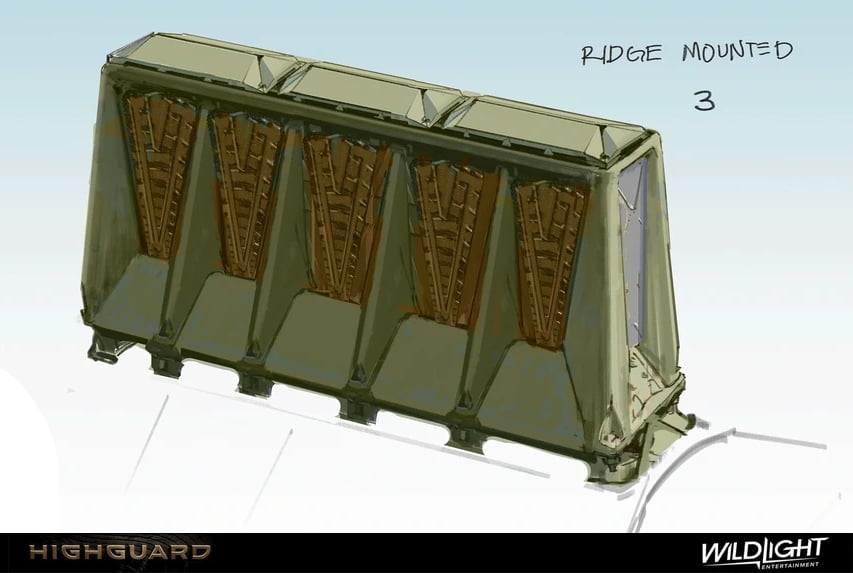
Early Props + Exploration by Gabriel Miura Brandt
https://www.artstation.com/artwork/nJnLP1
https://www.artstation.com/artwork/nJnLP1
- RULES -
Please read all the rules before starting:
- Try to post at least one critique for every post that you make. This will make for a better learning environment and help us all grow as artists.
- Try your best to finish as much as you can in the time frame provided, but remember even if you don't finish by the end of the challenge we encourage you to keep pushing and finish your piece!
- Post what you are working on in this thread so that way it's a more centralized place for advice and critique. Please avoid creating a new thread as we don't want to spam out the forums.
- It is recommended to use a game engine to present your work. Unreal Engine, Unity, and Godot are very common engines that can be used but feel free to use any alternatives that you want.
- 3D Viewers (Sketchfab, Marmoset Viewer, etc) are welcome, but please note that their contents can be stolen by those who know how. Please ensure you're comfortable with this potential before using one.
- Feel free to change up your chosen concept a bit if you want! Interpret these concepts to your liking, especially if your aim is to add storytelling elements.
- If you finish your project and decide to post it to something like Artstation, make sure you give credit to the concept artist in the form of a link to their profile. Additionally, it is recommended to ask a concept artist for their permission to post a 3D piece based on their work before doing so.
- RECOMMENDATIONS -
- When you are just starting out making a scene, it can seem complicated or imposing. Take your time planning and blocking out, it will set you up for success later on.
- Think about how you can re-use assets, re-use textures, break it down as simple as possible and plan it out. A lot of people will break it down in their own way when they start out their challenge. Gather some reference images as well for different parts of the scene, don't be afraid to make it your own.
- We strongly encourage you to go and look at other games and see how they make their assets as well as get concept art to give it your own feel.
- The goal is to learn and grow both artistically and in your ability to both give and receive critique, but don't stress about it and remember to have fun!
Replies
Here is my blockout. I used fspy to match the perspective in Blender. Next step is to plan out my trims.
Not sure how I'm going to tackle the muddy dirty ground yet. Tips are appreciated!
Good luck everyone!
I would suggest choosing your rendering system first, then set up the ground shader to work within it. For example, in Unity I would use a layered shader, and paint a mask where the water would be on the concrete. And add some clumps of dirt as geometry.
What is your idea how this folds/ unfolds? The artstation post doesn't include a folded variant, only states it could fold into a small box.
I interpreted it as the different panels sliding out, not folding. So it would slide out like a sliding door on each side maybe? I didn't realise that in the description it says that it would fold into a smaller box... Im not sure yet which direction i'd take it.
The bullet holes would be best to be done with decals, maybe with a POM material on the decal to give it depth. Its the chunks missing along the edges i'm not sure how to go about.. I guess it would be done using an alpha mask to make the frayed fabric along the edges.
Now I think it the first layer is folded in and only the second one is pulled out.
For stabilization, I imagine there's vertical supports in that drop down once unfolded, leading to both a stand and vertical stiffness (middle joint that allowed them to fold is now offset).