Is This How a Normal Map Should Look or Am I Doing Something Wrong?
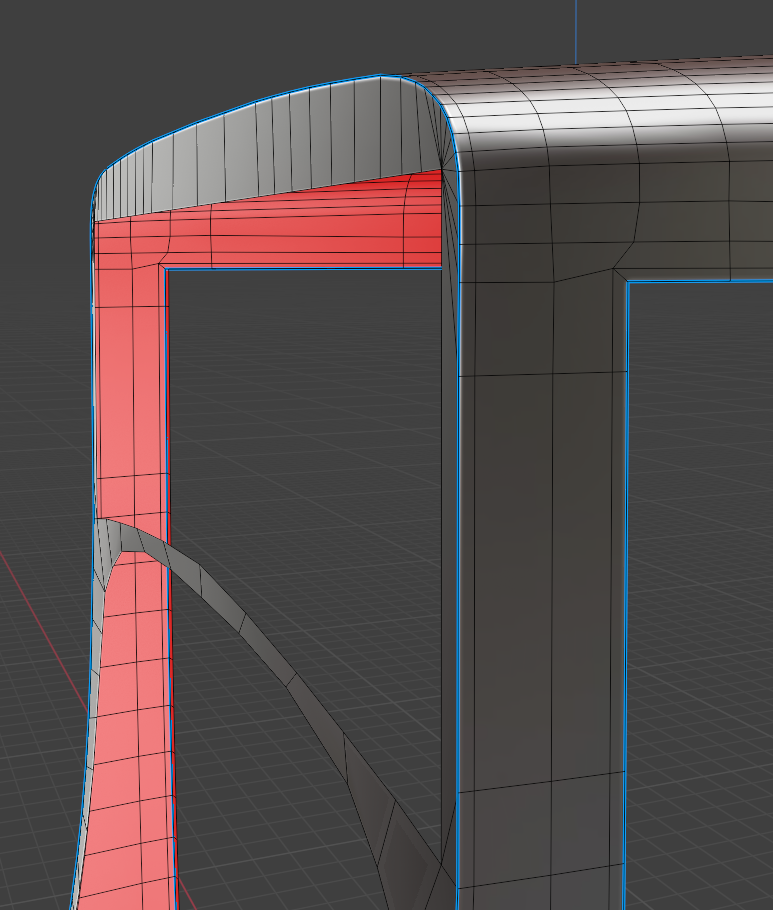
LowPoly:


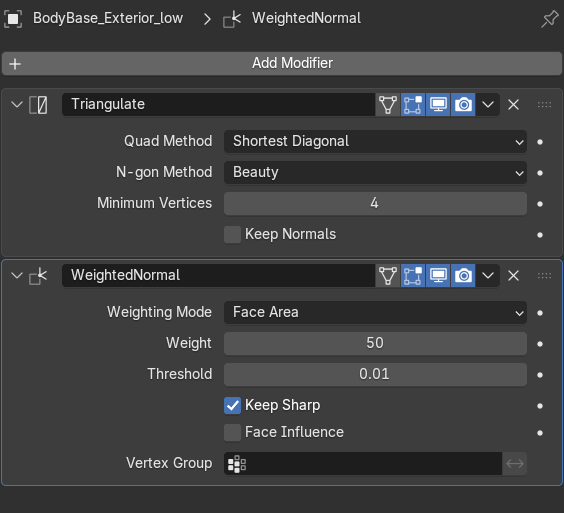
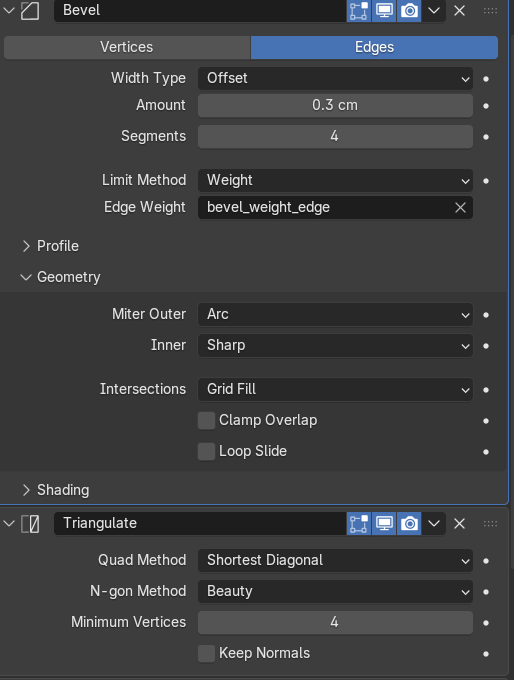
Low Poly modifires:
UV: (I have 2 udims as this model is part of the larger model of car with texel desniinity 10.24 px/cm. The rest (UDIM 1002, UDIM 1012 is for mirror texutring))
High poly:
Normal maping:

Textured:
Is the quality of the normal map acceptable considering that I'm trying to reproduce about three or four segments from the high-poly model on the low-poly version, or am I right to worry that there might be an issue with the normal map?
-
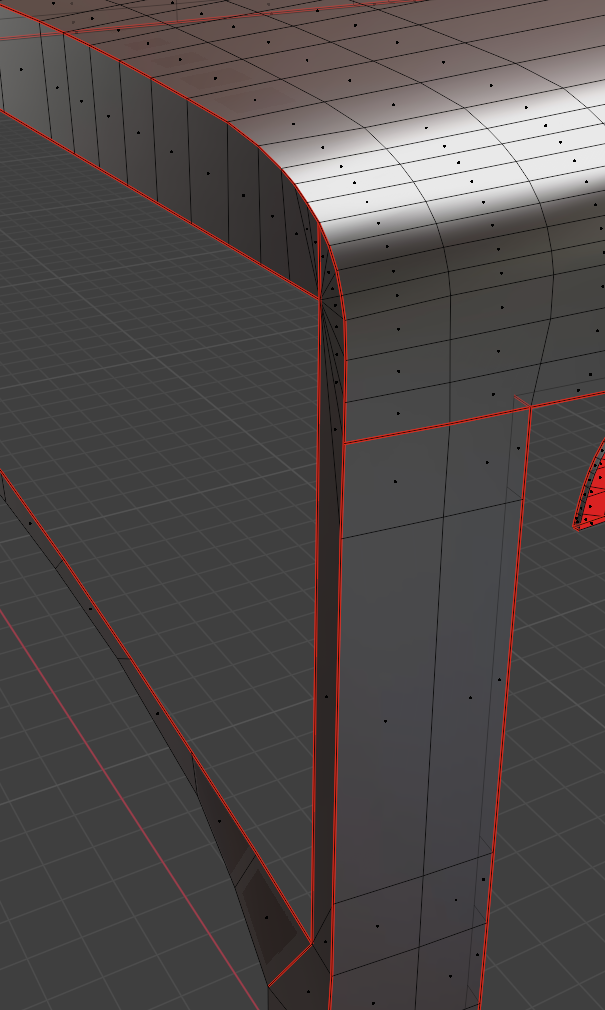
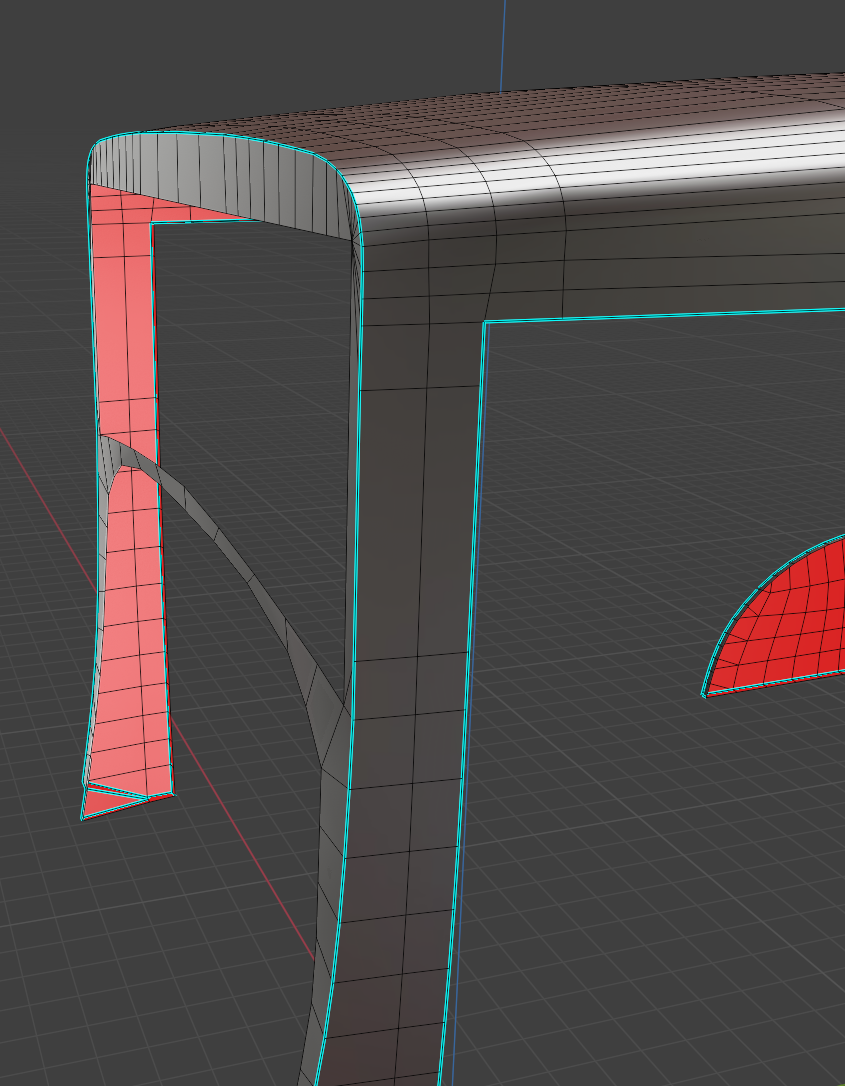
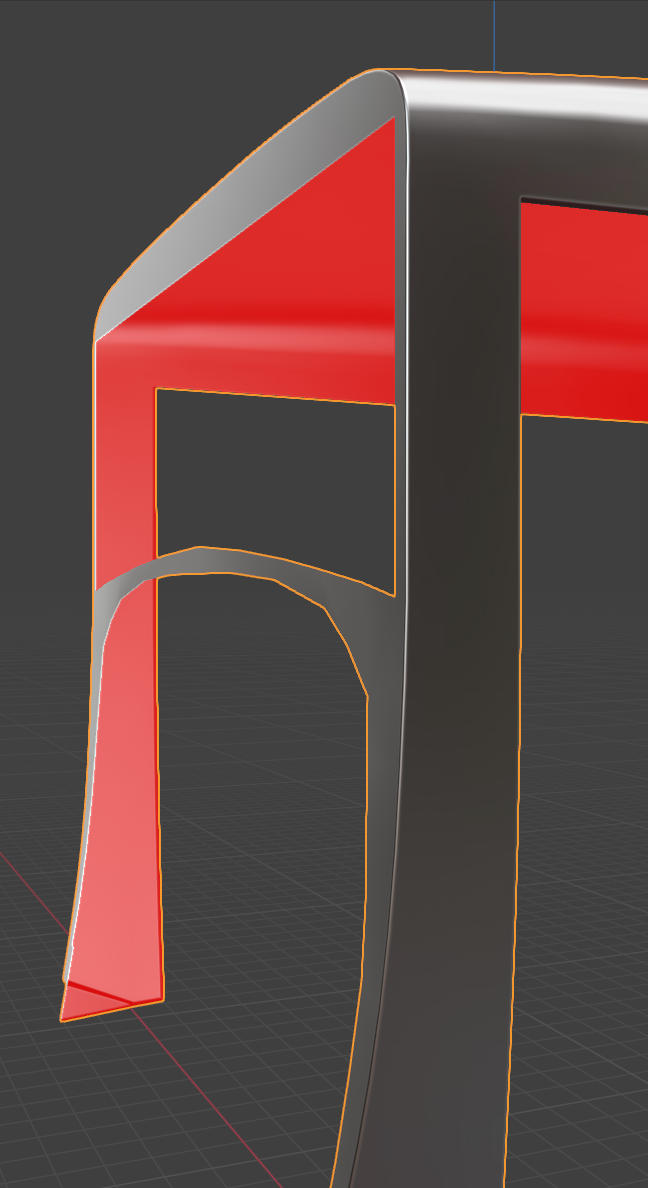
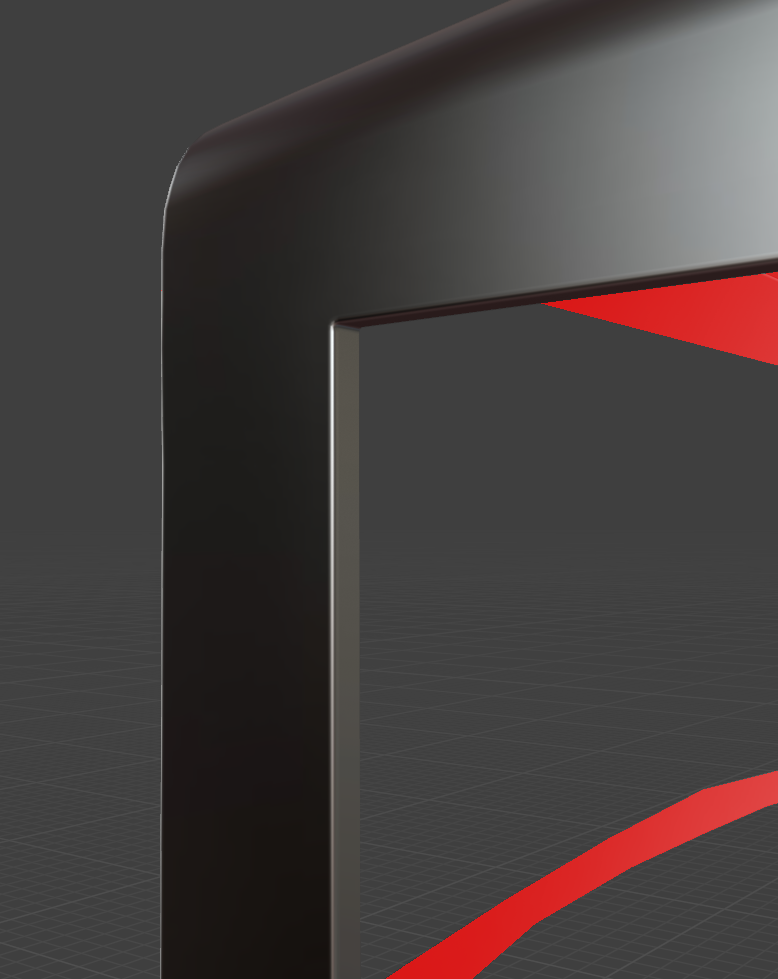
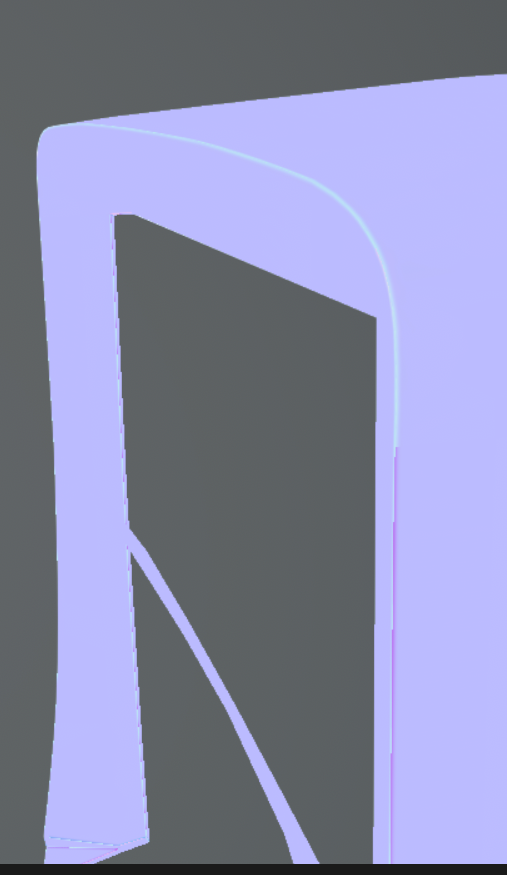
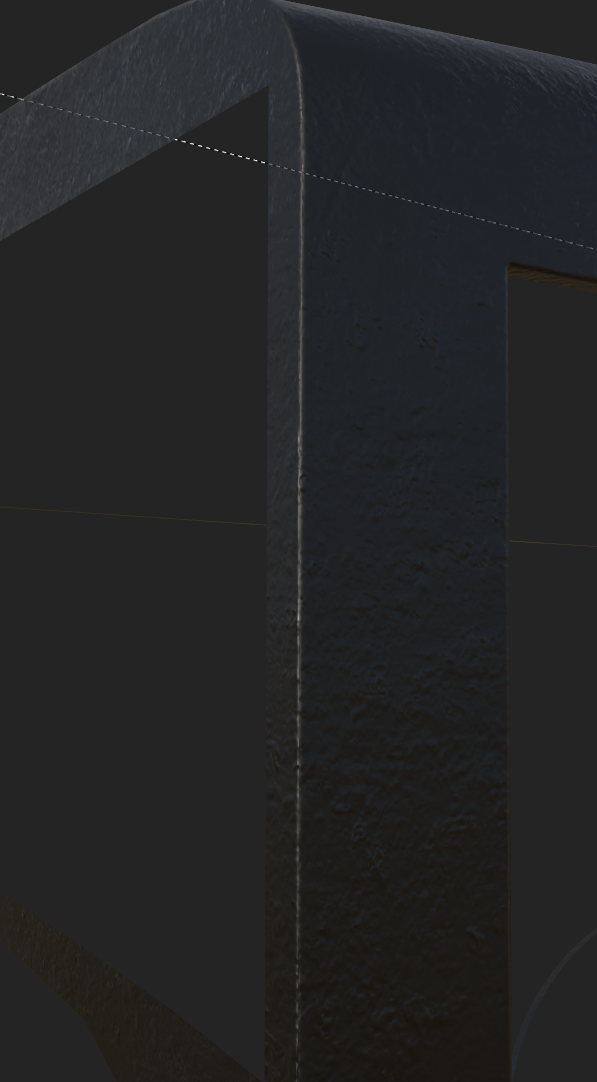
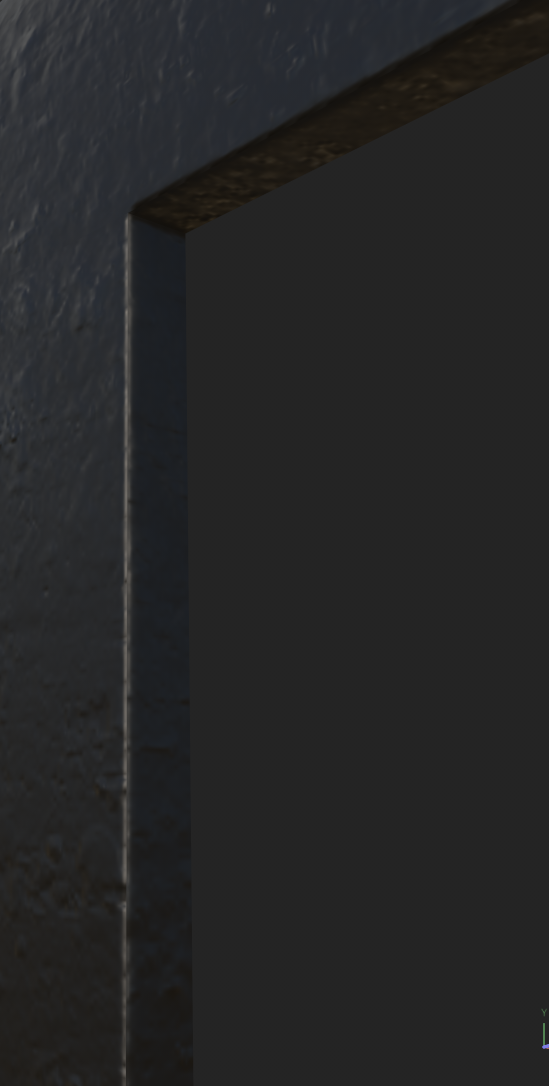
On the other hand, the edges on the top part of the car have a clean normal bake, while the edges on the sides start to show problems. Could this be caused by the angle of the bevel?
-
For baking, I use 128 samples, 32 pixels of padding (because I use a 4K texture and my UV islands also have 32 pixels of spacing), and 16-bit format. Does that sound correct?
-
I added seams on every sharp edge, so each sharp edge is also a UV seam. That’s the correct approach, right?
Did I miss anything? Is the only way to have clenaer normal map is to use bevel on low poly? (my full model of car has 150k triangles so I'm not going to do it)
Link do blend and fbx file: https://drive.google.com/drive/folders/1XIEKgt9O--VbXrhmkghQOzCfIwYRVsfk?usp=sharing
Replies
I realize this might be more about confirming whether the colors of a tangent-space normal map are supposed to look like that. The answer is yes, since the tangents rely on UV orientation. Here is a section in the wiki: Tangent Space Normal Map. When texturing a complex model, I would evaluate looking at the final shading.
'I added seams on every sharp edge, so each sharp edge is also a UV seam. That’s the correct approach, right?' Yes, that's correct.
When creating cars (or other larger objects), I typically rely on mesh shading for the body, no unique normal map. Perhaps that an option here too? Ah, I see you're worried to increase polycount. Do you have a reference asset? How is it done there?
Perhaps I'll manage to check the files sometime today. I like the amount of context you gave.
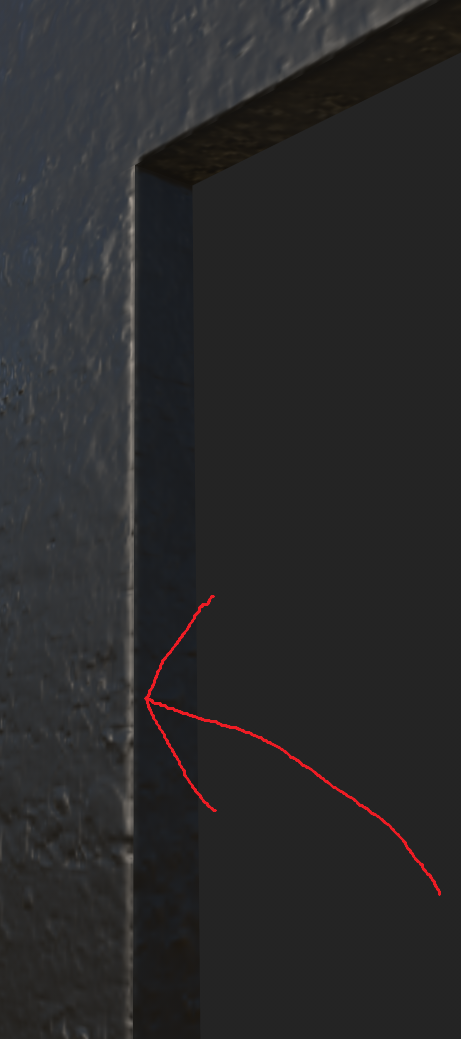
Regarding visible seam:
I think with a rounded bevel you will always get some slight seam showing when baked to a normal map. Mesh shading is continuous/ lossless, while a texture is limited in resolution and depth. If you wanted to minimize a visible seam even more, I would try a flat bevel, which would result in continuous, uniform colors at the edges of the normal map.
If you go on sketchfab and look at various hard surface models, I think there are plenty that have faint seams when inspected closely. I find the extend to which it's noticeable, distracting even, depends on surface detail and viewing distance.
Here are the images. Island for picture maked biger so it will be easier to you to look out.


It looks completely different from the errors I had on other meshes, and what’s probably worst is that out of the 72 meshes I export for baking, only this one causes problems that I can’t figure out. I spent several hours trying different things, but the issue doesn’t seem to change. I modified the island shapes, added bevel segments, and made other adjustments, but this problem seems unique.
The only thing that helped was increasing the pixels-per-centimeter value by about two times. However, my UV space is already quite tight, and increasing the resolution that much just for one model doesn’t feel like the right solution. I have no idea what is causing this issue and why only this model has this issue. What is causing this?
You write that only increasing the resolution has helped, so to me that would indicate you're limited by resolution here. I think UVs of those rounded elements not being aligned with the pixel grid will be always be a weak-spot.
Options I see at this moment: Make UVs straight strips. And/ or add that interior detail all in texture. Or exaggerate highpoly detail. Rely on mesh shading instead.
As a general note, I would look for models similar to yours, how they're solving things.
Hi @Fabi_G
Thank you for your patience. I really appreciate your support.
I can share the specific model if needed, although I’m not sure it’s necessary. I did some reading and experimented a bit with baking at 2x resolution and then downscaling and normalizing the normals. The results are definitely much better now. See for yourself.


However, I’m now facing a completely different issue, and I think the GIF shows it best. (also I did quick normal map in substance paitner so dont worry about it in this gif as it is not the same normal from the above example)
There’s some kind of strange grid triangle pattern appearing, and I have no idea where it’s coming from. I’m guessing it might be related to neighboring models? Tomorrow, when I wake up, I’ll try baking just the single object separately, maybe that will help me determine what’s causing it. Unless you already have an idea what might be responsible.
In about 90% of cases, my high-poly models are just copies of the low-poly versions with added bevels and occasionally some inward or outward extrusions.
One thing I haven’t tested yet, and it just occurred to me is that I’m baking the entire model while it’s positioned like this:
(The frame is touching other objects, though I’m not sure how important that is.)

I once heard about the “explode” method in ZBrush, where each object is separated by distance and baked individually. Maybe I should try that approach for this more complex mesh? Originally, I wanted to keep the meshes next to each other because I wanted them to cast ambient occlusion shadows onto one another. But maybe that’s not actually a good idea. Perhaps it would be better to let each model generate occlusion only for itself and let urneal engine with lighting cast those shadows, instead of having them affect each other and potentially create shading artifacts. At this point, I’m honestly not sure what the best approach is.
I guess I didn’t give you enough information in my first post, Fabi. Sorry abou that.
I know you mentioned that the mesh topology could be reduced fairly easily and that there are some areas where I could optimize it. But honestly, I still have quite a few models to create, and I don’t want to spend too much time on optimization right now. The current topology will have to be good enough for now.
The chassis, interior, and exterior together are around 130–140k vertices, which seems like a reasonable number to me, considering that I don’t plan to have more than 3–5 cars in a scene at the same time. For the demo, there will definitely be a maximum of two so I will defeineitly someday optimalise it better with better skills as I really fucked up with the topology of this car.
Sorry for brothering you!
You’re right, sorry. I could have done it before going to bed. Here you go: https://drive.google.com/drive/folders/1i7ncoR67U0dQiSNePU_jfc717plh61-I?usp=sharing
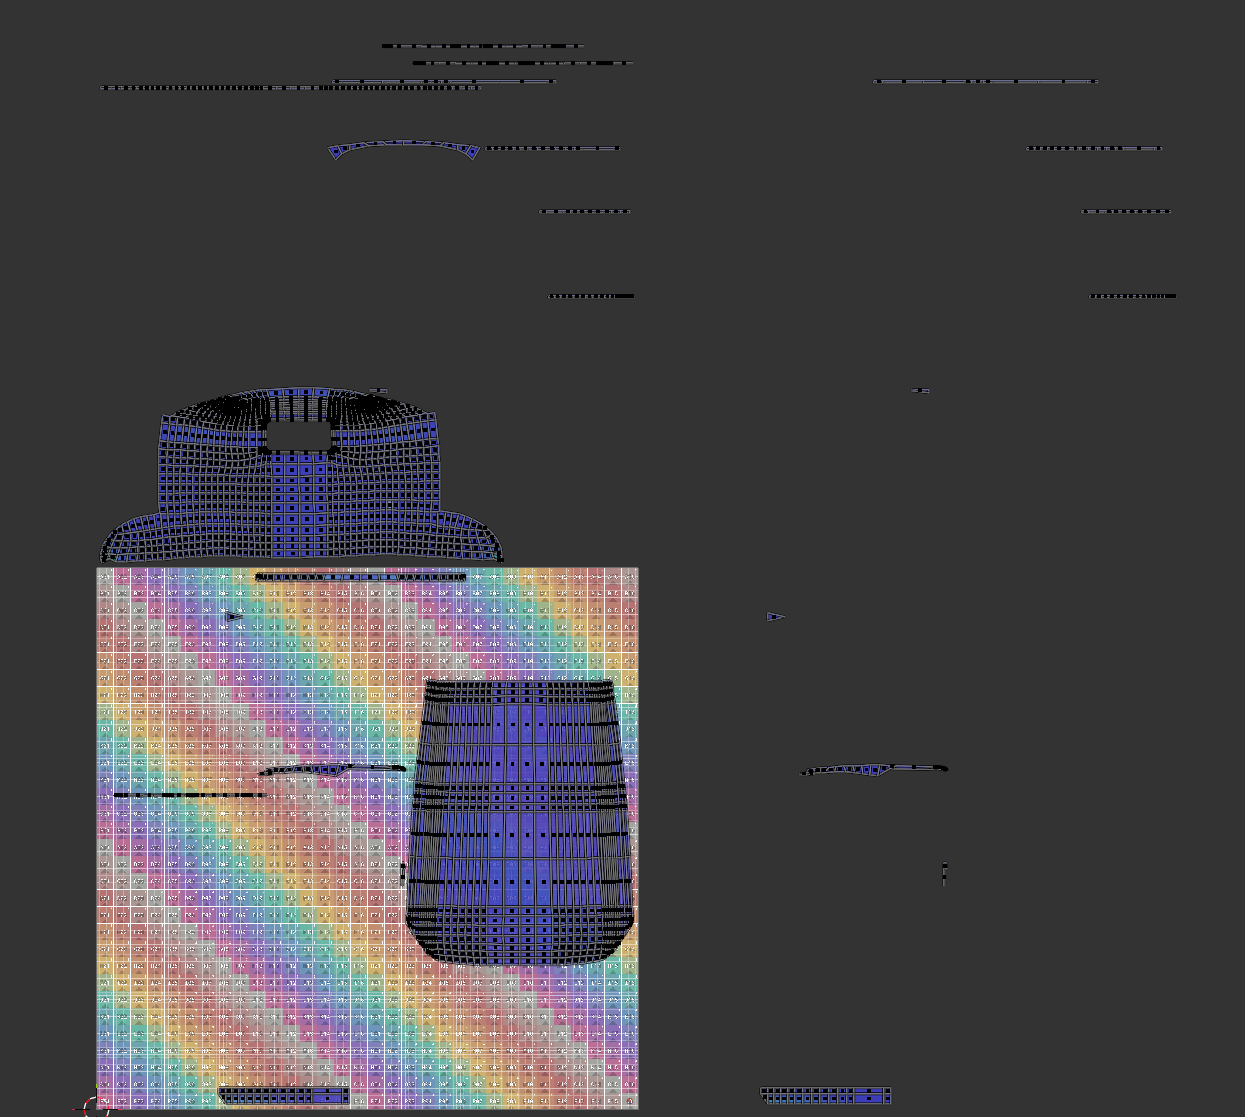
Here is how the UVs compare. I'm sure you can see that you'll need much, much, MUCH bigger textures than they did just because of the way your model is built.
Of course you're probably not going to rework this model from the ground up now that you're that far in. But in the future I would strongly encourage you to look at things more from the angle of what is actually needed for a game, keeping the in-game model and textures in mind right from the start as opposed to spending too much time modeling infinite amount of CAD detail.
It may seem counter-intuitive but good game optimization doesn't happen in the end ; rather it is something that is thought about right from the beginning. For the case of this car for instance you could have taken a few days to build a game model directly at conservative specs, like 20k tris maximum and mostly continuous surface-wise ; then focus on modeling high-poly sources only for the parts that really need them, like the car body, while doing all the minor bevels with simple trim sheets, or by baking a round edge shader, or by simply giving them raw geo bevels. The whole thing would have taken you less than a week including baking and it would have granted you a lot of flexibility to edit/redo parts on the fly.
So going back to your question of "is this how a normal map should look", I would say yes but also not really. There is nothing inherently wrong with it, but outside of a showcase scene with just this one car on screen I have a hard time thinking of a fitting game context for it.
Great to have your notes on this pior!
I'll surely have more notes once I had time to look at the model.
Assuming you don't want to do many further edits and are set on baking, I would would mainly optimize UV space to get as much out of the texture as possible. Offset and stack UVs of mirrored and repeated parts (I believe you're already doing this). Reduce size in UVs of areas that are not seen or low priority (or make them use some generic part of the texture atlas) to free space for important parts. Can't look under the car? Great, that's more resolution for the parts that are seen. Including some generic trims in the atlas, to be reused by parts, will free up space further. I already mentioned this, adding details going inwards/ not contributing to silhouette during texturing instead modeling will also help with amount of geometry and UV islands. I would try 2 texture sets, body and details (I have no experience working with UDIMs).
Attached you find the lowpoly model roughly prepared the way I described (2 sets, UVs scale adjusted), as well as baked AO and Normal maps at 2k. Surely I will have missed some parts and there's further UV improvement that can be done, but I hope this is sufficient to illustrate what I mean.
Checking how other 3d modelers solved certain objects is certainly super helpful and should help to learn of different methods quickly.
<p>Thank you so much for the detailed feedback. I really appreciate the time you took to write all of this down to help me out.</p>
<p>I have to admit, the comparison with the MGS3 boss caught me a bit off guard, but I genuinely appreciate your honesty. I know your intentions are good and you just want to steer me in the right direction, so thank you for the reality check.</p>
<p>Just to give a little context on why I went so crazy with the part count, especially on the chassis: I was initially planning to use this model for both a cinematic trailer and in-game, so I wanted it to look good from every angle. Since it's a Ford Model A Tudor Sedan and it sits quite high off the ground, I had this idea in my head that the player might crawl under the car. Because of that, I was worried the undercarriage would look too empty or unfinished. To be honest, this is my very first car model, and because it's such a complex object, I definitely overcomplicated a lot of things.</p>
<p>Regarding the techniques you mentioned – I've heard about trim sheets before but never actually used them. I always thought they were mainly for environments, so I had no idea you could approach vehicles that way. The round edge shader is completely new to me as well – first time hearing about it.</p>
<p>I will fix the UVs following the advice Fabi_G shared, but honestly, I just want to finish this model and move on. I'm a bit burnt out on this specific project, but I'm really happy with how much I've learned from it. I definitely plan to dive deeper into trim sheets and the round edge shader once I'm done. If you happen to have any favorite tutorials or trusted resources covering these techniques, I would really appreciate it if you could share them!</p>
<p>I hope you don't mind if I revisit this thread or ask a few more questions in the future once I start my next car (not anytime soon 😅), assuming you're not tired of me yet.</p>
<p>Thanks again for all the help. I really appreciate your time.</p>
As said in the case of car you could do pretty much all small mechanical details with a baked round edge/bevel shader and then only build source highs for a few things. Perhaps your next model could be a testbed for all kinds of alternative techniques.
(On a side note Nintendo seems to have some kind of clever secret sauce with the way they render beauty shots of ingame models for promotional material, which I believe must be related to the specific way the models are built. Perhaps something interesting to look into.)
Overwatch has fantastic vehicule props too, with clever texturing and trims. And as for a vintage car models in particular you could have a close look at assets from Mafia, LA noire, Uncharted, and so on - either finding some rips online or extracting them yourself, or even just inspecting the cars up close in game. Looping back to MGS the military vehicules from MGSV would be a great reference to look at. Basically games that not only look great but run great.
In practice you could use these references to firmly establish specifications on things like how many edges to use on a wheel, how dense the surface of the car body needs to be, or how to deal with the underside details. The less guesswork the better.