Normal artifacts mystery. Please help me solve it :/
Hi! I wonder if someone could help me figure out what's causing this
problem I'm having. Been trying to solve it for many hours today. At
first I thought it was just a bad bake, caused by bad match (distance)
between high- and lowpoly, but now I think it might be more than that.
The lowpoly is all soft edges, exported without tangents, which are then
recomputed in Substance Painter. I know the bake is not perfect, but
there is something more going on here. Is because of the poles in the
lowpoly geometry? Is it caused by locked/weird normals in the lowpoly
somehow?
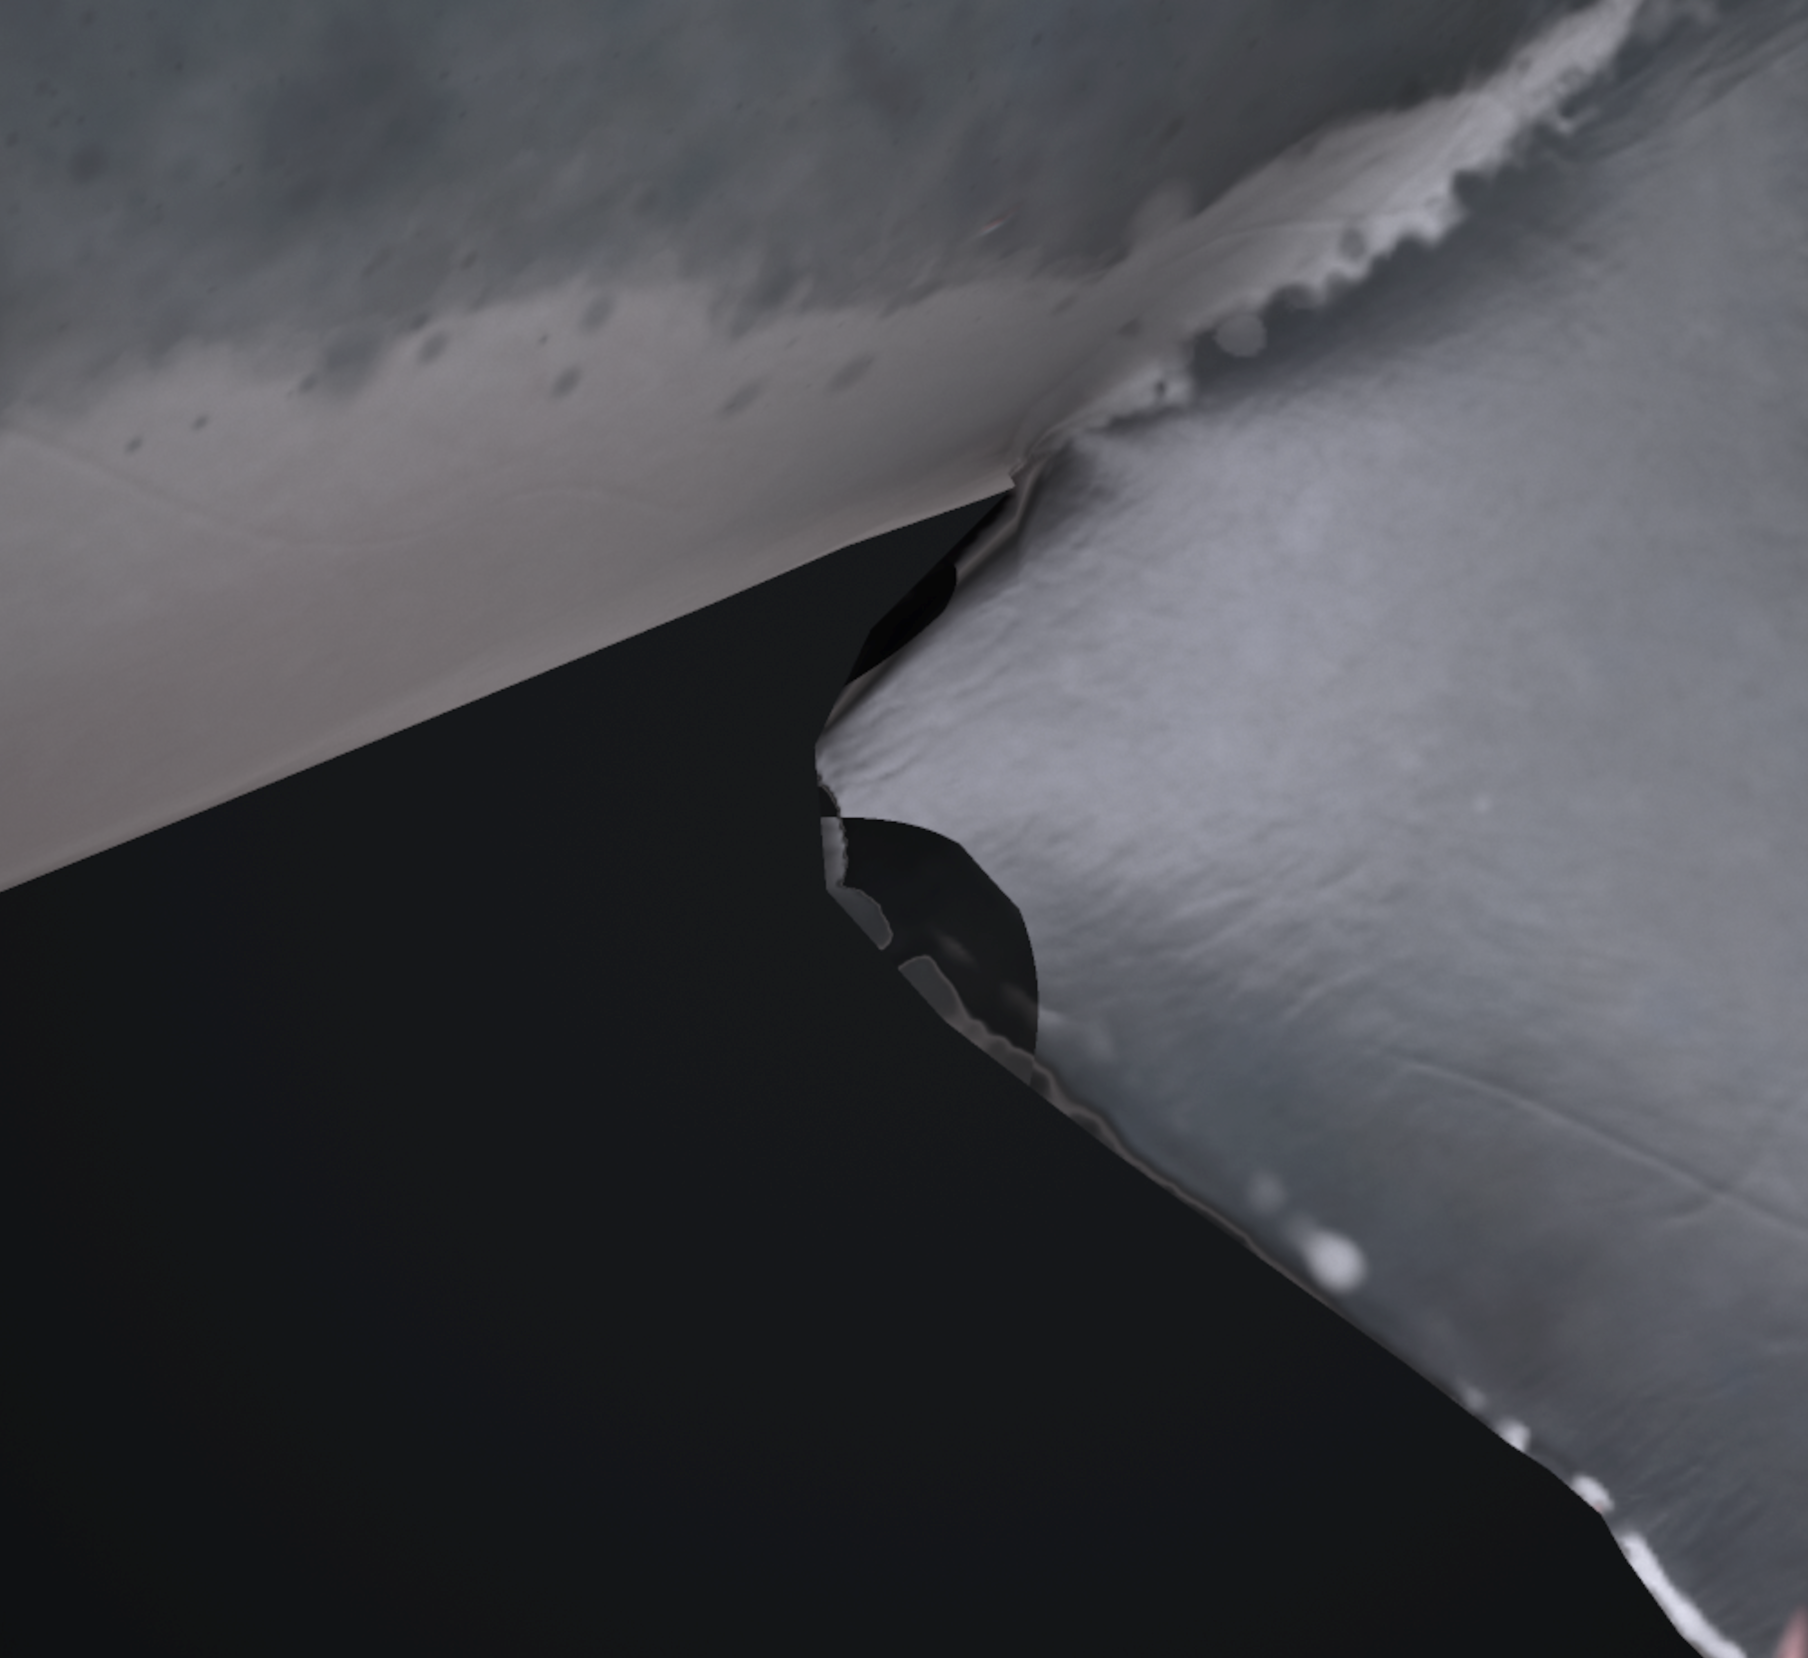
This is what it looks like in Marmoset. The problem was visible in Painter too, but not as bad, so I let it slide.
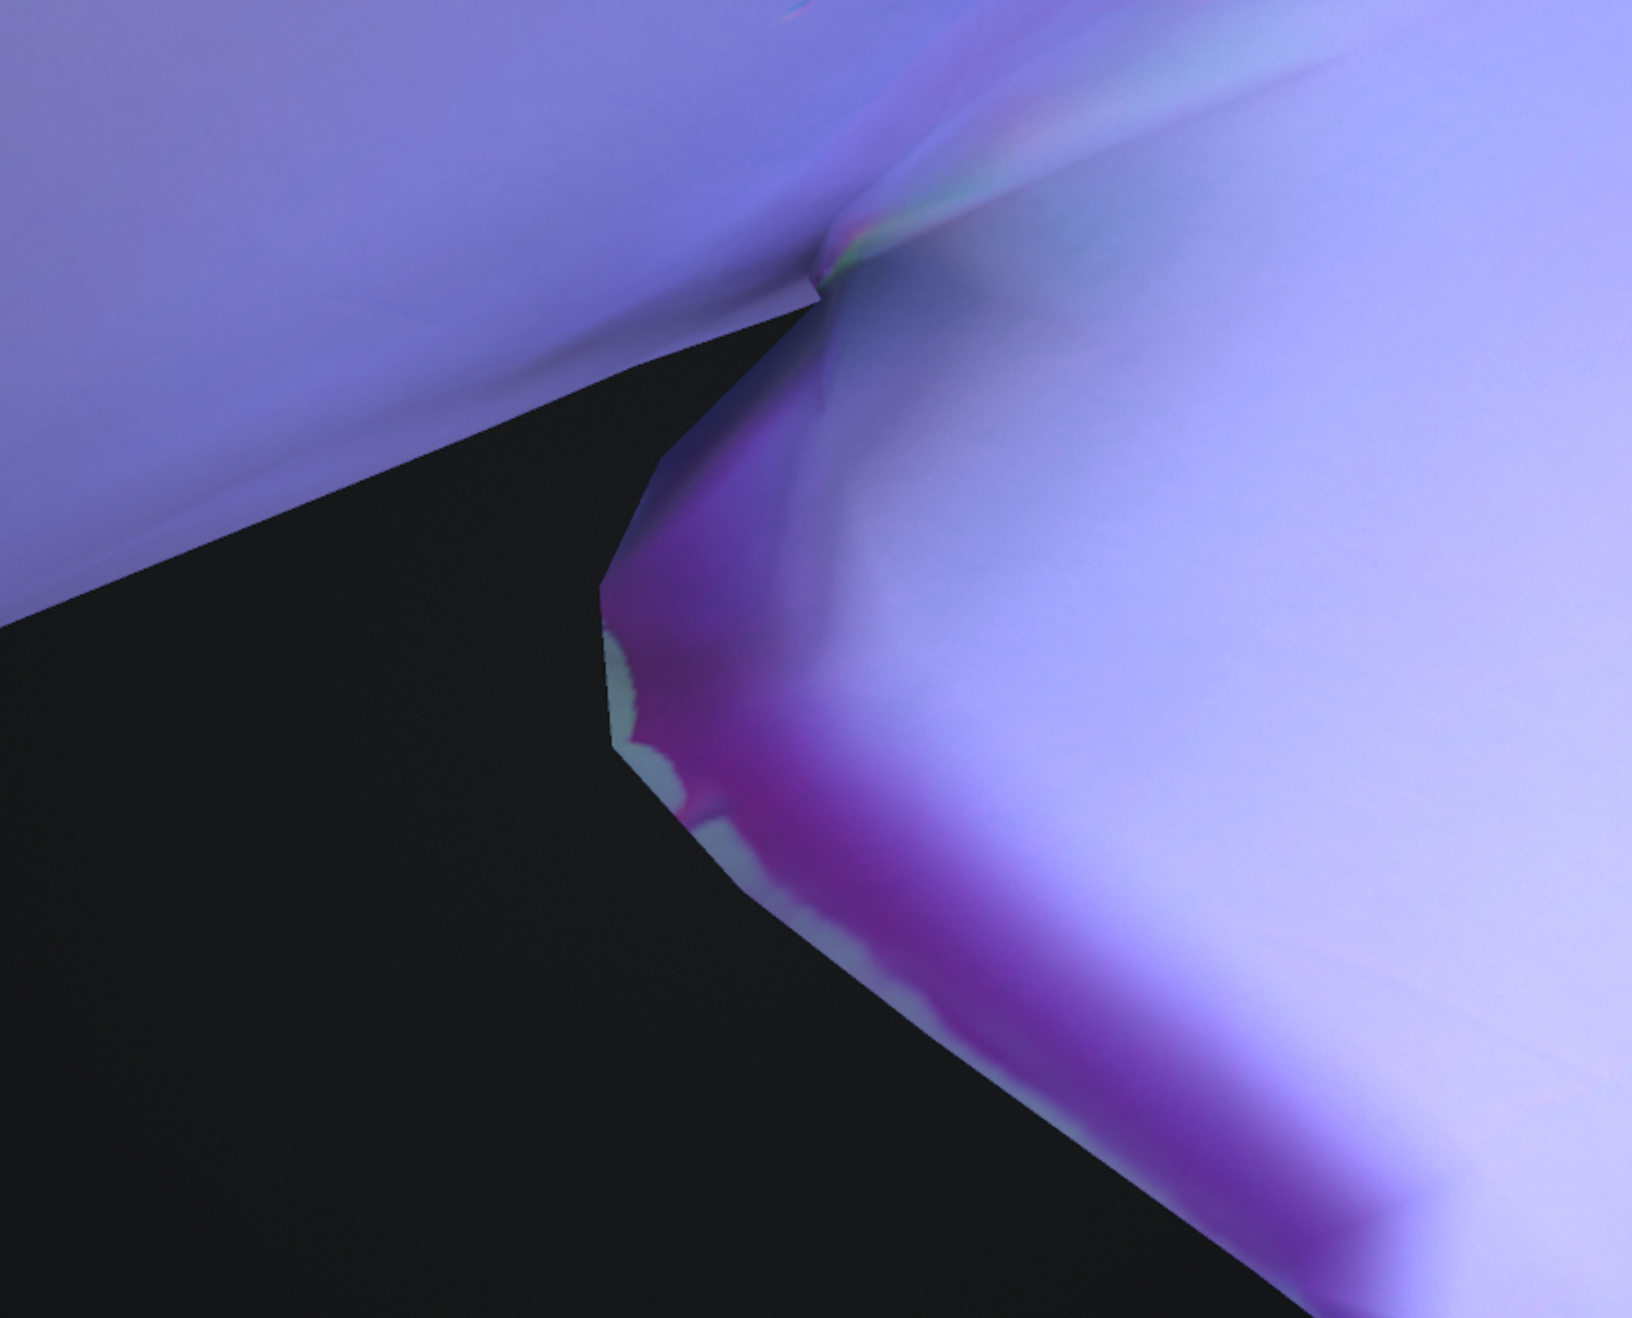
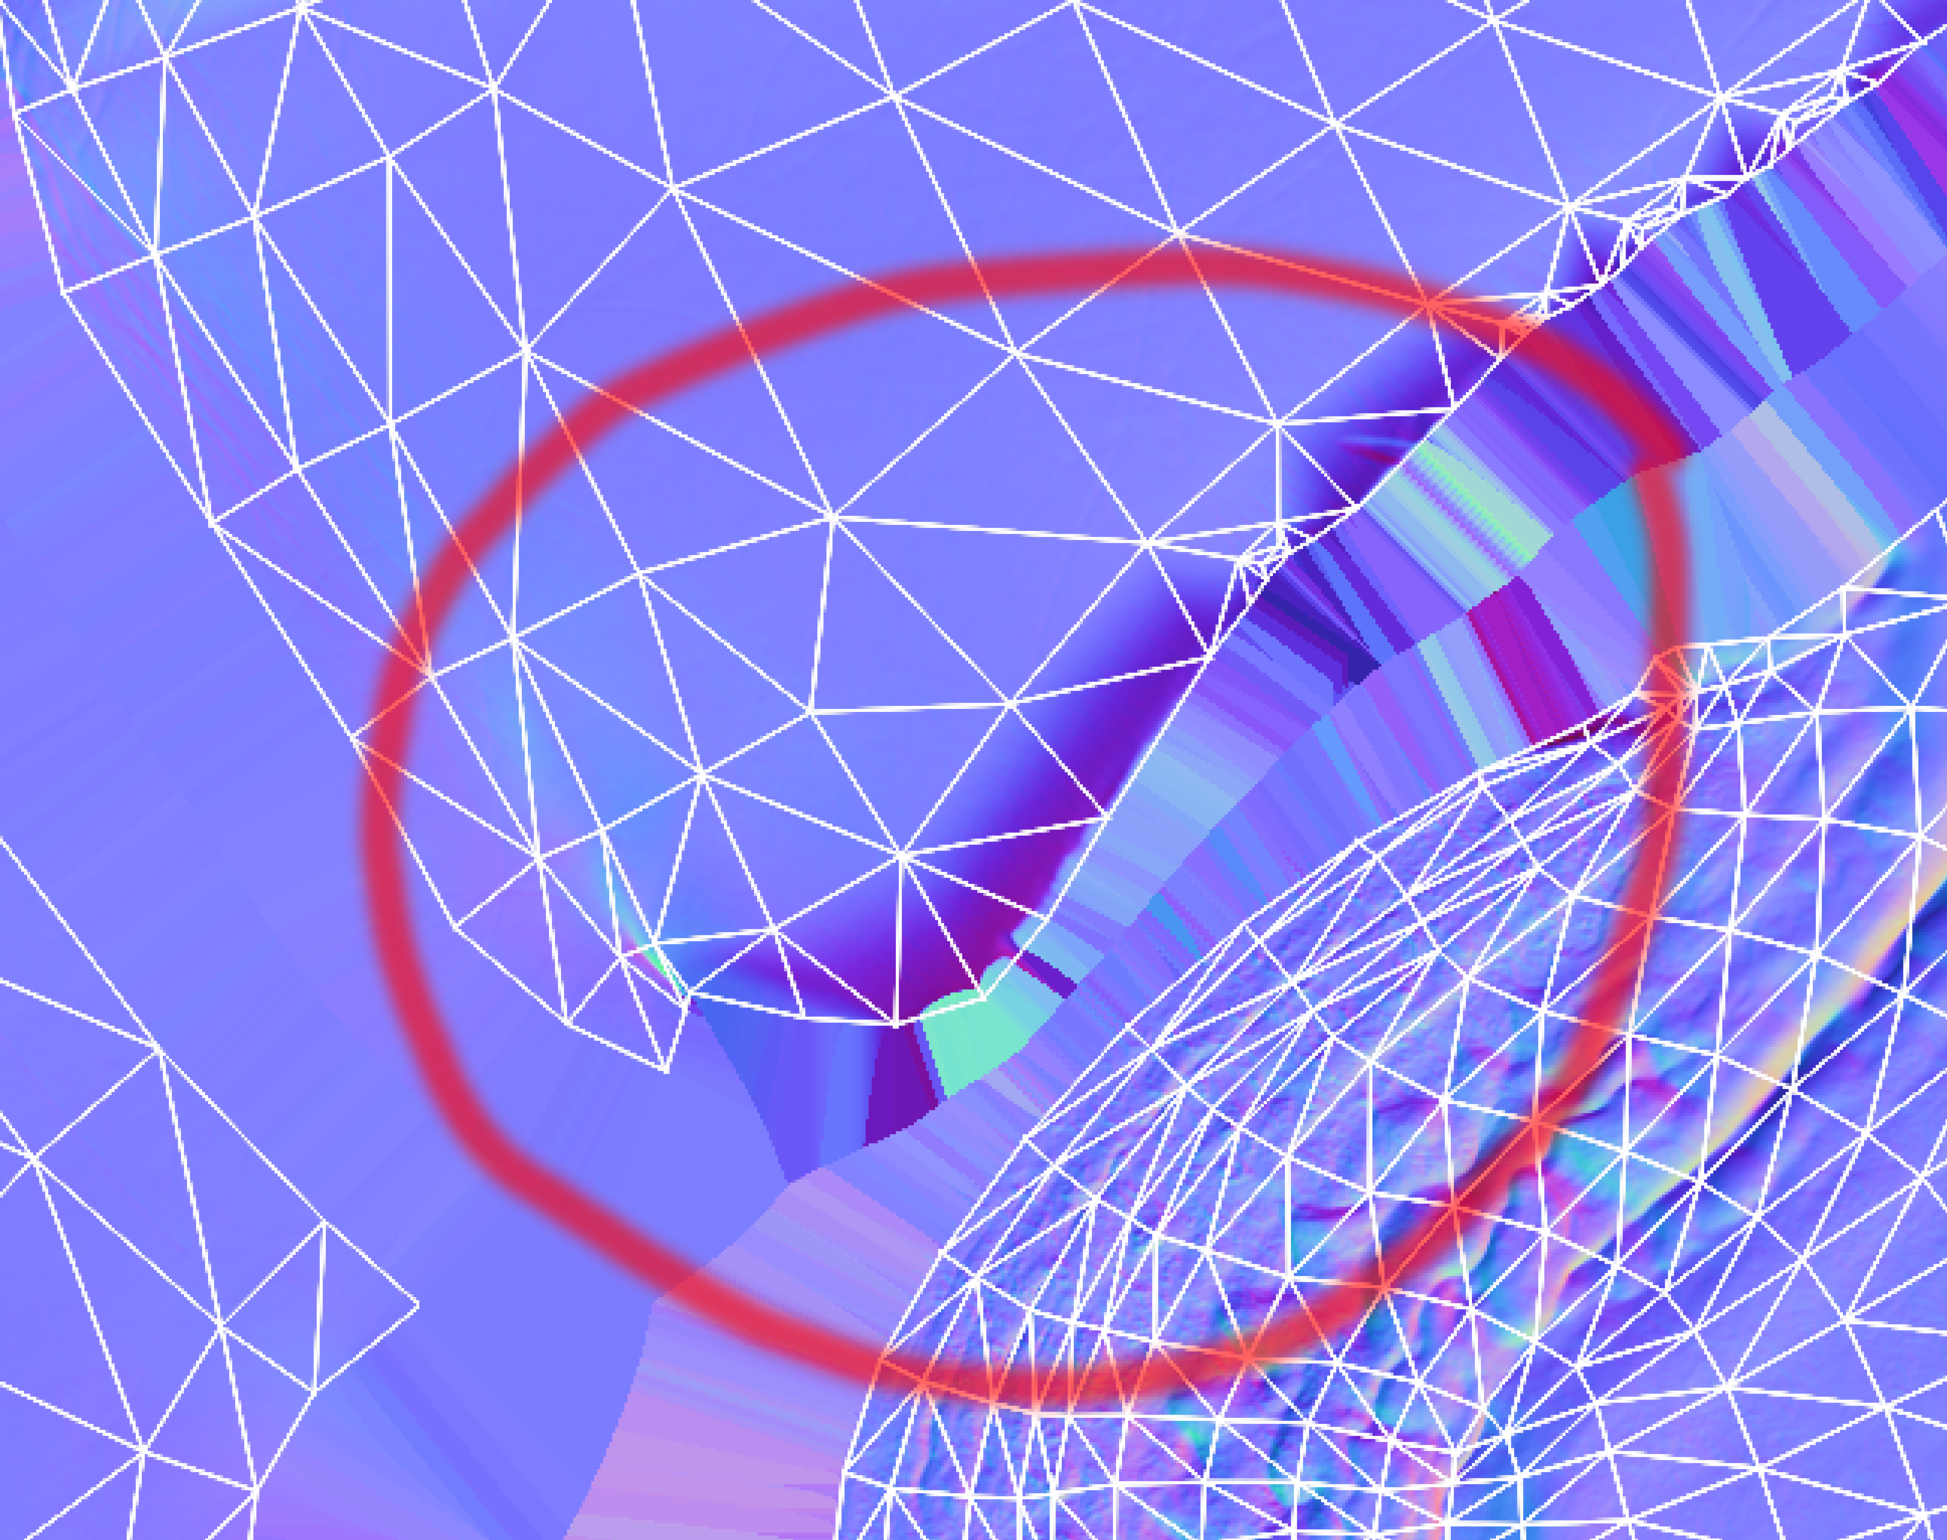
This is what the normal map looks like. There's some bleed from beneath I think (the bright stuff on the very edge).
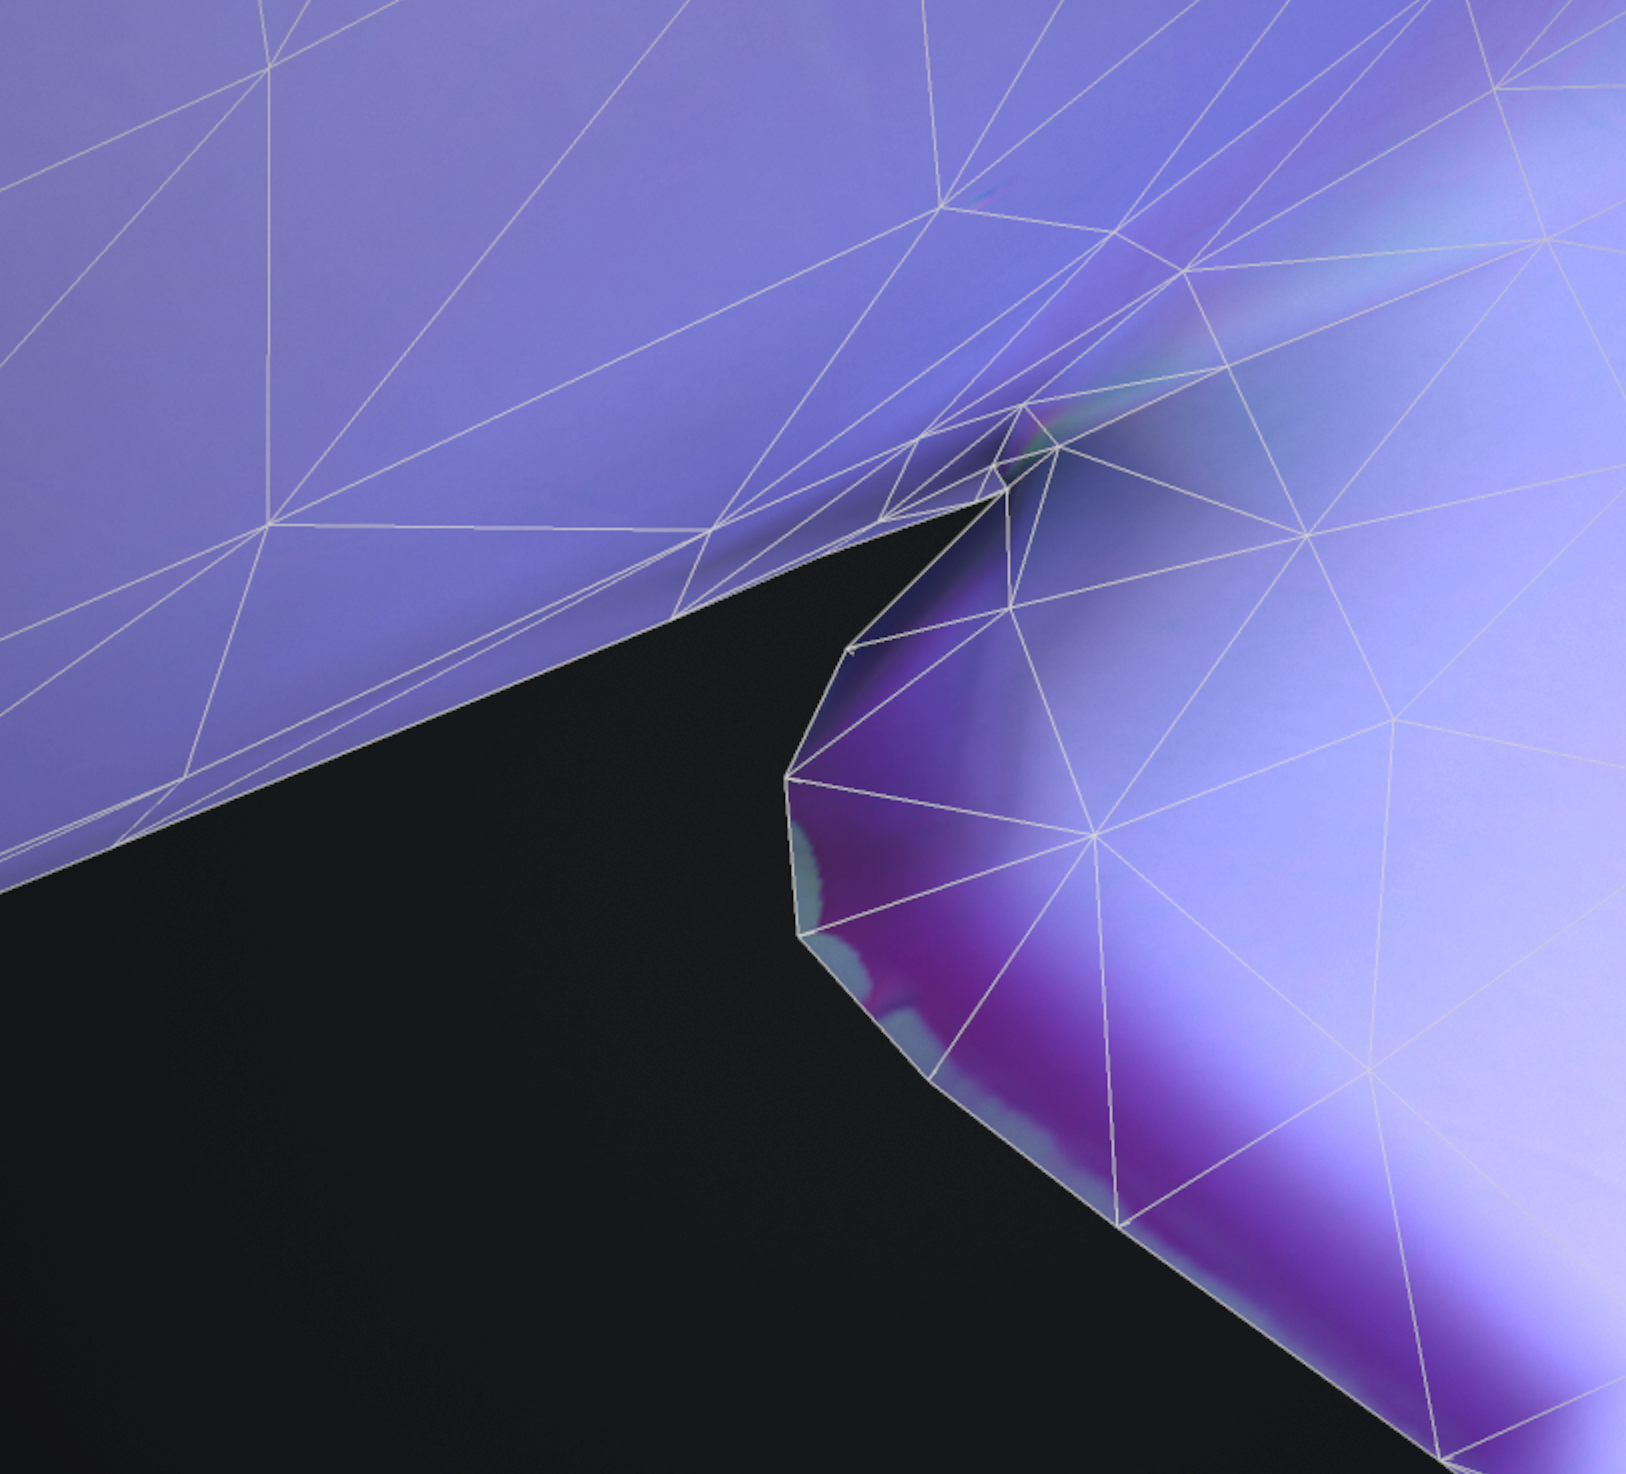
Same as above, but with wireframe.
This is without the normal map applied.
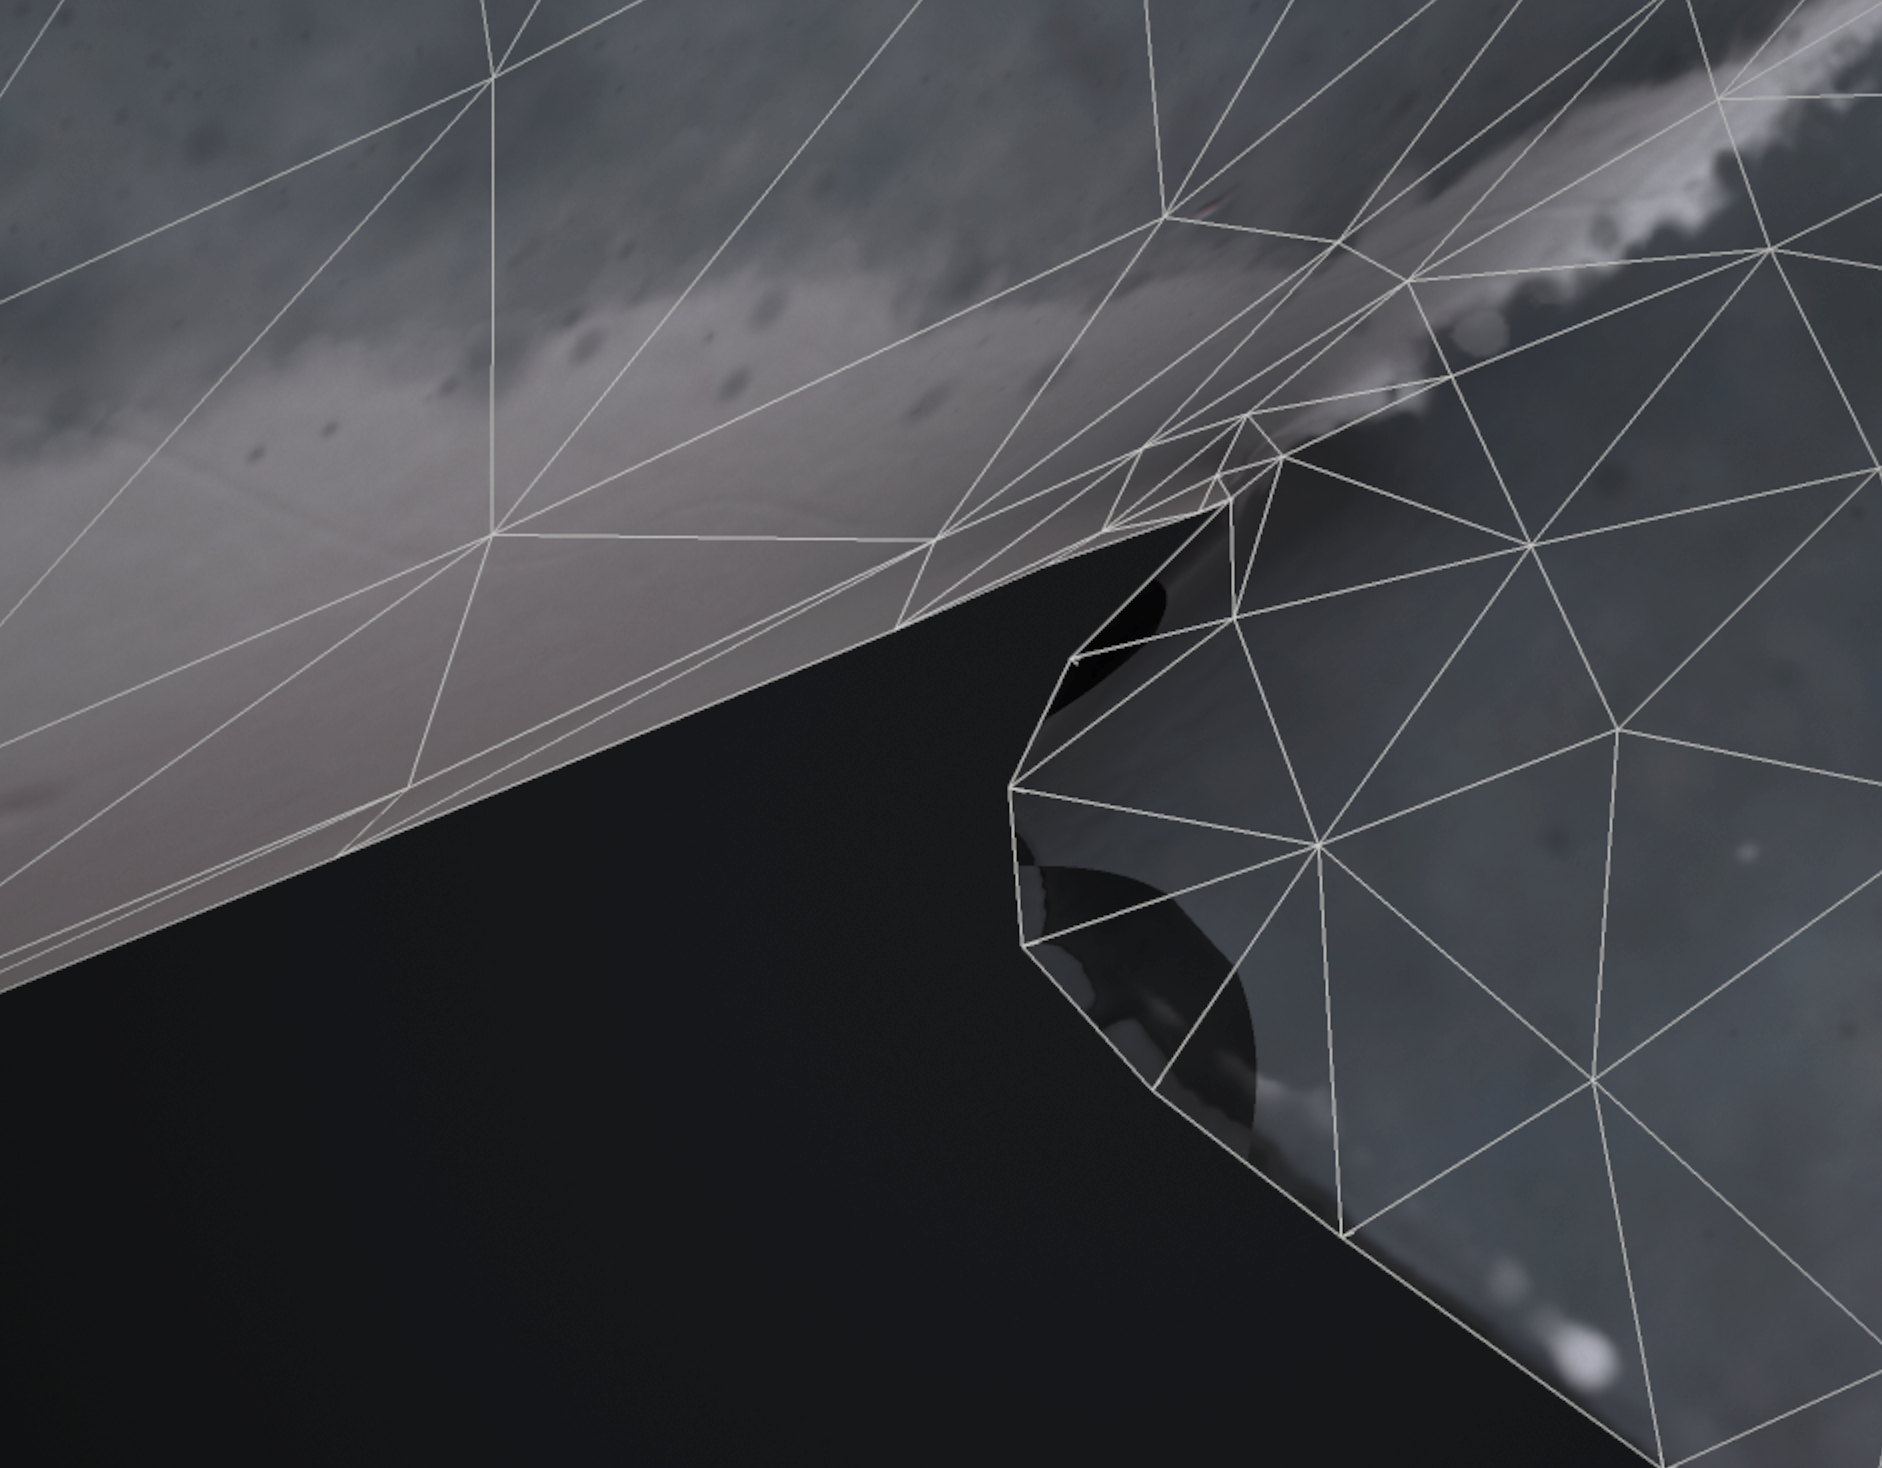
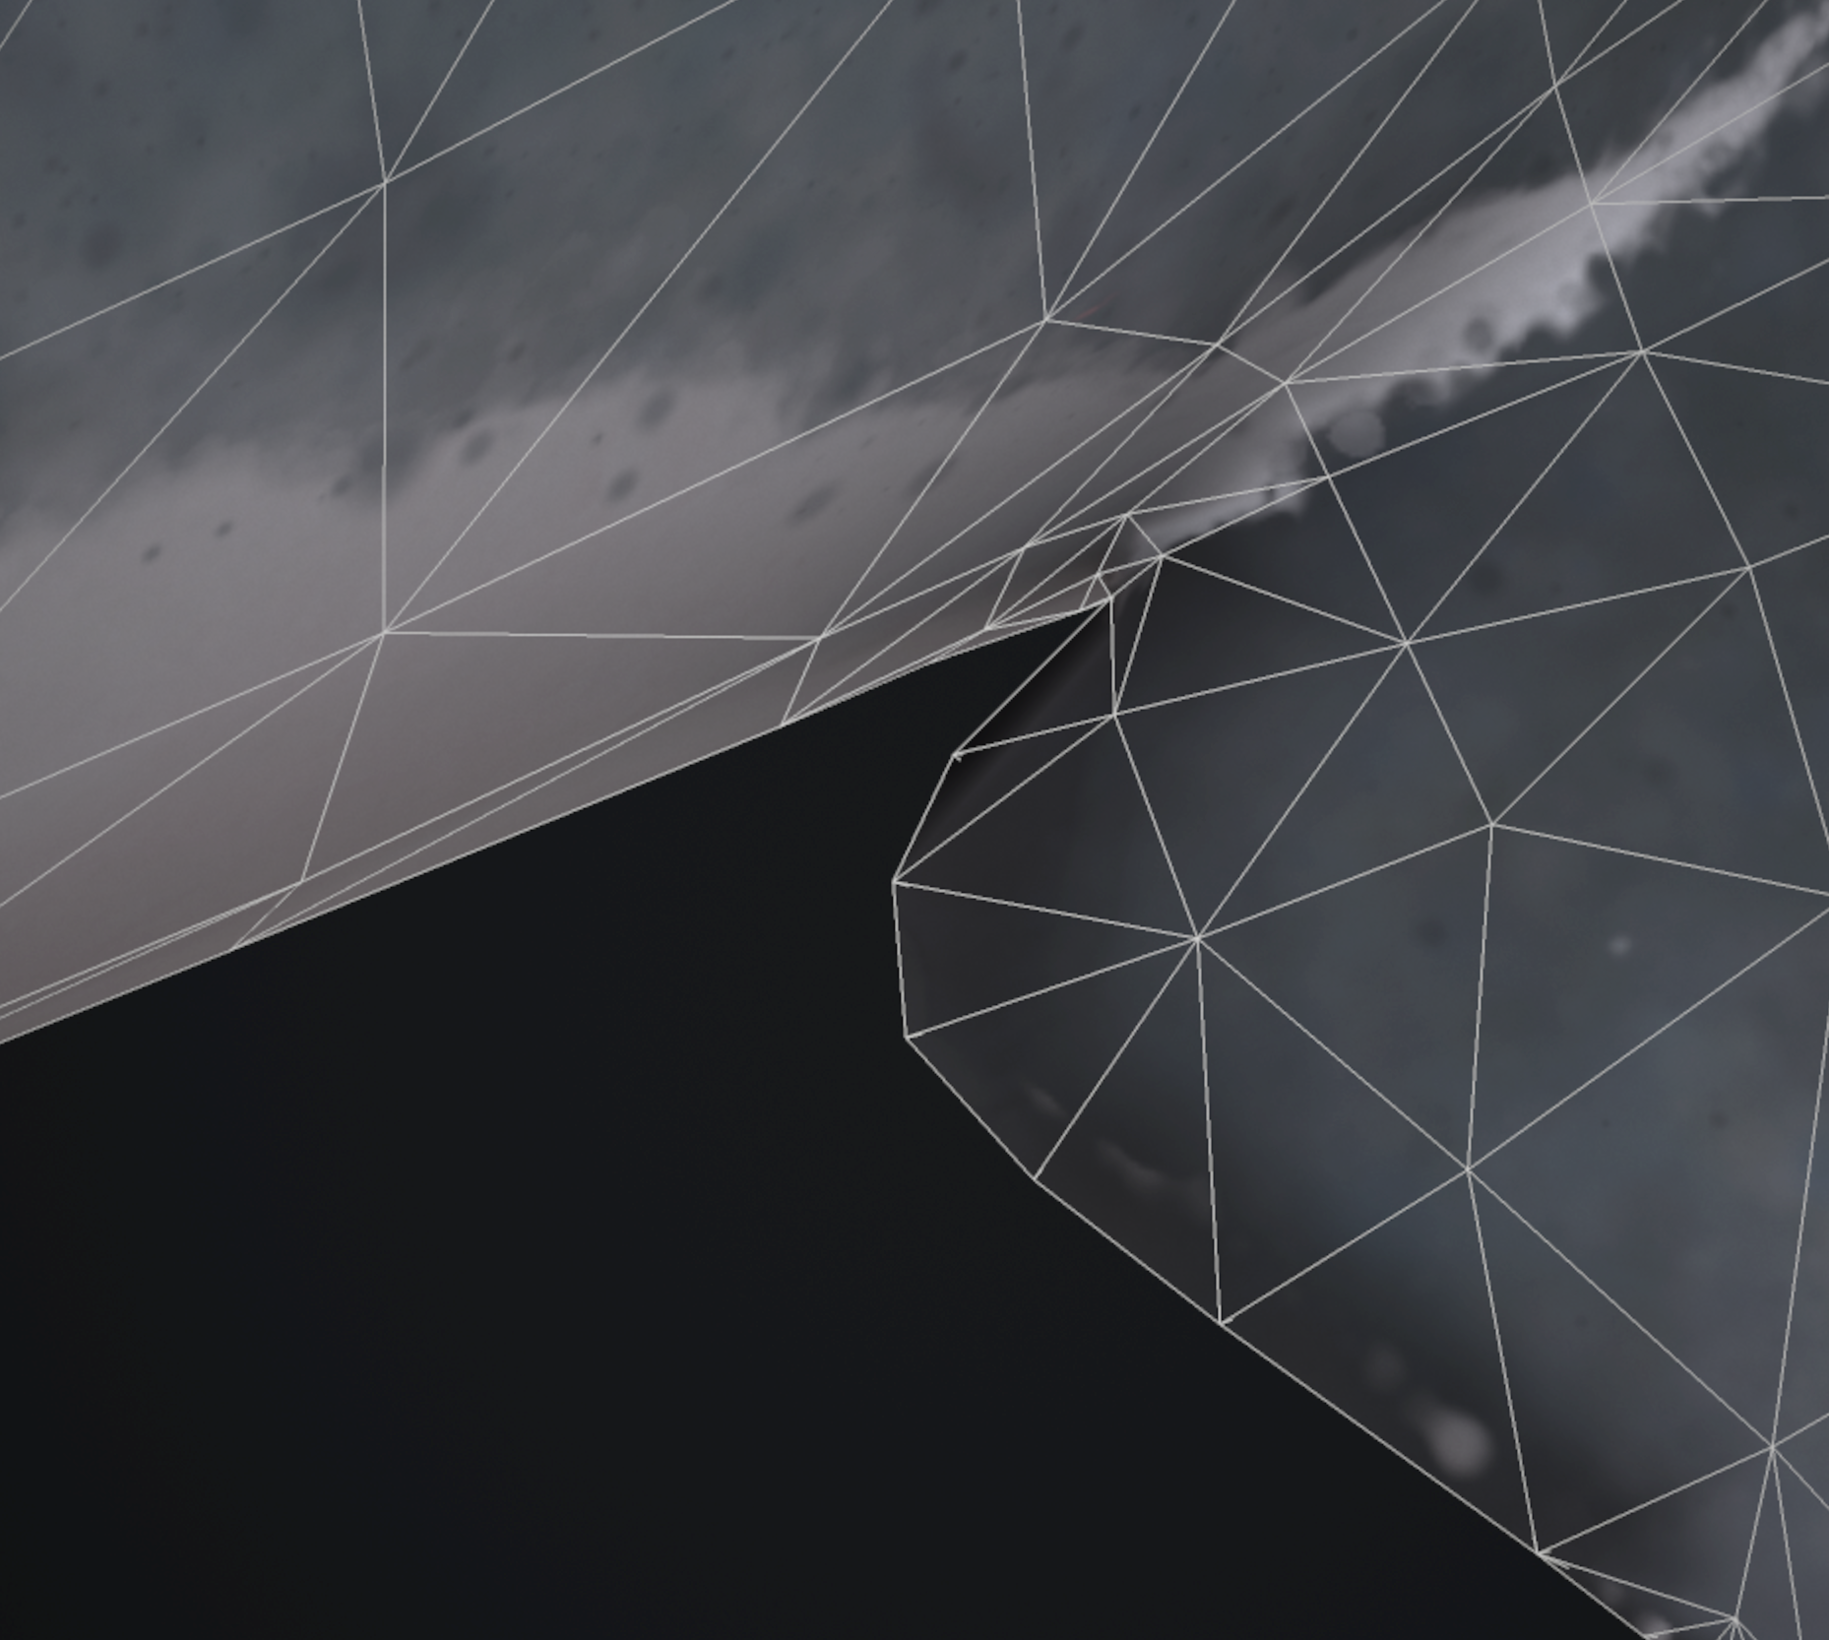
And again, with normal map applied and wireframe.
I was messing around in Photoshop, trying to move stuff around, and clone parts and paint over, but wasn't able to get any descent results. No matter what I tried, there were still issues. Before this, I tried rebaking with numerous settings, and also pasted the normal map into a fill layer, added mask and paint, but nothing gives a good result.
I've been working on this model for quite some time now, and would very much appreciate if someone could help me out, so I can get on with my life:)

This is what it looks like in Marmoset. The problem was visible in Painter too, but not as bad, so I let it slide.

This is what the normal map looks like. There's some bleed from beneath I think (the bright stuff on the very edge).

Same as above, but with wireframe.

This is without the normal map applied.

And again, with normal map applied and wireframe.

I was messing around in Photoshop, trying to move stuff around, and clone parts and paint over, but wasn't able to get any descent results. No matter what I tried, there were still issues. Before this, I tried rebaking with numerous settings, and also pasted the normal map into a fill layer, added mask and paint, but nothing gives a good result.
I've been working on this model for quite some time now, and would very much appreciate if someone could help me out, so I can get on with my life:)
Replies
https://sketchfab.com/models/1752952c121d4d5d9fa0c3e8662beb2f
Well, there is no nearby geometry that might be getting in the way. Probably there is a bad match.
You can move vertices around, that won't break animations. Animations are stored in the rig. The vertices are binded to the rig. If you make big adjustments to the vertices, then you may need to do some adjustment to the weighting of the vertices. This isn't a big deal.
But, if the animator won't budge (maybe they know something more than I do -- I'm a beginner), and you just can't adjust your lo to match your hi, I'm sure you can blend that out. I've fixed much worse artifacts than that in Substance Painter.
Split the top and bottom of the fin in different smoothing groups and rebake the normals.
Or you can chamfer that edge so you'll end up with an edge that's <90°. You'd have to reskin but that shouldn't take more than 30 minutes.
To me it seems like a high-low mismatch, but might be related to smoothing as well as that is pretty drastic angle. Did you use a cage to preview how the rays are cast?
Duplicate your lowpoly mesh and rename it to "your problems".
On "your problems", add support loops (orange) around the problem area so that the bad boi faces indicated with red lines shade similarly to the good boi faces indicated by green lines:
You've now pushed the vertex normals towards the tippy tip, like so:
Bake object space normals onto "your problems".
Download handplane and plug "your problems" and the object space normals into the mouth slots, and plug your lowpoly into the butt slot. Do convert that object space to tangent space.
Now you can delete your problems. Ba-dum-tsh.
OH! Thank you so much for your answers! I really appreciate the drawings - very pedagogic of you:) I work in Maya, so we don't have "Smoothing Groups" per se, but I get what you mean. In Maya, there are only "hard" or "soft" edges. At first, I was planning to have those edges hard, but then I read that you should have all edges soft, and export without tangents, in a Substance Painter workflow tutorial. I actually tried making them hard, and applied the normal map again, which solved some of the problems, but created new ones. Now it's obvious to me, that that was because I didn't rebake. I'm quite the noob when it comes to texturing and baking:) Do i have to split the UVs as well (islands), or can I keep them as is? Splitting them and then moving them to make room for padding, would definitely be a nightmare, considering the work that would be lost. I have a little bit of the same problems on other areas of the model, but nowhere near as grave as here, and I don't think I'll bother fixing them. So sick of this model now, but can't leave it in this shape.
If I could bother you again, I'd like to hear your opinion though. There's a little bit of the same issue on the gills and maybe on some other fins. Do you think it's something worth spending time on? https://mathiasaxelsson.artstation.com/projects/Lzayw
I also said that tangent space normal maps can't handle 90° angles which isn't necessarily true, if the edge you want it to portray is sharp, then the tangent space map quickly runs out of either available pixels or spectrum of available values it can use to compensate for the hard edge, so it rarely looks good. For a sharp edge that doesn't shade well I either chamfer or do a hard edge.
I can't talk about the substance painter workflow as I know absolutely nothing about it or , but in general you should always use a cage on complex models. Try baking with a cage to solve your problem. If it doesn't work,
You do need a split in the UVs when you have a hard edge. You don't need a hard edge where you have a split in the UVs tho.
If you hardify the edges around your fins sharp angles, it looks like you should be fine. I think the other fins and gills are fine. Perfection in a model is something to wish for, but accepting a compromise between efficiency and perfection is more realistic I think.
Maybe do it if it's a portfolio piece? IDK if it'll be worth it tho.
And yes, perfection is of course what everybody aims for, but you never get there. I'm still learning a lot, and many of the steps taken in the making this shark, were the first time for me. This is actually my first serious attempt at Substance Painter. Earlier, I've basically just used finished materials, and maybe tweaked them a little.
And when you have a really sharp angle like that there can in some cases be issues due to how the cage is projected. Adding a chamfer/bevel to "relax" the corner would give you a more even projection cage that might fix projection errors like these in some cases.
Source: Am animator, I deal with this all the time, it's not an issue.
Make sure the meshes are in the same pose, bind the new mesh to the same bones and copy skin weights from the old mesh. Delete the old mesh and he can move on with his day.
Now if you drastically change the mesh to the point that it means having to move joints around and redo some rigging then he it will eat up more of his time but it shouldn't cause him to start over from scratch. But something this minor would barely put a kink in his workflow. If he even complains about something so minor you should find yourself someone else to work with, it really is a non-issue.
3dsmax has a similar workflow for updating meshes. Apply skinwrap modifier > target old mesh > convert to skin.
Anyway : thanks everybody for all your input, it really made my day.