Home Technical Talk

Blender- Render out realtime black outline

polycounter lvl 10
Offline / Send Message
melviso polycounter lvl 10
Is there a way to render out only the black outline separately using opengl render?

https://www.youtube.com/watch?v=D4T1cDJryOI

Replies

  • RN
    Options
    Offline / Send Message
    RN sublime tool
    If you really want to use the raw OpenGL render (Render -> "OpenGL Render Image" from the top menu), there's a trick way.
    Set the character material(s) to use either the Mask or Z Transparency modes, with the alpha set to something really close to zero, but not perfectly zero. This way when it draws on the viewport it masks the black silhouette clone from the Solidify modifier and leaves just the outline of it.
    Set the alpha to this, copy and paste it: 1e-20
    (This value means "1 divided by 10-to-the-power-of-20", which is a really low value close to zero, it won't affect objects behind.)


    If you decide to use Blender Render or Cycles you could also do the same with a Mask-type transparency or the Holdout node, respectively:

    Since the outline is a flat colour you can also take some shortcuts to make it render really fast with Cycles at 1 sample, and even faster with B. Render.
  • melviso
    Options
    Offline / Send Message
    melviso polycounter lvl 10
    @RN   This was very helpful. Thanks a ton, mate.
  • melviso
    Options
    Offline / Send Message
    melviso polycounter lvl 10
    I saw this on artstation. How was the vertex editing done to get the lighting. I am aware of the data transfer using a different mesh. Was the vertex editing on the mesh itself to get the correct shading and lighting?
    https://www.artstation.com/artwork/3nLJY
    Also is there a way I can render out an animation with opengl that is in 2s?
  • RN
    Options
    Offline / Send Message
    RN sublime tool
    It's not clear if they're using edited vertex normals, they only mention that the Guilty Gears method "helped a lot". But I think they aren't, anyway: edited normals under toon shading (i.e. stepped lighting) make the surface snap from light to shadow instantly, as the light source becomes perpendicular to the edited normals.
    This is visible in the original Guilty Gears GDC presentation, but not in that artstation you linked to.

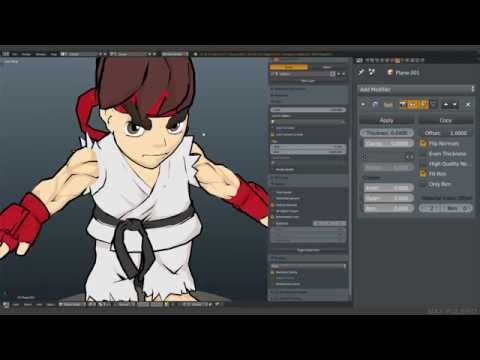
    If this is what you're trying to do (anime-style render), then the outline doesn't need to be rendered separate from the model, see that "Solidify modifier" link in my post for more info. The character and outline are drawn together.

    The GL render is like a viewport grab, so if your animation is done in twos, threes etc. and it looks fine, then the animated render should look the same.
    But if I were you I would use B.Render instead of GL because of the better-looking antialiasing, the ability to have transparent backgrounds as well as the overall control with the material and compositing nodes.
  • melviso
    Options
    Offline / Send Message
    melviso polycounter lvl 10
    Thanks RN,
    I meant say you animated  a whole scene with different assets on 1s and you want to render out the scene to be in 2s. Say Blender renders frame 1 for frame 1 and 2 and skips frame 2, renders frame 3 for frame 3 and 4 and skips 4. I am trying to create that steeped or low frame rate that 2d animations have or would I have to edit every asset to be on 2s and 3s.

    So do you think the guy is using a different vertex editing technique?
    https://www.youtube.com/watch?v=KSlud8DFXEk
  • RN
    Options
    Offline / Send Message
    RN sublime tool
    Try using a stepped-interpolation modifier on individual Actions of your animated objects. This way you can animate different objects with different step sizes (2s, 3s etc.).

    That video shows two ways of editing normals (Data Transfer modifier and the Normal Edit modifier). I think you can stack these modifiers using vertex groups to control their influences, so different parts of the mesh can be edited differently. There's also the normal editor from Blend4Web, and possibly some other addon tool(s) for normal editing.
  • melviso
    Options
    Offline / Send Message
    melviso polycounter lvl 10
    Thanks a lot, RN. Working on a very short animation just to try it out :- )
  • melviso
    Options
    Offline / Send Message
    melviso polycounter lvl 10
    Thanks to you Rn, finally tested it:

  • RN
    Options
    Offline / Send Message
    RN sublime tool
    Mind blown. Great work!!

    I wrote before that edited normals have a sharp transition in lighting (as seen on their GDC presentation), but I need to correct myself, I realized that this only happens when all those edited normals point in the exact same direction, so all those points become lit or shaded at the same time.
    But not all edited normals will cause this behaviour. You can transfer them from a smooth sphere to make smoother toon-shaded hair, for example.


  • melviso
    Options
    Offline / Send Message
    melviso polycounter lvl 10
    Thanks, RN.

    Noted. Using the data transfer modifier :- )

    I still need more practice. I am studying this atm:
    https://www.youtube.com/watch?v=STTeYMyBHNc
    There is also a downloadable blend file.
    Seems you can shade the character using vertex color. Still need to get how it works.
Sign In or Register to comment.