The BRAWL² Tournament Challenge has been announced!
It starts May 12, and ends Oct 17. Let's see what you got!
https://polycount.com/discussion/237047/the-brawl²-tournament
It starts May 12, and ends Oct 17. Let's see what you got!
https://polycount.com/discussion/237047/the-brawl²-tournament
Maya Invincible Edges
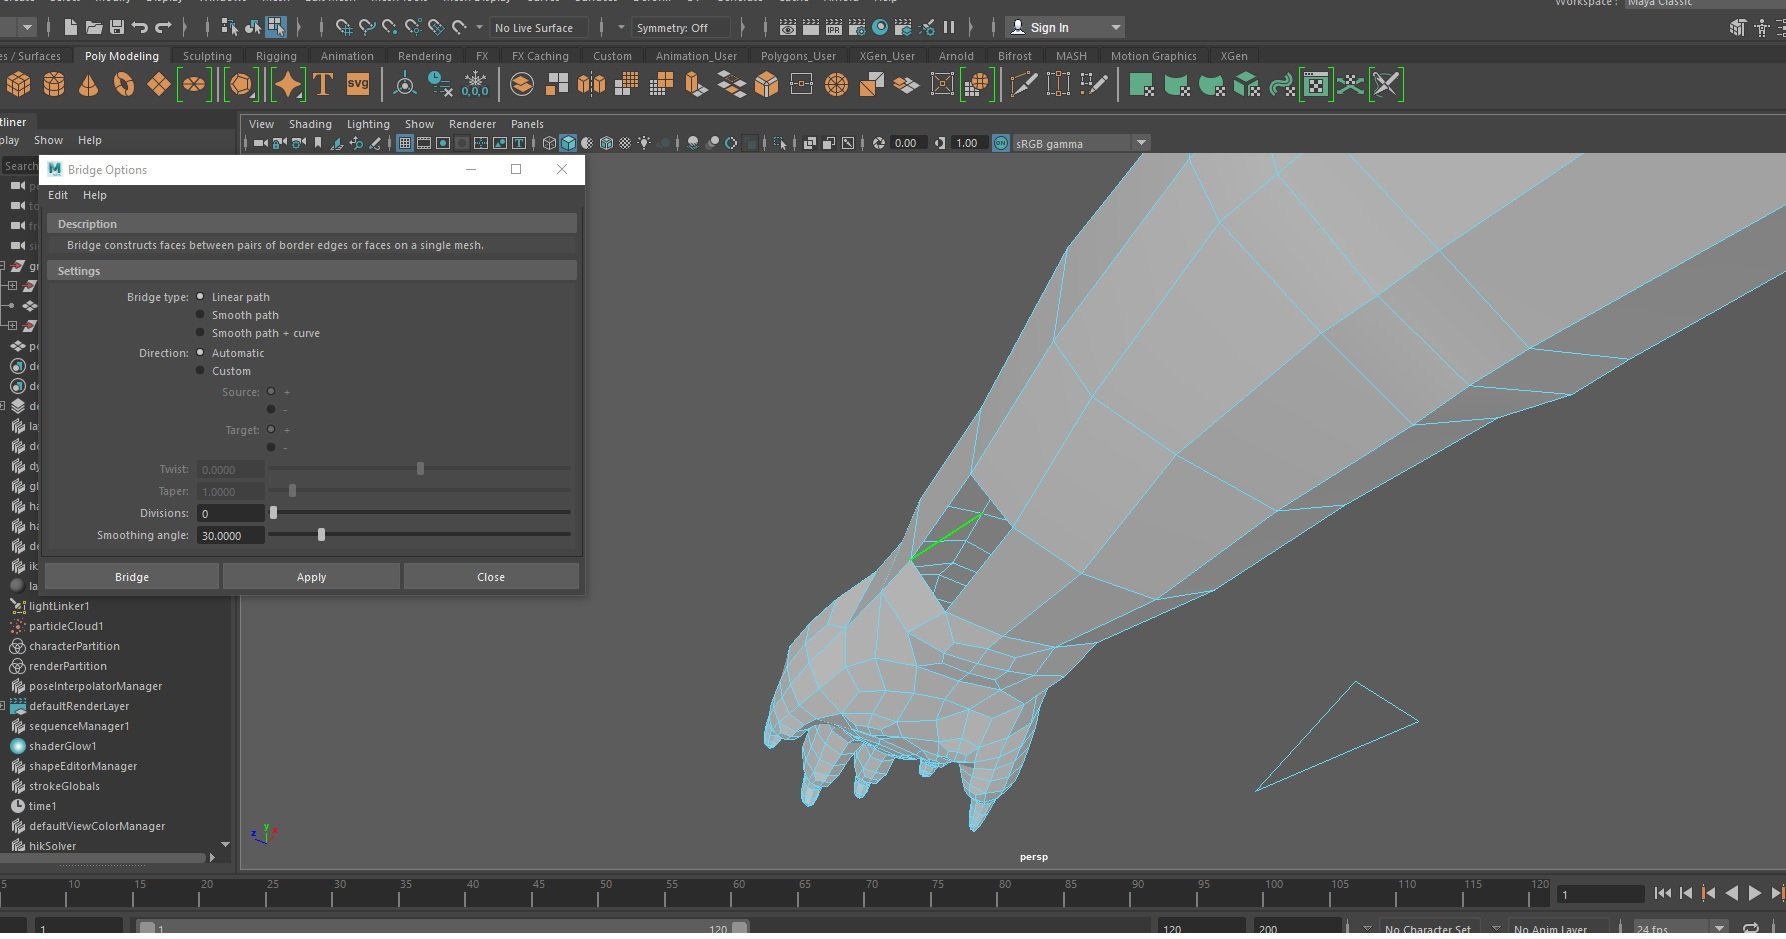
Alright Maya is driving me nuts to do the most simple actions. Not going to rant but in an attempt to not throw my pc into the wall... All I wanted to do was bridge between two edge loops that's all. THAT'S IT HOW MANY BUGS COME FROM SUCH A... no no.. calm.. It was the first action on my model in Maya so no need to worry about the odd not delete history ruining everything nonsense. After bridging the edgeloops I found there were extra vertacies that connected to other vertacies in some hidden pointless web of ****. SO in an attempt to clean this up I deleted the very simple bridge and started clearing the mess only to be left with invincible edges found displayed below. I've tried to delete this by, delete, menu-edge/vertex Delete, mesh clean up, Deleteing vertex, and I believe one other attempt through the menu but nothing works. I started bridging the edges one by one in hopes that would make them mortal once more but with no luck.
Maya drives me nuts how everyone doesn't drop this program for the 10000000x less buggy Max is beyond me. But it's what I'm trying to learn so if anyone has help plz let me know.

Maya drives me nuts how everyone doesn't drop this program for the 10000000x less buggy Max is beyond me. But it's what I'm trying to learn so if anyone has help plz let me know.

Replies
There are some options you can enable that will help you see degenerate faces.
In Windows>Setting/Preferences>Selection : Enable Face Centers
This will put a dot in the middle of faces, and can help you determine collapsed faces across your model. Caveat, this mode means you can only select faces by the center dot. Sometimes this can actually come in quite handy, but you'll probably want to toggle it off when it is not desired.
Also, instead of bridge, you might try MeshTools > Append Polygon
Once the tool is activated, click on a border edge. Look at the purple arrows that show up on the adjacent edges. You can then click on each edge following the arrow direction to rebuild missing polygons or bridge gaps. Press "Enter" on the Numpad to end the action.
Another FYI (if you don't already know), "y" on the keyboard will re-enter the last tool you were using, and "g" will re-perform the last action you completed.
Hope this helps!
cheers!
New question I'll post here in an attempt to avoid a new post.. Doing UVW Unwrapping.
When I try to select groups of polyfaces in marquee I get a bunch unselect and a bunch randomly selected, then unwanted faces can't be unselected, making the tool almost useless. Why is this happening?
Cool tip TTools, I didn't think about catching them with face centers before.
In regards to your new issue, do you have a selection constraint enabled? Check your modeling toolkit
Did you ever use the Make Hole tool on this model? Bridge can sometimes royally fuck a mesh up, but not as bad as make hole can. Mesh>Cleanup might work for you here.
For fixing the wrist wonky edge, I'd select a vert connected to the stray edge, convert to a face selection and delete. You'll have to remake the faces, but Maya doesn't handle cleaning up solo edges so what can you do.
I have not used close hole on this model I just deleted the polys between the shoulder and wrist, then bridged the gap. Moved vertex’s.. I didnt like the wrist alignment so I deleted the wrist poly loop and did them 3 by 3. I did have to use multi cut tool for the wrist polycount to match the shoulder. Which dosen’t translate in symmetry for some reason. So I believe I duplicated the body mirrored the arm, deleted everything else and combined/target wielded it to the base model.
TTools I want to thank you again for all the tips you gave. I went back and tried the center selection for polys but the remaining invincible edge has no dot.
Wonder what seemingly insignificant thing I did to cause all this insanity but I’m about to just redo it append poly method you mentioned.
If anyone catches it in time, is there a unique way I should delete poly's without breaking everything? or is face selection-delete work fine? Hesitant to do anything in this program ~.~
One thing that caught my eye was your mention of utilizing the -1 scale trick. You'll find that in using that method, once you freeze transforms you'll end up with a model that is inside out. This has to do with display settings applied at the shapenode level.
You might find this link valuable:
https://youtu.be/O2mK7I1Errw?t=154
This is for a script called MirrorPivot that is part of my TTools software. It handles mirroring utilizing the -1 method, but automatically freezes transforms and fixes the reversed node settings.
You might also find other tools in this set valuable, as many of them can help make the transition to Maya much more palatable.
http://www.thomashamiltonart.com/TTools.html
Regarding your model, if you would like someone to take a look at your topology to help you learn what might have happened, I'd be willing to take a gander.
Also, I know it is extremely frustrating to learn new 3d software. I encourage you not to give up. As a user of both Max, Maya, and Lightwave, it's just a matter of learning the idiosyncrasies of each program. Many moons ago when I first started learning 3dsMax, I used to say it belonged on a shelf at Toys'R'Us. I even told a very senior artist that 'good artists' used Maya over Max. He responded in saying, "A great artist knows both".
I was completely humbled. He was right, and I was a fool. There are too many extremely intelligent people in this world that use these different applications to believe that one is significantly better than the other. Today I just consider each of them a different tool in my toolbox, and go back and forth between the programs depending on what I am doing at the time.
I hope that gives you hope and encouragement on your journey. I promise, every program you learn will be valuable in your long term career development.
cheers!
I went ahead and did the -1 scale trick and wielded the arm onto the base before seeing your post. I'll check that freeze transforms thing, is there a way to check if it's inside-out and a way to correct it? (if that questions answered in the previous post disregard I'll be looking into the information provided in more detail.)
Good news is the uv editor selection seems to be working now.
I really appreciate the advice and the offer to look things over, ill shoot an obj over tonight.
Edit: Looks like everything is ok after freeze transformations.
and the UV editors working now so I should be alright. But I'll make sure to check out those links you provided. Thanks again.
It looks like Autodesk has corrected the issue (Opposite flag set when freezing transforms on -1 scale) sometime post Maya 2011, though I'm not sure in what version they fixed it. Clearly you're on a new enough version that you have the fix. I tested in 2016 and I don't have the issue there either...though I wouldn't normally be seeing it anyway since I've been using my Mirror script for so long.
For the curious:
In Maya 2011 when you froze negative transforms you would get this warning:
// Warning: Freeze transform with negative scale will set the 'opposite' attribute for these nodes: pCubeShape1
and your shape node under Render Stats would get the "Opposite" flag checked, like so:
This would cause geo to render inside out, unless you disabled DoubleSided, Disabled Opposite, and Re-Enabled Double-sided.
Anyway, looks like we won't have to worry about that bug anymore! Only took about a decade for the fix
The model is looking good man. Keep it up!