UDK - Transformers - Re-imagined Soundwave
polycounter lvl 14
Hey, welcome to my thread on a Transformers project! I'm hoping by the end I'm going to have a functional and great looking Decepticon to show off with. Any criticism is welcomed on getting this to be the best that it can be.
So without further ado lets begin. I sketched some really rough stuff on my favourite G1 character Soundwave:

Basically I'm highlighting the kind of things that I'd like to see; some kind of armoured vehicle mode that has practical use (I'm aiming for a sort of 'if G1 was modernised' kind of look, though if it can be fudged into the 'boombox' that he is known for that would be awesome) with some indication that he is capable of intercepting, eavesdropping and communicating with human technology (as of 201X).
The robot concept exists merely to help with things like proportion; I think that it helps to make the vehicle first as it defines aspects of the robot form. This will involve much back and forth work between 3DS Max and Photoshop but I hope that the iterative workflow is worth it.
I produced a moodboard that highlights things such as colour scheme, ideal vehicle forms and purposes and references of the character as he appears in G1/Fall of Cybertron.

Although I want the APC's as purpose and material reference (and the link between him and his minibots), I want a more futurised vision of it, so some interesting concept work by other artists was thrown in there for some inspiration. He will retain his primary colour plan as it is one of his most defining characteristics in common Transformers media (along with his head and shoulder cannon).
I needed the vehicle defined quickly to get things rolling, so I drew up some quick options:

I wanted some more interesting shapes which is why current APC designs can be a problem and why I felt the design could use some futurising. I took the third design (because I just really liked it) and tweaked it to be more APC like.

Making the vehicle longer and giving it large wheels gave a feel of an armoured troop carrying vehicle while increasing the variety in the shapes that make up the form. With that done I sketched it in perspective and drew up a rough storyboard to visualise a transformation sequence.

As gaudy as they are, I really think colour coding helped understand how I was going to make this thing transform. It helped give a goal to work to when creating the prototype in 3DS Max, rather than ad-libbing the whole thing entirely from a vehicle model/blueprint.

The workflow involves heavy use of instancing so that the parts can be worked on in either mode. This helps massively in helping things line up, and the storyboard makes things even easier in my mind; instead of the process being 'well I have Vehicle part X, how can I get this onto Robot part Y?', its just bodging it to make it work because I already planned out how it was roughly going to work.
The prototyping process helped address concerns and problems that came up and in this case were pretty quickly solved (all of this has taken roughly three weeks in total with modelling and animating at this stage being completed in one). An example of this would be the chest compartment the ejects his minions; I needed this to be upright when in robot mode, but face away from the cannon/arm when in vehicle mode, so it (and presumably the mechanism inside) swivels around to correct this. Since the storyboard is rough and only highlights the important parts to make it work it allows for nuances like this to be fixed with no feeling of restriction.
Below is a test run of the prototype in action with some slowmo renders. I'll render out a more comprehensive version (without the flipping) so that it is easier to see what goes where and how. There are currently a few 'floating bits' that aren't quite truly attached to things at the moment. I know that Fall of Cybertron fudges things with a model swap, so I hope that some suspension of disbelief can be spared by the players if they were playing as this Soundwave (but I'll try to make it believable all the same).
[ame="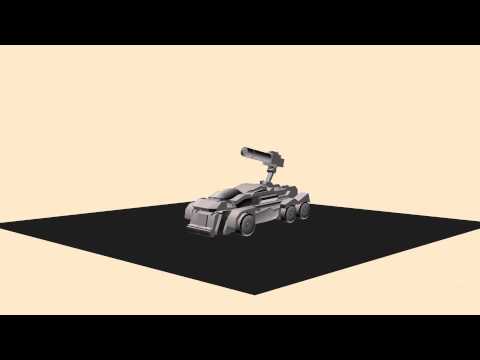 https://www.youtube.com/watch?v=eZb9V_Cjgy4"]Soundwave Transforming Prototype - YouTube[/ame]
Some aspects that I think need improving since the base vehicle forms now work;
I'm going to try to spice things up, tackle things I talked about in the bullet points and try to make the arms transformable into his gun. Hopefully I can get Laserbeak started as well. The prototype can serve as a base mesh for high poly sub division work and areas can be remodelled where needed (the head particularly).
So without further ado lets begin. I sketched some really rough stuff on my favourite G1 character Soundwave:
Basically I'm highlighting the kind of things that I'd like to see; some kind of armoured vehicle mode that has practical use (I'm aiming for a sort of 'if G1 was modernised' kind of look, though if it can be fudged into the 'boombox' that he is known for that would be awesome) with some indication that he is capable of intercepting, eavesdropping and communicating with human technology (as of 201X).
The robot concept exists merely to help with things like proportion; I think that it helps to make the vehicle first as it defines aspects of the robot form. This will involve much back and forth work between 3DS Max and Photoshop but I hope that the iterative workflow is worth it.
I produced a moodboard that highlights things such as colour scheme, ideal vehicle forms and purposes and references of the character as he appears in G1/Fall of Cybertron.
Although I want the APC's as purpose and material reference (and the link between him and his minibots), I want a more futurised vision of it, so some interesting concept work by other artists was thrown in there for some inspiration. He will retain his primary colour plan as it is one of his most defining characteristics in common Transformers media (along with his head and shoulder cannon).
I needed the vehicle defined quickly to get things rolling, so I drew up some quick options:
I wanted some more interesting shapes which is why current APC designs can be a problem and why I felt the design could use some futurising. I took the third design (because I just really liked it) and tweaked it to be more APC like.
Making the vehicle longer and giving it large wheels gave a feel of an armoured troop carrying vehicle while increasing the variety in the shapes that make up the form. With that done I sketched it in perspective and drew up a rough storyboard to visualise a transformation sequence.
As gaudy as they are, I really think colour coding helped understand how I was going to make this thing transform. It helped give a goal to work to when creating the prototype in 3DS Max, rather than ad-libbing the whole thing entirely from a vehicle model/blueprint.
The workflow involves heavy use of instancing so that the parts can be worked on in either mode. This helps massively in helping things line up, and the storyboard makes things even easier in my mind; instead of the process being 'well I have Vehicle part X, how can I get this onto Robot part Y?', its just bodging it to make it work because I already planned out how it was roughly going to work.
The prototyping process helped address concerns and problems that came up and in this case were pretty quickly solved (all of this has taken roughly three weeks in total with modelling and animating at this stage being completed in one). An example of this would be the chest compartment the ejects his minions; I needed this to be upright when in robot mode, but face away from the cannon/arm when in vehicle mode, so it (and presumably the mechanism inside) swivels around to correct this. Since the storyboard is rough and only highlights the important parts to make it work it allows for nuances like this to be fixed with no feeling of restriction.
Below is a test run of the prototype in action with some slowmo renders. I'll render out a more comprehensive version (without the flipping) so that it is easier to see what goes where and how. There are currently a few 'floating bits' that aren't quite truly attached to things at the moment. I know that Fall of Cybertron fudges things with a model swap, so I hope that some suspension of disbelief can be spared by the players if they were playing as this Soundwave (but I'll try to make it believable all the same).
[ame="
https://www.youtube.com/watch?v=eZb9V_Cjgy4"]Soundwave Transforming Prototype - YouTube[/ame]Some aspects that I think need improving since the base vehicle forms now work;
- Some areas are quite flat and can use some form changes to make them more interesting. They can then form flat surfaces to minimise clipping when going into vehicle mode.
- The back section is quite busy when the head and the crotch have to come into the back. The head does clip into the base arm of the cannon, but this is pretty minor considering how fast it is.
- It could use some more 'flurryness'. That is to say its a bit basic at the moment. Some things also need to have better solutions such as the hands as they simply retract into hammer space at the moment.
I'm going to try to spice things up, tackle things I talked about in the bullet points and try to make the arms transformable into his gun. Hopefully I can get Laserbeak started as well. The prototype can serve as a base mesh for high poly sub division work and areas can be remodelled where needed (the head particularly).
Replies
Alright, I'll work on that. For now I've pulled it up a bit more and rotated it out so it clips with the legs a little less (though the initial idea was for it to be on a hinge which will rotate as needed when the legs collide with it).
A little progression made in that the blaster that Soundwave has has now been integrated into his arms. A little animation follows showing the transformation.
[ame="
Progression seems to go quite slow. I'm working to try to get the high poly model done by Friday next week.
A render of the transformation sequence is here, I might render another one at a more helpful angle.
[ame]www.youtube.com/watch?v=HeVsGjJtTt0[/ame]
This is the current tested normal map projection; I'm not sure whether using the mental ray renderer was better than using scanline or not, but what was evident is that the min and max samples should really exceed 4 else the aliasing be too terrible under close scrutiny. Further normal detailing will be performed in 3D coat/Photoshop.
The head has been unwrapped and rendered below in UDK. The current plan is to split this up into Head,Torso, Arms and Legs as the educational version of 3D Coat has a limit of 2048x2048 textures. The textures will then be combined to make a large 4096x4096 texture. This can be scaled down as we go lower in LODs.
Additionally the head of the character has been textured to a minimum standard with a diffuse, specular, normal and emissive map.
The body has also been textured, just the legs and the arms to go after this:
Find some good overlaying scratched metal from Google images and merge them together nice enough to give a flow to the metal and the scratches right now it seems that there is a lot of noise coming from different layers/textures., diffuse, spec, perhaps normals.
Otherwise this is turning out really cool.
https://www.youtube.com/watch?v=wXJgxOxCy4c
A sligtly older render (bad texture on the chest compartment door) shows the transformation at its original speed)
https://www.youtube.com/watch?v=iTG1QLTfjtw