Transfer Map Problem
Im having a bit of a transfer maps problem here.
The model is fairly simple and believe me when I way I have tried to manipulate the envelope every which way and also the settings in the Transfer maps options. I have also tried to blow it up using the keyframes method and do the pieces seperately but no change.
Usually it is the normal map that f..ks everything up here.
Replies
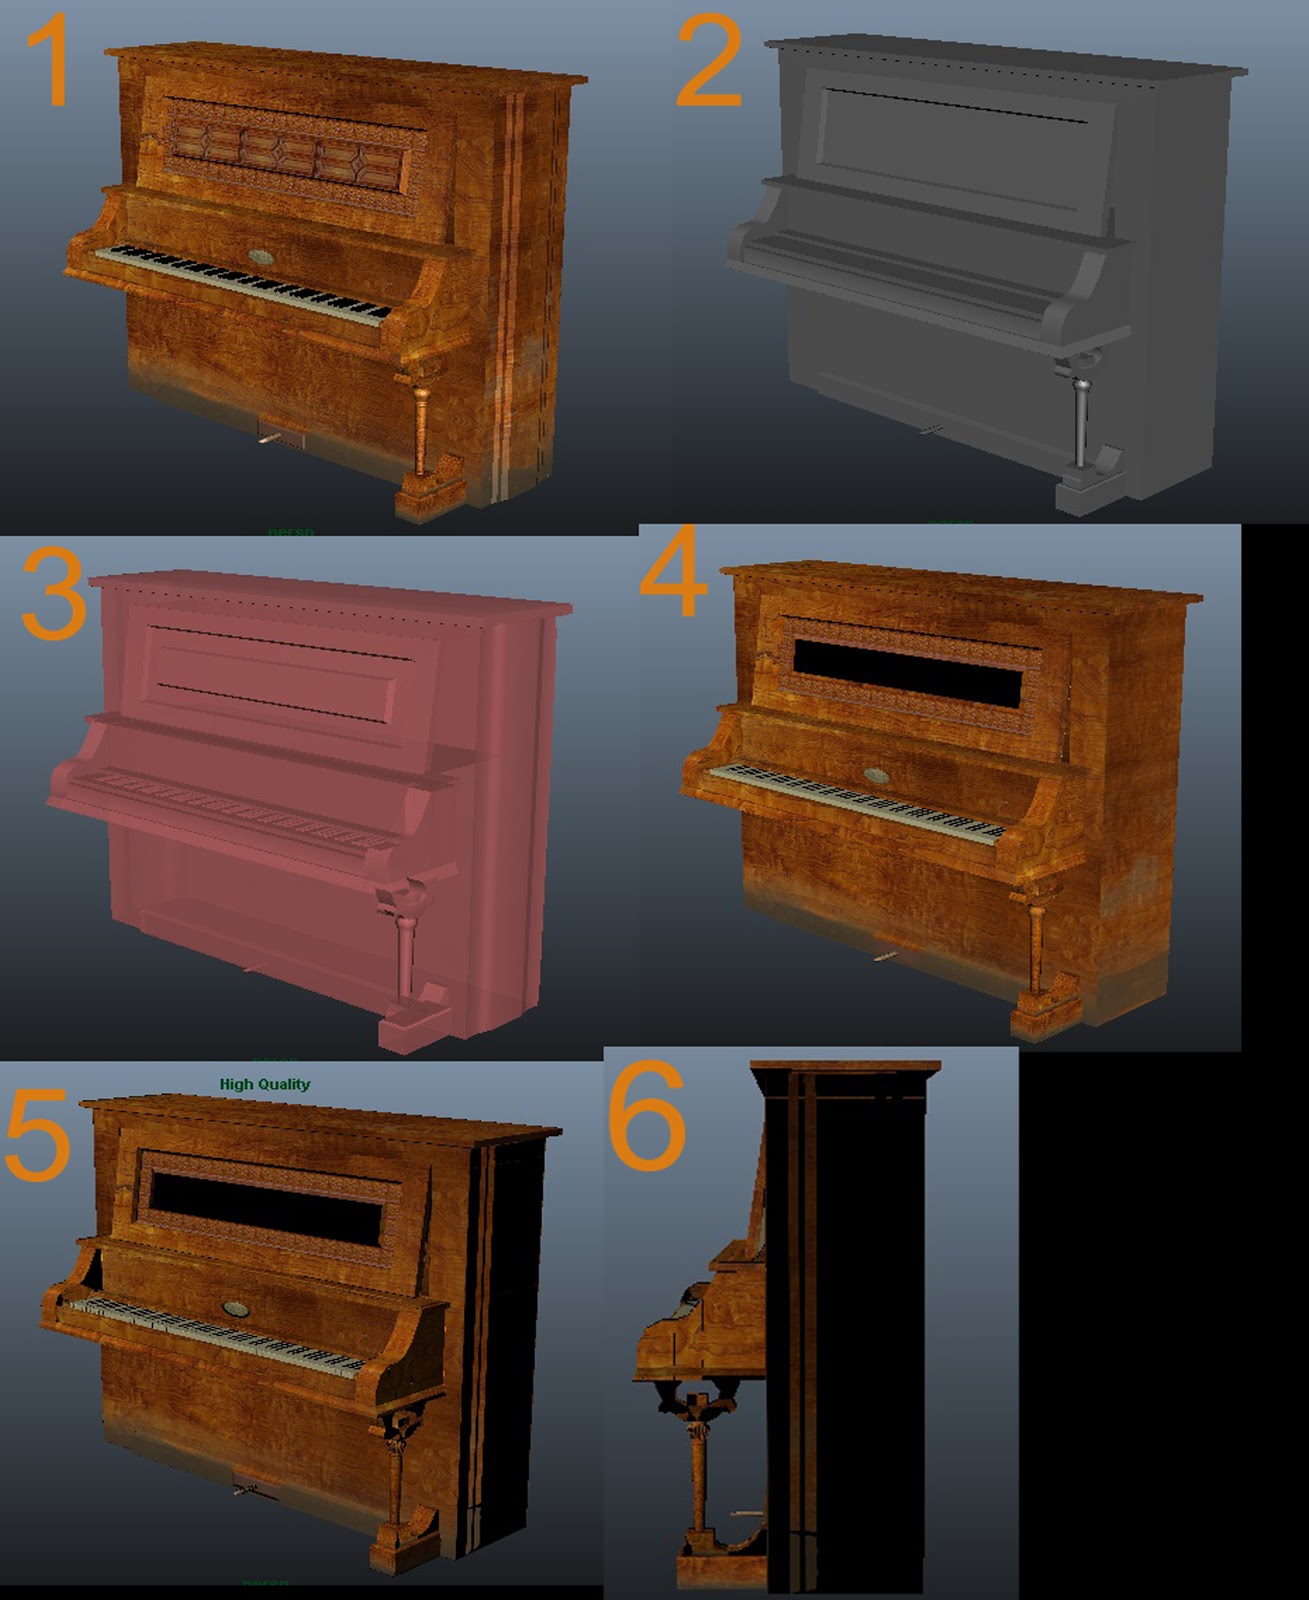
1. this is the hi poly model.
2. this is the lo poly model.
3. this is the envelope of the lo poly model, which I have done a bunch of extrusions on to better fit the hi poly one (which worked the first couple of times on the front board but never on the sides)
4. this is the lo poly with projected textures on default renderer.
5/6. is the two sides of lo poly with high quality renderer
as you can see on the last images, on the front theres a problem with the color texture and on the sides are problems with the normal map that is suppose to catch the extrusions on the sides
You can see on how the color map turnes out the black area at the top right is not suppose to be there, in the normal its ok, but the rest of the normal is totally out of whack
This time the overlapping ones have managed to flip their normals ONLY where their counterparts are on the map, to clarify their normals are the right way and shows the texture great.... anywhere else then where they're suppose to be, and when I actually flip their normals inward it shows the texture normally and great BUT this ofcourse makes them see through in a game engine.
any thoughts on this?
EDIT: try to use automatic unwrap and render if it helps.
EDIT 2: is that 3rd one normal map? Am I color blind? This is how "bump" map looks in 3ds max (greyscale) or Maya renders normal map in gray?
http://www.scriptspot.com/3ds-max/scripts/unify-flip-normal-polygons
It will unify your polygons so that backward facing polys get flipped to face the same way as the majority of the faces in the mesh.
Doesn't Maya have a "backface culling" option? I usually have it turned on so the faces are only visible from one side.
Alternatively you can go into Lighting and turn off two sided lighting, this will show a black polygon face instead of a transparent polygon(possibly easier to spot).
You can also verify face normal directions through Display>Polygons>Face Normals. If the lines are too big/short a little bit further down from Face Normals is Normals Size.
When you mirror a mesh the normals get flipped after you freeze transforms(axis value -1->0). Select the flipped faces and choose Normals>Reverse.
As cupsster pointed out the issue is likely due to your UV layout. Overlapping UV's are ok, keep in mind that the blue is generally what you want, if the UV's are coloured red you'll get the texture flipped eg a gradient that flows red to blue, will show up as blue to red or numbers will be like a reflection in a mirror.
What you want to avoid though is overlapping the UV's in the 0-1 space. You want to offset them by -1/+1 in either axis. The 0-1 UV space repeats so provided you offset the UV's correctly that were overlapping they'll still get the texture information. The problem that is happening is that when you bake a texture such as normal map, that information is rendered into that 0-1 UV space. Having overlapping UV shells means that area will get rendered incorrectly. I can't remember if it renders the texture sampling from all shells at once or if it does it in passes, I'm pretty sure it's the former.
@cupsster: Normal Maps far as I know look as you'd expect them to, maya does not bake normal maps out in black/white, so something is up here as well.
You should also check how you have applied the normal map, it's applied through a bump2d node but you need to change the "Use As" attribute to 'Tangent Space Normals' not 'Bump' which is default.
I know this is a ridiculously long post but also want to point out that you probably shouldn't be modifying your cage like that. I think moving the cage around to fit is ok, but I don't think you're meant to add/remove detail from the cage mesh.
Alternatively, you could delete the polygons that are being mirrored, bake, and rebuild the mirrored stuff.